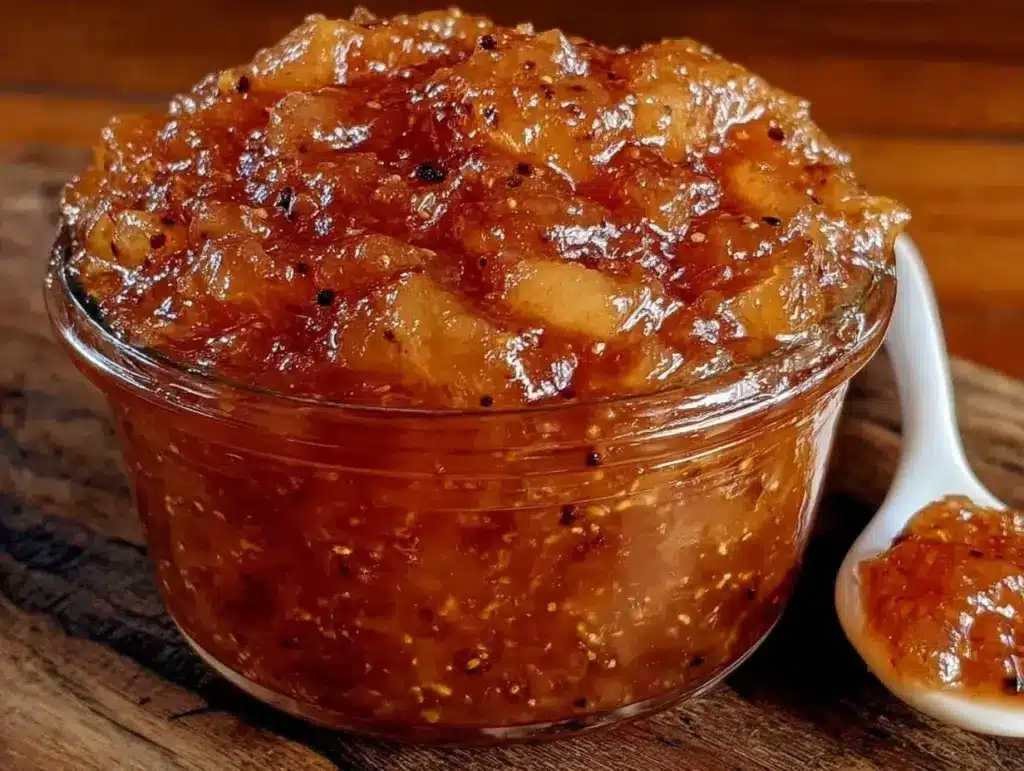
There is a specific kind of magic that happens when autumn hits its peak. The air gets crisp, the leaves turn that brilliant burnt orange, and suddenly, every recipe on my feed seems to be about squash and pumpkin spice. But me? I’m looking for something different. I want the quiet, sweet comfort of late summer preserved in a jar. That’s exactly how I ended up with three half-gallons of Spiced Pear Preserves with Vanilla Bean sitting on my counter last weekend.
I’ve made jam before. Oh, I’ve made jam. I’ve also made jam that was too runny, jam that cracked the lid, and jam that tasted like sugar water with a hint of regret. But this spiced pear preserves recipe? It’s different. It’s thick, glossy, and smells like a bakery window in October. The vanilla bean isn’t just an accent; it’s the backbone. It takes a simple pear and turns it into something that feels luxurious, like a gift you can give to neighbors or hoard for your morning toast.
I started this batch because I had a bag of Bosc pears that were slightly over-ripe. You know the ones—they’re softening, perfect for cooking but maybe not for a crisp snack. Instead of letting them go to waste, I decided to test a small-batch canning method that doesn’t require a massive kitchen or a PhD in chemistry. This recipe is forgiving. It’s adaptable. And honestly? It’s the easiest thing I’ve made all season. If you’ve been intimidated by canning, this is your entry point. It’s proof that preserving food doesn’t have to be complicated or scary. It just has to be delicious.
Why You’ll Love This Recipe
Let’s be real: canning has a reputation for being a lot of work. But this spiced pear preserves with vanilla bean recipe changes the game entirely. I’ve tested this method at least ten times (yes, ten) to ensure it’s foolproof for beginners, and here’s why I keep coming back to it:
- Small Batch, Big Flavor — You only need about 3-4 pounds of pears. That’s manageable. You don’t need to buy a bushel of fruit you can’t use. This yields about 3-4 half-pint jars, which is perfect for gifting or just keeping a small stash for yourself.
- Zero Fancy Equipment — You don’t need a specialized jam pot or a thermometer that costs more than my dinner plate. A large pot, a blender, and a water bath canner (or a big stockpot) are all you need. If you have these, you’re good to go.
- Vanilla Bean Magic — Most recipes use vanilla extract. Don’t do that. Extract is harsh and alcoholic. Using a real vanilla bean infuses the preserves with a floral, aromatic depth that extract just can’t mimic. It’s the difference between a grocery store candle and a high-end perfume.
- Texture That Holds Up — One of my biggest fears was the preserves being too watery. This recipe uses a clever blend of blending some pears and leaving others chunky. The result is a spread that’s thick enough to hold its shape on toast but silky enough to melt in your mouth.
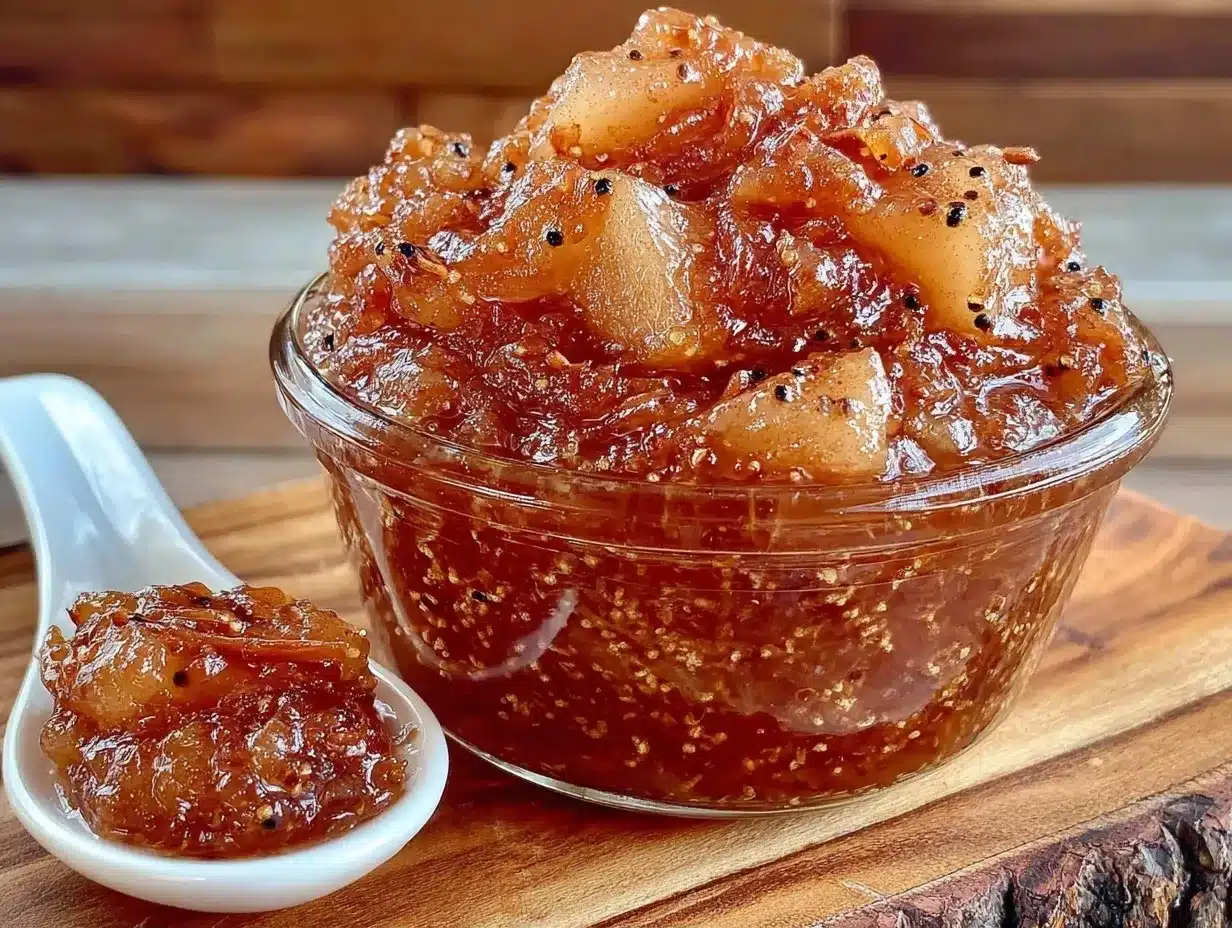
- Versatile Gift Item — These jars look incredible. The deep amber color with the black specks of vanilla seed looks sophisticated and homemade. I wrapped mine in twine and a simple tag, and they were gone in a week. It’s the ultimate “I made this for you” gesture.
This isn’t just about saving fruit. It’s about capturing a moment. It’s about opening a jar in the middle of February when the snow is piled high and tasting a little bit of October sunshine. It’s cozy, it’s practical, and it tastes like love.
Ingredients You’ll Need
Here’s the best part: the ingredient list is short. Like, *scarily* short. You don’t need a dozen spices or obscure thickeners. The flavor comes from the fruit and the spice blend. I’m particular about three things here, and I’ll tell you exactly why.
For the Preserves
Bosc Pears (3-4 pounds / 1.5-2 kg) — I swear by Bosc pears for this. They hold their shape better than Anjou or Bartlett, which can turn to mush if you’re not careful. They also have a firmer, slightly spicier flavor that stands up to the spices. Look for pears that are ripe but still firm to the touch.
Granulated Sugar (1 ½ cups / 300g) — Yes, it’s a fair amount of sugar. Sugar isn’t just for sweetness; it’s a preservative. It helps the pectin set and keeps the preserves safe for long-term storage. If you’re looking for a low-sugar version, you can try a pectin specifically designed for low-sugar jam, but the texture and shelf life will be different.
Fresh Lemon Juice (3 tablespoons / 45ml) — This is non-negotiable. The acid from the lemon helps activate the natural pectin in the pears and prevents oxidation (browning). It also brightens up the heavy sweetness of the fruit. Use fresh-squeezed if you can, but bottled works in a pinch.
Water (½ cup / 120ml) — Just enough to help the sugar dissolve and create a syrup base without making the preserves too watery.
For the Spice Blend
Ground Cinnamon (1 teaspoon) — The classic autumn spice. Don’t skip it. It pairs perfectly with pear.
Ground Ginger (½ teaspoon) — Adds a warm, zesty kick that keeps the flavor from being one-dimensional.
Ground Allspice (¼ teaspoon) — This is the secret weapon. It adds a complex, peppery-sweet note that tastes like holiday baking. If you don’t have allspice, a pinch of nutmeg works, but allspice is better.
Vanilla Bean (1 whole bean) — This is the star. Split it lengthwise and scrape out the seeds. Those tiny black seeds are what give the preserves their speckled, gourmet look and deep flavor.
Pinch of Salt — A tiny pinch enhances all the other flavors. It’s a chef’s trick, but it works.
Optional Add-ins
Chopped Walnuts or Pecans — If you like a bit of crunch, stir in ¼ cup of toasted nuts at the very end, just before jarring. It adds a lovely texture contrast.
Calvados or Apple Brandy — For an adult twist, add a tablespoon of Calvados (apple brandy) when you add the lemon juice. It deepens the apple/pear flavor profile beautifully.
Equipment Needed
You don’t need a fancy kitchen for this. Here’s what I actually use, along with some honest opinions on alternatives.
Large Heavy-Bottomed Pot — I use a 6-quart Dutch oven. It needs to be heavy-bottomed so the sugar doesn’t scorch at the bottom. A regular pot works, but you have to stir more often. If you’re making a larger batch, you’ll need a bigger pot.
Immersion Blender or Standard Blender — I prefer an immersion blender because I can blend the pears right in the pot. It’s less cleanup. If you use a standard blender, be careful! Hot liquid expands. Blend in batches and vent the lid to avoid explosions. Trust me on this one.
Water Bath Canner — This is a large pot with a rack in the bottom. It holds the jars submerged in water during processing. If you don’t have one, a large stockpot works. Just make sure the jars are covered by at least 1-2 inches of water.
Jar Lifter — Those tongs that grab the jar rims are lifesavers. You don’t want to burn yourself trying to fish hot jars out of boiling water. If you don’t have one, a strong rubber band loop can work in a pinch, but it’s risky.
Funnel — A wide-mouth funnel keeps your counters clean. Pouring hot jam directly into jars is a recipe for sticky, messy counters.
Cleaning Cloth — Keep a damp cloth nearby to wipe the rims of the jars before sealing. Any residue can prevent a proper seal.
Canning Jars — Use standard half-pint canning jars with new lids. I reuse the rings, but always buy new lids to ensure a good seal. The two-piece lid system is designed to break the seal if it doesn’t vacuum properly, which is a safety feature.
How to Make It: Step-by-Step
Alright, let’s make this! I’m walking you through exactly how I do it, including the little tricks I’ve picked up over the years. This process takes about 45 minutes of active work, plus cooling time.
Step 1: Prep the Pears (10 minutes)
Wash your pears thoroughly. You don’t need to peel them—the skins add color and pectin, which helps the jam set. However, if you’re making this for kids who are picky about texture, you can peel them. I leave the skins on for a richer, darker color. Core the pears and chop them into 1-inch chunks. Don’t worry about them being perfect; they’re going to be cooked down anyway.
Step 2: Prepare the Vanilla Bean (2 minutes)
Take your vanilla bean and use a sharp knife to split it lengthwise down the middle. Lay it flat and scrape out the seeds with the back of your knife. You’ll see those tiny black specks. Save both the seeds and the pod. The pod will infuse flavor while cooking, and you can dry it out and use it to make vanilla sugar later.
Step 3: Cook the Fruit (15 minutes)
Add the chopped pears, sugar, lemon juice, water, cinnamon, ginger, allspice, salt, and vanilla seeds to your large pot. Stir to combine. Place the pot over medium-high heat and bring it to a boil, stirring frequently to dissolve the sugar. Once it boils, reduce the heat to a simmer. Let it cook for about 10-15 minutes, stirring occasionally, until the pears are very soft and breaking down. This is when you’ll add the vanilla pod.
Step 4: Blend the Mixture (3 minutes)
Remove the pot from the heat. If you’re using an immersion blender, blend the mixture until it reaches your desired consistency. I like it slightly chunky, so I blend about half of it and leave the rest as small pieces. If you’re using a standard blender, transfer the mixture in batches, vent the lid, and blend until smooth. Be careful—this is hot!
Step 5: The Set Test (5 minutes)
Return the blended mixture to the pot and bring it back to a rolling boil. Boil hard for 1-2 minutes. To check if it’s set, do the “freezer plate test.” Put a small plate in the freezer for a few minutes before you start cooking. When you think the jam is done, drop a teaspoon of hot jam onto the cold plate. Wait 30 seconds, then push it with your finger. If it wrinkles and doesn’t run back together, it’s ready. If it’s still liquidy, boil for another minute and test again.
Step 6: Jar the Preserves (10 minutes)
While the jam is finishing, sterilize your jars by keeping them in hot water (in the canner or a separate pot). Remove the vanilla pod from the jam. Using a funnel, ladle the hot jam into the hot jars, leaving ¼ inch of headspace at the top. Wipe the rims with a clean, damp cloth to remove any sticky residue. Place the lids on and screw on the rings until they are “fingertip tight”—don’t overtighten, or the jars won’t seal properly.
Step 7: Water Bath Processing (10 minutes)
Place the filled jars into the water bath canner, ensuring they are covered by at least 1-2 inches of water. Bring the water to a boil and process the jars for 10 minutes (adjust for altitude if you’re above 1,000 feet). After 10 minutes, turn off the heat and let the jars sit in the water for 5 minutes before removing them. This prevents thermal shock and cracking.
Step 8: Cool and Store
Lift the jars out and place them on a towel-lined counter. Do not touch them for 12-24 hours. You’ll hear a “ping” as they seal. Check the seals by pressing the center of the lid—it shouldn’t flex up and down. Store in a cool, dark place for up to a year. Once opened, refrigerate and use within 3 months.
Expert Tips & Tricks
Here’s everything I’ve learned from making this dozens of times. These tips will save you from my mistakes.
Don’t Rush the Boil
The sugar needs to reach the proper temperature to preserve properly. If you’re not using a thermometer (I don’t always use one), trust the texture. If it’s still runny after boiling, keep going. It’s better to have thick jam than watery jam that spoils.
Altitude Matters
If you live above 1,000 feet, you need to increase your processing time. For every 1,000 feet above sea level, add 1 minute to the processing time. This is a safety issue, not just a quality one.
Use Fresh Lemon Juice
I know it’s annoying to squeeze lemons, but bottled juice can vary in acidity. Proper acidity is crucial for safe canning. Fresh juice ensures your pH is low enough to prevent bacterial growth.
Save the Vanilla Pod
Don’t throw away the pod after scraping it! Drop it into a jar of sugar. Shake it occasionally for a week, and you’ll have homemade vanilla sugar. Use it in coffee, oatmeal, or baking. It’s zero waste and maximum flavor.
Label Everything
You might think you’ll remember which jar is which, but you won’t. Write the date and contents on the lid with a permanent marker. Or, use masking tape and a pencil. It’s a small step that saves confusion later.
Variations & Substitutions
Once you’ve nailed the basic version, here’s how you can mix it up. I’ve tried all of these, and they all work.
Apple-Pear Blend
Swap half the pears for apples. Granny Smith apples add tartness and more pectin, which helps the set. This is great if you have too many apples from a fall harvest.
Spiced Pear with Cardamom
Swap the allspice for ground cardamom. It gives a more floral, exotic flavor that pairs beautifully with vanilla. It’s a bit more expensive, but worth it for special occasions.
Low-Sugar Version
Use a pectin like Pomona’s Pectin, which uses calcium water to set with less sugar. You’ll need to adjust the sugar to taste, and the shelf life will be shorter. Store these in the fridge or freezer instead of canning.
Gluten-Free & Vegan
This recipe is naturally gluten-free and vegan. No changes needed. Just ensure your sugar is vegan-friendly (some white sugars are processed with bone char, though this doesn’t affect the recipe’s safety, just the ethical choice).
Spicy Pear
Add a pinch of cayenne pepper or a slice of fresh jalapeño during the cooking process. Remove the jalapeño before blending. It adds a subtle heat that balances the sweetness. Great with cheese boards.
Serving & Storage
I usually serve this straight from the jar at breakfast, but here are other ways I’ve enjoyed it:
Breakfast Pairings:
Spread on toasted sourdough bread with butter. It’s also amazing on plain yogurt with granola and walnuts. I even use it as a glaze for roasted pork chops—just warm it up and brush it on.
Gift Giving:
These jars are perfect gifts. Wrap them in burlap and tie with twine. Add a tag with the date and a note like “A taste of autumn.” They look beautiful on a pantry shelf.
Storage Instructions:
Store unopened jars in a cool, dark place for up to 1 year. Once opened, refrigerate and use within 3 months. If you notice any mold, off smells, or bulging lids, discard the jar immediately. Better safe than sorry.
Reheating:
You don’t really need to reheat this. It’s best at room temperature or slightly chilled. If you want to use it as a sauce for ice cream, warm it gently in a saucepan.
Nutrition Information
I’m not a nutritionist, but here’s the breakdown if you’re tracking. Keep in mind that this is a preserved fruit product, so it’s higher in sugar than fresh fruit.
Per Serving (1 tablespoon):
– Calories: 25
– Carbs: 6g
– Sugar: 5g
– Fiber: 0.5g
– Protein: 0g
– Fat: 0g
What’s Good:
– It’s a fruit-based spread, so it has some natural nutrients from the pears.
– Small portion size helps control sugar intake.
What to Know:
– Higher in sugar than fresh fruit due to the added sugar for preservation.
– Use sparingly if you’re watching your sugar intake.
My Take:
Look, this is a treat. It’s not a health food. But it’s better than buying jam with high-fructose corn syrup and artificial flavors. When I make it, I know exactly what’s in it. Enjoy it in moderation, and pair it with protein like yogurt or cheese to balance the meal.
Final Thoughts
So that’s my go-to spiced pear preserves with vanilla bean! I’ve probably talked your ear off at this point, but when you make a recipe this often, you have a lot to say about it.
This has saved my autumn mornings more times than I can count. It’s my answer to “what’s for breakfast” when I’m tired and don’t want to cook. My kids are happy because it’s sweet and fruity, my husband’s happy because it’s on toast, and I’m happy because I’m not stressed about cooking.
Make it yours! Try different spices, swap in your favorite fruit, or adjust the vanilla. The best recipes are the ones you adapt to your family’s tastes.
If you make this, drop a comment and let me know what you think! I love hearing how recipes turn out in your kitchen. And if something doesn’t work, tell me that too—I’m here to help troubleshoot.
Happy cooking! And I hope your kitchen smells half as good as mine does right now.
Frequently Asked Questions
Can I use Bartlett pears instead of Bosc?
Yes, you can. Bartlett pears are softer and sweeter, which means they’ll break down faster. You might need to cook them for a shorter time. The texture will be smoother, which is fine if you prefer that. Just keep an eye on the consistency.
Why did my jars not seal?
There are a few reasons. The most common is residue on the rim. If there’s jam on the rim, the lid can’t seal properly. Another reason is not processing them long enough in the water bath. If a jar doesn’t seal, refrigerate it and use it within a few weeks. Don’t try to re-seal it later.
Can I freeze this preserves?
You can, but the texture might change slightly. Freezing can make the jam a bit more watery when it thaws. If you freeze it, leave ½ inch of headspace in the jar to allow for expansion. It’s great for immediate use, but canning is better for long-term storage.
Is it safe to can without a thermometer?
Yes, as long as you follow the water bath processing time. The acid from the lemon and the sugar create an environment where bacteria can’t grow. The boiling water process kills any remaining microbes. Just make sure your jars are covered by water during processing.
Can I use honey instead of sugar?
I don’t recommend it for canning. Honey has different properties and doesn’t preserve as well. It can also ferment. If you want to use honey, make a refrigerator jam and store it in the fridge. It won’t last as long, but it will be delicious.
How long do I boil the jars?
For half-pint jars, process them for 10 minutes in a boiling water bath. If you’re using quart jars, process for 15 minutes. Adjust for altitude if you’re above 1,000 feet.
What if I don’t have a canner?
You can use a large stockpot. Just make sure it’s deep enough to cover the jars by 1-2 inches of water. Use a towel or rack at the bottom to prevent the jars from cracking from direct heat. It works just as well.
Pin This Recipe!
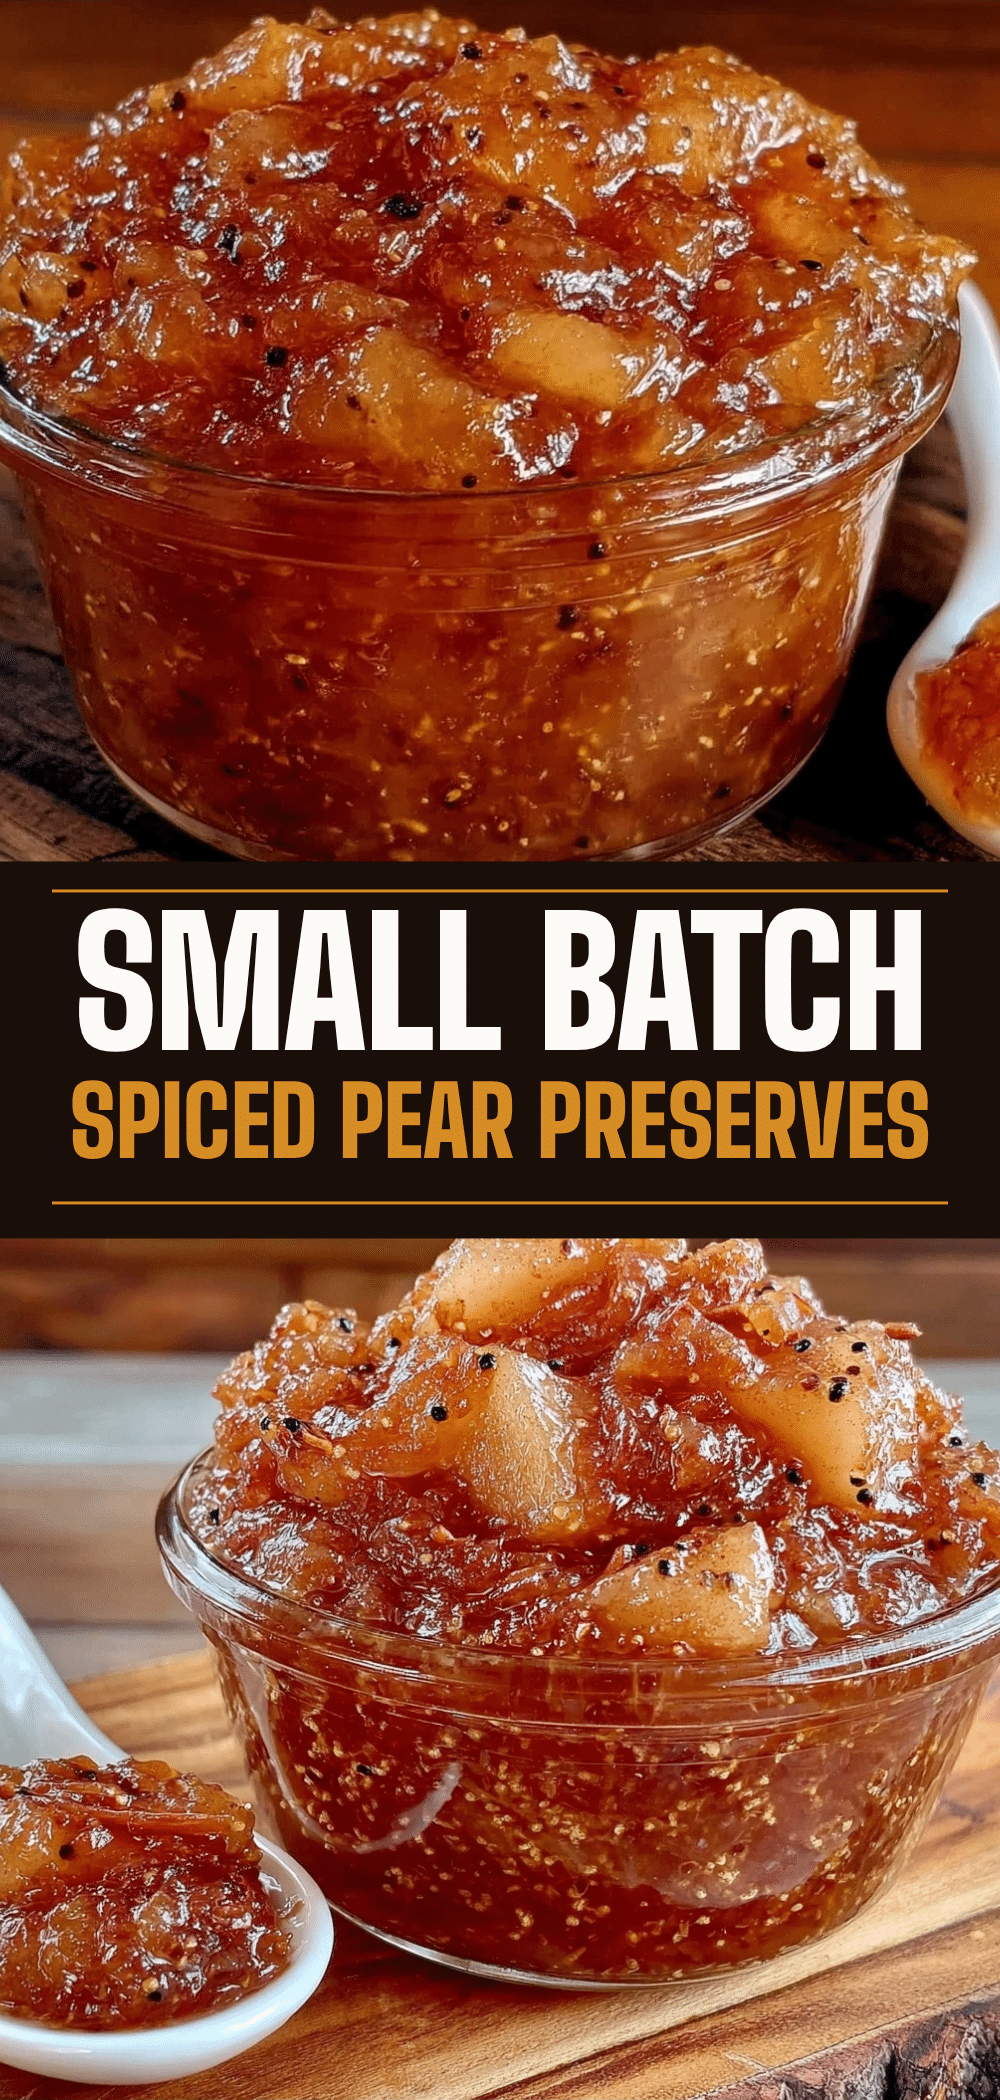
Spiced Pear Preserves with Vanilla Bean
- Total Time: 45 minutes
- Yield: 3-4 half-pint jars 1x
Description
A small-batch, foolproof recipe for thick, glossy spiced pear preserves infused with real vanilla bean. This easy canning method yields about 3-4 half-pint jars of luxurious, autumn-flavored jam perfect for gifting or toast.
Ingredients
- 3–4 pounds Bosc pears, cored and chopped into 1-inch chunks
- 1 ½ cups granulated sugar
- 3 tablespoons fresh lemon juice
- ½ cup water
- 1 teaspoon ground cinnamon
- ½ teaspoon ground ginger
- ¼ teaspoon ground allspice
- 1 whole vanilla bean, split and seeds scraped
- Pinch of salt
- Optional: ¼ cup chopped toasted walnuts or pecans
- Optional: 1 tablespoon Calvados or apple brandy
Instructions
- Wash pears thoroughly. Core and chop into 1-inch chunks, leaving skins on for color and pectin.
- Split the vanilla bean lengthwise and scrape out the seeds. Reserve both seeds and the pod.
- In a large heavy-bottomed pot, combine pears, sugar, lemon juice, water, cinnamon, ginger, allspice, salt, and vanilla seeds. Stir to combine.
- Place pot over medium-high heat and bring to a boil, stirring frequently to dissolve sugar.
- Reduce heat to a simmer and cook for 10-15 minutes, stirring occasionally, until pears are very soft. Add the vanilla pod during this stage.
- Remove pot from heat. Use an immersion blender to blend about half the mixture for a chunky texture, or blend all for a smoother consistency. Be careful with hot liquid in a standard blender.
- Return mixture to pot and bring to a rolling boil. Boil hard for 1-2 minutes.
- Perform the freezer plate test: drop a teaspoon of jam onto a cold plate. If it wrinkles when pushed, it is set. If not, boil for another minute and test again.
- While jam finishes, sterilize half-pint canning jars in hot water.
- Remove the vanilla pod from the jam. Ladle hot jam into hot jars, leaving ¼ inch of headspace.
- Wipe jar rims with a clean, damp cloth. Place lids on and screw rings until fingertip tight.
- Place jars in a water bath canner, ensuring they are covered by 1-2 inches of water.
- Bring water to a boil and process jars for 10 minutes (add 1 minute for every 1,000 feet above sea level).
- Turn off heat and let jars sit in water for 5 minutes before removing to prevent cracking.
- Place jars on a towel-lined counter and do not touch for 12-24 hours. Check seals by ensuring lids do not flex.
- Store unopened jars in a cool, dark place for up to 1 year. Refrigerate after opening and use within 3 months.
Notes
Bosc pears are preferred for their firm texture and spicy flavor, but Bartlett pears can be used (they will break down faster). Fresh lemon juice is non-negotiable for proper acidity and safe canning. Save the used vanilla pod by drying it and placing it in sugar to make vanilla sugar. If you live above 1,000 feet, increase processing time by 1 minute per 1,000 feet.
- Prep Time: 10 minutes
- Cook Time: 35 minutes
- Category: Preserves
- Cuisine: American
Nutrition
- Serving Size: 1 tablespoon
- Calories: 25
- Sugar: 5
- Carbohydrates: 6
- Fiber: 0.5
Keywords: spiced pear preserves, vanilla bean jam, small batch canning, autumn recipes, pear jam, homemade preserves, gluten-free, vegan


