There is a specific kind of silence that falls over a kitchen at 9 PM on a Sunday. It’s not the chaotic quiet of a house with sleeping children or the tense quiet of waiting for a phone call. It’s just… peace. The kind of quiet that feels like a warm blanket. Last week, after a month that felt like it lasted three years, I stood in my kitchen at that exact hour. My shoulders were tight, my mind was racing, and all I wanted was something soft. Not a meal that required chopping, sautéing, and constant attention. I wanted something I could make, set aside, and let the oven do the heavy lifting while I sat on the floor with a cup of tea and watched the rain hit the window.
That’s when I made this ultra-creamy vanilla bean cheesecake. I didn’t make it for a party or to impress anyone. I made it for me. It became my little ritual of self-care. The smell of vanilla and baking cream cheese filled the house, turning that lonely silence into something cozy and inviting. It’s not just dessert; it’s a pause button. And honestly? It’s the best thing I’ve baked in years. Not because it’s complicated, but because it’s forgiving. You can’t really mess this up. You just have to trust the process.
I’ve tested this ultra-creamy vanilla bean cheesecake version about six times over the last two months. Each time, I’ve tweaked the ratios slightly, trying to find that perfect balance between firm enough to slice and creamy enough to melt on your tongue. I learned that the secret isn’t fancy equipment or expensive ingredients. It’s patience. It’s letting the cheesecake cool slowly, like you’re letting yourself unwind after a long day. This ultra-creamy vanilla bean cheesecake is my answer to stress. It’s my way of saying, “I deserve something sweet, and I have time to make it right.”
If you’re feeling overwhelmed, or just need a moment of sweetness in your day, this is the one. It’s gentle. It’s rich. It’s exactly what you need.
Why This Ultra-Creamy Vanilla Bean Cheesecake Is Your New Self-Care Ritual
I know what you’re thinking. Cheesecake sounds like a lot of work. But this ultra-creamy vanilla bean cheesecake is different. It’s designed for the tired baker. The one who wants something special but doesn’t have the energy for a complicated technique. Here’s why I keep coming back to this recipe, especially on those nights when I need to take care of myself:
- It’s a hands-off activity — Seriously. Once you mix the batter and pour it into the pan, you’re done. For the next hour, you don’t have to chop, stir, or watch anything. You can read, nap, or just breathe. I made this while watching a movie, and I didn’t even realize how fast the time passed. It’s the ultimate low-energy baking project.
- The flavor is pure comfort — Vanilla bean is the most soothing flavor in the world. It’s nostalgic, warm, and simple. Unlike fruity or chocolate flavors which can be intense, vanilla is gentle on the senses. It smells like a spa, tastes like a hug. This ultra-creamy vanilla bean cheesecake doesn’t shout; it whispers. And that’s exactly what you need when you’re overstimulated.
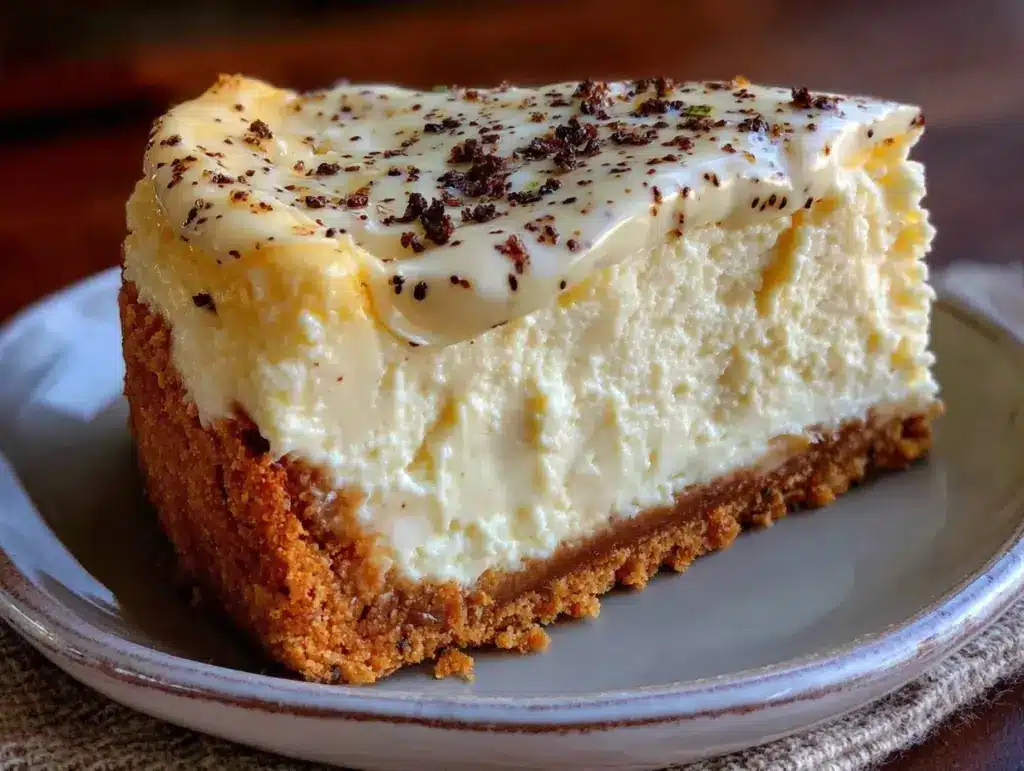
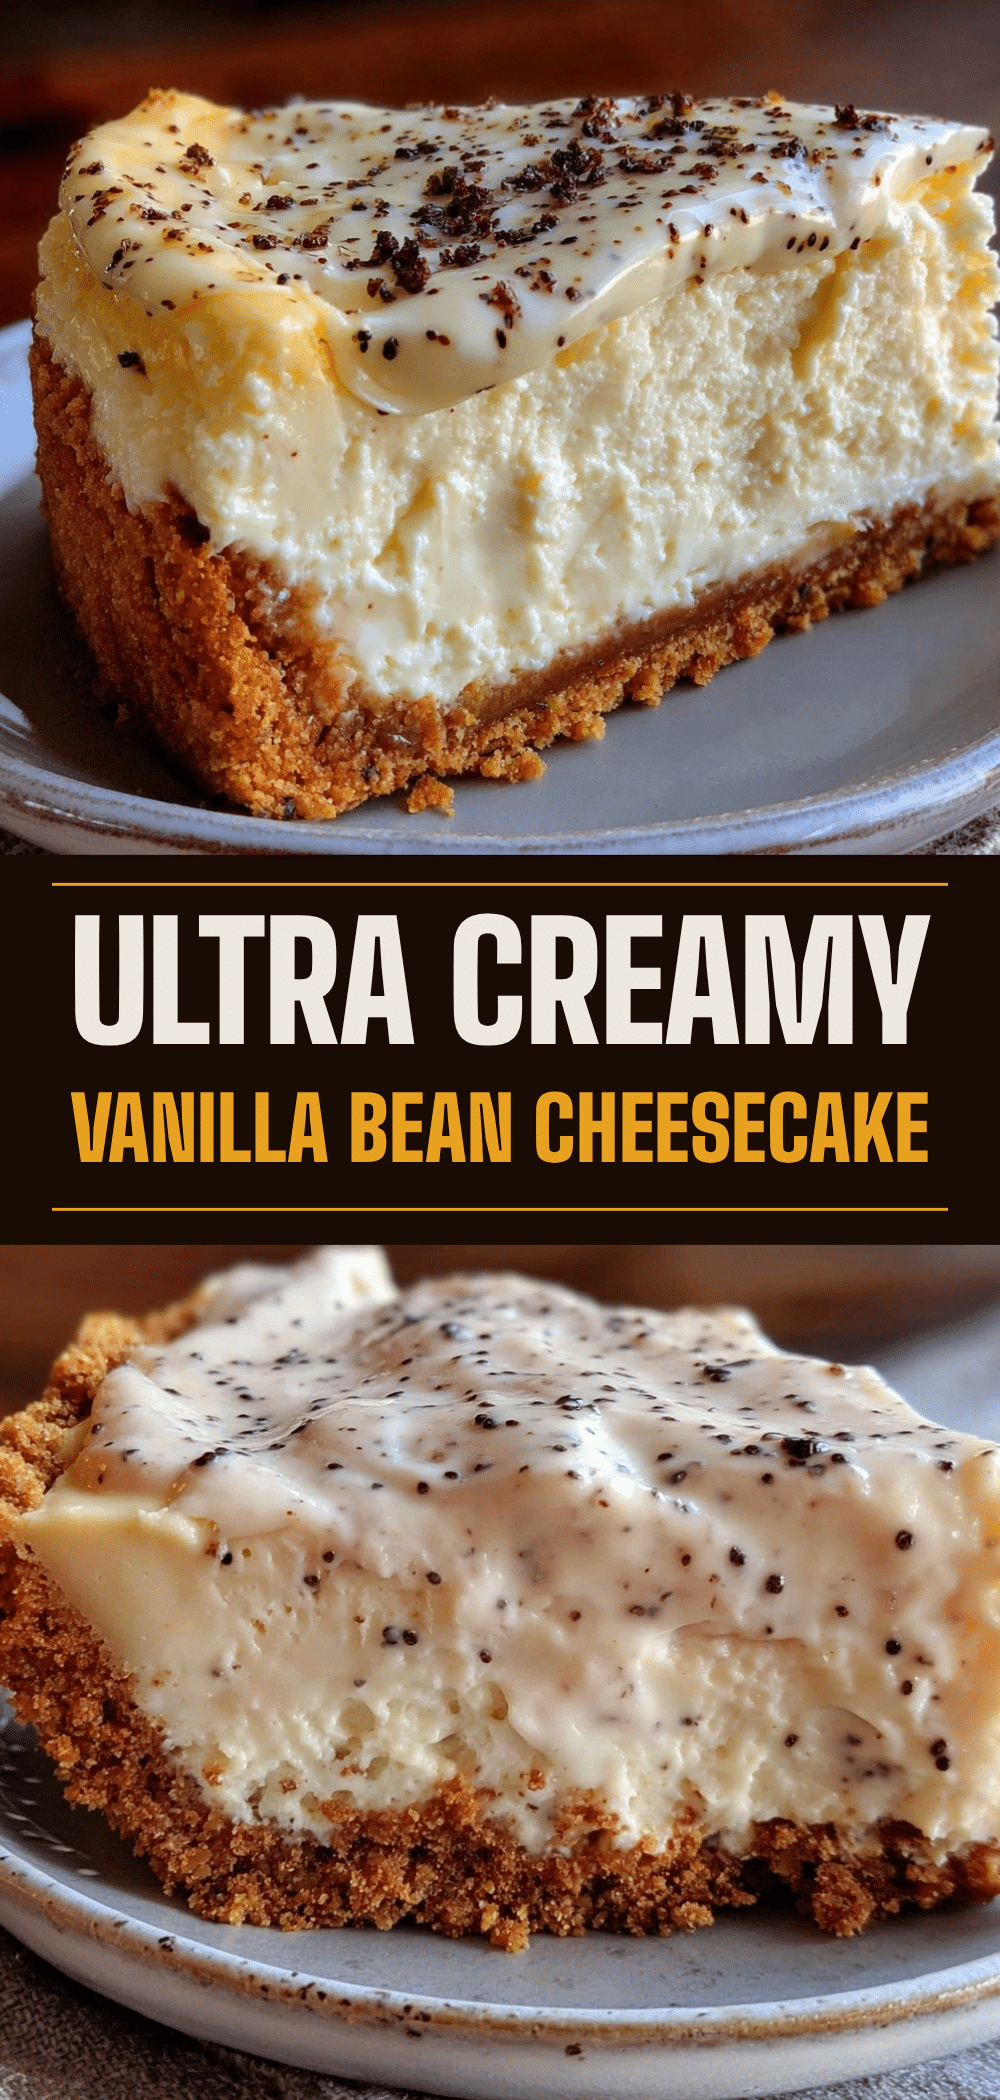
- It feels luxurious but is actually simple — There’s something deeply satisfying about making something that tastes like it came from a high-end bakery, but you made it in your pajamas. It boosts your mood just to look at it. The glossy top, the tiny black specks of vanilla bean—it looks fancy, but the method is incredibly straightforward. I’ve made this after 10-hour workdays, and it’s still better than anything I’ve bought at a store.
- It lasts (and improves) for days — You don’t have to eat it all at once. In fact, I prefer it the next day. The flavors settle, the texture firms up just a bit more, and it’s even creamier. It’s like a gift to your future self. I’ll make this on Sunday and have a slice every evening that week, taking a moment to just enjoy it. It extends the self-care ritual.
- No water bath stress — Traditional cheesecakes often require a water bath, which is messy and anxiety-inducing. I’ve cracked pans, leaked water, and ruined crusts. Not this time. This ultra-creamy vanilla bean cheesecake uses a simple oven technique that eliminates the risk. No leaking, no cracking, no stress. Just smooth, perfect cheesecake.
This recipe isn’t about perfection. It’s about presence. It’s about giving yourself permission to slow down and create something beautiful, even if no one else is there to see it. It’s my go-to when I need to reset.
Ingredients for Your Self-Care Moment
Here’s the beautiful part: you don’t need a specialty store to make this. The ingredients are simple, high-quality, and comforting. I’m particular about a few things here, mostly because they make the difference between “good” and “unforgettable.” But don’t worry, I’ll tell you exactly what matters.
For the Crust
Graham cracker crumbs (1 ½ cups / 150g) — I buy pre-made crumbs to save energy, but if you have a food processor, crushing them yourself is kind of therapeutic. It’s a nice way to start the process. Use standard graham crackers, not the sugary snack ones. You want that subtle honey flavor.
Unsalted butter (6 tablespoons / 85g, melted) — Use real butter. Margarine just doesn’t have the same richness. Melt it in the microwave in 15-second intervals. Don’t let it boil.
Granulated sugar (2 tablespoons / 25g) — Just a touch. The crust should be slightly sweet, not a dessert on its own. It’s there to bind the crumbs.
A pinch of salt — Essential. It balances the sweetness and enhances the butter flavor. Don’t skip it.
For the Ultra-Creamy Filling
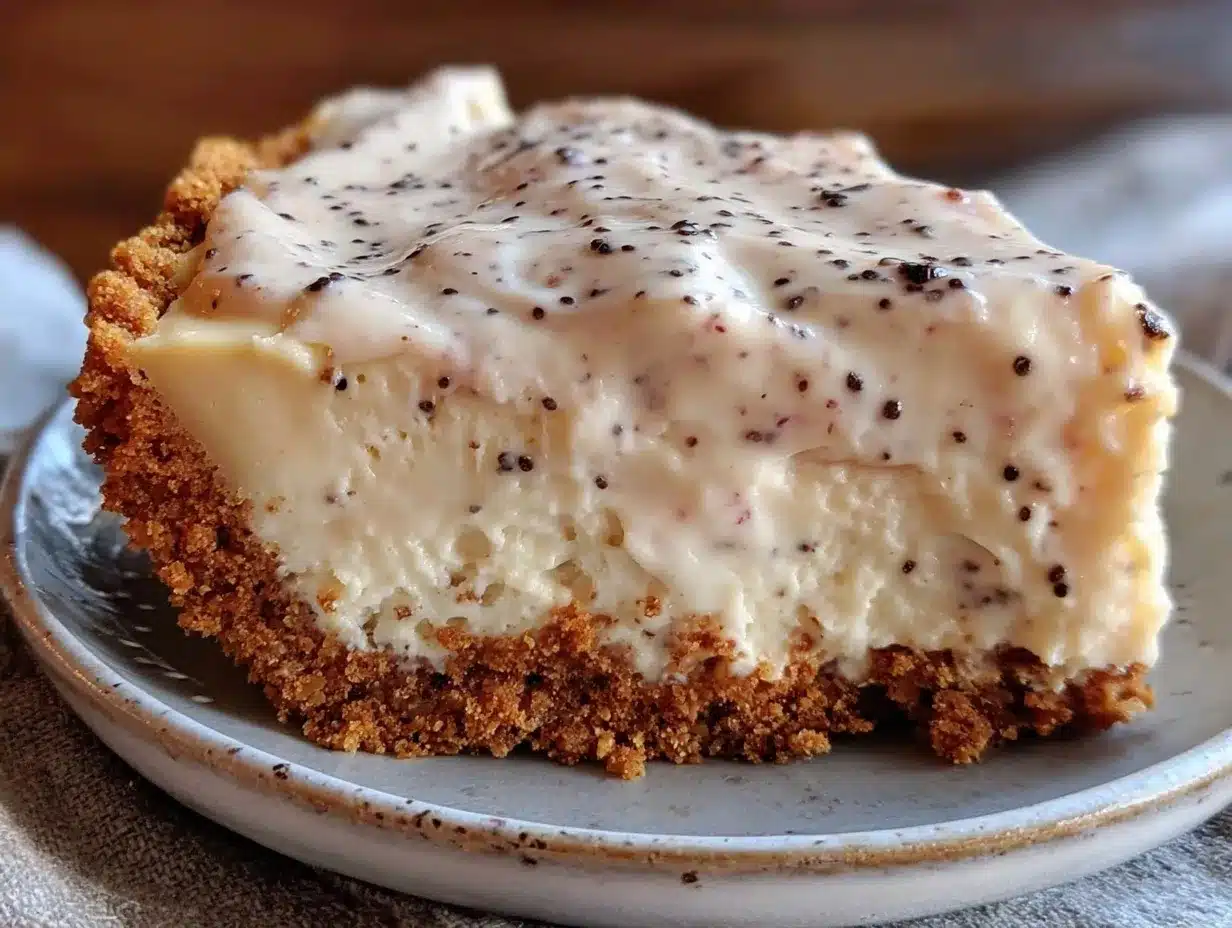
Cream cheese (32 ounces / 900g, full-fat) — This is the star. Use full-fat block cream cheese, not the tub spread. Block cream cheese has less water and more fat, which equals creamier texture. Let it sit on the counter for 30 minutes before you start. Cold cream cheese creates lumps, and we don’t want lumps. We want silk.
Granulated sugar (1 cup / 200g) — This is the right amount for sweetness without being cloying. If you prefer less sweet, you can reduce to ¾ cup, but I don’t recommend going lower. The vanilla needs sugar to shine.
Sour cream (1 cup / 240g, full-fat) — This is the secret to the “ultra-creamy” texture. Sour cream adds tang and richness, and it helps keep the cheesecake moist. Don’t use low-fat. It will change the texture.
Heavy cream (½ cup / 120ml) — Just a little bit. It lightens the batter slightly and ensures a smooth pour. Use full-fat heavy cream.
Vanilla beans (2 large pods) — Yes, real vanilla beans. Not extract. I know it’s more expensive, but the tiny black specks are gorgeous, and the flavor is incomparable. If you can’t find fresh vanilla beans, use 2 teaspoons of high-quality vanilla extract, but the beans are worth it for this special treat. Split the pods lengthwise and scrape out the seeds.
Eggs (4 large, room temperature) — Room temperature eggs blend more smoothly. If you forget, just place them in a bowl of warm water for 5 minutes. Cold eggs can cause the batter to separate.
Cornstarch (2 tablespoons / 16g) — This is my trick. A little cornstarch helps stabilize the cheesecake and prevents cracking. It also contributes to that dense, fudge-like texture. I learned this from a pastry chef who told me it’s the key to “no-crack” cheesecake.
Lemon juice (1 teaspoon) — Just a splash. It brightens the vanilla flavor and cuts through the richness. You won’t taste lemon, I promise. It’s just there to balance.
For the Topping (Optional but Recommended)
Whipped cream — Made with heavy cream and a little sugar. Or use store-bought if you’re too tired to whip it.
Extra vanilla bean seeds — For garnish. It looks pretty and adds a little extra punch.
Equipment You’ll Need
You don’t need fancy tools for this. Here’s what I actually use:
9-inch springform pan — This is essential. The springform allows you to release the sides easily. Make sure it’s a good quality one that doesn’t leak. I wrap the bottom in foil just to be safe, though I haven’t had issues with my current pan.
Stand mixer or hand mixer — You need to beat the cream cheese until it’s perfectly smooth. A stand mixer is easier, but a hand mixer works fine. Just be patient. It takes about 5 minutes to get it lump-free.
Rubber spatula — For scraping down the sides of the bowl. You want every bit of that creamy mixture.
Fine-mesh sieve — Optional, but I like to strain the batter through this to ensure there are absolutely no lumps. It’s an extra step, but it guarantees that ultra-creamy texture.
Oven thermometer — Ovens can be inaccurate. If your oven runs hot, your cheesecake might crack. An inexpensive thermometer helps you know the real temperature.
How to Make It: Step-by-Step
Alright, let’s make this. I’m walking you through exactly how I do it, including the little tricks I’ve picked up to keep it stress-free and delicious.
Step 1: Prep Your Pan and Oven (10 minutes)
Preheat your oven to 325°F (160°C). This is a gentle temperature. We’re not rushing this. Grease the bottom of your springform pan with a little butter. Then, line the bottom with a circle of parchment paper. This ensures the crust never sticks. Wrap the outside of the pan in two layers of heavy-duty aluminum foil. This is to prevent water from seeping in if you decide to use a water bath (though this recipe doesn’t strictly require it, it’s good insurance). Set the pan aside.
Step 2: Make the Crust (5 minutes)
In a medium bowl, mix the graham cracker crumbs, melted butter, sugar, and salt. It should look like wet sand. Press this mixture firmly into the bottom of your prepared pan. Use the bottom of a measuring cup to pack it down evenly. Don’t press it up the sides; we want a flat base. Put the crust in the fridge while you make the filling. It helps it set.
Step 3: Beat the Cream Cheese (5 minutes)
In the bowl of your stand mixer (or a large mixing bowl), add the softened cream cheese and sugar. Beat on medium-low speed until smooth and creamy. Scrape down the sides and bottom of the bowl. This step is crucial. If there are lumps, they will show up in the final product. Take your time here. It’s a meditative process. The mixture should look like thick, white frosting.
Step 4: Add the Wet Ingredients (3 minutes)
Add the sour cream, heavy cream, lemon juice, and scraped vanilla bean seeds (including the pods, if you want extra flavor, but remove them before baking). Mix on low until just combined. Don’t overmix. You don’t want to incorporate too much air, which can cause cracking.
Step 5: Incorporate the Eggs (3 minutes)
Add the eggs one at a time, mixing on low speed just until each egg is incorporated. Stop as soon as you see the yellow disappear. Overmixing at this stage is the #1 cause of cracks. Be gentle. Add the cornstarch and mix briefly to combine.
Step 6: Strain and Pour (5 minutes)
For that ultra-creamy texture, I like to strain the batter through a fine-mesh sieve into a large measuring cup with a spout. This catches any tiny bits of unmixed cream cheese or vanilla pod. Pour the batter over the chilled crust. Smooth the top with a spatula.
Step 7: The Gentle Bake (1 hour 15 minutes)
Place the pan in the oven. Bake at 325°F (160°C) for 1 hour and 15 minutes. The edges should be set, but the center should still jiggle slightly like Jell-O when you shake the pan. It will look soft in the middle. This is correct. Do not overbake. The residual heat will finish cooking it.
Step 8: The Slow Cool (2 hours)
Turn off the oven and crack the door open slightly. Let the cheesecake sit in the oven for 1 hour. This gradual cooling prevents thermal shock, which causes cracking. Then, remove it from the oven and let it cool completely on a wire rack. Finally, refrigerate for at least 6 hours, preferably overnight. This is the hardest part. Waiting. But it’s necessary for the texture to set properly.
Expert Tips for a Flawless Self-Care Dessert
Here’s everything I’ve learned from making this dozens of times. These tips will save you from my mistakes.
- Room temperature is non-negotiable — Cold cream cheese and eggs create a grainy batter. If you forget to take them out, put the cream cheese blocks in a bowl of warm water for 10 minutes. Put the eggs in warm water for 5 minutes. It’s worth the 10 minutes of waiting.
- Don’t overmix — Once you add the eggs, mix as little as possible. Air bubbles are the enemy of a dense, creamy cheesecake. Mix until just combined.
- The jiggle test — When you take it out of the oven, the center should wobble like gelatin, not look liquid. If it looks liquid, it’s underbaked. If it’s firm, it’s overbaked. Aim for the jiggle.
- Patience during cooling — The slow cool in the turned-off oven is the secret to no cracks. Don’t rush this. Let the oven cool down with the cheesecake inside.
- Chill overnight — I know you want to eat it now. But it tastes infinitely better after 24 hours in the fridge. The flavors meld, and the texture becomes richer. Use the waiting time to do something nice for yourself.
Variations and Substitutions
Once you’ve mastered the basic ultra-creamy vanilla bean cheesecake, here’s how you can mix it up. I’ve tried all of these.
Berry Swirl — Before baking, dollop ½ cup of berry jam (strawberry, raspberry, or blueberry) on top of the batter. Use a knife to swirl it gently. It adds a tart contrast to the sweet vanilla. This is my favorite variation for summer.
Chocolate Chip — Fold ½ cup of mini chocolate chips into the batter after adding the eggs. Simple and delicious. Great for kids or chocolate lovers.
Gluten-Free — Use gluten-free graham cracker crumbs or crushed gluten-free cookies for the crust. The filling is naturally gluten-free. I’ve used gluten-free Oreos crushed for the crust, and it works great.
Dairy-Free — This is trickier. Use vegan cream cheese (like Kite Hill), vegan butter, and coconut cream instead of sour cream and heavy cream. The texture will be different but still creamy. I’ve made this for friends with dairy allergies, and they loved it.
Lemon Vanilla — Add the zest of one lemon to the batter. It brightens the vanilla flavor nicely. Great for spring.
Serving and Storage
How to Serve
I usually serve this straight from the fridge. It’s best cold. Use a sharp knife dipped in hot water for clean slices. Wipe the knife between cuts. Top with a dollop of whipped cream and a sprinkle of vanilla bean seeds. It looks elegant and tastes even better.
Side Dishes
This cheesecake is rich, so it pairs well with light, fresh sides if you’re serving it as part of a meal. A simple green salad with a vinaigrette works well. Or, serve it with fresh berries. I often pair it with my iced vanilla chai latte for a cozy afternoon treat.
Storage Instructions
Refrigerator: Store in an airtight container or wrapped tightly in plastic wrap for up to 5 days. It actually gets better after day 2.
Freezing: You can freeze this ultra-creamy vanilla bean cheesecake. Wrap the whole cheesecake (or slices) tightly in plastic wrap and then foil. Freeze for up to 2 months. Thaw in the fridge overnight. The texture might be slightly softer, but it’s still delicious.
Reheating: Do not reheat. Cheesecake is best served cold or at room temperature. If you want it slightly softer, let it sit on the counter for 20 minutes before eating.
Nutrition Information
I’m not a nutritionist, but here’s the breakdown if you’re tracking. This is a rich dessert, so portion control is key. I usually cut it into 12 slices.
Per Serving (1/12 of cheesecake):
| Nutrient | Amount |
|---|---|
| Calories | 380 |
| Protein | 6g |
| Carbs | 32g |
| Fiber | 0.5g |
| Sugar | 24g |
| Fat | 26g |
| Saturated Fat | 16g |
| Cholesterol | 95mg |
| Sodium | 280mg |
What’s Good: It’s relatively low in carbs compared to other desserts, thanks to the lack of flour in the filling. It provides some calcium from the dairy.
What to Know: It’s high in calories and saturated fat due to the cream cheese and butter. It’s a treat, not a health food. Enjoy it mindfully.
Final Thoughts
So that’s my ultra-creamy vanilla bean cheesecake. I’ve probably talked your ear off at this point, but when you make a recipe this often, you have a lot to say about it. This has saved my evenings more times than I can count. It’s my answer to “I need to take care of myself” when I’m tired, stressed, or just overwhelmed.
It’s not about the taste, though it is delicious. It’s about the process. It’s about the smell of vanilla filling your home. It’s about the patience required to let it cool. It’s a reminder that good things take time. And that’s okay.
Make it yours. Add a berry swirl if you’re feeling playful. Keep it plain if you’re feeling simple. The best recipes are the ones you adapt to your mood. If you make this, drop a comment and let me know how it went. I love hearing how recipes turn out in your kitchen. And if something doesn’t work, tell me that too—I’m here to help troubleshoot.
Happy baking. And I hope your kitchen smells half as good as mine does right now.
Frequently Asked Questions
Can I use vanilla extract instead of vanilla beans?
Yes, you can. Use 2 teaspoons of high-quality vanilla extract. The texture will be the same, but you won’t have the pretty black specks. The flavor will still be excellent, just less complex. I recommend using beans if you can find them, but extract works in a pinch.
Why did my cheesecake crack?
Cracking is usually caused by overmixing (incorporating too much air), overbaking (drying it out), or cooling too quickly (thermal shock). This recipe is designed to prevent cracking with gentle mixing and slow cooling. If it cracks, it’s still delicious. You can cover it with whipped cream or fruit.
Can I make this ahead of time?
Absolutely. This ultra-creamy vanilla bean cheesecake is better when made ahead. You can make it up to 3 days in advance. In fact, I recommend making it the night before so it has time to set fully. It stores well in the fridge.
How do I know when it’s done?
The edges should be set and slightly puffed, but the center should still jiggle like Jell-O when you gently shake the pan. It will continue to cook from residual heat as it cools. If the center is completely firm, it’s overbaked.
Can I use a different pan size?
If you use a 10-inch pan, the cheesecake will be thinner and bake faster. Reduce the baking time by 15-20 minutes. If you use a 9-inch springform pan with high sides, you can double the recipe, but you’ll need to bake it longer. I stick to the 9-inch pan for the best results.
Is this recipe gluten-free?
The filling is naturally gluten-free. The crust contains graham crackers, which have wheat. To make it gluten-free, use gluten-free graham cracker crumbs or crushed gluten-free cookies. I’ve tested this with gluten-free Oreos, and it works perfectly.
Can I freeze leftovers?
Yes. Wrap slices tightly in plastic wrap and then foil. Freeze for up to 2 months. Thaw in the fridge overnight. The texture might be slightly softer, but it’s still very good. I don’t recommend freezing the whole cheesecake if you plan to serve it soon, as thawing can cause condensation.
Pin This Recipe!
Best Ultra-Creamy Vanilla Bean Cheesecake For Self Care
- Total Time: 8 hours 45 minutes
- Yield: 12 servings 1x
Description
An ultra-creamy, forgiving vanilla bean cheesecake designed for self-care. This hands-off dessert features a rich, smooth texture and requires no water bath, making it perfect for tired bakers seeking a moment of peace.
Ingredients
- 1 ½ cups (150g) graham cracker crumbs
- 6 tablespoons (85g) unsalted butter, melted
- 2 tablespoons (25g) granulated sugar
- 1 pinch salt
- 32 ounces (900g) full-fat block cream cheese, room temperature
- 1 cup (200g) granulated sugar
- 1 cup (240g) full-fat sour cream
- ½ cup (120ml) heavy cream
- 2 large vanilla beans, split and seeds scraped
- 4 large eggs, room temperature
- 2 tablespoons (16g) cornstarch
- 1 teaspoon lemon juice
- Whipped cream (optional, for topping)
- Extra vanilla bean seeds (optional, for garnish)
Instructions
- Preheat oven to 325°F (160°C). Grease the bottom of a 9-inch springform pan, line with parchment paper, and wrap the outside in two layers of heavy-duty aluminum foil.
- In a medium bowl, mix graham cracker crumbs, melted butter, 2 tablespoons sugar, and salt until it resembles wet sand. Press firmly into the bottom of the prepared pan. Refrigerate while making the filling.
- In a stand mixer or large bowl, beat the softened cream cheese and 1 cup sugar on medium-low speed until smooth and creamy, about 5 minutes. Scrape down the sides and bottom.
- Add sour cream, heavy cream, lemon juice, and vanilla bean seeds. Mix on low until just combined.
- Add eggs one at a time, mixing on low speed just until incorporated. Do not overmix. Add cornstarch and mix briefly to combine.
- Strain the batter through a fine-mesh sieve into a measuring cup to remove any lumps. Pour over the chilled crust and smooth the top.
- Bake at 325°F (160°C) for 1 hour and 15 minutes. The edges should be set, but the center should jiggle slightly like Jell-O.
- Turn off the oven and crack the door open slightly. Let the cheesecake sit in the oven for 1 hour to cool gradually.
- Remove from the oven and let cool completely on a wire rack. Refrigerate for at least 6 hours, preferably overnight, before serving.
Notes
Ensure all dairy ingredients (cream cheese, eggs) are at room temperature to prevent lumps and cracking. Do not overmix the batter after adding eggs to avoid incorporating air, which causes cracks. The cheesecake improves in flavor and texture after sitting in the fridge for 24 hours. It can be frozen for up to 2 months.
- Prep Time: 30 minutes
- Cook Time: 1 hour 15 minutes
- Category: Dessert
- Cuisine: American
Nutrition
- Serving Size: 1 slice (1/12 of che
- Calories: 380
- Sugar: 24
- Sodium: 280
- Fat: 26
- Saturated Fat: 16
- Carbohydrates: 32
- Fiber: 0.5
- Protein: 6
Keywords: vanilla bean cheesecake, ultra-creamy cheesecake, self care dessert, easy cheesecake, no water bath cheesecake, homemade vanilla cheesecake


