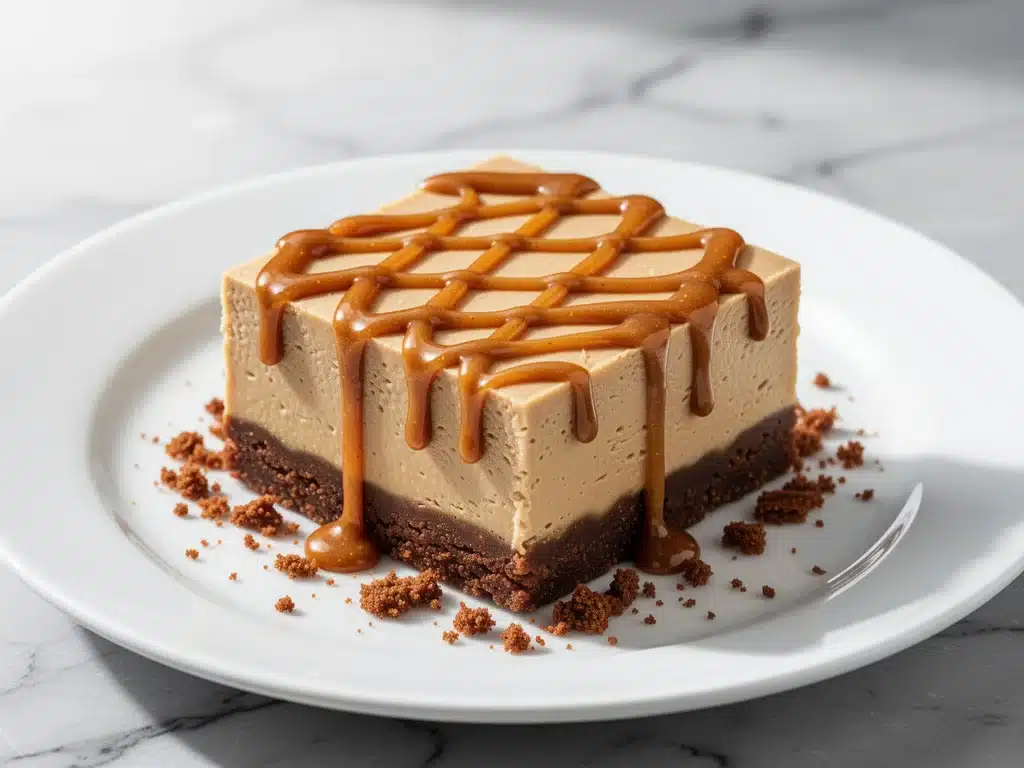
It was a Tuesday evening, and I was in that dangerous, hungry state where I’m staring into the pantry like it owes me money. I had a sudden, overwhelming craving for something sweet—specifically, something creamy, crunchy, and vaguely reminiscent of a caramel latte. I grabbed a jar of what I thought was Biscoff spread from the back of my cupboard. You know the one. The one that’s been there since last Christmas, slightly separated, with a lid that fights you every time you open it.
I spread it on a cracker. It tasted… off. A little bitter. A little stale. Then I read the label. It wasn’t Biscoff. It was a generic “cookie butter” brand I’d bought on a whim at a discount store, and honestly? It was weirdly spicy. Cinnamon-forward. Almost too intense for just spreading on toast.
But here’s the thing: that weird, spicy, overly cinnamon-heavy spread was the catalyst for the best dessert I’ve made in years. I didn’t want to throw it out, so I thought, “What if I bake it?” But then I remembered it was 9 PM, I was tired, and I definitely didn’t want to turn on the oven and deal with a cheesecake water bath. So I did the unthinkable. I went no-bake.
I mixed that questionable cookie butter with cream cheese, whipped cream, and a heap of crushed Biscoff cookies (the real ones, thank god, because you need the crunch). I pressed it into a pan, popped it in the fridge, and went to bed. When I came out the next morning, it was set. Perfectly. Silky. The kind of texture that makes you pause mid-bite and just stare at the spoon.
That accidental Tuesday night experiment turned into a obsession. I’ve made these **no-bake Biscoff cheesecake bars** at least a dozen times since. I’ve tested them with different cookie brands, different cream cheese temperatures, and different drizzle consistencies. And I can confidently say: this is the easiest, most crowd-pleasing dessert you will ever make. It’s rich, it’s tangy, it’s crunchy, and it requires zero oven skills. If you love **fall caramel apple cheesecake bars** but want something faster, or if you’re looking for a dessert that feels fancy but takes ten minutes of active work, this is it.
Why You’ll Love This No-Bake Biscoff Cheesecake Recipe
Look, I’m not going to stand here and tell you this is “light” or “healthy.” It’s cream cheese. It’s cookie butter. It’s sugar. It’s glorious. But there are specific reasons why this recipe has taken over my kitchen (and my friends’ fridges).
Zero Oven Required — Seriously. I live in an apartment where the oven feels like a hazard zone in the summer. This recipe lives entirely in the fridge. You mix, you press, you chill. That’s it. No preheating, no water baths, no worrying about cracked tops. If you can open a jar of peanut butter, you can make this.
Make-Ahead Friendly — This is my secret weapon for hosting. I can make these bars three days before a party. In fact, they taste *better* after sitting overnight. The flavors meld, the texture firms up, and it saves me from panicking on the day of the event. It’s the ultimate stress-free dessert strategy.
Texture Heaven — There’s nothing worse than a cheesecake that’s just… mush. These bars have a distinct crunch from the cookie crust and the sprinkled crumbs on top, a dense but airy cheesecake layer, and a gooey, warm(ish) drizzle. It’s a mouthfeel trifecta. It reminds me a bit of the crunch in **cherry almond crumble bars**, but with that smooth, rich cheesecake profile.
Uses Up Leftover Cookies — Do you have a half-empty box of Biscoff cookies gathering dust? Or maybe you bought the spread for toast and now have a giant jar? This recipe is the perfect way to use up both. It’s not wasteful; it’s strategic.
Gluten-Free Option (Sort Of) — If you use gluten-free cookies for the crust, the rest of the recipe is naturally gluten-free (check your cookie butter label, though). It’s one of the few desserts I can make for my gluten-intolerant friend without her feeling like she’s missing out. She actually prefers these to the regular ones because the crust is so crisp.
So basically, if you want a dessert that looks like you spent hours in a bakery but actually took 15 minutes plus fridge time, stop scrolling. This is your sign.
Ingredients You’ll Need
Here’s the best part: you probably have most of this already. It’s a pantry-staple dessert. But I am particular about three things here, and I’ll tell you exactly why.
For the Crust
Biscoff Cookies (Lotus Biscoff) (2 cups, finely crushed / about 250g) — I know there are cheaper generic brands. Use the real thing for the crust. The texture and flavor of authentic Lotus Biscoff are superior. You need them fine—like sand. I use my food processor, but you can put them in a ziplock bag and smash them with a rolling pin if you’re old school.
Unsalted Butter (6 tablespoons / 85g, melted) — This binds the crumbs. Don’t use margarine. It just doesn’t have the right fat content for that crisp, shortbread-like texture. Melt it completely before mixing.
Granulated Sugar (2 tablespoons / 25g) — The cookies are already sweet, so we’re just adding a little extra sweetness to help the crust crisp up and caramelize slightly in the fridge.
Salt (½ teaspoon) — Crucial. It cuts through the sugar and brings out the cinnamon notes. Don’t skip it.
For the Cheesecake Layer
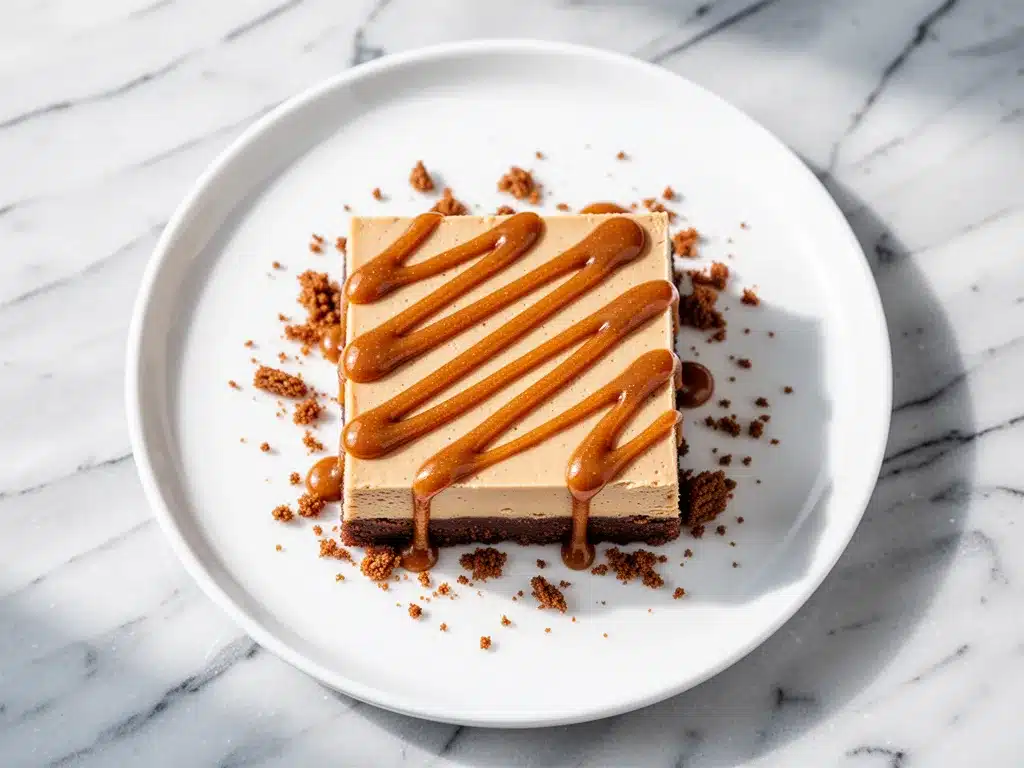
Full-Fat Cream Cheese (24 oz / 680g, softened) — This is non-negotiable. Light cream cheese will make this runny and sad. Block cream cheese only—never the tub stuff. Let it sit on the counter for 30 minutes before you start. If it’s cold and chunky, your bars will be lumpy. Softened cream cheese blends into silk.
Biscoff Spread (Cookie Butter) (½ cup / 128g, softened) — This is the star. If you have that weird generic jar from my intro story, now is the time to use it. It adds that deep, spiced caramel flavor. Make sure it’s at room temperature so it blends smoothly with the cream cheese.
Heavy Cream (1 cup / 240ml, cold) — Whip this to stiff peaks. This is what gives the cheesecake its airy, light texture instead of being dense and heavy. Use cold cream from the fridge. If it’s warm, it won’t whip.
Vanilla Extract (1 teaspoon) — Pure vanilla. Not imitation. It rounds out the cinnamon flavor.
Confectioners’ Sugar (½ cup / 60g) — Powdered sugar blends better than granulated. It dissolves instantly. Sift it if it’s clumpy.
For the Drizzle
Biscoff Spread (½ cup / 128g) — Same as above. Just more of it.
Heavy Cream (2-3 tablespoons) — You’ll add this gradually to get the right consistency. It should be drizzle-thick, like warm honey. Not too runny (it won’t set), not too thick (you’ll break your arm trying to spread it).
Pinch of Salt — Again, salt makes the sweet taste sweeter.
Extra Crushed Biscoff Cookies — For garnish. Because we love texture.
Equipment Needed
You don’t need fancy gadgets for this. Here’s what I actually use.
9×13 Inch Pan — I use a glass Pyrex pan. It helps me see the crust browning (if I were baking it) and makes cleanup easy. Line it with parchment paper, leaving an overhang on the sides. This is your lifeline for lifting the bars out later. Do not skip the parchment.
Food Processor — For crushing the cookies quickly and evenly. If you don’t have one, a heavy-duty blender works, or the classic ziplock bag + rolling pin method. Just be patient.
Electric Mixer — Hand mixer or stand mixer. Mixing cream cheese by hand is possible, but your arm will hate you. A mixer ensures that smooth, lump-free texture.
Spatula — A sturdy silicone spatula for folding in the whipped cream. You want to keep the air in the mixture, so gentle folds are key.
Small Saucepan or Microwave-Safe Bowl — For warming the drizzle. I prefer the microwave in 15-second bursts. It’s faster and easier to control.
How to Make It: Step-by-Step
Alright, let’s make this! I’m walking you through exactly how I do it, including the little tricks I’ve picked up so your bars come out perfect every time.
Step 1: Prep Your Pan and Cookies (5 minutes)
Line your 9×13 pan with parchment paper. Leave a generous overhang on the long sides—this acts like a handle to lift the finished bars out later. Crush your Biscoff cookies into fine crumbs. If they’re too chunky, your crust won’t hold together. Mix the crumbs with the melted butter, sugar, and salt in a bowl. It should look like wet sand.
Step 2: Press the Crust (2 minutes)
Pour the crumb mixture into the pan. Use the bottom of a measuring cup or a flat glass to press it down firmly. I know it feels like too much pressure, but a loose crust falls apart. You want it compact and even. I usually press it up the sides slightly, like a tart shell. Pop it in the fridge while you make the filling. This helps it set.
Step 3: Whip the Cream Cheese Mixture (5 minutes)
In a large bowl, beat the softened cream cheese and softened Biscoff spread until completely smooth. No lumps allowed. If you see white specks, keep beating. Scrape down the sides of the bowl. Add the vanilla and powdered sugar. Beat on medium-high until combined and creamy. This base should be thick and smooth.
Step 4: Whip the Heavy Cream (3 minutes)
In a separate cold bowl, whip the heavy cream to stiff peaks. This means when you lift the beaters, the cream stands up straight and doesn’t droop. Don’t over-whip it into butter, but it needs to be firm enough to hold the structure of the cheesecake.
Step 5: Fold It Together (3 minutes)
This is the most important step. Add one-third of the whipped cream to the cream cheese mixture and fold gently to lighten it. Then, add the rest of the cream. Fold until just combined. You want to keep as much air as possible. The mixture should look fluffy and uniform, like mousse. Do not stir vigorously, or you’ll deflate it and end up with dense, heavy bars.
Step 6: Assemble and Chill (4 hours minimum)
Pour the fluffy cheesecake mixture over the chilled crust. Spread it evenly with a spatula. Tap the pan gently on the counter to release any air bubbles. Cover with plastic wrap and refrigerate for at least 4 hours, but overnight is best. I know waiting is hard, but this step is what transforms it from a “mousse on crumbs” into a “cheesecake bar.” Patience pays off.
Step 7: Make the Drizzle and Garnish (5 minutes)
Once the bars are set, make the drizzle. Warm the Biscoff spread and heavy cream together. Microwave in 15-second intervals, stirring between each, until it’s smooth and pourable. If it’s too thick, add another teaspoon of cream. If it’s too runny, add a teaspoon of cookie butter.
Lift the bars out of the pan using the parchment sling. Place on a cutting board. Drizzle the warm Biscoff sauce over the top in a zigzag pattern. While the drizzle is still wet, sprinkle with extra crushed Biscoff cookies for that final crunch.
Let the drizzle set for 10 minutes at room temperature, then slice into squares. Serve immediately, or store in the fridge.
Expert Tips & Tricks
Here’s everything I’ve learned from making this dozens of times. These tips will save you from my mistakes.
Temperature is Everything
Cream cheese and cookie butter must be at room temperature. Heavy cream must be cold. If your cream cheese is cold, you’ll get lumps. If your cream is warm, it won’t whip. Plan ahead. Take the cream cheese out of the fridge when you start dinner.
Don’t Overmix the Filling
Once you add the whipped cream, fold, don’t beat. Overmixing deflates the air, and your bars will be dense and heavy. You want a light, airy texture. It’s a gentle dance, not a wrestling match.
The Drizzle Consistency Test
Before you drizzle the whole batch, test it. Dip a spoon in and lift it. The drizzle should fall off in a steady ribbon that sits on the surface for a second before sinking in. If it disappears instantly, it’s too thin. If it sits on top in a blob, it’s too thick. Adjust with more cream or butter.
Chill the Knife
For clean cuts, dip your knife in hot water and wipe it dry between each cut. This prevents the creamy filling from sticking to the blade and making a mess. It’s a small trick that makes a huge difference in presentation.
Storage is Key
These bars are best stored in the fridge, covered tightly. They last up to 5 days. If you leave them out for more than 2 hours, the cream cheese can spoil. They also freeze well! Wrap individual squares in plastic wrap and freeze for up to 2 months. Thaw in the fridge overnight. I do this all the time for quick dessert fixes.
Variations & Substitutions
Once you’ve nailed the basic version, here’s how you can mix it up. I’ve tried all of these.
Gluten-Free Version
Use gluten-free Biscoff-style cookies (like Madeleine Brand or generic GF shortbread) for the crust. Check your cookie butter label—most are naturally gluten-free, but always verify. The rest of the recipe is GF.
Strawberry Biscoff
Swirl in ½ cup of strawberry puree into the cheesecake mixture before pouring it over the crust. It creates a beautiful pink swirl. It’s like a fruit cheesecake but with that caramel kick. Great for spring.
Double Chocolate Biscoff
Add ¼ cup of cocoa powder to the cream cheese mixture. It’s a weird combo, but the chocolate and caramel flavors work surprisingly well together. Like a peanut butter cup vibe.
Mineral Water Variation
I know, I know. But if you’re tired of heavy cream, you can substitute half the heavy cream with chilled club soda. It makes the filling even lighter and airier. It’s a trick I learned from making **no-bake pumpkin pie cheesecake**. It works surprisingly well!
Different Cookies
You can use graham crackers, Oreos, or ginger snaps for the crust. But Biscoff is best because it matches the spread. If you use Oreos, you get a “Golden Oreo” vibe if you use vanilla cookie butter.
Serving & Storage
How to Serve:
I usually serve these straight from the fridge. They’re firm and cool, which contrasts nicely with the room-temperature drizzle. They go great with a cup of hot coffee or tea. I also like to serve them with a dollop of freshly whipped cream and a few fresh raspberries to cut the richness. If you’re hosting a dinner party, these look stunning on a platter with a dusting of cinnamon on top.
Side Dishes:
These are rich, so they don’t need much else. But if you’re making a full meal, pair them with something light. A simple green salad or some **everything bagel smashed avocado toast** (okay, maybe not avocado, but you get the idea—something savory and light to balance the sweet). Or if you’re doing a dessert course, serve them alongside some **iced vanilla chai lattes** to dip into.
Storage Instructions:
Refrigerator: Store in an airtight container for up to 5 days. The drizzle might soften, but the flavor stays great. I recommend keeping them in the coldest part of the fridge.
Freezing: Yes, they freeze well! Wrap individual squares tightly in plastic wrap, then put them in a freezer bag. They’ll last up to 2 months. Thaw in the fridge overnight. Do not thaw at room temperature, or the texture might get weird.
Reheating: Do not reheat these. They are meant to be eaten cold or at room temperature. Heating them will melt the structure and make them runny.
Nutrition Information
I’m not a nutritionist, but here’s the breakdown if you’re tracking. Keep in mind, this is a rich dessert, so portion control is key.
Per Serving (based on 16 bars):
- Calories: 380
- Protein: 5g
- Carbs: 35g
- Fiber: 1g
- Sugar: 28g
- Fat: 24g
- Saturated Fat: 14g
- Cholesterol: 60mg
- Sodium: 250mg
What’s Good:
- It’s no-bake, so you save energy!
- It’s satisfying, so one or two bars is usually enough.
- You can adjust the sugar in the crust if you’re sensitive.
What to Know:
- High in saturated fat from the cream cheese and butter.
- High in sugar from the cookies and spread.
- Contains gluten (unless GF cookies used).
- Contains dairy.
My Take:
Look, this is a treat. It’s not a salad. But it’s way better than store-bought cheesecake, and you know exactly what’s in it. When I make it, I usually cut it into smaller squares (24 instead of 16) to keep portions reasonable. It’s a special occasion dessert, not a daily snack. Enjoy it guilt-free!
Final Thoughts
So that’s my go-to no-bake Biscoff cheesecake bars! I’ve probably talked your ear off at this point, but when you make a recipe this often, you have a lot to say about it. This has saved dessert nights more times than I can count. It’s my answer to “what should I bring to the potluck” when I’m tired, don’t want to bake, and still want something that tastes amazing.
My kids are happy, my husband’s happy, and I’m happy because I’m not stressed about cooking. The best part? The leftovers never last long. There’s always someone eyeing the pan.
Make it yours! Try different cookie crumbs, add some nuts, or play with the drizzle consistency. The best recipes are the ones you adapt to your tastes. If you make this, drop a comment and let me know what you think! I love hearing how recipes turn out in your kitchen. And if something doesn’t work, tell me that too—I’m here to help troubleshoot.
Happy cooking! And I hope your kitchen smells half as good as mine does right now.
Frequently Asked Questions
Can I use light cream cheese?
I strongly recommend against it. Light cream cheese has more water and less fat, which means your cheesecake won’t set properly. It will be runny and sad. Full-fat block cream cheese is essential for that dense, creamy texture. If you’re worried about calories, just have a smaller slice!
Why is my drizzle too runny?
This usually happens if you add too much heavy cream or don’t warm the cookie butter enough. Cookie butter is thick at room temperature. You need to warm it until it’s fluid, then add the cream gradually. If it’s too runny, put it in the fridge for 10 minutes to thicken, then try again. It should coat the back of a spoon.
Can I make this in a springform pan?
Yes! A 9-inch springform pan works great. Just make sure to line the bottom and sides with parchment paper so you can lift it out. You’ll need to adjust the baking/chilling time slightly, but the method is the same. Just press the crust into the bottom, not up the sides.
How long do these need to chill?
Minimum 4 hours. But honestly? Overnight is best. The longer they sit, the firmer they get and the better the flavors meld. If you’re in a rush, you can freeze them for 1-2 hours to speed up the setting process, but the texture won’t be quite as good as a long chill.
Can I substitute the Biscoff spread with something else?
You can try peanut butter or almond butter, but the flavor will be completely different. It will be more like a peanut butter cheesecake. If you want that spiced caramel flavor, Biscoff is really the only option. There are other cookie butters (like Speculoos), but they’re similar enough that Biscoff is the standard.
Why did my crust fall apart?
Usually, this means you didn’t press it down firmly enough, or you didn’t have enough butter. The ratio should be about 2 cups of crumbs to 6 tablespoons of butter. Press it down hard with the bottom of a glass. And make sure to chill it before adding the filling—it helps the butter solidify and hold everything together.
Can I add nuts?
Absolutely! Toasted pecans or walnuts would be amazing in the crust or sprinkled on top. They add a nice crunch and earthiness that balances the sweetness. I like to add ½ cup of toasted pecans to the crust mixture. It’s a great variation if you like **fall maple pecan pie bars** vibes.
Pin This Recipe!
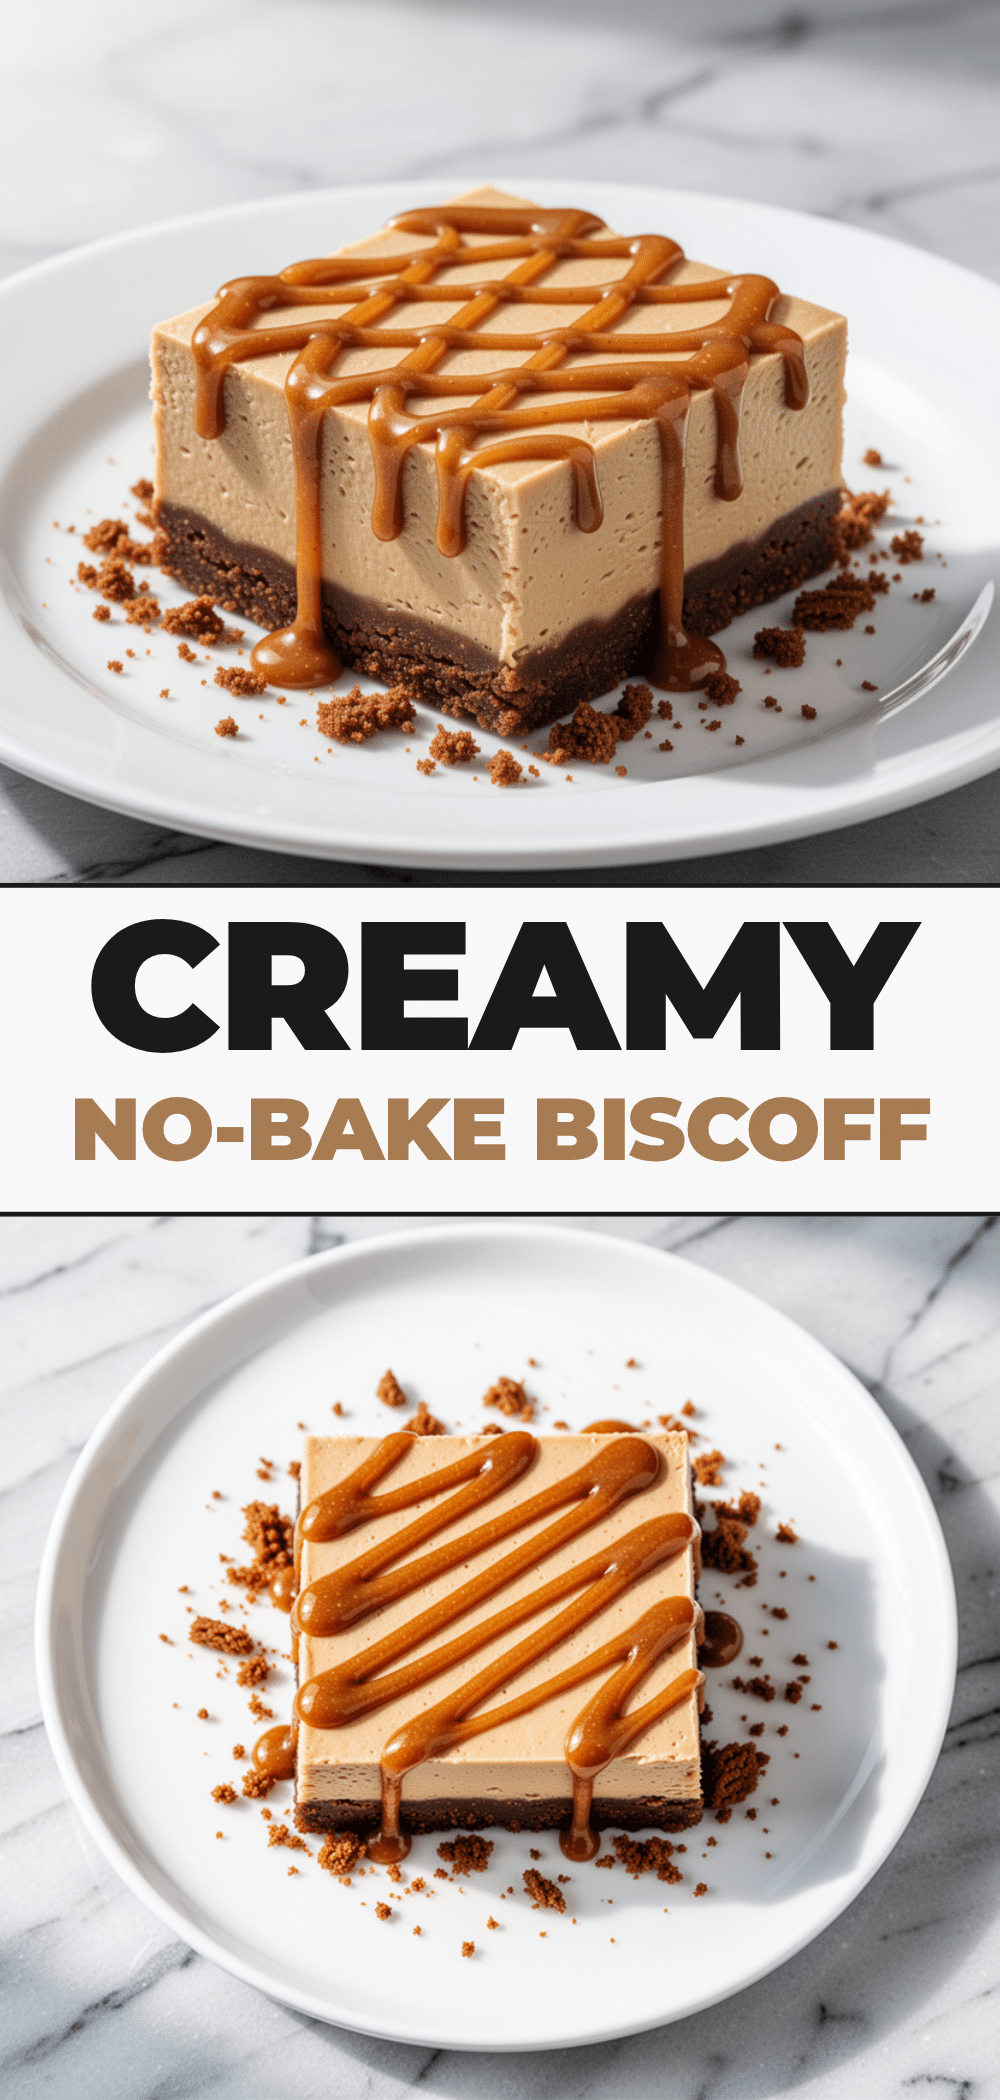
No-Bake Biscoff Cheesecake Bars
- Total Time: 4 hours 15 minutes
- Yield: 16 servings 1x
Description
These easy, no-bake Biscoff cheesecake bars feature a crunchy cookie crust, a creamy and airy cheesecake filling, and a rich caramel drizzle. They are make-ahead friendly, require zero oven skills, and offer a perfect balance of sweet and tangy flavors.
Ingredients
- 2 cups finely crushed Biscoff cookies (about 250g)
- 6 tablespoons unsalted butter, melted
- 2 tablespoons granulated sugar
- 1/2 teaspoon salt
- 24 oz full-fat block cream cheese, softened
- 1/2 cup Biscoff spread (cookie butter), softened
- 1 cup heavy cream, cold
- 1 teaspoon pure vanilla extract
- 1/2 cup confectioners’ sugar
- 1/2 cup Biscoff spread (for drizzle)
- 2–3 tablespoons heavy cream (for drizzle)
- Pinch of salt (for drizzle)
- Extra crushed Biscoff cookies (for garnish)
Instructions
- Line a 9×13 inch pan with parchment paper, leaving an overhang on the sides for easy removal.
- Crush Biscoff cookies into fine crumbs. Mix with melted butter, granulated sugar, and salt until the texture resembles wet sand.
- Press the crust mixture firmly into the bottom of the prepared pan, slightly up the sides. Refrigerate while making the filling.
- In a large bowl, beat the softened cream cheese and softened Biscoff spread until completely smooth. Add vanilla extract and confectioners’ sugar, beating until creamy.
- In a separate cold bowl, whip the heavy cream to stiff peaks.
- Gently fold one-third of the whipped cream into the cream cheese mixture to lighten it. Add the remaining whipped cream and fold gently until just combined and fluffy. Do not overmix.
- Pour the cheesecake mixture over the chilled crust and spread evenly. Tap the pan to release air bubbles.
- Cover and refrigerate for at least 4 hours, or overnight, until set.
- To make the drizzle, warm the Biscoff spread and 2-3 tablespoons of heavy cream together in the microwave in 15-second intervals, stirring until smooth and pourable.
- Lift the bars out of the pan using the parchment sling. Drizzle the warm Biscoff sauce over the top in a zigzag pattern.
- Sprinkle with extra crushed Biscoff cookies while the drizzle is wet.
- Let the drizzle set for 10 minutes at room temperature, then slice into squares using a knife dipped in hot water for clean cuts.
Notes
Ensure cream cheese and cookie butter are at room temperature to avoid lumps. Heavy cream must be cold to whip properly. For clean cuts, dip your knife in hot water and wipe dry between each slice. These bars can be stored in the fridge for up to 5 days or frozen for up to 2 months.
- Prep Time: 15 minutes
- Cook Time: 0 minutes
- Category: Dessert
- Cuisine: American
Nutrition
- Serving Size: 1 bar
- Calories: 380
- Sugar: 28
- Sodium: 250
- Fat: 24
- Saturated Fat: 14
- Carbohydrates: 35
- Fiber: 1
- Protein: 5
Keywords: no-bake, Biscoff, cheesecake bars, cookie butter, easy dessert, make-ahead dessert, fall dessert, caramel dessert


