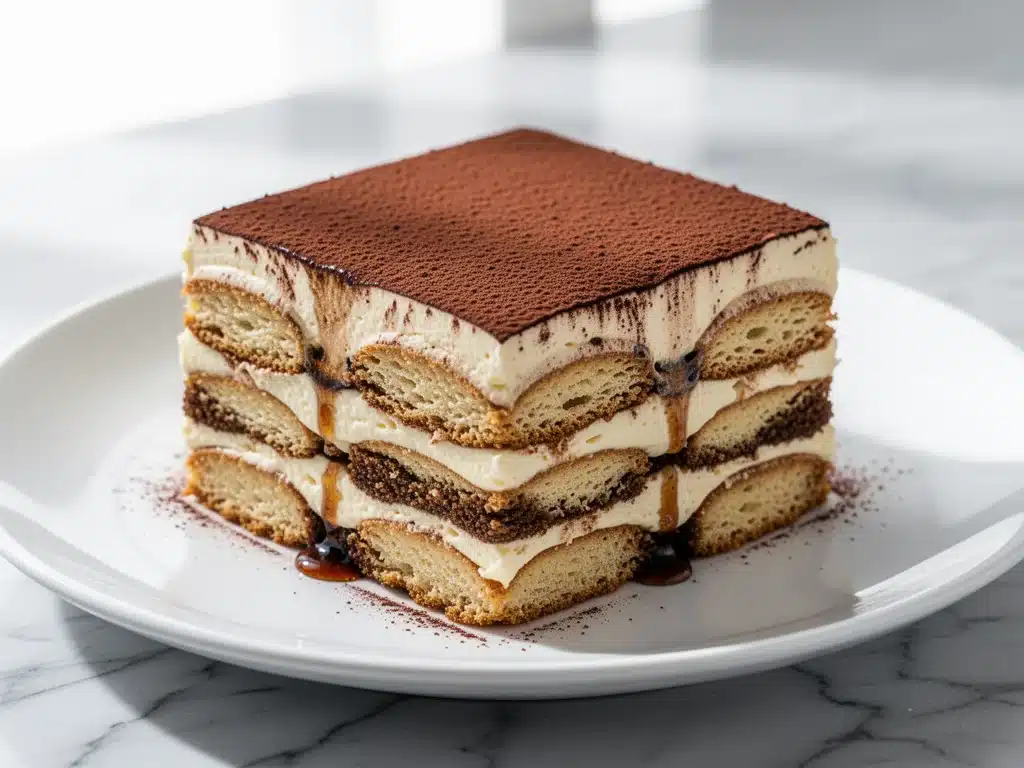
I have a confession to make. For years, I was terrified of making tiramisu. Not because I didn’t love it—I actually think it’s the single best dessert in the entire world—but because I was convinced it was too delicate. Too fussy. I remembered one disastrous attempt in college where I soaked the ladyfingers until they were essentially coffee soup, and the mascarpone separated into a weird, grainy mess. I was so embarrassed I threw the whole thing in the trash and ordered takeout instead.
That was fifteen years ago. Last weekend, I decided to try again. I had a dinner party coming up, and I wanted to make something that felt elegant but didn’t require me to stand over a stove for three hours. I pulled out my old recipe card, dusted off the coffee stains, and got to work. And you know what? It was perfect. The layers were distinct but melded together beautifully. The coffee flavor was bold but not bitter. The mascarpone cream was silky smooth. My guests ate three pieces each and asked for the recipe before they even finished their wine.
This isn’t just another dessert recipe. This is the Homemade Tiramisu with Espresso Soaked Ladyfingers that I’ve perfected over dozens of batches. It’s the kind of dessert that stops conversation. It’s rich, it’s caffeinated, and it’s surprisingly simple if you know the one trick to keeping the layers from turning into mush. I’ve tested this method so many times that I can make it in my sleep (though I wouldn’t recommend making it while half-asleep, just in case). If you’ve been intimidated by the idea of assembling a no-bake Italian classic, this is your sign. It’s easier than you think, and the results will have everyone asking if you went to culinary school.
Why You’ll Love This Recipe
There are a million reasons to make this Homemade Tiramisu with Espresso Soaked Ladyfingers, but let’s get real about the ones that actually matter to your life.
- Zero Baking Required — Seriously. No oven, no timers, no burnt edges. You just whip, dip, and layer. I made this on a Tuesday night while wearing sweatpants, and it looked like something from a high-end Italian restaurant. If you can whisk eggs and dip a cookie, you can do this.
- It Actually Improves with Time — Most desserts are best the second they’re made. Tiramisu is different. The flavors meld overnight. The coffee softens the biscuits just right without making them soggy. I always make this at least 24 hours ahead. If you make it and serve it immediately, you’re doing it wrong (and the texture won’t be right).
- Impressive but Not High-Maintenance — I’ve served this at potlucks, dinner parties, and holiday gatherings. People assume it’s complicated because of the name. But the prep is mostly hands-off chilling time. You spend maybe 30 minutes active, and the fridge does the rest. It’s the ultimate low-effort, high-reward dessert.
- Customizable Strength — Want it boozy? Add Kirsch or Marsala. Want it strictly for kids (or non-drinkers)? Skip the liquor and just use strong espresso. This Homemade Tiramisu with Espresso Soaked Ladyfingers adapts to your crowd. I usually add a splash of dark rum for my husband and leave it rum-free for my coffee-loving friends.
- Make-Ahead Friendly — This is my go-to when I’m stressed. I can assemble it on Sunday, keep it in the fridge, and just grab it on Friday night. It keeps perfectly for up to five days. Actually, it’s usually gone by day three, but it stays good.
It’s the dessert that saves you when you want to look like a pro chef but just want to relax. It’s creamy, it’s bitter, it’s sweet, and it’s everything.
Ingredients You’ll Need
Before we dive into the assembly, let’s talk about what you need. This recipe looks like it has a lot of ingredients, but most of them are staples. The magic here is in the quality of three specific items: the cheese, the coffee, and the eggs.
For the Espresso Soak
Strong Espresso or Very Strong Coffee (2 cups / 480ml) — This is non-negotiable. Do not use instant coffee if you can help it. Freshly brewed espresso is best because it’s concentrated. If you don’t have an espresso machine, brew a very strong pot of dark roast coffee using half the usual amount of water. Let it cool completely. Warm coffee will melt the cheese too fast.
Liqueur (Optional) (3-4 tablespoons) — Traditional Italian tiramisu uses Marsala wine, but dark rum or Kirsch are my favorites. They add a depth that plain coffee can’t achieve. If you’re skipping alcohol, just use a teaspoon of vanilla extract in the coffee to add flavor complexity.
For the Mascarpone Cream
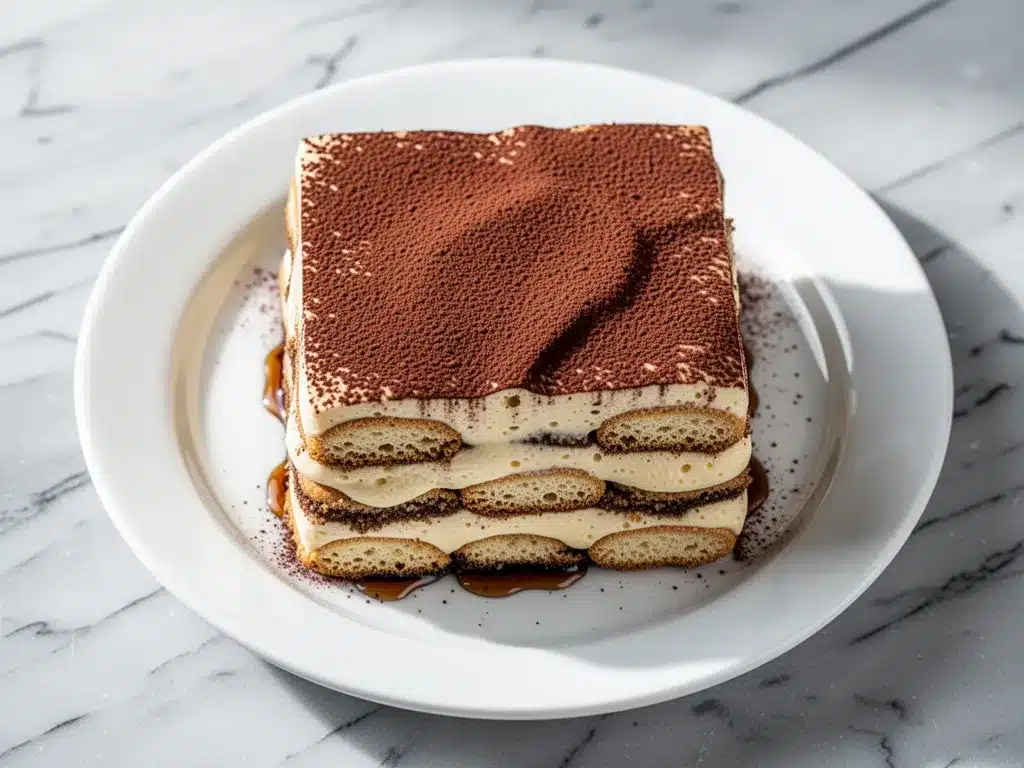
Mascarpone Cheese (16 oz / 450g) — This is the star. Do not substitute with cream cheese. They taste and texture completely different. Mascarpone is richer, smoother, and less tangy. Let it sit at room temperature for 30 minutes before using; cold mascarpone is lumpy and hard to whip.
Heavy Cream (1 cup / 240ml) — You need cold heavy whipping cream to get those stiff peaks. This gives the tiramisu its airy, cloud-like texture. Half-and-half won’t whip up properly, so stick with the heavy stuff.
Egg Yolks (6 large) — Traditional tiramisu uses raw eggs. I use pasteurized eggs to be safe, especially if serving kids or pregnant guests. If you’re uncomfortable with raw eggs, you can make a cooked custard base (zabaglione), but it changes the texture slightly. I prefer the raw method for that authentic, airy bite.
Granulated Sugar (½ cup / 100g) — Standard white sugar works fine. Don’t use brown sugar; it will make the cream too dense and change the color.
Vanilla Extract (1 teaspoon) — Just a touch to round out the coffee flavor. Use real vanilla, not imitation.
For the Assembly
Ladyfingers (Savoiardi) (2-3 boxes / about 30-40 cookies) — Look for the hard, dry Italian ladyfingers. The soft, cake-like ones you see in some grocery stores are too moist and will disintegrate. You want the dry, crisp kind that soaks up coffee like a sponge. Brands like Mezzetta or any Italian import brand work great.
Unsweetened Cocoa Powder (For dusting) — Use a good quality cocoa powder. Hershey’s is fine, but a darker European-style cocoa (like Ghirardelli or Valrhona) gives a more professional, bitter contrast to the sweet cream.
Common Substitutions
Egg Substitute: If you’re worried about raw eggs, you can make a cooked mascarpone cream. Whisk egg yolks and sugar over a double boiler until they reach 160°F (71°C), then cool before folding into the cheese. It’s safer but denser.
Coffee Substitute: Cold brew concentrate works beautifully if you’re in a rush. Just dilute it with a little water to match the strength of espresso.
Equipment Needed
You don’t need anything fancy. Here’s what I actually use in my kitchen.
- Large Mixing Bowl — For whipping the cream. A stainless steel or glass bowl works best because it stays cold.
- Hand Mixer or Stand Mixer — You need to whip the cream to stiff peaks. Doing this by hand is possible but tiring. A hand mixer is perfect for this.
- Shallow Dish or Pie Plate — For dipping the ladyfingers. A 9×9 inch or 10×10 inch dish is ideal. You need enough width to dip the cookies easily.
- 8×8 or 9×9 Inch Baking Dish — This is where you assemble the tiramisu. Glass is nice because you can see the layers, but ceramic or metal works too.
- Whisk — For mixing the egg yolks and sugar.
- Spatula — A silicone spatula is best for folding the cream into the mascarpone without deflating it.
- Microplane or Fine Grater — For grating fresh chocolate (optional) or dusting cocoa powder evenly.
Pro Tip: Keep your mixing bowl and beaters cold. If your kitchen is warm, pop the bowl in the fridge for 15 minutes before whipping. Cold cream whips faster and holds its shape better.
How to Make It: Step-by-Step
Alright, let’s make this! I’m walking you through exactly how I do it, including the little tricks I’ve picked up over the years. This process is all about timing and temperature.
Step 1: Brew and Cool the Coffee
Start by brewing your espresso or strong coffee. You need about 2 cups. Pour it into a heat-proof pitcher and let it cool to room temperature. If you’re in a hurry, you can put it in the fridge, but make sure it’s completely cold before you use it. Warm coffee will melt the mascarpone cream and make your tiramisu watery. If you’re adding liqueur, stir it in now.
Step 2: Whip the Heavy Cream
In a large, cold bowl, whip the heavy cream until you see soft peaks. This means when you lift the beaters, the cream forms a peak that droops over slightly. Don’t over-whip it into butter! Just soft peaks. Set this aside. We’ll fold it in later to keep it light and airy.
Step 3: Whip the Egg Yolks and Sugar
In a separate large bowl, whisk the egg yolks and sugar together. Use a hand mixer on medium-high speed for about 4-5 minutes. You want this mixture to become pale yellow, thick, and ribbon-like. When you lift the beaters, the batter should fall in a ribbon that sits on the surface for a few seconds before dissolving. This step incorporates air and dissolves the sugar completely, so you don’t get gritty tiramisu.
Step 4: Fold in the Mascarpone
Add the room-temperature mascarpone cheese to the egg yolk mixture. Beat on low speed just until combined and smooth. Be careful not to over-mix here, or the mascarpone can curdle. Once it’s smooth, gently fold in the whipped heavy cream. Use a spatula and fold from the bottom up, turning the bowl as you go. You want to keep as much air in the mixture as possible. Stop when there are no visible streaks of white cream. It should look fluffy and uniform.
Step 5: Dip the Ladyfingers
This is the most critical step. Take a ladyfinger and dip it quickly into the cold coffee. I mean quick—like 1-2 seconds per side. You want it soaked but not soggy. If you leave it in too long, it will fall apart. If you don’t dip it enough, it will be dry and crunchy. Think of it like dipping a cookie in milk, but faster. Arrange the dipped ladyfingers in a single layer in the bottom of your 8×8 or 9×9 dish. They should fit snugly, but don’t force them if they’re slightly too big; they’ll soften as they sit.
Step 6: First Layer of Cream
Spread half of the mascarpone cream mixture over the ladyfingers. Use an offset spatula or a regular spatula to create an even layer. Don’t worry if it’s not perfectly smooth; it will settle.
Step 7: Second Layer of Ladyfingers
Repeat the dipping process with the next layer of ladyfingers. Dip them in coffee and arrange them over the cream. Try to overlap them slightly to cover any gaps.
Step 8: Top with Remaining Cream
Spread the remaining cream over the second layer of ladyfingers. Smooth the top. This is your finishing surface, so make it as neat as you want. You can leave it rustic or smooth it out completely.
Step 9: Chill and Set
Cover the dish tightly with plastic wrap. Place it in the refrigerator for at least 6 hours, but ideally overnight (12-24 hours). This chilling time is what allows the flavors to meld and the ladyfingers to soften into a cake-like texture. Do not skip this step!
Step 10: Dust and Serve
Just before serving, dust the top generously with unsweetened cocoa powder. Use a fine-mesh sieve for an even, professional-looking dusting. Slice with a sharp knife. For clean cuts, wipe the knife between slices. Serve chilled.
Expert Tips & Tricks
Here’s everything I’ve learned from making this dozens of times. These tips will save you from my early mistakes.
- Cold Coffee is Key — I cannot stress this enough. If your coffee is warm, it will melt the cream. I usually brew the coffee the night before and let it cool in the fridge. Cold coffee also makes the ladyfingers set faster, so they hold their shape better.
- Room Temperature Mascarpone — Cold mascarpone is lumpy. Take it out of the fridge 30-60 minutes before you start. If you’re short on time, you can microwave it on low for 10-second bursts, but watch it closely. You want it soft, not melted.
- Don’t Soak Too Long — Ladyfingers are like sponges. They absorb liquid incredibly fast. A 1-second dip is usually enough. If you’re using very large ladyfingers, maybe 2 seconds. But err on the side of under-soaking. They will continue to absorb moisture from the cream as they chill.
- Pasteurized Eggs — If you are serving pregnant women, young children, or elderly guests, use pasteurized eggs. You can buy them pre-shelled or carton-style at most grocery stores. It’s a small change that makes a big difference for peace of mind.
- Fold, Don’t Stir — When combining the cream and mascarpone, use a gentle folding motion. Stirring vigorously will deflate the whipped cream, and your tiramisu will end up dense and heavy instead of light and airy.
- Sharp Knife for Slicing — Tiramisu is soft. If you try to slice it with a dull knife, it will squish. Dip your knife in hot water and wipe it dry before each cut. This gives you those beautiful, clean layers.
Variations & Substitutions
Once you’ve nailed the basic version, here’s how you can mix it up. I’ve tried all of these, and they’re all delicious.
Chocolate Tiramisu
Add 2 tablespoons of unsweetened cocoa powder to the mascarpone mixture. Or, melt 4 ounces of dark chocolate and fold it into the cream before spreading. This is my go-to when I want something richer.
Lemon Tiramisu
Add the zest of one lemon to the mascarpone cream. Swap the coffee for a lemon syrup (sugar and water boiled together, then cooled). It’s lighter and brighter, perfect for spring.
Pumpkin Spice Tiramisu
Swap the coffee for strong chai tea. Add 1 teaspoon of pumpkin pie spice to the mascarpone mixture. Top with whipped cream and a drizzle of caramel. This is a huge hit during fall, similar to the vibe of my fall maple pecan pie bars.
Strawberry Tiramisu
Skip the coffee. Dip the ladyfingers in a mixture of strawberry puree and sugar. Layer with fresh sliced strawberries. It’s a summer twist on the classic.
Dairy-Free Version
Use coconut cream instead of heavy cream, and a dairy-free mascarpone alternative (like cashew-based cream cheese). Use vegan ladyfingers (most are naturally vegan, but check the label). It’s not exactly the same, but it’s still creamy and satisfying.
Serving & Storage
How to Serve: I usually serve this straight from the fridge. It’s best cold. I garnish with a few chocolate shavings or a mint leaf if I’m feeling fancy, but cocoa powder is traditional and always looks great.
Side Dishes: Tiramisu is rich, so I like to serve it with a light fruit salad or just black coffee. It pairs beautifully with a glass of red wine or a strong espresso. It’s also a great finisher after a heavy meal, like the ground beef stroganoff I make sometimes.
Storage: Store covered in the refrigerator for up to 5 days. It actually gets better on day 2 and 3. Do not freeze it. The dairy and egg mixture will separate and become grainy when thawed. It’s best fresh (well, chilled fresh).
Meal Prep: This is the ultimate make-ahead dessert. Assemble it 2 days in advance. It saves you so much stress when guests are coming over. Just grab it, dust with cocoa, and serve.
Nutrition Information
I’m not a nutritionist, but here’s the breakdown if you’re tracking. This is a rich dessert, so portions matter.
Per Serving (based on 9 servings):
- Calories: 380
- Protein: 6g
- Carbs: 32g
- Fiber: 1g
- Sugar: 20g
- Fat: 24g
- Saturated Fat: 14g
- Cholesterol: 110mg
- Sodium: 80mg
What’s Good: It’s a good source of calcium from the cheese. The eggs provide protein. It’s also naturally gluten-free if you use gluten-free ladyfingers (though traditional ladyfingers contain wheat).
What to Know: It’s high in sugar and saturated fat due to the cream, cheese, and sugar. Enjoy it as a special treat, not a daily snack. If you’re watching sugar, you can reduce the sugar in the yolk mixture to ¼ cup, though it will be less sweet.
Final Thoughts
So that’s my go-to Homemade Tiramisu with Espresso Soaked Ladyfingers! I’ve probably talked your ear off at this point, but when you make a recipe this often, you have a lot to say about it.
This dessert has saved me more times than I can count. It’s my answer to “what’s for dessert?” when I want to impress but don’t have hours to bake. My family loves it, my friends beg for it, and I love it because it’s so satisfying to make something that looks so professional with minimal effort.
Make it yours! Try different liqueurs, add chocolate shavings, or serve it with fresh berries. The best recipes are the ones you adapt to your tastes. If you make this, drop a comment and let me know what you think! I love hearing how recipes turn out in your kitchen. And if something doesn’t work, tell me that too—I’m here to help troubleshoot.
Happy cooking! And I hope your kitchen smells half as good as mine does right now (which is basically just coffee and vanilla).
Frequently Asked Questions
Can I use instant coffee instead of espresso?
You can, but it’s not ideal. Instant coffee often has a bitter, metallic taste that doesn’t pair well with the delicate cream. If you must use it, dissolve 2-3 tablespoons of instant espresso powder in 2 cups of hot water, then cool completely. Freshly brewed coffee always tastes better.
Why is my tiramisu runny?
This usually happens for two reasons: either the coffee was too warm when you dipped the cookies, or you didn’t chill it long enough. Make sure your coffee is ice-cold. Also, ensure you’ve chilled it for at least 6 hours, preferably overnight. The structure needs time to set.
Can I make this ahead of time?
Yes! In fact, it’s better made ahead. You can assemble it up to 2 days in advance. Just keep it covered in the fridge. The flavors meld and improve over time. It’s perfect for meal prepping desserts.
Is tiramisu safe to eat with raw eggs?
Traditional tiramisu uses raw egg yolks. If you’re concerned about salmonella, use pasteurized eggs. You can buy them pre-shelled or in cartons. Alternatively, you can cook the yolks with sugar over a double boiler to 160°F before mixing, but this changes the texture slightly.
How do I store leftover tiramisu?
Store it in an airtight container or covered tightly with plastic wrap in the refrigerator. It will last for up to 5 days. Do not freeze it, as the dairy will separate and become grainy upon thawing.
Can I use cake-like ladyfingers?
It’s not recommended. Cake-like ladyfingers are too moist and will disintegrate quickly when dipped in coffee. You need the dry, crisp Italian ladyfingers (savoiardi) that absorb liquid without falling apart.
What’s the best way to slice tiramisu?
Use a sharp knife. Dip the knife in hot water and wipe it dry before each cut. This ensures clean slices without squishing the layers. For a neater presentation, you can also use a pizza cutter, but be gentle.
Pin This Recipe!
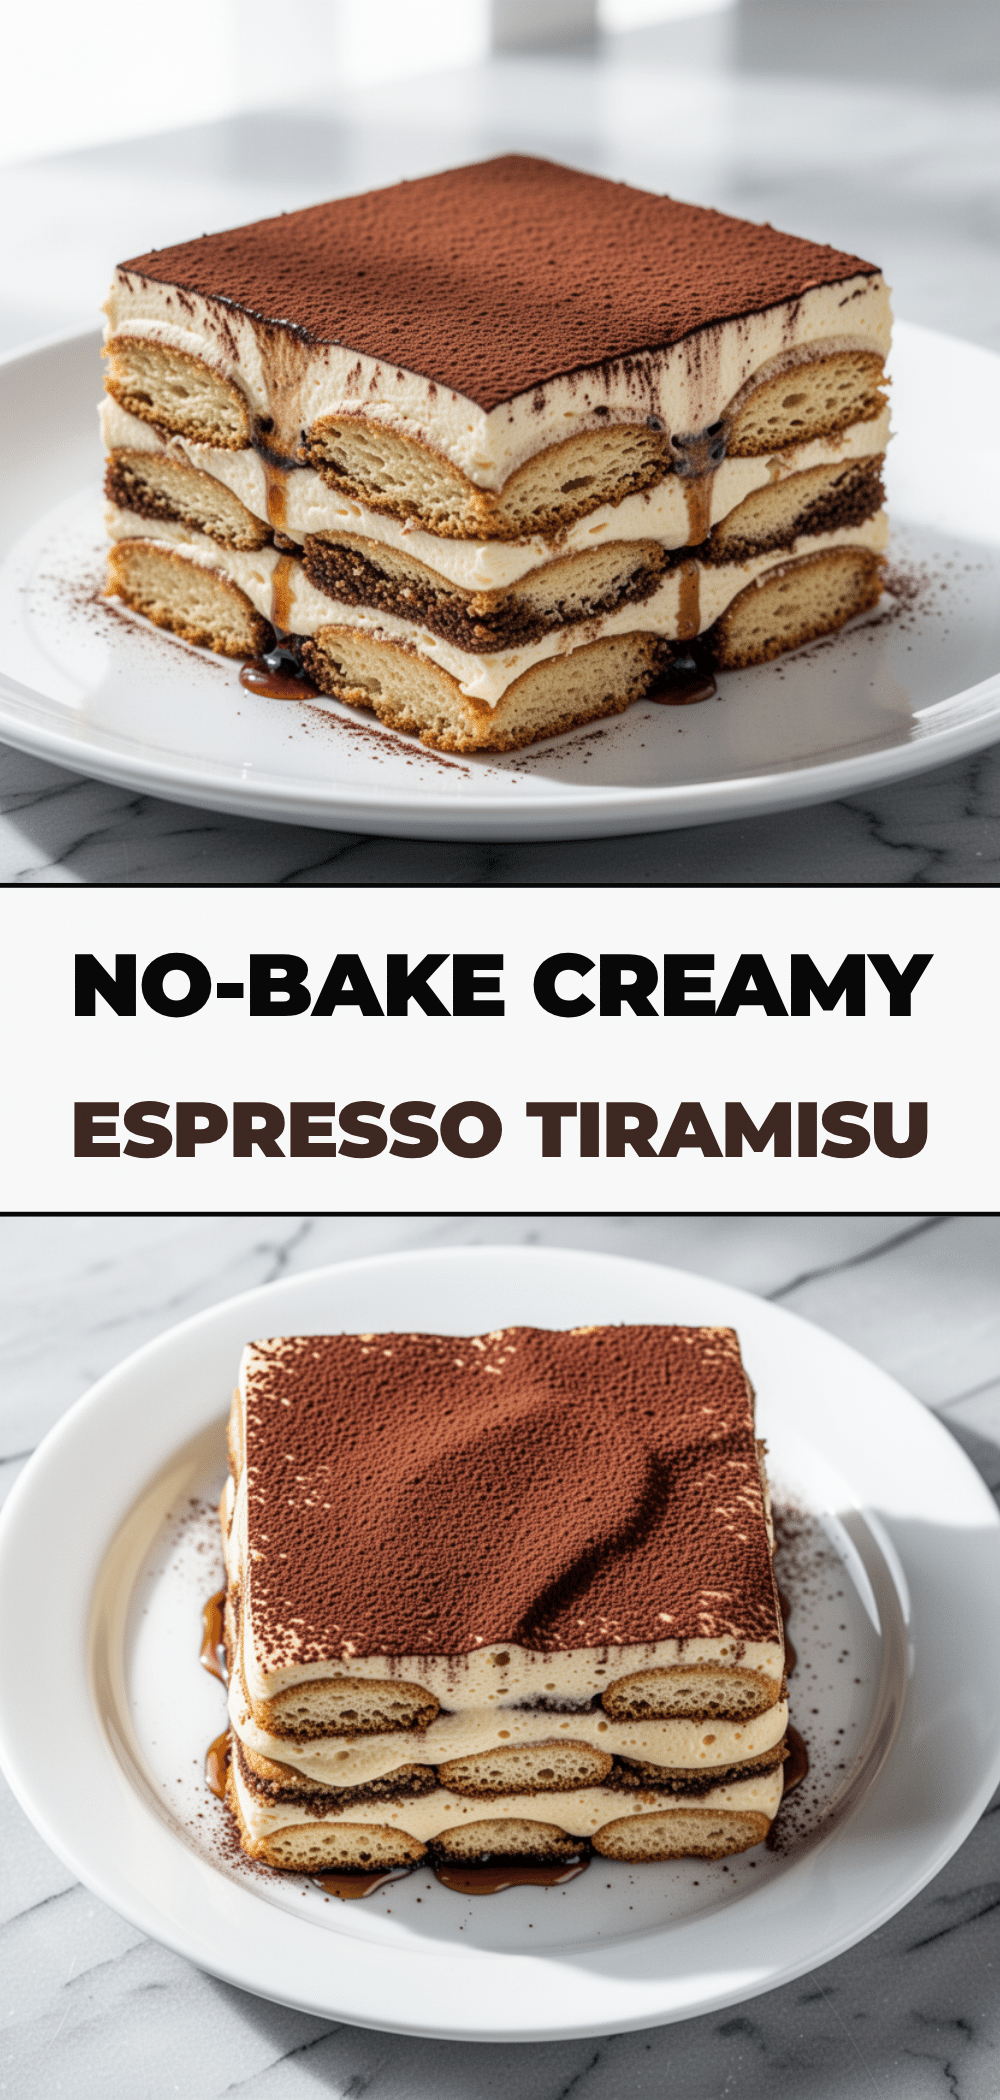
Homemade Tiramisu: Best Espresso Soaked Ladyfingers
- Total Time: 6 hours 30 minutes
- Yield: 9 servings 1x
Description
A perfected, no-bake Italian classic featuring silky mascarpone cream and espresso-soaked ladyfingers. This recipe is surprisingly simple, improves with overnight chilling, and delivers a rich, professional-quality dessert.
Ingredients
- 2 cups (480ml) strong espresso or very strong coffee, cooled completely
- 3–4 tablespoons liqueur (optional, such as Marsala, dark rum, or Kirsch)
- 16 oz (450g) mascarpone cheese, room temperature
- 1 cup (240ml) heavy whipping cream, cold
- 6 large egg yolks (pasteurized recommended)
- ½ cup (100g) granulated sugar
- 1 teaspoon vanilla extract
- 2–3 boxes (30–40 cookies) dry Italian ladyfingers (savoiardi)
- Unsweetened cocoa powder, for dusting
Instructions
- Brew the espresso or strong coffee and let it cool completely to room temperature. Stir in liqueur if using.
- In a large, cold bowl, whip the heavy cream until soft peaks form. Set aside.
- In a separate large bowl, whisk egg yolks and sugar together using a hand mixer on medium-high speed for 4-5 minutes until pale, thick, and ribbon-like.
- Add the room-temperature mascarpone to the egg yolk mixture and beat on low speed just until combined and smooth.
- Gently fold the whipped heavy cream into the mascarpone mixture using a spatula until no streaks remain.
- Quickly dip each ladyfinger into the cold coffee (1-2 seconds per side) and arrange in a single layer in the bottom of an 8×8 or 9×9 inch baking dish.
- Spread half of the mascarpone cream mixture over the first layer of ladyfingers.
- Repeat the dipping process with the next layer of ladyfingers, arranging them over the cream.
- Spread the remaining cream over the second layer of ladyfingers and smooth the top.
- Cover the dish tightly with plastic wrap and refrigerate for at least 6 hours, ideally overnight (12-24 hours).
- Just before serving, dust the top generously with unsweetened cocoa powder. Slice with a sharp knife and serve chilled.
Notes
Ensure coffee is completely cold to prevent melting the cream. Use dry, crisp Italian ladyfingers, not soft cake-like ones. For best texture, make the recipe at least 24 hours in advance. Do not freeze, as the dairy will separate. Use pasteurized eggs if serving pregnant women or young children.
- Prep Time: 30 minutes
- Cook Time: 0 minutes
- Category: Dessert
- Cuisine: Italian
Nutrition
- Serving Size: 1 slice
- Calories: 380
- Sugar: 20
- Sodium: 80
- Fat: 24
- Saturated Fat: 14
- Carbohydrates: 32
- Fiber: 1
- Protein: 6
Keywords: tiramisu, espresso, mascarpone, ladyfingers, no-bake dessert, Italian dessert, make-ahead dessert, coffee dessert


