I still remember the exact Tuesday morning that led to these cookies. It was raining—that cold, miserable rain that makes you want to stay under the covers until noon. I was running late for work, my toddler was screaming because his toast was “too crunchy,” and I had absolutely nothing ready to eat. I grabbed a banana, some oats, and a spoon, mixed them in a mug, and shoved it in the microwave. It was… fine. Edible, even. But as I stared at the sad, mushy result, I realized I was tired of sacrificing taste for convenience. I wanted something that felt like a treat but didn’t wreck my energy levels by 10 a.m.
That failed microwave experiment sparked a month-long obsession. I tried using applesauce (too cakey), flax eggs (weird texture), and even tried to make them crispy (they just burnt). I burned three batches of cookies in that first week alone. But then, I hit on the secret: soft-baking. By keeping the centers underdone and letting them cool in the pan, they stay chewy, moist, and genuinely delicious. These Soft-Baked Banana Oatmeal Breakfast Cookies have saved my mornings more times than I can count. They’re the answer to “what’s for breakfast” when I’m rushing out the door, and honestly, they taste like dessert, which helps me get out of bed.
There’s something deeply satisfying about grabbing one of these from the counter while putting on my shoes. They’re warm, they smell like vanilla and baked fruit, and they don’t leave me feeling heavy or sluggish. I’ve made this recipe for my husband (who claims he doesn’t like “health food”), my picky-eater niece, and even my dietitian friend (who was surprised by how little refined sugar was in them). If you’re tired of dry granola bars or soggy oatmeal, you need to try this. It’s not just a recipe; it’s a morning survival tool.
Why You’ll Love This Recipe
I’m not exaggerating when I say these cookies have completely reshaped my morning routine. They solve the biggest problem with healthy eating: the fact that healthy food often tastes like cardboard. Here’s why these Soft-Baked Banana Oatmeal Breakfast Cookies are now a permanent fixture in my kitchen:
- Zero Prep Stress — Seriously, if you can mash a banana, you can make these. I’ve made them while holding a baby, and my teenagers can make them on their own. There’s no chopping, no measuring cups (you can use a large bowl and a fork), and no complicated techniques. It’s just mixing and baking.
- Actually Stays Soft — Most “healthy” cookies turn into rock-hard bricks after they cool. These don’t. The key is the soft-bake method. They stay chewy and moist for days. I’ve eaten these on day four and they still felt fresh. That’s huge for meal prep.
- Pantry Staples Only — You probably have everything you need right now. Ripe bananas, oats, peanut butter, honey, and baking powder. No weird superfoods you have to order online. This is real food, accessible food.
- Energy That Lasts — Because they’re balanced with protein from the peanut butter and fiber from the oats, I don’t get that mid-morning sugar crash. I feel full and focused. My husband says he can actually get his work done before lunch now.
- Kid-Approved — This is the ultimate test. My 6-year-old will refuse to eat “healthy” breakfasts. But she loves these. She calls them “banana cookies” and asks for them every weekend. If you’re trying to sneak more whole grains into your family’s diet, this is your best friend.
So basically, these are the perfect bridge between “I want something healthy” and “I want something tasty.” They work for breakfast, they work for a snack, and they work when you’re just hungry. I make a batch every Sunday, and they last all week. It’s one less thing to worry about.
Ingredients You’ll Need
Here’s the best part: this recipe is incredibly forgiving. You don’t need fancy ingredients or a trip to a specialty store. I’m particular about three things here—the ripeness of the banana, the type of oats, and the quality of the peanut butter—but for the rest, just grab what you have.
For the Base
Ripe bananas (2 large / about 1 cup mashed) — This is non-negotiable. They need to be spotted brown. Green or yellow bananas won’t be sweet enough and will make the cookies taste bland. If your bananas aren’t ripe enough, bake them in their peels at 300°F for 15 minutes. Trust me, it’s worth it.
Old-fashioned rolled oats (1 ½ cups / 120g) — I use regular rolled oats, not quick oats. Quick oats turn into mush. Rolled oats give that chewy, substantial texture. If you need gluten-free, use certified gluten-free oats. I love the store brand; it works perfectly.
Peanut butter (½ cup / 128g) — Natural or regular? Regular is easier because it’s smoother and sweeter. Natural peanut butter (the kind where you have to stir the oil) works too, but make sure it’s well-mixed. Almond butter is a great substitute if you’re nut-free or just prefer it. I use Jif or natural Skippy.
Honey (2 tablespoons / 42g) — Just a touch to boost sweetness. Maple syrup works too if you want it vegan. Don’t skip this; the bananas help, but the honey binds everything and adds that caramel note.
For the Flavor & Texture

Vanilla extract (1 teaspoon) — Pure vanilla makes a huge difference. I use the bottle from the grocery store; you don’t need the fancy $20 stuff. It’s about flavor, not prestige.
Cinnamon (1 teaspoon) — Ground cinnamon. It makes these taste like banana bread. If you don’t like cinnamon, you can skip it, but I strongly recommend it.
Baking powder (1 teaspoon) — This is what helps them puff up slightly. Make sure it’s not expired. I keep a new tin on my counter because expired baking powder is the silent killer of cookies.
Salt (¼ teaspoon) — Just a pinch. It balances the sweetness and makes the banana flavor pop. Don’t skip it.
Optional Add-ins (The Fun Part)
Dark chocolate chips (¼ cup) — I add these about half the time. It turns these into a dessert-like treat. Use mini chips so you get a bit in every bite.
Chopped walnuts or pecans (¼ cup) — Adds crunch and healthy fats. My dad loves these with nuts. Toast them in a dry pan first for extra flavor.
Chia seeds or flax seeds (1 tablespoon) — I toss these in for extra fiber and omega-3s. You won’t taste them, but they help with digestion.
Mini marshmallows (¼ cup) — Okay, this is my secret indulgence. It makes them taste like s’mores. I only do this on weekends when I’m feeling extra lazy.
Equipment Needed
You don’t need fancy equipment for this. Here’s what I actually use:
Large mixing bowl — I use a 4-quart ceramic bowl. Any bowl works, but make sure it’s big enough to mash the bananas comfortably. I’ve used a salad bowl, a mixing bowl, and even a large mug (for single servings).
Fork — For mashing bananas and mixing. No mixer needed. This is a hand-mix recipe, which I love because it’s fast and easy.
Baking sheet — I use a standard half-sheet pan. A large one is better so the cookies have room to spread. I line it with parchment paper because cleanup is easier, but a silicone mat works too. Grease it lightly if you don’t use parchment.
Silicone spatula — For scraping the bowl. Or just use the fork. I’m not fancy.
Cooling rack — Optional but helpful. These cool fast, so a rack isn’t strictly necessary, but it helps them stay chewy instead of steaming in the pan.
Measuring spoons — For the honey, vanilla, and baking powder. Or eyeball it. I eyeball the cinnamon and salt, but I measure the baking powder because it matters for texture.
How to Make It: Step-by-Step
Alright, let’s make these! I’m walking you through exactly how I do it, including the little tricks I’ve picked up over dozens of batches.
Step 1: Prep and Mash (3 minutes)
Preheat your oven to 350°F (175°C). Line a baking sheet with parchment paper. Peel your bananas and put them in the large bowl. Mash them with a fork until they’re smooth with a few small lumps. I like a few lumps because they add texture. If your bananas are very wet, you can drain off any excess liquid, but usually, it’s fine.
Step 2: Mix the Wet Ingredients (2 minutes)
Add the peanut butter, honey, vanilla extract, and cinnamon to the mashed bananas. Stir vigorously with the fork. The peanut butter might be stiff, so just keep mixing until it’s fully incorporated and the mixture is smooth and uniform. It should look like thick cookie dough batter. If it’s too dry, add a teaspoon of milk. If it’s too wet, add a tablespoon of oats.
Step 3: Add the Dry Ingredients (1 minute)
Add the rolled oats, baking powder, and salt. Stir until everything is combined. The mixture will be thick and sticky. This is normal. If you’re adding chocolate chips or nuts, fold them in now. Don’t overmix; just get it even.
Step 4: Scoop and Shape (3 minutes)
Scoop about 2 tablespoons of batter per cookie onto the prepared baking sheet. I use a small ice cream scoop for consistency, but two spoons work too. Flatten them slightly with your fingers or the back of a spoon. They don’t spread much, so shape them how you want them. I like them about 2 inches wide. Leave 2 inches between each cookie because they might spread a little.
Step 5: Bake (12-14 minutes)
Put the pan in the oven and bake for 12-14 minutes. Here’s the key: you want them to look slightly underdone. The edges should be just starting to turn golden, but the centers should still look soft and puffy. They will firm up as they cool. If you bake them until they look done in the oven, they’ll be dry. I take mine out at 12 minutes for softer centers, or 14 minutes if I like them a bit chewier.
Step 6: Cool (10 minutes)
Let the cookies cool on the baking sheet for at least 10 minutes. This is the hardest part, but it’s crucial. They are very fragile when hot. If you try to move them too soon, they’ll break. Let them sit until they’re firm to the touch. Then transfer them to a cooling rack or serve them warm.
Total Time:
About 20 minutes (5 minutes prep, 14 minutes bake, 10 minutes cool). You can eat them warm, but they’re best once they’ve cooled slightly.
Expert Tips & Tricks
Here’s everything I’ve learned from making this recipe dozens of times. These tips will save you from my mistakes.
Use Ripe Bananas
I can’t stress this enough. Brown-spotted bananas are sweeter and mash easier. If your bananas are green, you’ll need to add more honey or maple syrup. I keep a bag of bananas on the counter until they’re fully brown, then freeze them for smoothies or baking. Frozen bananas work great in this recipe—just thaw them slightly first.
Don’t Overbake
This is the #1 mistake people make. These cookies continue to cook on the hot pan after you take them out of the oven. If they look perfect in the pan, they’ll be dry on the plate. Pull them when they look just barely done. The centers should look soft.
Storage is Key
These cookies are moist, so they need to be stored properly. Let them cool completely before storing, or they’ll get soggy. Keep them in an airtight container at room temperature for up to 4 days. If your kitchen is hot, store them in the fridge to prevent mold. They last longer in the freezer—up to 3 months.
Batch Cooking Hack
I double the recipe and freeze half the batter. Scoop the batter onto a baking sheet, freeze until solid, then transfer the frozen discs to a zip-top bag. When you want cookies, just bake them from frozen, adding 2-3 minutes to the bake time. This is my lifesaver on busy mornings.
Customize the Sweetness
Bananas vary in sweetness. Taste your mashed bananas before adding honey. If they’re super sweet, skip the honey. If they’re bland, add an extra tablespoon. Adjust as you go.
Variations & Substitutions
Once you’ve nailed the basic version, here’s how you can mix it up. I’ve tried all of these.
Almond Butter Version
Swap peanut butter for almond butter. It’s slightly sweeter and has a more delicate flavor. I love this with chocolate chips. It tastes like an almond joy.
Chia Egg Variation
For a vegan option, use 1 tablespoon chia seeds mixed with 3 tablespoons water instead of the egg (if the recipe called for one, though this one is naturally egg-free). Wait 5 minutes for it to gel before mixing.
Protein Boost
Add a scoop of vanilla protein powder. Start with 2 tablespoons and add more if the batter is too dry. It makes these more filling for post-workout breakfasts. Note: This will make them denser.
Berry Blast
Add ½ cup fresh or frozen blueberries. If using frozen, don’t thaw them first, or they’ll bleed color. They burst in the oven and create little pockets of jammy goodness.
Apple Cinnamon
Swap the banana for 1 cup of unsweetened applesauce and add ½ teaspoon nutmeg. It tastes like apple pie cookies. Add ¼ cup chopped walnuts for crunch.
Gluten-Free
Use certified gluten-free oats. Everything else is naturally gluten-free. The texture might be slightly softer, but it’s delicious.
Serving & Storage
How to Serve:
I usually serve these warm from the oven, maybe with a little pat of butter on top (sounds weird, but it’s amazing). But here are other ways I’ve enjoyed them:
- With a cup of black coffee or tea.
- Crumbled over yogurt with fresh fruit.
- Warmed in the toaster oven for 2 minutes.
- With a side of turkey bacon for a savory-sweet combo.
Storage Instructions:
Refrigerator: Store in an airtight container for up to 5 days. They stay soft but might firm up slightly. Bring to room temperature before eating.
Freezer: These freeze beautifully. Place cooled cookies in a single layer in a freezer-safe bag or container. They last up to 3 months. Thaw at room temperature or microwave for 30 seconds.
Reheating: Microwave for 15-20 seconds to warm them up. They taste best warm. Don’t overheat, or they’ll get tough.
Nutrition Information
I’m not a nutritionist, but here’s the breakdown if you’re tracking. This is per cookie (makes about 12 cookies).
- Calories: 110
- Protein: 3g
- Carbs: 16g
- Fiber: 2g
- Sugar: 6g (natural from banana and honey)
- Fat: 5g
- Sodium: 45mg
These are relatively low-calorie but high in fiber, which keeps you full. They’re a great alternative to sugary cereals or pastries. If you add chocolate chips or nuts, the calorie count will go up slightly, but the satisfaction factor is worth it.
Final Thoughts
So that’s my go-to Soft-Baked Banana Oatmeal Breakfast Cookies! I’ve probably talked your ear off at this point, but when you make a recipe this often, you have a lot to say about it. These have saved my mornings more times than I can count. They’re my answer to “what’s for breakfast” when I’m rushing out the door, and they taste like a treat, which makes all the difference.
Make it yours! Try different add-ins, swap in your favorite nut butter, or adjust the sweetness. The best recipes are the ones you adapt to your family’s tastes. If you make this, drop a comment and let me know what you think! I love hearing how recipes turn out in your kitchen. And if something doesn’t work, tell me that too—I’m here to help troubleshoot.
Happy cooking! And I hope your kitchen smells half as good as mine does right now.
Frequently Asked Questions
Can I use quick oats instead of rolled oats?
You can, but the texture will be different. Quick oats are thinner and will make the cookies softer and more cake-like, almost like a muffin top. I prefer rolled oats for that chewy, cookie-like texture. If you use quick oats, reduce the bake time by 2 minutes so they don’t dry out.
Why did my cookies spread too much?
This usually happens if the butter or peanut butter was too warm, or if the oats were too fine. Make sure your peanut butter is at room temperature but not melted. Also, don’t pack the oats into the measuring cup; fluff them up first. If they spread too much, chill the batter in the fridge for 15 minutes before baking.
Can I make these ahead of time?
Absolutely! These are perfect for meal prep. Make a batch on Sunday, store them in an airtight container, and grab one each morning. They actually taste better on day two because the flavors meld together. You can also freeze the batter (see tips above) for even more convenience.
Are these gluten-free?
Yes, if you use certified gluten-free oats. Oats are naturally gluten-free, but they’re often processed in facilities with wheat, so cross-contamination is a risk. Always check the label. The rest of the ingredients are naturally gluten-free.
Can I substitute honey with something else?
Yes! Maple syrup is the best substitute. Use the same amount. Agave nectar also works. If you want to avoid added sugars entirely, you can skip the honey, but the cookies will be less sweet. Taste your bananas first to decide.
How do I know when they’re done?
Look for golden edges and a set center. They will look slightly soft in the middle. If you press them gently and they spring back, they’re done. If they leave an indent, they need another minute. Remember, they firm up as they cool.
Can I add protein powder?
Yes, but add it gradually. Start with 2 tablespoons of vanilla or unflavored protein powder. If the batter is too dry, add a splash of milk or water. Protein powder absorbs moisture, so you might need a little extra liquid. The cookies will be denser but more filling.
Pin This Recipe!


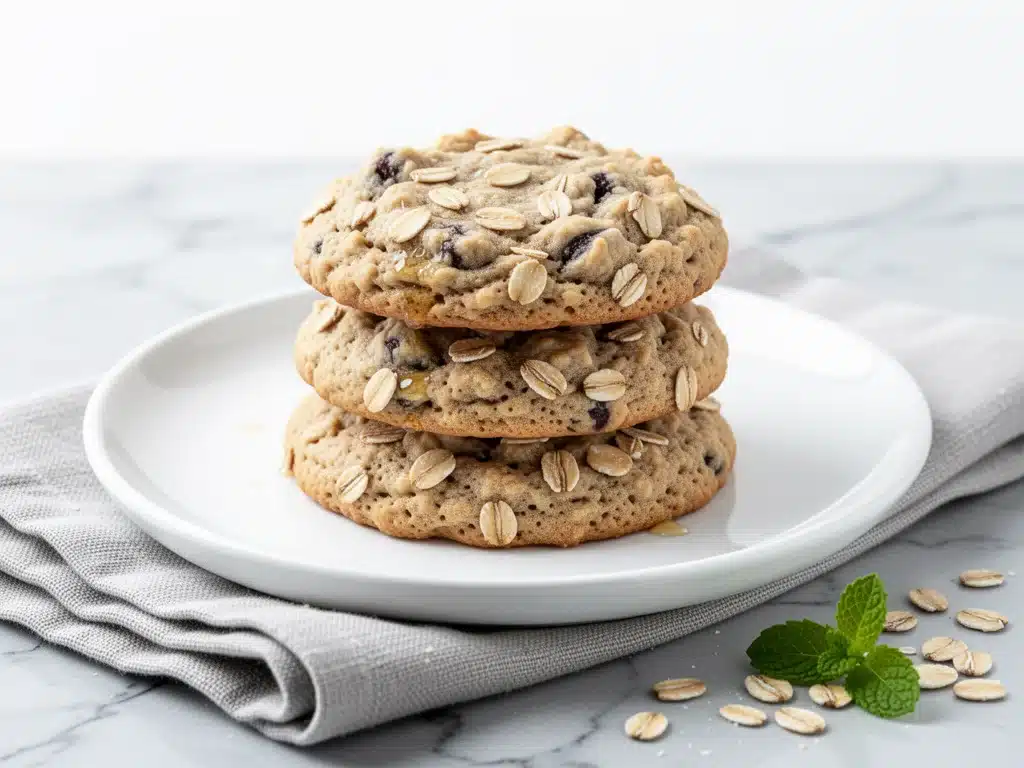
Soft-Baked Banana Oatmeal Breakfast Cookies
- Total Time: 20 minutes
- Yield: 12 cookies 1x
Description
A quick, 5-minute prep healthy breakfast cookie that stays soft and chewy. Made with simple pantry staples like ripe bananas, oats, and peanut butter, these cookies are kid-approved and perfect for busy mornings.
Ingredients
- 2 large ripe bananas (about 1 cup mashed)
- 1 ½ cups old-fashioned rolled oats
- ½ cup peanut butter (natural or regular)
- 2 tablespoons honey (or maple syrup for vegan)
- 1 teaspoon vanilla extract
- 1 teaspoon ground cinnamon
- 1 teaspoon baking powder
- ¼ teaspoon salt
- Optional: ¼ cup dark chocolate chips, ¼ cup chopped nuts, 1 tablespoon chia/flax seeds, or ¼ cup mini marshmallows
Instructions
- Preheat oven to 350°F (175°C) and line a baking sheet with parchment paper.
- Peel bananas and mash them in a large bowl with a fork until smooth with a few small lumps.
- Add peanut butter, honey, vanilla extract, and cinnamon to the mashed bananas. Stir vigorously until fully incorporated and smooth.
- Add rolled oats, baking powder, and salt. Stir until combined. Fold in optional add-ins if using.
- Scoop about 2 tablespoons of batter per cookie onto the prepared baking sheet. Flatten slightly with fingers or the back of a spoon.
- Bake for 12-14 minutes. The edges should be golden but centers should still look soft and puffy.
- Let cookies cool on the baking sheet for at least 10 minutes before transferring to a cooling rack or serving.
Notes
Use very ripe, spotted bananas for natural sweetness. Do not overbake; cookies continue to cook on the hot pan after removal. Store in an airtight container at room temperature for up to 4 days or freeze for up to 3 months. For a vegan version, use maple syrup instead of honey.
- Prep Time: 5 minutes
- Cook Time: 14 minutes
- Category: Breakfast
- Cuisine: American
Nutrition
- Serving Size: 1 cookie
- Calories: 110
- Sugar: 6
- Sodium: 45
- Fat: 5
- Saturated Fat: 1
- Carbohydrates: 16
- Fiber: 2
- Protein: 3
Keywords: banana oatmeal cookies, healthy breakfast, soft baked cookies, gluten-free option, meal prep, kid-friendly breakfast, no flour cookies


