It was 95 degrees in July, the kind of heat that makes the air feel heavy and sticky the second you step outside. I was supposed to be hosting a small gathering for some friends who were passing through town. I wanted something festive, something that screamed “summer,” but I also didn’t want to spend my entire afternoon sweating over a hot oven. My kitchen was already like a sauna, and the last thing I wanted to do was turn it into an inferno.
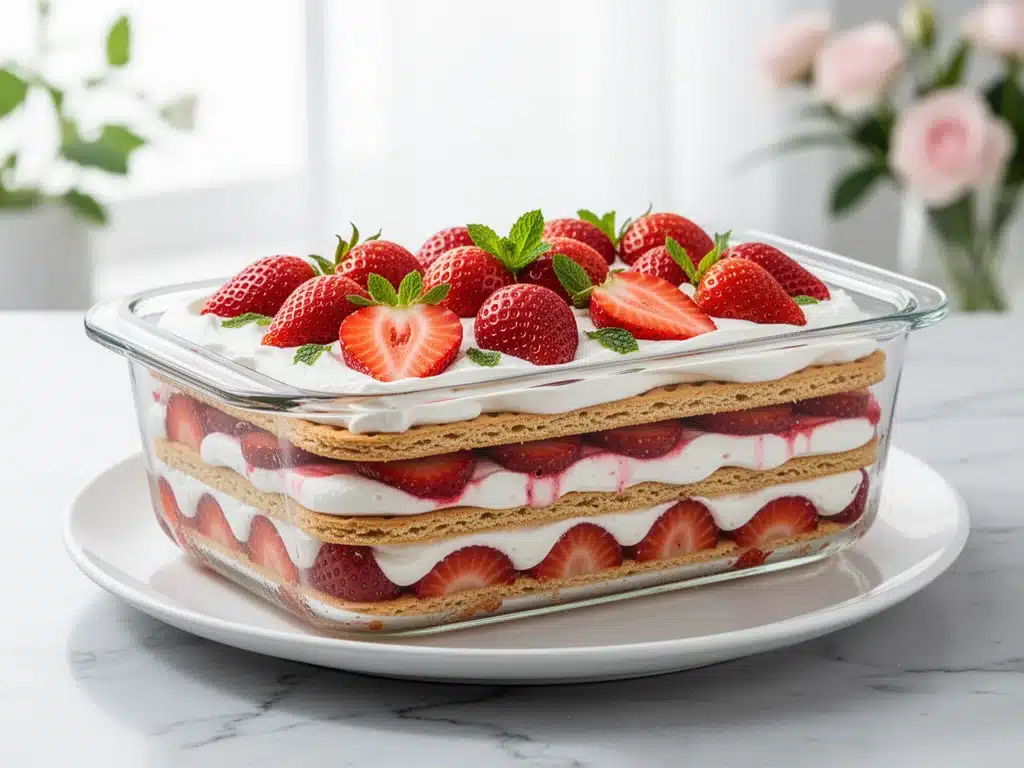
So, I did what I always do when I’m stressed about dessert: I improvised. I had a box of vanilla wafers, a tub of cool whip, a bag of fresh strawberries, and a carton of heavy cream. I threw them together in a glass dish, chilled it for a few hours, and hoped for the best. When my friends arrived, I pulled this no-bake strawberry shortcake icebox cake out of the fridge. It looked gorgeous—layers of pink and white, glistening with juice. One bite, and my friend Sarah actually stopped talking mid-sentence. She just nodded and said, “This is the best thing I’ve ever eaten.”
That was three summers ago. Since then, I’ve made this no-bake strawberry shortcake icebox cake for pretty much every barbecue, potluck, and casual hangout we’ve had. It’s become my go-to summer dessert, and honestly? It’s the only one I trust when I don’t want to stress. It’s simple, it’s refreshing, and it tastes like a vacation. I’ve tweaked it a few times, but the core recipe stays the same because it just works. It’s foolproof, it’s delicious, and it’s going to save your summer.
Why You’ll Love This No-Bake Strawberry Shortcake Icebox Cake
There are about ten reasons I keep coming back to this dessert, but if you’re looking for the main selling points, here they are. This isn’t just another cookie-cutter dessert; it’s a game-changer for busy summer days.
Zero Oven Required — Seriously. If you can stack cookies and spread cream, you can make this. I’ve made this while wearing my workout clothes because I didn’t want to change into “cooking clothes.” It keeps your kitchen cool, which is a huge win in July.
Five Ingredients Max — I’m not exaggerating. You don’t need a grocery run. You likely have everything in your pantry or fridge right now. This is the ultimate pantry-staple dessert. It’s budget-friendly and stress-free.
Make-Ahead Magic — This is the real secret. The cake needs to sit in the fridge for at least four hours, which means you can make it the day before. All the stress is done before your guests arrive. You just pull it out, slice it, and look like a genius.
Customizable for Any Crowd — I’ve served this to picky eaters and food snobs alike. The texture is soft, the flavor is classic strawberry shortcake, and nobody complains about it. It’s universally loved.
Light and Refreshing — Unlike heavy cheesecakes or dense brownies, this feels light on the stomach. It’s perfect for a summer evening when you want something sweet but not overwhelming. It’s like dessert, but lighter.
This recipe has saved me more times than I can count. It’s my answer to “what’s for dessert?” when I’m tired, hot, and don’t want to deal with a complicated bake. It just works.
Ingredients You’ll Need
Here’s the best part: you probably have most of this already. I’m particular about a few things here, but honestly, this recipe is very forgiving. Let’s break down what you need and why it matters.
For the Base
Vanilla Wafers (1 package, about 30-40 cookies) — This is the foundation. I always use Nabisco or a store-brand equivalent. They need to be crisp enough to hold up but soft enough to absorb the cream. Don’t use sugar cookies; they’re too sweet and don’t have the right texture.
Fresh Strawberries (1 pint, hulled and sliced) — Fresh is non-negotiable. Canned strawberries are too mushy and watery. Look for bright red, fragrant berries. If they’re not in season, you can use frozen, but thaw them completely and drain the excess liquid first. Fresh strawberries make all the difference.
For the Cream Filling
Heavy Cream (2 cups / 480ml) — Full-fat only. Half-and-half won’t whip up properly. I buy the heavy whipping cream from the dairy section, not the shelf-stable kind. It needs to be cold—straight from the fridge. If it’s warm, it won’t whip.
Confectioners’ Sugar (½ cup / 60g) — Also known as powdered sugar. This sweetens the cream without adding graininess. Sift it if it’s clumpy. I use about half a cup, but you can adjust to taste. If you like it sweeter, add a little more.
Vanilla Extract (1 teaspoon) — Pure vanilla, not imitation. It adds that classic shortcake flavor. I use McCormick or Nielsen-Massey. A little goes a long way.
For the Topping
Cool Whip (1 tub, 8 oz, thawed) — This is optional but highly recommended. It adds a light, airy texture and makes the cake extra creamy. I use the original flavor. If you want to keep it all-natural, you can skip it and just use extra whipped cream, but the Cool Whip gives it that nostalgic icebox cake vibe.
Extra Strawberries (for garnish) — Slice a few more strawberries for the top. It makes it look beautiful and adds a burst of fresh flavor in every bite.
Personal Tips
– Chill Your Bowl: If you’re whipping your own cream, put your mixing bowl in the freezer for 15 minutes beforehand. It helps the cream whip faster and hold its shape better.
– Don’t Skip the Sifting: Powdered sugar can be lumpy. Sift it into the cream to avoid gritty bites in your final dessert.
– Choose Good Strawberries: Taste your strawberries before you start. If they’re bland, the cake will be bland. Pick the reddest, smelliest berries you can find.
Equipment Needed
You don’t need fancy equipment for this. Here’s what I actually use:
9×13 Inch Glass Dish — I use a Pyrex dish because it lets you see the layers. It also goes nicely from fridge to table. A ceramic dish works too, but glass is easier to clean.
Mixing Bowls — One large bowl for whipping the cream. Make sure it’s big enough so the cream doesn’t splash out.
Electric Mixer or Whisk — An electric mixer is faster and easier, but a hand whisk works if you have strong arms. I use a handheld mixer because I’m lazy.
Spatula — A rubber spatula is best for folding the cream and spreading it evenly. Don’t use a spoon; you’ll get air bubbles and uneven layers.
Slicing Knife — A sharp knife for slicing the strawberries and later cutting the cake. I use a serrated knife for the strawberries to avoid crushing them.
Measuring Cups and Spoons — Standard stuff. Dollar store versions work fine.
Optional but nice:
– Piping Bag — If you want to make it look fancy, pipe the cream between layers. It’s not necessary, but it looks pretty.
– Cooling Rack — Not really needed for this recipe, but good to have on hand.
How to Make It: Step-by-Step
Alright, let’s make this! I’m walking you through exactly how I do it, including the little tricks I’ve picked up.
Step 1: Prep Your Strawberries (5 minutes)
Wash your strawberries and hull them (remove the green tops). Slice them into thin, even slices. I like them thin so they fit between the cookies nicely. Set half aside for the layers, and save the other half for garnish. If you’re using frozen strawberries, make sure they’re completely thawed and drained. You don’t want extra water making the cake soggy.
Step 2: Whip the Cream (5 minutes)
In a large bowl, combine the heavy cream, powdered sugar, and vanilla extract. Whip with an electric mixer on medium-high speed until stiff peaks form. This means when you lift the beaters, the cream stands up straight and doesn’t droop. It takes about 2-3 minutes. Don’t over-whip, or it’ll turn into butter. Stop as soon as you see stiff peaks.
Step 3: Fold in the Cool Whip (2 minutes)
If you’re using Cool Whip, gently fold it into the whipped cream. Use a rubber spatula and fold from the bottom up, like you’re folding a letter. Do this gently to keep the air in the cream. If you’re not using Cool Whip, skip this step and just use the whipped cream.
Step 4: Assemble the Layers (10 minutes)
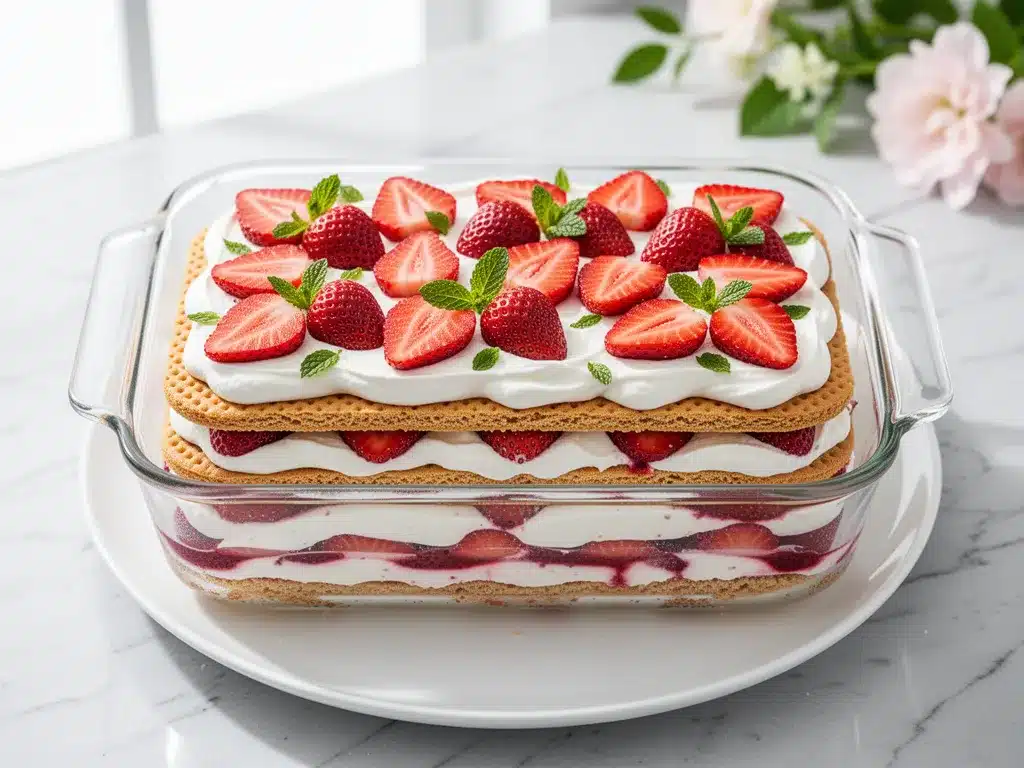
Start with a layer of vanilla wafers at the bottom of your 9×13 dish. Break cookies as needed to fit. Spread a thin layer of the cream mixture over the cookies. Then, add a layer of sliced strawberries. Repeat: cookies, cream, strawberries. Do this three times total. End with a layer of cream on top. Make sure the cream covers the entire surface.
Step 5: Chill (4+ hours)
Cover the dish with plastic wrap or a lid. Refrigerate for at least 4 hours, but overnight is best. This is the most important step. The cookies need time to soften and absorb the cream, becoming cake-like. If you cut into it too soon, it’ll be crumbly and messy. Patience pays off.
Step 6: Garnish and Serve (2 minutes)
Before serving, decorate the top with extra strawberry slices. You can also sprinkle a little powdered sugar or add mint leaves for color. Slice with a sharp knife and serve chilled. Enjoy!
Total Time: About 20 minutes active, plus 4+ hours chilling.
Troubleshooting:
– Cream won’t whip? Your cream or bowl might be too warm. Chill them and try again.
– Cake is too dry? You didn’t chill it long enough. The cookies need time to soften.
– Cake is too soggy? You used too much liquid in the strawberries. Drain them well.
Expert Tips & Tricks
Here’s everything I’ve learned from making this dozens of times. These tips will save you from my mistakes.
Use Cold Ingredients — Cold cream whips better. Keep everything in the fridge until the last minute. If your kitchen is hot, work quickly.
Don’t Skip the Chill Time — I know it’s tempting to eat it right away, but resist. The texture transforms after 4 hours. It’s worth the wait.
Layer Evenly — Try to keep your layers even. It makes slicing easier and looks better. Use a spatula to spread the cream smoothly.
Choose Fresh Strawberries — Ripe, sweet strawberries are key. If they’re sour, the cake will be tart. Taste test first.
Make Ahead — This cake is better the next day. The flavors meld together. Make it the night before for best results.
Common Mistakes:
– Mistake: Cream is runny — Fix: Whip longer or chill the bowl. Check that your cream is heavy whipping, not light.
– Mistake: Cake falls apart — Fix: You cut it too soon. Wait at least 4 hours.
– Mistake: Too sweet — Fix: Reduce the powdered sugar or use less Cool Whip.
Variations & Substitutions
Once you’ve nailed the basic version, here’s how you can mix it up. I’ve tried all of these.
Chocolate Version — Use chocolate wafers instead of vanilla. Add a layer of chocolate pudding if you want it extra rich.
Lemon Berry — Swap strawberries for blueberries and raspberries. Add lemon zest to the cream for a citrusy twist.
Peanut Butter Cup — Use peanut butter cookies and add a layer of peanut butter cups. This pairs well with my no-bake peanut butter granola bites for a dessert spread.
Gluten-Free — Use gluten-free vanilla wafers. Everything else is naturally gluten-free.
Dairy-Free — Use coconut cream instead of heavy cream and dairy-free Cool Whip. It’s different but still tasty.
Different Proteins: Not applicable for this dessert, but you can add nuts like sliced almonds or pistachios for crunch.
Serving & Storage
How to Serve: I usually serve this straight from the dish at the dinner table. It looks rustic and stays cold. But here are other ways I’ve enjoyed it:
Side Dishes: This dessert stands alone. It’s perfect after a light meal like turkey cheddar pinwheels for a complete summer lunch.
Toppings Bar: When I have guests, I put out extra strawberries, whipped cream, and chocolate shavings. Everyone customizes their slice.
Wine Pairing: A light Riesling or Moscato works great with this. It’s sweet but not heavy.
Storage Instructions:
Refrigerator: Store in an airtight container or covered with plastic wrap for up to 3 days. The texture might get softer, but it’s still good.
Freezing: Honestly, this doesn’t freeze well. The cream separates when thawed. Make it fresh or store in the fridge.
Pro tip: If leftovers are drying out, add a dollop of fresh whipped cream when serving. Brings back that creamy texture.
Nutrition Information
I’m not a nutritionist, but here’s the breakdown if you’re tracking. This is a treat, so enjoy it in moderation.
Per Serving (based on 12 servings):
– Calories: 280
– Protein: 3g
– Carbs: 35g
– Fiber: 1g
– Sugar: 22g
– Fat: 14g
– Saturated Fat: 8g
– Cholesterol: 35mg
– Sodium: 120mg
What’s Good:
– Uses fresh fruit
– No baking means less added sugar in some versions
What to Know:
– Higher in sugar from cookies and cream
– Contains dairy and gluten
My Take: Look, this is a summer dessert. It’s sweet, it’s creamy, and it’s delicious. It’s not a health food. But it’s better than store-bought cake, and I know exactly what’s in it. When I want to make it lighter, I use less sugar and more fruit. But usually? I just eat a slice and enjoy it.
Final Thoughts
So that’s my no-bake strawberry shortcake icebox cake! I’ve probably talked your ear off at this point, but when you make a recipe this often, you have a lot to say about it.
This has saved summer dinners more times than I can count. It’s my answer to “what’s for dessert?” when I’m tired, hot, and don’t want to bake. My friends are happy, my family is happy, and I’m happy because I’m not stressed about cooking.
Make it yours! Try different berries, swap the cookies, adjust the sweetness. The best recipes are the ones you adapt to your tastes.
If you make this, drop a comment and let me know what you think! I love hearing how recipes turn out in your kitchen. And if something doesn’t work, tell me that too—I’m here to help troubleshoot.
Happy cooking! And I hope your kitchen smells half as good as mine does right now.
Frequently Asked Questions
Can I use frozen strawberries?
You can, but they need to be completely thawed and drained. Frozen strawberries release a lot of water, which can make the cake soggy. Pat them dry with paper towels before using. Fresh is always better, but frozen works in a pinch.
Why did my cake turn out crumbly?
Usually, this means you didn’t chill it long enough. The cookies need time to absorb the cream and soften. Wait at least 4 hours, but overnight is best. If you cut into it too soon, it’ll be crumbly and messy.
Can I make this ahead for a party?
Absolutely! This is actually better when made ahead. Make it the day before and store it in the fridge. It’ll be ready to serve when your guests arrive. Just add the garnish right before serving.
Can I use whipped topping instead of Cool Whip?
Yes, but it won’t be as stable. Cool Whip helps hold the layers together. If you use homemade whipped cream, the cake might be a bit softer. It’s still delicious, just less structured.
How long does this last in the fridge?
Up to 3 days. After that, the cookies get too soft and the texture changes. It’s best eaten within 24-48 hours for optimal texture.
Can I double this recipe?
Yes! Use a larger dish, like a 9×13 or even a 9×15. Double all ingredients and layer accordingly. The chilling time stays the same.
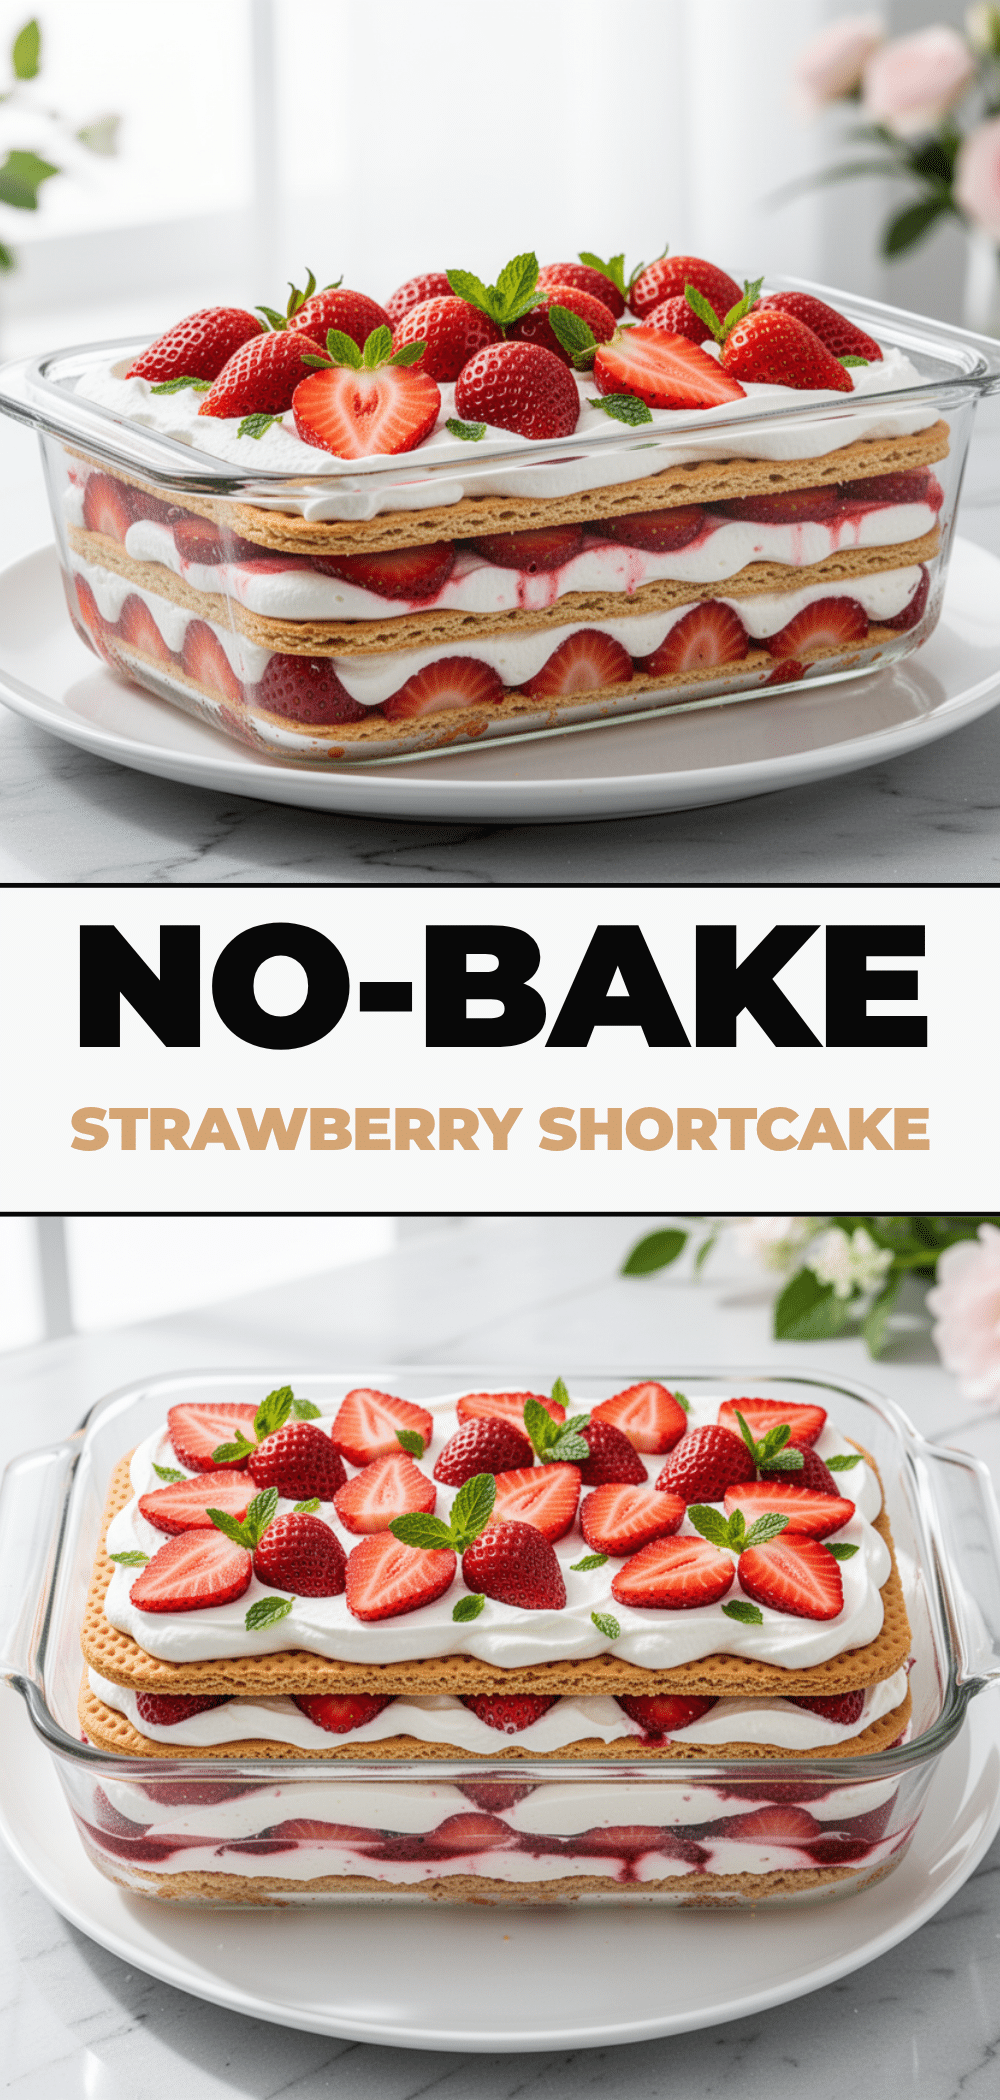
Pin This Recipe!
No-Bake Strawberry Shortcake Icebox Cake: 5-Ingredient Summer Dessert
- Total Time: 4 hours 20 minutes
- Yield: 12 servings 1x
Description
A refreshing, no-bake summer dessert made with vanilla wafers, fresh strawberries, and a light whipped cream filling. This easy, make-ahead cake requires no oven and is perfect for hot days.
Ingredients
- 1 package (30-40 cookies) vanilla wafers
- 1 pint fresh strawberries, hulled and sliced
- 2 cups (480ml) heavy whipping cream, cold
- 1/2 cup (60g) confectioners’ sugar, sifted
- 1 teaspoon pure vanilla extract
- 1 tub (8 oz) Cool Whip, thawed (optional)
- Extra strawberries for garnish
Instructions
- Wash, hull, and slice the strawberries. Set half aside for layering and save the other half for garnish.
- In a large chilled bowl, combine heavy cream, confectioners’ sugar, and vanilla extract. Whip with an electric mixer on medium-high speed until stiff peaks form.
- If using Cool Whip, gently fold it into the whipped cream using a rubber spatula to maintain airiness.
- In a 9×13 inch glass dish, create layers: start with vanilla wafers, spread a layer of cream mixture, then add a layer of sliced strawberries. Repeat this process three times, ending with a layer of cream on top.
- Cover the dish with plastic wrap or a lid and refrigerate for at least 4 hours, or overnight, to allow cookies to soften.
- Before serving, garnish with extra strawberry slices and serve chilled.
Notes
Ensure cream and bowl are very cold for best whipping results. Do not skip the chilling time as it is crucial for the cookies to soften and absorb the cream. If using frozen strawberries, thaw completely and drain excess liquid to prevent sogginess. This dessert is best made ahead of time.
- Prep Time: 20 minutes
- Cook Time: 0 minutes
- Category: Dessert
- Cuisine: American
Nutrition
- Serving Size: 1 slice
- Calories: 280
- Sugar: 22
- Sodium: 120
- Fat: 14
- Saturated Fat: 8
- Carbohydrates: 35
- Fiber: 1
- Protein: 3
Keywords: no-bake, strawberry shortcake, icebox cake, summer dessert, easy dessert, make-ahead dessert, 5-ingredient dessert


