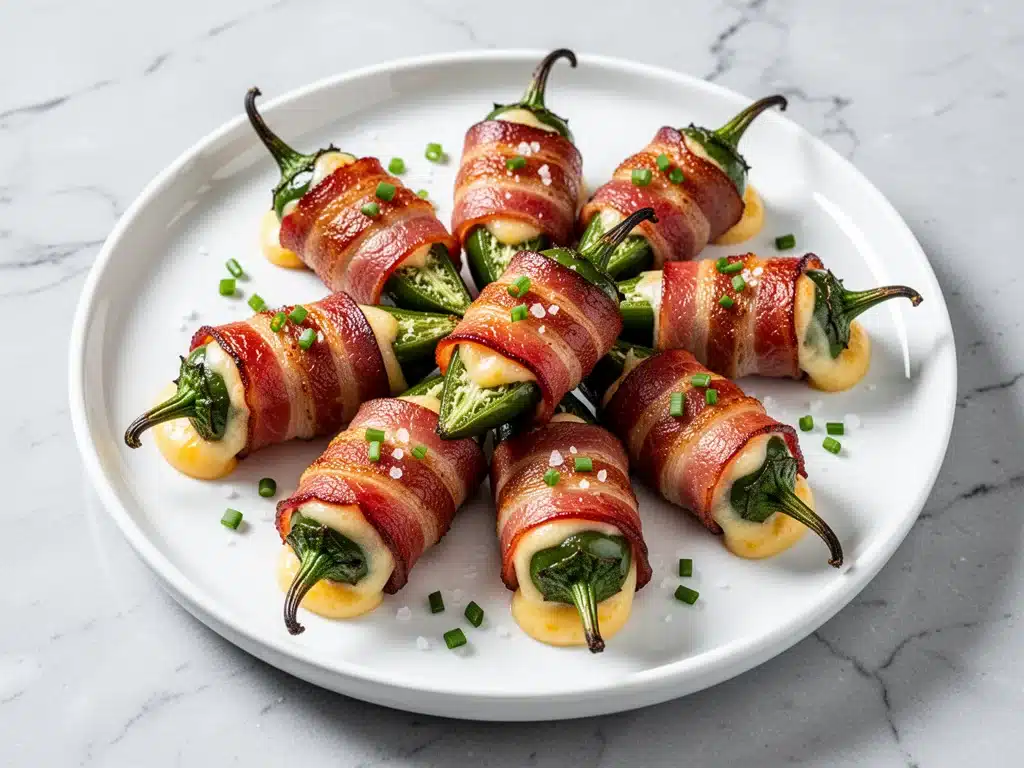
It was 6:45 PM on Christmas Eve, and I was staring at a half-empty pantry like it owed me money. My husband had just texted: “Party starts in 45 mins. Don’t forget the appetizers.” I panicked. I’d spent the afternoon roasting the turkey, prepping the stuffing, and making sure the mashed potatoes were smooth enough to glide across. I had nothing for the cocktail hour. Nothing except a bag of jalapeños, a block of cream cheese, and a package of bacon that was about to expire.
I threw them together in a panic, rolling them up, wrapping them, and shoving them in the oven at the last possible second. When we got to the party, I didn’t bring a fancy charcuterie board or a store-bought dip. I brought a plate of these bacon-wrapped jalapeno poppers. And you know what happened? The charcuterie board got ignored. The dip stayed full. People lined up for the poppers. My husband whispered, “How did you make these in 20 minutes?”
That was the moment I realized I had stumbled onto the ultimate holiday party hack. These bacon-wrapped jalapeno poppers aren’t just food; they’re a social lifeline. They look impressive, they taste incredible, and they disappear faster than you can say “pass the napkins.” I’ve made them for Thanksgiving, New Year’s Eve, Super Bowl parties, and random Tuesday nights when I need a snack that feels like a cheat meal. They are hands-down the best appetizer I know how to make.
If you’ve ever felt the pressure to bring something “fancy” to a holiday gathering, this is your answer. It’s spicy, it’s creamy, it’s salty, and it’s ready in 30 minutes. Let me show you how to make them so you can walk into your next party with confidence (and maybe a little extra bacon on your fingers).
Why You’ll Love These Holiday Party Appetizers
I’ve tried just about every appetizer out there over the years. From the overly complicated stuffed mushrooms that require a food processor to the sad, cold veggie trays that nobody touches. These bacon-wrapped jalapeno poppers hit that sweet spot between gourmet and grocery-store-simple. Here’s why they’ve earned a permanent spot in my rotation:
- Stupid Simple Setup — Seriously, if you can slice a jalapeño and spread cream cheese, you can master this. I’ve walked my teenage nephew through it over FaceTime while he was supposed to be studying. He made them better than I did.
- Lightning Fast — 30 minutes from start to finish. 10 minutes of active chopping and wrapping, and 20 minutes in the oven. I make these on weeknights when I get home late and need something that feels special but doesn’t take all evening.
- Crowd-Pleaser Magic — I’ve served these to my spicy-food-loving brother-in-law and my mild-palate aunt. Everyone loves them. The bacon makes the heat manageable for beginners, and the cream cheese adds richness that even the pickiest eaters can’t resist.
- Make-Ahead Friendly — You can wrap them up to a day ahead and keep them in the fridge. When guests arrive, they go straight into the oven. This is huge for holiday hosting when your oven is already fighting for space with the turkey.
- Budget-Smart — Feeds a crowd of 8-10 people for under $15. That’s less than the cost of an appetizer plate at a fancy restaurant, and way better quality.
This is my go-to when I need dinner or party food to just work. No complicated techniques, no weird ingredients you can’t find, just reliable, delicious food that makes everyone happy. And honestly? The smell of bacon and roasted peppers filling the house is the best part.
Ingredients You’ll Need
Here’s the best part: you probably have most of this already. This isn’t a recipe that requires a trip to three different specialty stores. I’m particular about three things here, and I’ll tell you exactly why they matter.
For the Filling
Full-fat cream cheese (8 oz / 225g) — This is non-negotiable. I use the brick kind, not the spreadable tub stuff. The tub stuff has too much moisture and air, and your filling will be runny. Let it sit on the counter for 15 minutes to soften so it’s easy to mix. I always use Philadelphia because it melts smoothly.
Sharp cheddar cheese (1 cup / 100g, shredded) — I use a block of sharp cheddar and shred it myself. Pre-shredded cheese is coated in potato starch to prevent clumping, which means it doesn’t melt as well. You want that gooey, stringy cheese pull, and pre-shredded won’t give you that. Sharp cheddar has more flavor than mild, which balances the heat.
Garlic powder (1 teaspoon) — Fresh garlic can burn easily in the oven with the bacon, so I stick with powder for even flavor. It adds that savory backbone without burning.
Onion powder (½ teaspoon) — Just a touch to round out the flavors. If you don’t have it, skip it, but it adds nice depth.
Green onions (2 stalks, finely chopped) — I like the fresh bite they add. It cuts through the richness of the cheese. You can use chives if you prefer, but green onions give better texture.
Black pepper (½ teaspoon) — Freshly cracked is best. Don’t skimp on the seasoning here; the filling needs to be flavorful on its own.
For the Wrap
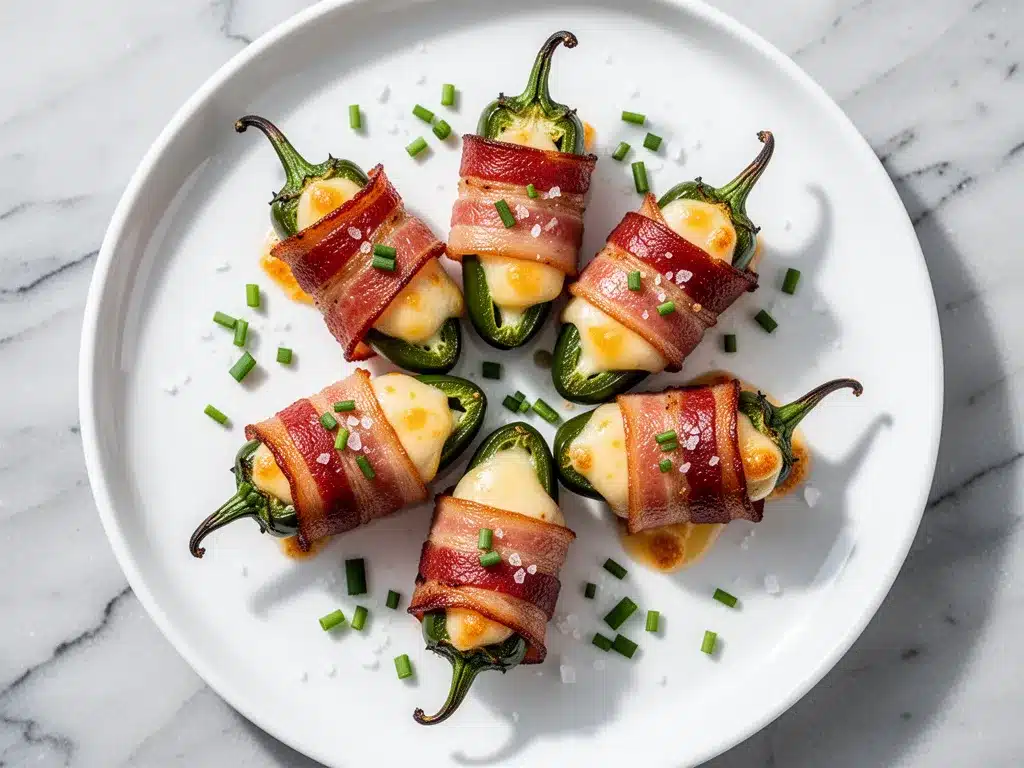
Jalapeño peppers (8-10 medium) — Look for firm, shiny jalapeños. Avoid any that are soft or wrinkled. You want them crisp so they hold up in the oven. If you can’t find fresh ones, frozen jalapeños work in a pinch, but they’re softer and harder to handle. I usually buy a bag and freeze the extras for later.
Bacon (12-14 slices) — I use regular thickness bacon. Thick cut is too bulky and takes longer to crisp up. Thin bacon can burn before the pepper is cooked. I like the balance of regular thickness—it crisps up nicely without being too salty. I always buy the kind that says “center cut” if I can find it, because it’s slightly leaner and less greasy.
Brown sugar (1 tablespoon, optional) — I sprinkle a tiny bit on top before baking. It helps the bacon caramelize and adds a hint of sweetness that contrasts with the spice. If you’re strictly keto, skip it, but it really is a game-changer for flavor.
Equipment Needed
You don’t need fancy equipment for this. Here’s what I actually use:
Baking sheet — I use a standard half-sheet pan. Line it with parchment paper or a silicone mat. This makes cleanup so much easier. Bacon grease is a pain to scrub off.
Sharp knife — For slicing the jalapeños. A serrated knife works well if you’re worried about slipping. Learned this the hard way with a dull paring knife.
Paring knife or small spoon — To scoop out the seeds. A small spoon gives you more control, but a paring knife works if you’re careful. I use a spoon because it’s safer and faster.
Mixing bowl — Any medium-sized bowl for mixing the cheese filling. I use a glass bowl because it’s easy to clean.
Pastry bag or ziplock bag — This is optional but highly recommended. Cut the corner off a ziplock bag and use it to pipe the cheese into the jalapeños. It’s much cleaner than spooning it in. If you’re feeling lazy, a regular spoon works, but you’ll get cheese on your fingers.
How to Make It: Step-by-Step
Alright, let’s make this! I’m walking you through exactly how I do it, including the little tricks I’ve picked up over the years. This is simpler than it looks, but there are a few key steps to get it right.
Step 1: Prep Your Oven and Pan (5 minutes)
Preheat your oven to 400°F (200°C). Line a baking sheet with parchment paper or a silicone baking mat. This is crucial because bacon grease will drip down, and you don’t want to deal with scrubbing a pan later. I also like to set out a small bowl of ice water nearby. If you get any capsaicin on your hands (the stuff that makes peppers hot), rinsing with cold water and ice helps more than hot water. Trust me on this.
Step 2: Slice and Seed the Jalapeños (10 minutes)
Wash and dry your jalapeños. Slice them in half lengthwise. You want two long boats. Now, here’s the important part: remove the seeds and the white membranes. This is where most of the heat lives. If you want mild poppers, scrape them out thoroughly. If you like it spicy, leave some seeds in. I usually leave about half the seeds for a medium kick. Use a small spoon or your paring knife to scrape out the insides. Be gentle—you don’t want to tear the pepper walls. If you tear them, just patch them with a bit of cream cheese later.
Step 3: Make the Cheese Filling (5 minutes)
In a mixing bowl, combine the softened cream cheese, shredded cheddar, garlic powder, onion powder, black pepper, and chopped green onions. Mix it all together until it’s smooth and well combined. If it’s too thick, add a tablespoon of milk. If it’s too thin, add a bit more cheese. You want a spreadable consistency, like thick frosting. I usually mix this with a fork, but a small spatula works too. Don’t overmix or you’ll incorporate too much air, which can make the filling puffy and weird.
Step 4: Stuff the Jalapeños (5 minutes)
Take your cheese mixture and fill each jalapeño half. If you’re using a pastry bag or ziplock bag, pipe it in. If you’re using a spoon, just pack it in. Don’t be shy—fill them to the top. If you have leftover filling, you can pipe it onto the baking sheet as little “cheese bites” to bake alongside the poppers. They’re delicious and save you from scraping the bowl.
Step 5: Wrap with Bacon (5 minutes)
Take a slice of bacon and wrap it around the stuffed jalapeño. Start at one end and wrap it around the middle, then tuck the end under or over the top. You want the bacon to hold the filling in place. If the bacon is too long, you can cut it in half and use two smaller pieces. The goal is to cover the cheese completely so it doesn’t burn. I usually use one slice per pepper, but if the pepper is large, you might need a bit more. Don’t worry about it being perfect; they’ll shrink in the oven anyway.
Step 6: Bake Until Crispy (20 minutes)
Place the wrapped poppers on the prepared baking sheet. Bake for 20-25 minutes. You want the bacon to be crispy and golden brown, and the jalapeños to be tender. Check them at 20 minutes. If the bacon isn’t crispy enough, you can broil for 1-2 minutes, but watch them like a hawk because bacon burns fast. I usually rotate the pan halfway through for even cooking. The peppers will soften, and the cheese inside will get gooey. That’s the goal.
Step 7: Cool and Serve
Let them cool for 5 minutes before serving. This is the hardest part because they’re hot and delicious, but the cheese inside will be molten lava if you eat them immediately. Letting them rest allows the cheese to set slightly and the bacon to crisp up further. Serve warm. They’re best eaten within an hour of coming out of the oven.
Expert Tips & Tricks
Here’s everything I’ve learned from making these dozens of times. These tips will save you from my mistakes.
Wear Gloves
This is the #1 tip. I’ve burned my fingers on jalapeños before, and it’s not fun. Wear disposable gloves when handling the peppers, especially when seeding them. If you touch your eyes or face later, you’ll regret it. I keep a pair of nitrile gloves in my kitchen drawer specifically for this recipe.
Don’t Skip the Parchment
I know it’s extra work, but lining your pan saves you from scrubbing bacon grease off a metal sheet. It also prevents the bacon from sticking and tearing when you try to remove them. I use parchment paper because it’s cheap and effective. Silicone mats are great too, but parchment is easier to swap out.
Use a Toothpick for Security
If your bacon keeps unwrapping in the oven, secure it with a toothpick. Insert the toothpick through the bacon and into the pepper to hold it in place. Remove the toothpick before serving. I do this when I’m making a large batch and don’t want to risk a mess. It’s a small step that makes a big difference in presentation.
Adjust the Heat
Not everyone likes it spicy. If you’re serving a mixed crowd, seed the jalapeños thoroughly. Or, make a batch with mild peppers and a batch with jalapeños. I usually do a mix because some people like to dip their mild ones in hot sauce. It’s a nice touch.
Crisp Up the Bacon
If you like your bacon extra crispy, bake the bacon-wrapped poppers for the last 5 minutes under the broiler. Watch them closely! Bacon goes from golden to burnt in seconds. I usually set a timer for 3 minutes and check every 30 seconds. It’s worth the extra attention for that crunch.
Variations & Substitutions
Once you’ve nailed the basic version, here’s how you can mix it up. I’ve tried all of these, and they’re all winners.
Cream Cheese & Bacon Variations
Bacon & Cheddar Classic — This is the standard version. Sharp cheddar and regular cream cheese. Simple, effective, delicious.
Smoked Gouda & Bacon — Swap the cheddar for smoked gouda. It adds a smoky depth that pairs beautifully with the bacon. My husband loves this version because it tastes like a gourmet appetizer.
Blue Cheese & Bacon — Use crumbled blue cheese instead of cheddar. It’s stronger and tangier. This is for the adventurous eaters. I serve this at parties with a dipping sauce because it’s polarizing.
Ranch Style — Add 1 packet of ranch seasoning to the cream cheese mixture. It adds a herby, tangy flavor that complements the bacon. This is a crowd favorite, especially with kids.
Dietary Modifications
Gluten-Free — This recipe is naturally gluten-free. Just make sure your bacon doesn’t have added sugars or flavorings with gluten (most don’t, but check labels). Use gluten-free cream cheese if needed (most are fine).
Lower-Carb/Keto — This is already low-carb because there’s no flour or breadcrumbs. Just ensure your bacon is sugar-free. I use sugar-free bacon for my keto friends, and it works great.
Dairy-Free — Replace cream cheese with a dairy-free alternative (like Kite Hill or Miyoko’s). Use dairy-free cheddar. It doesn’t melt quite the same way, but it’s still tasty. I’ve made this for lactose-intolerant friends, and they loved it.
Protein Swaps
Turkey Bacon — If you want a lighter option, use turkey bacon. It’s less crispy but still flavorful. I use it when I’m trying to cut back on saturated fat. It’s not as good as pork bacon, but it’s a decent alternative.
Chicken Bacon — Similar to turkey bacon, but slightly meatier. It works well if you want a poultry-based option. Just note that it can be drier, so keep an eye on the baking time.
Serving & Storage
I usually serve these straight from the baking sheet at the party—it looks rustic and stays warm. But here are other ways I’ve enjoyed them:
How to Serve
With Dipping Sauces — I like to serve them with a cool dipping sauce to balance the heat. A ranch dressing, a blue cheese dip, or even a simple sour cream with chives works well. I put the sauces in small bowls around the plate so people can dip as they go.
As a Side Dish — These also make a great side dish for BBQs or grilled meats. The smoky bacon pairs perfectly with burgers and ribs. I’ve served them at backyard barbecues, and they disappear just as fast as at parties.
Storage Instructions
Refrigerator: Store leftovers in an airtight container for up to 3 days. The bacon will soften in the fridge, which is normal. They’re best reheated to restore crispiness.
Reheating: The best method is to reheat them in the oven or an air fryer at 350°F for 5-7 minutes. This restores the bacon’s crispiness. Avoid the microwave—it makes the bacon rubbery and the cheese rubbery too. I learned this the hard way with a sad, chewy popper that tasted nothing like the original.
Freezing: You can freeze unbaked poppers. Wrap them tightly in plastic wrap and store in a freezer bag for up to 2 months. Thaw in the fridge overnight and bake as directed. I do this when I buy bacon on sale. Baked poppers don’t freeze well because the texture changes. The cheese can become grainy, and the bacon gets soggy.
Nutrition Information
I’m not a nutritionist, but here’s the breakdown if you’re tracking. Keep in mind that these are rich, fatty appetizers, so portion control is key.
Per Serving (based on 2 poppers):
- Calories: 250
- Protein: 12g
- Carbs: 3g
- Fiber: 1g
- Fat: 20g
- Saturated Fat: 8g
- Cholesterol: 45mg
- Sodium: 400mg
What’s Good: High in protein from the bacon and cheese. Low in carbs, making it keto-friendly. The jalapeños add some vitamin C and fiber.
What to Know: High in saturated fat and sodium due to the bacon and cheese. If you’re watching your intake, stick to 1-2 poppers per serving. Use leaner bacon or turkey bacon to reduce fat and sodium.
Final Thoughts
So that’s my go-to bacon-wrapped jalapeno poppers recipe! I’ve probably talked your ear off at this point, but when you make a recipe this often, you have a lot to say about it. These poppers have saved me more times than I can count. They’re my answer to “what do I bring to the party?” when I’m tired, don’t want to spend hours cooking, and still want something that tastes really good. My guests are happy, my husband is happy, and I’m happy because I’m not stressed about cooking.
Make it yours! Try different cheeses, adjust the spice level, or add some extra herbs. The best recipes are the ones you adapt to your family’s tastes. If you make this, drop a comment and let me know what you think! I love hearing how recipes turn out in your kitchen. And if something doesn’t work, tell me that too—I’m here to help troubleshoot.
Happy cooking! And I hope your kitchen smells half as good as mine does right now.
Frequently Asked Questions
Can I use frozen jalapeños?
You can, but they’re softer and harder to handle. Fresh jalapeños hold their shape better and have a crispier texture. If you must use frozen, thaw them completely and pat them dry before stuffing. I prefer fresh because they’re easier to slice and seed without tearing.
Why did my bacon burn?
Bacon burns easily because of its high fat content and thin slices. Make sure you’re using regular thickness bacon, not thick-cut or extra-thick. Also, keep an eye on the oven in the last 5 minutes. If your oven runs hot, lower the temperature to 375°F. I usually check them at 20 minutes and rotate the pan for even cooking.
Can I make these ahead of time?
Yes! You can assemble them up to 24 hours in advance. Wrap them tightly in plastic wrap and store in the fridge. Bake them right before serving. This is great for holiday hosting because you can prep everything the day before and just pop them in the oven when guests arrive.
Are these spicy?
It depends on how you prepare them. If you remove all the seeds and membranes, they’re mild. If you leave some seeds in, they’re medium-spicy. I usually leave about half the seeds for a kick that’s noticeable but not overwhelming. If you’re serving kids or people with mild palates, seed them thoroughly.
Can I use turkey bacon?
Yes, turkey bacon works well. It’s leaner and has less fat, so it won’t get as crispy. You might need to bake them a few minutes longer or broil them at the end. I use turkey bacon when I want a lighter option, but it’s not quite as delicious as pork bacon.
How do I reheat leftovers?
Reheat them in the oven or air fryer at 350°F for 5-7 minutes. This restores the bacon’s crispiness. Avoid the microwave—it makes the bacon rubbery and the cheese tough. I’ve tried both methods, and the oven is definitely superior for texture.
Pin This Recipe!
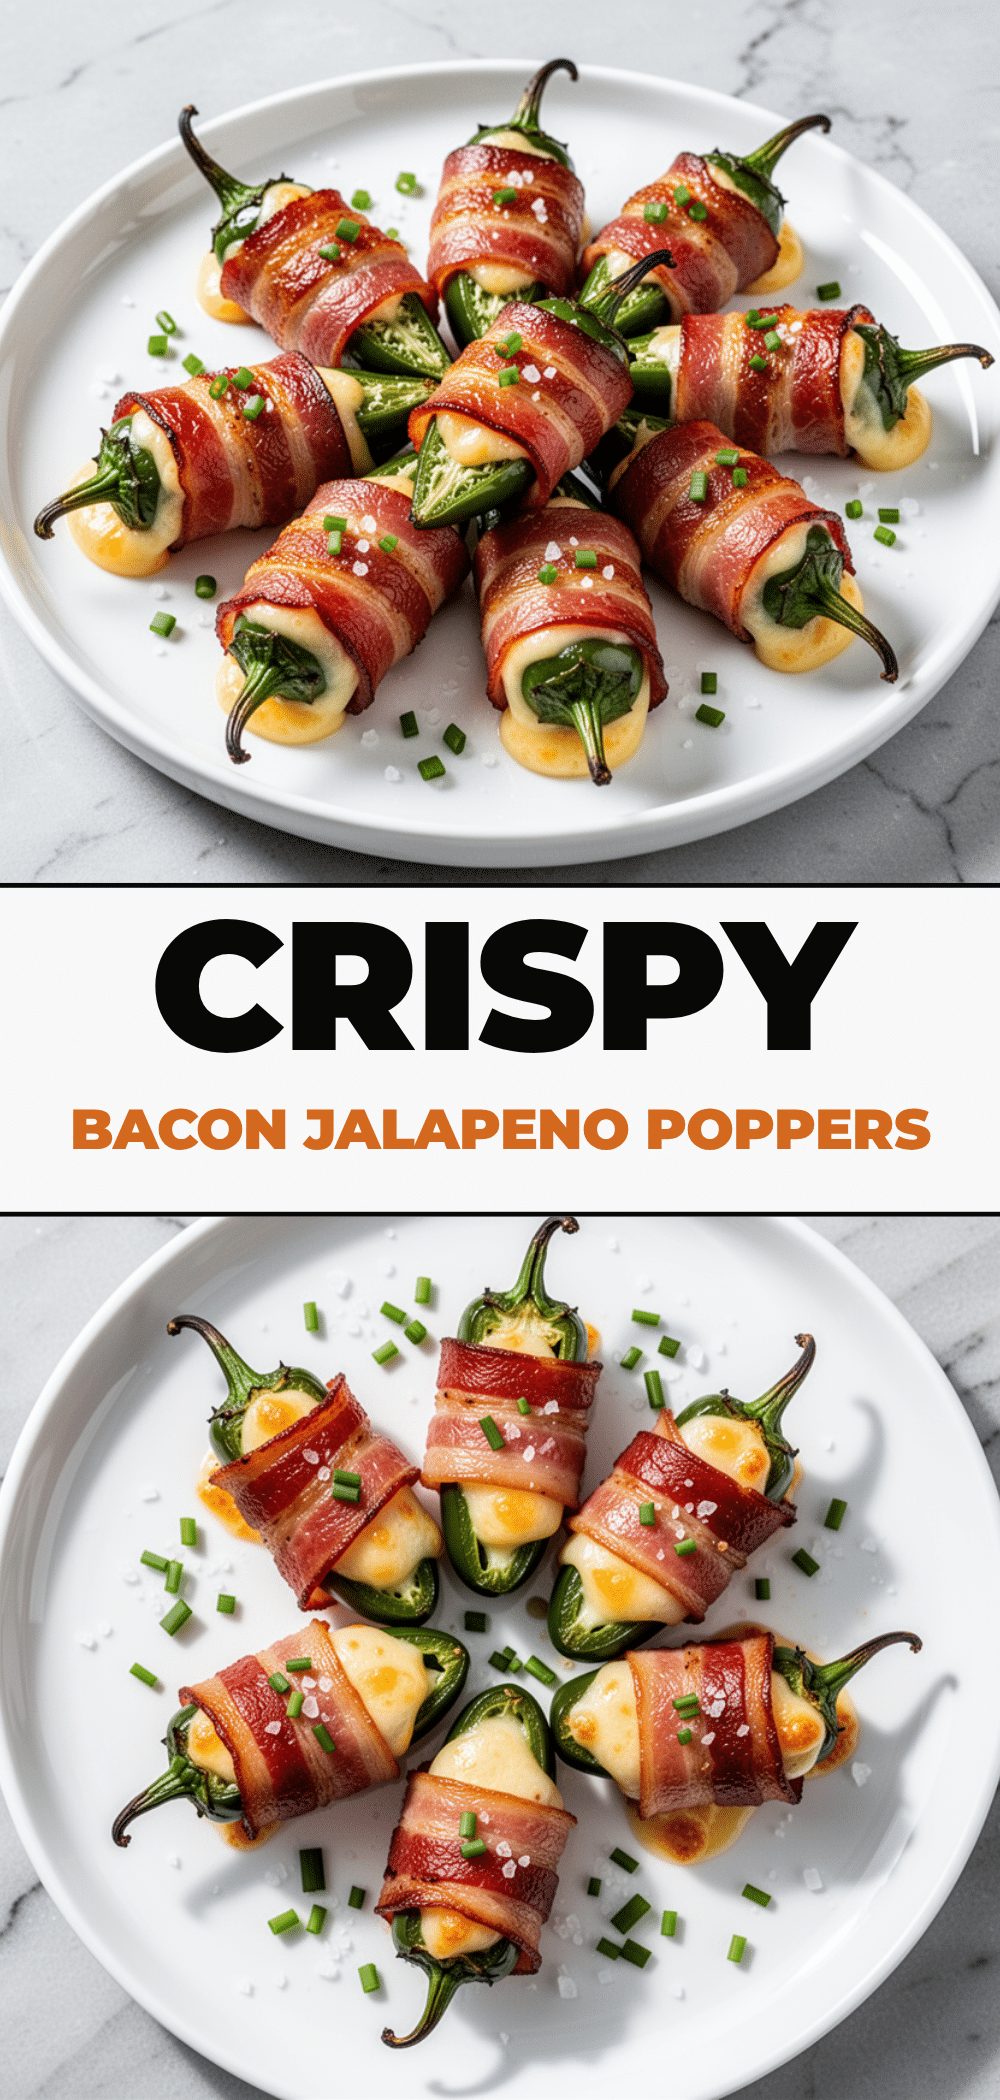
Bacon-Wrapped Jalapeno Poppers: 30-Min Holiday Party Appetizer
- Total Time: 30 minutes
- Yield: 8-10 servings 1x
Description
These bacon-wrapped jalapeno poppers are a spicy, creamy, and salty holiday party hack that comes together in just 30 minutes. They are crowd-pleasing, easy to make, and perfect for any gathering.
Ingredients
- 8 oz full-fat cream cheese (brick kind, softened)
- 1 cup sharp cheddar cheese (shredded)
- 1 teaspoon garlic powder
- 1/2 teaspoon onion powder
- 2 stalks green onions (finely chopped)
- 1/2 teaspoon black pepper
- 8–10 medium jalapeño peppers
- 12–14 slices regular thickness bacon
- 1 tablespoon brown sugar (optional)
Instructions
- Preheat oven to 400°F (200°C). Line a baking sheet with parchment paper or a silicone mat.
- Wash and dry jalapeños. Slice them in half lengthwise. Remove seeds and white membranes using a small spoon or paring knife, leaving some seeds for medium heat if desired.
- In a mixing bowl, combine softened cream cheese, shredded cheddar, garlic powder, onion powder, black pepper, and green onions. Mix until smooth.
- Stuff each jalapeño half with the cheese mixture, filling to the top.
- Wrap each stuffed jalapeño with a slice of bacon, tucking the end under or over. Secure with a toothpick if necessary.
- Place poppers on the prepared baking sheet. Bake for 20-25 minutes until bacon is crispy and golden brown and peppers are tender.
- Let cool for 5 minutes before serving to allow cheese to set and bacon to crisp further.
Notes
Wear gloves when handling jalapeños to avoid skin irritation. For extra crispy bacon, broil for 1-2 minutes at the end, watching closely. Leftovers can be stored in the fridge for 3 days and reheated in the oven or air fryer at 350°F. Unbaked poppers can be frozen for up to 2 months.
- Prep Time: 10 minutes
- Cook Time: 20 minutes
- Category: Appetizer
- Cuisine: American
Nutrition
- Serving Size: 2 poppers
- Calories: 250
- Sugar: 1
- Sodium: 400
- Fat: 20
- Saturated Fat: 8
- Carbohydrates: 3
- Fiber: 1
- Protein: 12
Keywords: bacon wrapped jalapeno poppers, holiday appetizer, party food, spicy appetizer, cream cheese stuffed peppers, easy party snacks, 30 minute recipes


