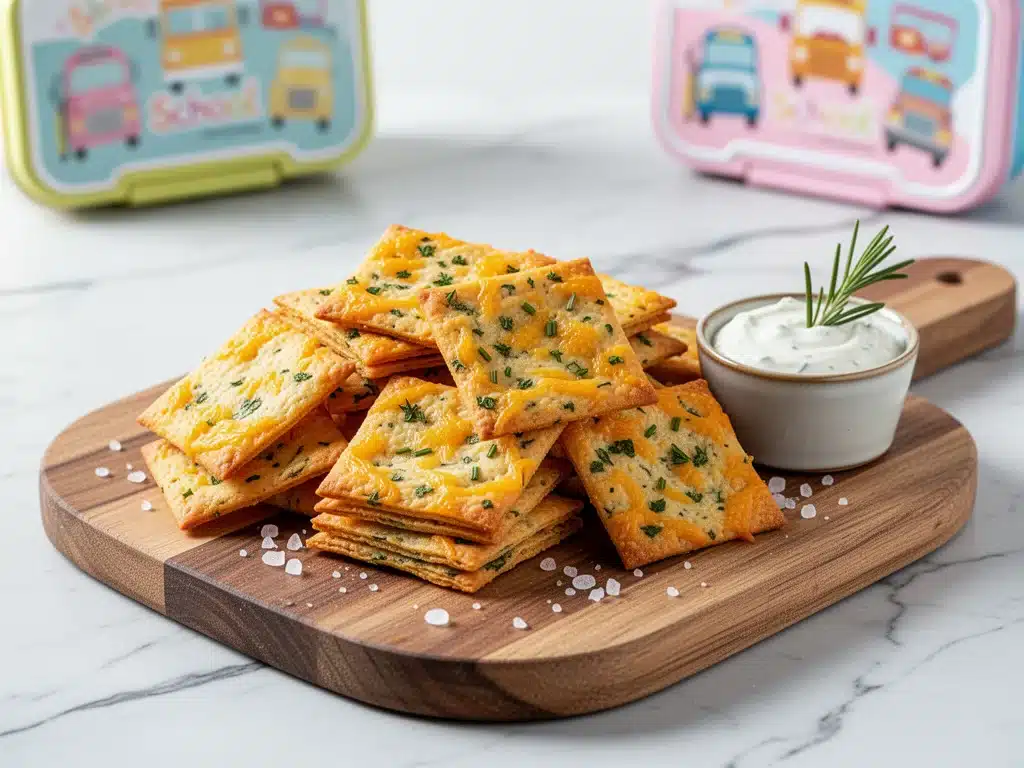
Last Tuesday, I stood in the cereal aisle of the grocery store, holding a box of cheese crackers, feeling that familiar wave of guilt wash over me. You know the one. The one where you look at the ingredient list and realize there are more words you can’t pronounce than actual food. Then I looked at my six-year-old’s lunchbox sitting on the counter at home. It was stuffed with the same pre-packaged, neon-orange processed cheese puffs that had been in there for three years. I was tired. I was running late. And I was done with the compromise.
I wanted something better. Something real. Something that tasted like actual cheddar and herbs, not like a chemical experiment. But I also didn’t have time to spend my entire evening rolling dough and waiting for it to bake. That’s when I decided to try making homemade cheddar herb snack crackers. Just a simple, no-fuss dough that comes together in five minutes flat.
I’ll be honest with you: I expected them to be a disaster. I’ve tried making homemade crackers before, and they usually come out either too tough to chew or too crumbly to handle. But this recipe? It’s different. It’s buttery, it’s salty, it’s got that perfect snap, and best of all, it takes less time than it takes to drive to the store and back. These homemade cheddar herb snack crackers have become the undisputed champion of my kid’s lunchbox. They don’t get crushed into dust by the end of the school day, they actually taste good (my kid asked for more, which is basically a miracle), and I feel good knowing exactly what’s in them.
If you’re stuck in the same rut I was—buying overpriced, ingredient-heavy snack crackers and feeling like a bad parent—stop right there. Put the box down. Let’s make something real together. It’s easier than you think, and your lunchbox will thank you.
Why You’ll Love These Homemade Cheddar Herb Snack Crackers
There are a dozen reasons I keep coming back to this recipe, but let’s be real. It’s not just about the taste. It’s about the fact that this thing actually works in the chaos of real life. Here’s why these homemade cheddar herb snack crackers are now a permanent fixture in our kitchen routine.
Stupid Simple Dough — Seriously. If you can mix flour and cheese, you can make these. There’s no yeast, no rising, no kneading. You just mix, roll, and bake. I’ve made this dough while holding a toddler on my hip and while waiting for the school bus. It just works.
Five-Minute Prep Time — This isn’t a typo. The actual hands-on time to get the dough ready is about five minutes. Maybe six if you’re being extra careful with the cheese grating. The rest is just waiting for the oven to preheat and bake. It’s perfect for those mornings when you need to get out the door in twenty minutes.
Lunchbox Durable — I’ve tested these in lunchboxes all week long. They hold up. They don’t break into a million pieces by lunchtime like store-bought rice cakes or delicate store-bought crackers. They stay intact, which means my kid actually gets to eat them instead of picking through crumbs.
Customizable Flavor — While the cheddar and herb combo is our favorite, this dough is a blank canvas. Want spicy? Add cayenne. Want garlic? Throw in some granulated garlic. Want to use up that block of sharp cheddar in the fridge? This is the way. I’ve made these with everything from rosemary to jalapeño, and they all turn out amazing.
Budget-Friendly — Making these at home costs pennies compared to the name-brand boxes at the store. A block of cheese, some flour, butter, and spices costs way less than a single box of artisanal crackers. It’s a win for your wallet and your sanity.
This recipe has saved me from the pre-packaged snack trap. It’s my go-to when I want to give my kids a snack that feels special but is actually healthy. No weird preservatives, no artificial colors. Just good, simple food. And if that’s not worth your time, I don’t know what is.
Ingredients You’ll Need
Here’s the best part: you probably have most of this already in your pantry and fridge. This isn’t a recipe that requires a special trip to a specialty store. It’s built on basics that taste amazing when you combine them right.
For the Dough
Sharp Cheddar Cheese (1 cup, finely grated / about 115g) — This is the star. Use a block of sharp cheddar and grate it yourself. Pre-shredded cheese has anti-caking agents that make the dough sticky and prevent it from melting properly. I use a box grater for this. It takes two minutes, but it makes a huge difference in the texture. Sharp cheddar has more flavor, so you don’t need as much salt.
All-Purpose Flour (1 ½ cups / about 190g) — Standard flour works perfectly here. It gives the crackers structure without making them tough. If you want to make them slightly healthier, you can swap half the flour for whole wheat pastry flour, but regular all-purpose gives that classic cracker snap.
Unsalted Butter (½ cup / 115g, cold and cubed) — Cold butter is key. You want little bits of butter to remain in the dough so that when they bake, they create flaky layers. If your butter is too soft, the dough will be greasy. Cube it straight from the fridge. Don’t even think about microwaving it to soften it.
Ice Water (2-4 tablespoons) — This binds the dough together. Keep it ice cold. If you’re really serious, add a few ice cubes to your water glass and use the water after the ice melts. Cold fat + cold liquid = tender crackers.
Garlic Powder (½ teaspoon) — Not fresh garlic. Fresh garlic will burn in the oven. Garlic powder gives you that savory depth without the risk of burning. It’s a pantry staple for a reason.
Dried Oregano (1 teaspoon) — This adds that classic herb flavor. Don’t skip it. It balances the richness of the cheese and butter. If you don’t have oregano, dried thyme or even Italian seasoning works great.
Salt (¼ teaspoon) — Since we’re using sharp cheddar, which is already salty, you don’t need much. Taste your cheese first. If it’s super salty, skip the salt entirely.
Black Pepper (¼ teaspoon, freshly cracked) — Adds a little bite. Freshly cracked is best, but pre-ground works in a pinch.
For the Topping (Optional but Recommended)
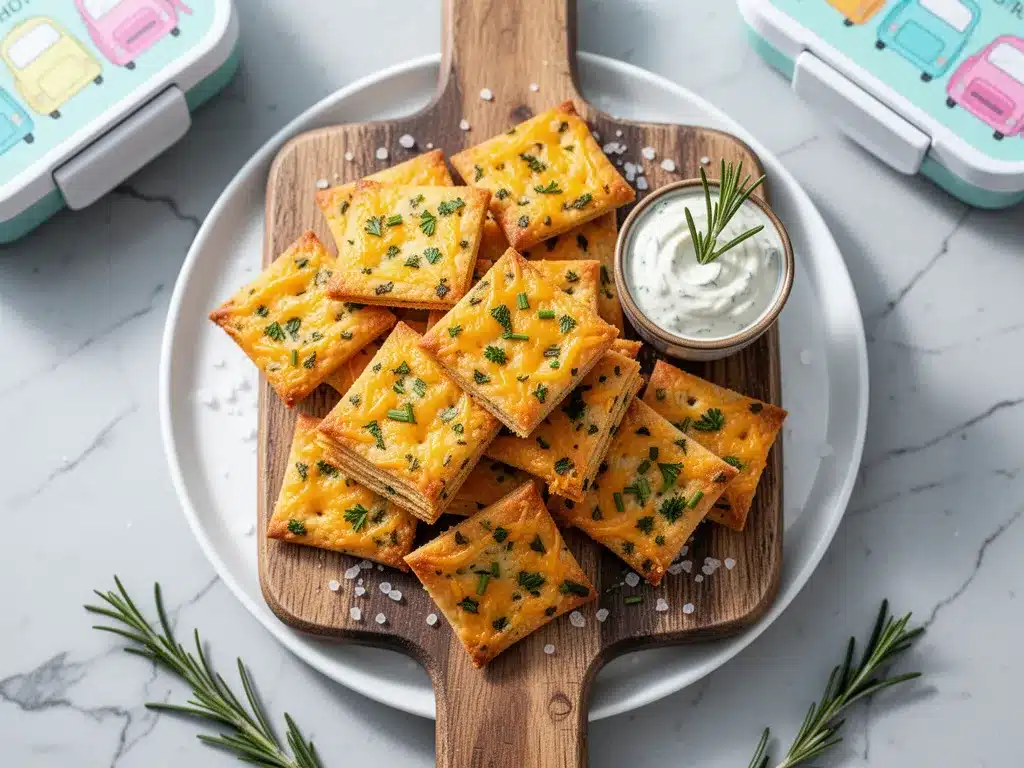
Flaky Sea Salt — A light sprinkle on top before baking makes them look professional and adds a nice crunch. I use Maldon sea salt because it’s what I have, but any flaky salt works.
Extra Grated Cheese — Sprinkle a little extra cheddar on top for those cheesy bites everyone loves.
Herbs — A little extra dried oregano or parsley on top for color.
Equipment Needed
You don’t need fancy equipment for this. Here’s what I actually use. If you don’t have something, there’s almost always a workaround.
Large Bowl — I use a wide mixing bowl so I can toss the ingredients easily. A salad bowl works too.
Fork or Pastry Cutter — To cut the butter into the flour. I use a fork because it’s what’s on the counter. A pastry cutter is faster, but not necessary.
Rolling Pin — Standard rolling pin. Wooden or silicone works. Just make sure it’s clean.
Parchment Paper — Essential. These crackers stick easily if you don’t use parchment. I never bake these directly on a pan.
Baking Sheet — Any standard baking sheet. I use two sheets because I like to bake in batches, but one works if you’re patient.
Sharp Knife or Pizza Cutter — To score the dough into squares. A pizza cutter is faster and cleaner, but a sharp knife works fine.
Box Grater — For the cheese. A food processor with a grating attachment works too if you’re making a huge batch, but hand-grating gives you better control.
How to Make It: Step-by-Step
Alright, let’s make these homemade cheddar herb snack crackers! I’m walking you through exactly how I do it, including the little tricks I’ve picked up over the years. This is going to be quick.
Step 1: Prep Your Cheese and Butter (2 minutes)
Grate your cheddar cheese finely. I mean fine. You want it to look like sand, not chunks. This helps it melt into the dough evenly. Cube your cold butter into small pieces. If the butter is warm, pop it in the freezer for five minutes. We want it cold.
Step 2: Mix the Dry Ingredients (1 minute)
In your large bowl, whisk together the flour, garlic powder, oregano, salt, and black pepper. Make sure there are no clumps of spices. You want everything distributed evenly.
Step 3: Cut in the Butter (2 minutes)
Add the cold butter cubes to the flour mixture. Use a fork or your fingers to cut the butter into the flour. You’re looking for a coarse, sandy texture with some pea-sized bits of butter remaining. Don’t overmix. You want those butter bits to stay distinct. This is what creates the flaky layers.
Step 4: Add the Cheese and Water (1 minute)
Stir in the grated cheddar cheese. Then, add the ice water, one tablespoon at a time. Mix gently with a fork until the dough just starts to come together. It should look shaggy. Do not overwork the dough. If it’s too dry, add another tablespoon of water. If it’s too sticky, add a sprinkle of flour. Stop as soon as you can press it into a ball.
Step 5: Roll Out the Dough (2 minutes)
Place a sheet of parchment paper on your counter. Put the dough ball on top and cover with another sheet of parchment. Roll it out to about ⅛-inch thickness. Uniform thickness is important so they bake evenly. If you roll it too thick, they’ll be doughy. Too thin, and they’ll burn.
Step 6: Score and Bake (15 minutes)
Remove the top sheet of parchment. Use a pizza cutter or sharp knife to score the dough into squares or rectangles. Don’t cut all the way through, just indent the dough. This makes them easy to break later. Sprinkle with flaky salt and extra cheese if you’re using it. Bake at 375°F (190°C) for 12-15 minutes, or until the edges are golden brown. They will firm up as they cool.
Step 7: Cool and Store
Let them cool on the pan for 5 minutes, then transfer to a wire rack to cool completely. They will crisp up as they cool. Store in an airtight container once completely cool.
Expert Tips & Tricks
Here’s everything I’ve learned from making these dozens of times. These tips will save you from my mistakes.
Keep Everything Cold — This is the #1 rule. Cold butter, cold water, cold cheese. If your kitchen is hot, work quickly or put the dough in the fridge for 10 minutes before rolling. Warm butter melts into the flour, and you lose that flaky texture. I learned this the hard way with a greasy, dense batch of crackers.
Grate Your Own Cheese — Pre-shredded cheese is coated in cellulose to prevent clumping. That coating stops the cheese from melting smoothly. It makes the dough grainy. Grating a block takes two minutes and is worth every second.
Don’t Overmix — Once you add the water, mix just until it comes together. Overmixing develops gluten, which makes the crackers tough instead of tender. You want them to snap, not chew.
Uniform Thickness — Roll the dough evenly. If some parts are thick and some are thin, the thin parts will burn before the thick parts are cooked. Use a rolling pin guide or just be careful.
Cool Completely — They will feel soft when you take them out of the oven. This is normal. They crisp up as they cool. If you try to store them while warm, they’ll get soggy. Patience pays off.
Flavor Boosters — I love adding a pinch of smoked paprika for a smoky depth. Or a teaspoon of onion powder. Get creative with the herbs. Thyme pairs beautifully with cheddar. Basil is great too.
Variations & Substitutions
Once you’ve nailed the basic version, here’s how you can mix it up. I’ve tried all of these, and they’re all winners.
Jalapeño Cheddar — Add 1 tablespoon of finely diced pickled jalapeños and a pinch of cayenne. These are spicy and addictive. Perfect for adults who want a kick.
Garlic Parmesan — Swap the cheddar for Parmesan cheese. Double the garlic powder to 1 teaspoon. Add a pinch of red pepper flakes. These are like fancy restaurant starters.
Herb Garden — Use a mix of dried thyme, rosemary, and parsley instead of oregano. Add a teaspoon of lemon zest for brightness. These taste like spring.
Gluten-Free — Use a 1-to-1 gluten-free flour blend. The texture might be slightly more crumbly, but they still taste great. I’ve used Bob’s Red Mill blend with good results.
Vegetarian — This recipe is already vegetarian, but just double-check your cheese. Some cheeses use animal rennet. Look for vegetarian-certified cheddar if that’s important to you.
Dairy-Free — This is tricky because cheese is the main flavor. Use a high-quality vegan cheddar shreds (grate them yourself) and vegan butter. They won’t be exactly the same, but they’re close. My dairy-free friend liked them, though she said they were a bit more crumbly.
Serving & Storage
How to Serve: I serve these straight out of the lunchbox, but they’re also amazing with a dip. Hummus, marinara, or a simple garlic yogurt dip works well. They’re great for parties too—arranged on a platter with cheese and fruit.
Side Dishes: These pair well with soup, salads, or just as a standalone snack. I often serve them with apple slices for a balanced snack.
Storage: Store in an airtight container at room temperature for up to one week. If your kitchen is humid, add a piece of bread to the container to absorb moisture. They might soften slightly, but they’ll crisp up again if you leave them out for a few hours.
Freezing: Yes, you can freeze them! Freeze the baked crackers in a single layer on a baking sheet, then transfer to a freezer bag. They’ll last for up to 3 months. Thaw at room temperature. They might lose a little crunch, but they’re still good.
Reheating: If they get soft, pop them in the oven at 350°F for 3-5 minutes. They’ll crisp right back up. Don’t microwave them—they’ll get chewy.
Nutrition Information
I’m not a nutritionist, but here’s the breakdown if you’re tracking. These are estimates based on standard ingredients.
Per Serving (about 10 crackers):
- Calories: 90
- Protein: 3g
- Carbs: 7g
- Fiber: 0g
- Sugar: 0g
- Fat: 6g
- Saturated Fat: 4g
- Cholesterol: 15mg
- Sodium: 120mg
What’s Good: Low in sugar, no artificial ingredients, decent protein from the cheese. You control the sodium, which is a huge plus over store-bought versions.
What to Know: Higher in fat from the butter and cheese, but it’s real, good fat. Contains dairy and gluten. Not suitable for vegan or dairy-free diets without modifications.
My Take: Look, these are crackers. They’re not a salad. But they’re way better than the processed stuff. When I want to make them lighter, I use less butter and more herbs. But usually? I just enjoy them as a treat. Moderation is key.
Final Thoughts
So that’s my homemade cheddar herb snack crackers! I’ve probably talked your ear off at this point, but when you make a recipe this often, you have a lot to say about it.
This has saved my sanity more times than I can count. It’s my answer to “what’s in the lunchbox?” when I’m tired, don’t want to buy junk, and still want something my kids will actually eat. They’re happy, I’m happy, and I’m not stressed about reading ingredient labels.
Make it yours! Try different herbs, different cheeses, different shapes. The best recipes are the ones you adapt to your family’s tastes. If you make this, drop a comment and let me know what you think! I love hearing how recipes turn out in your kitchen. And if something doesn’t work, tell me that too—I’m here to help troubleshoot.
Happy baking! And I hope your kitchen smells half as good as mine does right now.
Frequently Asked Questions
Can I use mild cheddar instead of sharp?
You can, but the flavor will be much milder. Sharp cheddar has a stronger taste that stands up to the butter and flour. If you only have mild cheddar, add a little extra salt and garlic powder to boost the flavor. I wouldn’t recommend using white American cheese or something very mild.
Why did my crackers spread in the oven?
This usually happens if the butter was too warm when you mixed it, or if you rolled the dough too thin. Make sure your butter is cold and cube it small. Also, don’t roll the dough thinner than ⅛-inch. If they spread a little, they’ll still taste good, just less crunchy.
Can I make these ahead for the week?
Absolutely! This is actually the best way to use them. Make a double batch on Sunday, let them cool completely, and store them in an airtight container. They’ll stay fresh all week. I make these every Sunday for my kid’s lunches.
Can I freeze the dough?
Yes, you can freeze the dough ball for up to a month. Let it thaw in the fridge overnight before rolling and baking. The texture might be slightly different, but it works fine. I do this when I’m planning ahead.
How do I store them so they stay crunchy?
Make sure they’re completely cool before storing. Any warmth will create condensation, which makes them soft. Use an airtight container with a paper towel at the bottom to absorb any moisture. If they get soft, bake them at 350°F for 5 minutes to crisp them up.
Can I use whole wheat flour?
You can, but the crackers will be denser and darker. I recommend using half whole wheat and half all-purpose flour for a balance of nutrition and texture. If you use 100% whole wheat, they might be a bit crumbly.
What’s the best cheese to use?
Sharp cheddar is my favorite because it has the most flavor. But you can also use pepper jack, gouda, or even a mix of cheeses. Just make sure to grate it yourself. Pre-shredded cheese will ruin the texture.
Pin This Recipe!
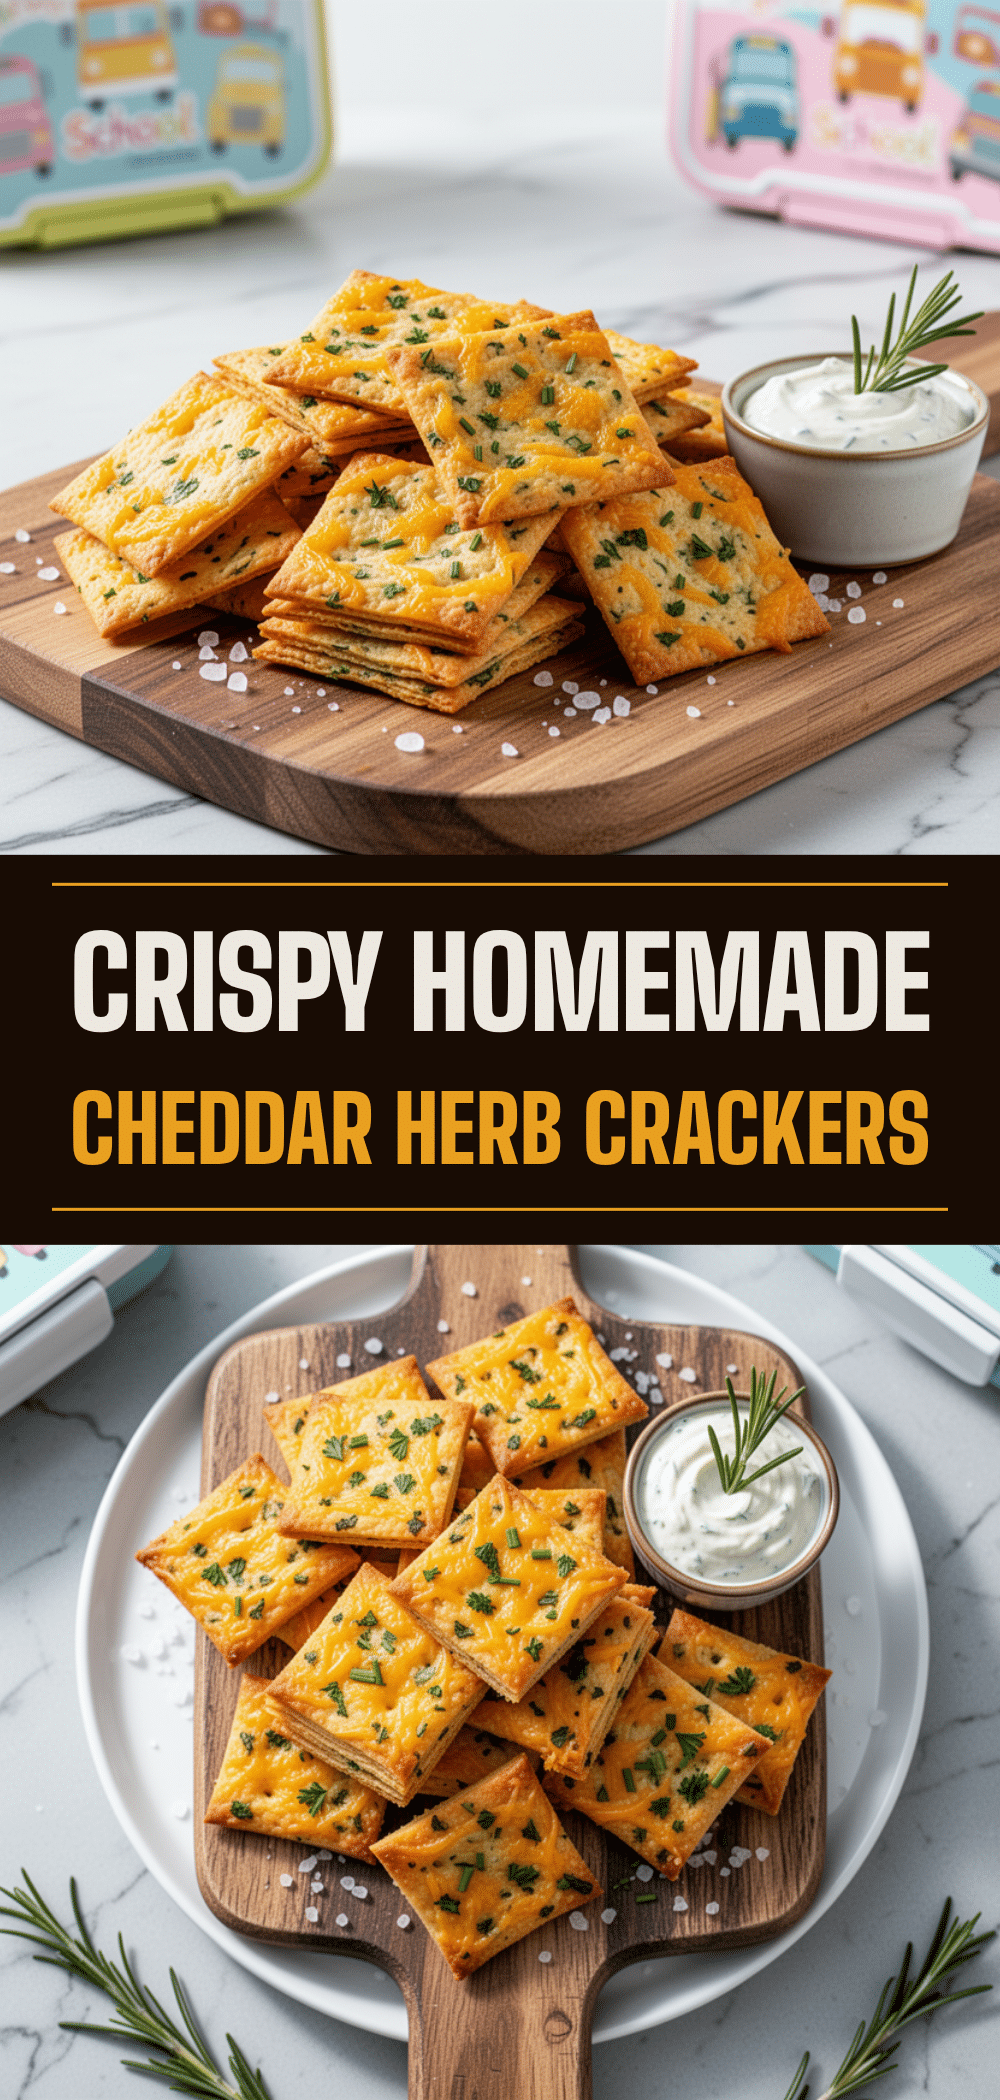
Homemade Cheddar Herb Snack Crackers: 5-Min Back-to-School Lunch
- Total Time: 20 minutes
- Yield: Approximately 40 crackers (4 servings) 1x
Description
Simple, buttery, and salty homemade cheddar herb snack crackers that come together in just five minutes. Perfect for lunchboxes, these durable crackers are free from artificial ingredients and customizable to your taste.
Ingredients
- 1 cup sharp cheddar cheese, finely grated (about 115g)
- 1 ½ cups all-purpose flour (about 190g)
- ½ cup unsalted butter, cold and cubed (115g)
- 2–4 tablespoons ice water
- ½ teaspoon garlic powder
- 1 teaspoon dried oregano
- ¼ teaspoon salt
- ¼ teaspoon black pepper, freshly cracked
- Flaky sea salt, for topping (optional)
- Extra grated cheese, for topping (optional)
- Extra dried herbs, for topping (optional)
Instructions
- Grate the cheddar cheese finely and cube the cold butter into small pieces.
- In a large bowl, whisk together the flour, garlic powder, oregano, salt, and black pepper.
- Add the cold butter cubes to the flour mixture and cut them in using a fork or pastry cutter until the texture is coarse and sandy with pea-sized bits of butter remaining.
- Stir in the grated cheddar cheese, then add ice water one tablespoon at a time, mixing gently until the dough just comes together and looks shaggy.
- Place the dough ball between two sheets of parchment paper and roll it out to about ⅛-inch thickness.
- Score the dough into squares or rectangles with a pizza cutter or sharp knife without cutting all the way through.
- Sprinkle with flaky sea salt and extra cheese if desired.
- Bake at 375°F (190°C) for 12-15 minutes, or until the edges are golden brown.
- Let the crackers cool on the pan for 5 minutes, then transfer to a wire rack to cool completely until crisp.
Notes
Keep all ingredients cold to ensure flaky layers. Do not overmix the dough to avoid tough crackers. Pre-shredded cheese contains anti-caking agents that can make the dough sticky; always grate cheese from a block. Crackers will soften when hot but crisp up as they cool completely. Store in an airtight container at room temperature for up to one week.
- Prep Time: 5 minutes
- Cook Time: 15 minutes
- Category: Snack
- Cuisine: American
Nutrition
- Serving Size: 10 crackers
- Calories: 90
- Sodium: 120
- Fat: 6
- Saturated Fat: 4
- Carbohydrates: 7
- Protein: 3
Keywords: homemade crackers, cheddar crackers, lunchbox snacks, back-to-school lunch, easy snacks, vegetarian snacks, gluten-free option


