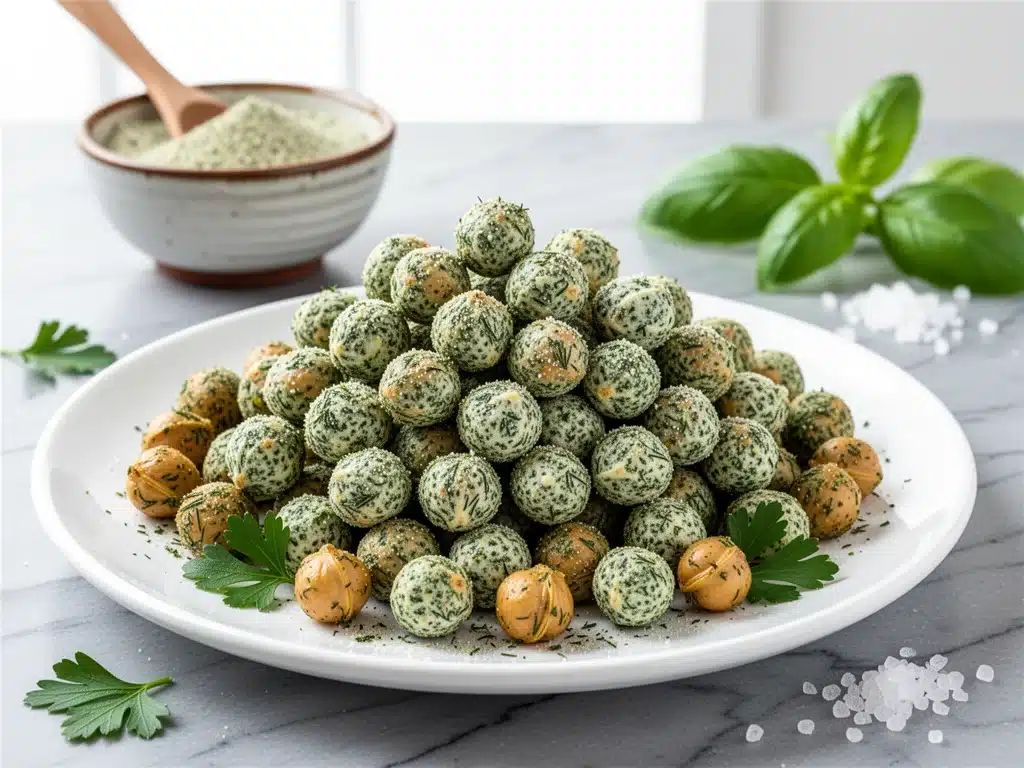
It was 3 PM on a Tuesday, and I was staring into the pantry like it owed me money. My brain wanted something crunchy, salty, and satisfying, but my body was screaming for something that wouldn’t leave me feeling like a lethargic potato by dinner time. The bag of store-bought chips was empty. The crackers were stale. And suddenly, I remembered a can of chickpeas hiding in the back of my cupboard from a failed hummus attempt two weeks ago.
I’ve always been obsessed with the perfect snack. Not the sad, dry “diet” snacks that taste like cardboard, but the kind that actually makes you stop and think, “Wait, is this healthy?” You know the type. I’ve tried everything from kale chips (too bitter) to roasted nuts (too expensive). But these crispy baked ranch chickpeas? This is the one. The one that changed my afternoon snacking game entirely.
I first made these about six months ago when I was trying to cut back on processed carbs. I expected them to be soggy and bland. They weren’t. They were crunchy, tangy, herby, and impossibly addictive. I ate half the batch before they even cooled down. Now, I keep cans of chickpeas stocked specifically for this. They’re my go-to when I need a quick fix, when I’m meal prepping for the week, or when I just need a little comfort without the guilt. If you’re looking for a better alternative to no-bake peanut butter granola bites, these are your next best bet.
Why You’ll Love This Recipe
Let’s be real for a second. Healthy snacking usually feels like a punishment. These crispy baked ranch chickpeas are the opposite. They’re a celebration of crunch and flavor, using ingredients you probably already have. Here’s why they’ve earned a permanent spot in my kitchen rotation:
Five Ingredients, Maximum Flavor — Seriously. Chickpeas, olive oil, ranch seasoning, parmesan, and garlic powder. That’s it. No weird supplements, no obscure spices you have to order online. If you can read a label, you can make this. I’ve made these for my picky teenage nephew, and he asked for the recipe. That’s the ultimate seal of approval.
Stupid Cheap — A can of chickpeas costs about $1.20. A bag of gourmet chips costs $6.00. Do the math. These chickpeas feed 3-4 people as a snack, or 2 people as a light appetizer. I make these on Sundays to have ready for the week, and it saves me at least $30 a month on impulse buys from the vending machine or the corner store.
High Protein Powerhouse — One serving has about 6-7 grams of protein. That’s huge for a snack. It keeps you full. I used to graze on crackers and feel hungry an hour later. Now? I eat a handful of these, and I’m good until dinner. It’s satisfying in a way that chips just aren’t.
Customizable Crunch — Want them extra crispy? Roast them longer. Want them softer? Roast them less. You control the texture. I like them with a slight chew in the center but a hard shell on the outside. It’s like a popcorn kernel but way more nutritious.
Gluten-Free and Vegan Friendly — Naturally gluten-free. If you swap the parmesan for nutritional yeast, they’re vegan. I make the vegan version for my friend who’s lactose intolerant, and she says they’re indistinguishable from the dairy version. (Okay, maybe 95% indistinguishable, but who’s counting?)
This recipe has saved me from so many unhealthy temptations. It’s my answer to “I’m bored and hungry” when I don’t want to cook a full meal. It’s quick, it’s cheap, and it tastes like a cheat meal but fuels you like a health food.
Ingredients You’ll Need
Here’s the best part: you probably have 90% of this already. I’m not asking you to go on a special grocery run. This is pantry-friendly cooking at its finest. Let’s break down what you need and why each ingredient matters.
Canned Chickpeas (Garbanzo Beans) (2 cans, 15 oz / 425g each) — Look for low-sodium if you can find it. You can use dry chickpeas, but you’d need to soak them overnight and boil them for an hour. Save your time. Use canned. Just make sure you rinse and drain them really well. Wet chickpeas = soggy snacks. I use Goya or Eden Foods; they’re consistently good quality.
Olive Oil (2 tablespoons / 30ml) — Extra virgin works, but I use regular extra virgin or light olive oil because the high heat of roasting can burn the delicate flavors of premium EVOO. You just need enough to coat the chickpeas so the seasoning sticks. Don’t drown them.
Ranch Seasoning Mix (2 tablespoons / 12g) — This is the flavor star. You can use a packet of dry ranch mix (like Hidden Valley) or make your own. I prefer my own blend because it’s less salty and has no MSG. If you use a packet, check the sodium content. I usually use half a packet and add more herbs if needed.
Parmesan Cheese (¼ cup / 25g, freshly grated) — This adds that savory, umami punch and helps with browning. Buy a block and grate it yourself. Pre-grated cheese has cellulose that prevents it from melting properly. You want that cheesy crust on your chickpeas. If you’re vegan, swap this for 2 tablespoons of nutritional yeast. It gives that same cheesy flavor without the dairy.
Garlic Powder (1 teaspoon / 2g) — Fresh garlic burns in the oven. Garlic powder stays put and infuses the oil. Don’t skip this. It’s the backbone of the ranch flavor. If you only have granulated garlic, use half the amount—it’s stronger.
Salt (½ teaspoon / 3g) — Depends on your ranch mix. If your ranch is salty, skip this. If it’s unsalted, add it. Taste your ranch mix first to decide.
Optional Add-ins:
- Chili Flakes (½ teaspoon) — For a spicy kick. I love this if I’m pairing it with crispy baked chicken nuggets for a game day spread.
- Smoked Paprika (½ teaspoon) — Adds a smoky depth. Great if you like a barbecue vibe.
- Dried Dill (1 teaspoon) — Boosts the ranch flavor. Fresh dill doesn’t work here; it’ll burn.
Pro Tip: I keep a bag of dry ranch seasoning mix in my pantry specifically for this. It’s cheaper than buying packets and I can control the salt. If you don’t have it, a packet works fine. Just use about 1 tablespoon of dry mix per can of chickpeas.
Equipment Needed
You don’t need fancy gadgets for this. Here’s what I actually use, and what you can swap if you don’t have it.
Baking Sheets — I use two half-sheet pans. You need space. If you pile the chickpeas on top of each other, they steam instead of roast. I line them with parchment paper for easy cleanup. Silicone mats work too, but parchment is cheaper and recyclable.
Colander — For rinsing the chickpeas. Any size works. I press them against the side of the sink to get extra water off.
Clean Kitchen Towel or Paper Towels — This is crucial. After rinsing, you need to dry them thoroughly. I use a clean tea towel. Pat them dry. Then pat them dry again. If they’re wet, they won’t get crispy. I’ve learned this the hard way. Twice.
Large Bowl — For tossing the chickpeas with oil and seasoning. Something wide so they don’t fall out when you shake it.
Measuring Spoons — Standard stuff. Dollar store versions work fine.
Parchment Paper — Not strictly necessary, but it saves you from scrubbing the pan later. I’m lazy. I like easy cleanup.
Optional: A kitchen scale if you’re being precise, but eyeballing it works perfectly fine here. I’ve made these by feel for years and they’re always good.
How to Make It: Step-by-Step
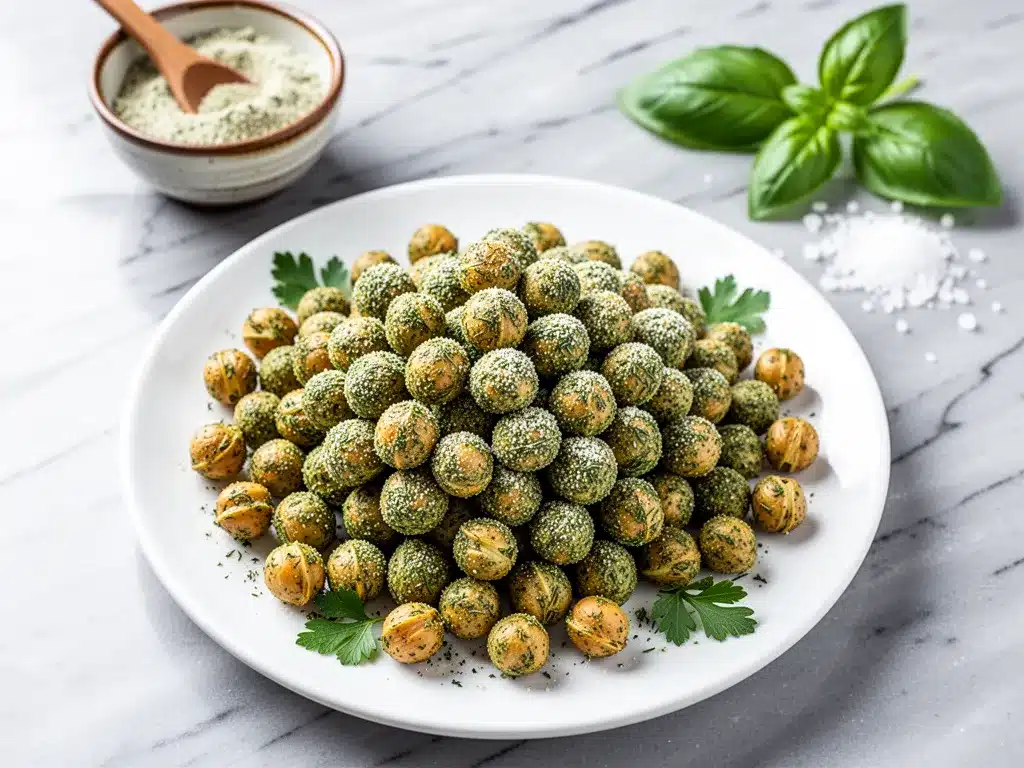
Alright, let’s make these! I’m walking you through exactly how I do it, including the little tricks that make the difference between soggy beans and crunchy gold.
Step 1: Prep the Chickpeas (5 minutes)
Open your cans and pour the chickpeas into a colander. Rinse them under cold water until the foam disappears. This removes the canned taste and excess sodium. Now, here’s the secret step: dry them. Spread them on a clean kitchen towel or layers of paper towels. Pat them dry. Then, roll them around in the towel to get every bit of moisture off. Look for any chickpeas with loose skins still attached and pull them off. The skins can get chewy. You want smooth, dry chickpeas. This step takes about 5 minutes, but it’s the most important one.
Step 2: Preheat and Prep Pan (2 minutes)
Preheat your oven to 400°F (200°C). Line your baking sheets with parchment paper. Make sure your oven rack is in the middle position. You want even heat circulation. If you have a convection oven, reduce the temperature to 375°F (190°C) and check 5 minutes early. Convection ovens roast faster.
Step 3: Season the Chickpeas (3 minutes)
Put the dried chickpeas in your large bowl. Drizzle with the olive oil. Toss them well. You want every chickpea coated, but not swimming in oil. Sprinkle the ranch seasoning, garlic powder, and salt (if using) over the top. Toss again. Make sure the seasoning is distributed evenly. If you see clumps of dry powder, keep tossing. You want a uniform coating.
Step 4: Add Parmesan (1 minute)
Spread the chickpeas in a single layer on the baking sheets. Do not overcrowd. If they’re touching, they’ll steam. I usually use two pans for this reason. Sprinkle the grated parmesan evenly over the top. Press it down gently so it sticks to the oil. This will create that cheesy, crispy crust.
Step 5: Roast (20-25 minutes)
Put the pans in the oven. Roast for 20 minutes. At the 10-minute mark, take them out and shake the pans or stir the chickpeas with a spatula. This ensures even browning. After 20 minutes, check them. They should be golden brown and crisp. If they’re still soft, roast for another 5 minutes. Keep an eye on them—they can go from perfect to burnt in about 2 minutes. I’ve done it. Don’t be me.
Step 6: Cool (10 minutes)
Take them out of the oven. They will feel soft when they come out. This is normal. They crisp up as they cool. Let them sit on the pan for 10 minutes. Do not skip this. If you eat them hot, they might feel chewy. After 10 minutes, they’ll be shatteringly crisp. Store them in a container once they’re completely cool.
Troubleshooting:
- Soggy? You didn’t dry them enough, or you overcrowded the pan.
- Burnt? Oven was too hot, or you left them in too long. Check at 20 minutes.
- Seasoning fell off? You didn’t use enough oil, or you shook them too hard before they cooled.
Expert Tips & Tricks
Here’s everything I’ve learned from making these dozens of times. These tips will save you from my mistakes.
Dryness is Key — I can’t stress this enough. Wet chickpeas never get crispy. I use a towel, then paper towels, then I let them air dry for 5 minutes if I have time. It’s worth it.
Single Layer Only — If you pile them up, the bottom ones stay soft. Spread them out. If you need two pans, use two pans. Don’t crowd the pan.
Shake, Don’t Stir — When you’re roasting, shake the pan instead of stirring with a spoon. Stirring can bruise the chickpeas. Shaking keeps them whole and ensures even exposure.
Cool Completely — They crisp up as they cool. This is a chemical thing with the starches. If you eat them hot, they’re chewy. Wait 10 minutes. Trust me.
Storage is Short — These are best eaten within 2-3 days. They lose crunch after that. If they get soft, pop them back in the oven at 350°F for 5 minutes to revive them. I’ve done this, and it works.
Flavor Variations — Once you master ranch, try everything else. Try taco seasoning with cumin and chili powder. Try Italian seasoning with oregano and basil. Try honey mustard with mustard powder and a drizzle of honey after roasting. The base recipe is just a starting point.
Variations & Substitutions
Once you’ve nailed the basic ranch version, here’s how you can mix it up. I’ve tried all of these, and they’re all winners.
Spicy Ranch — Add ½ teaspoon cayenne pepper or 1 teaspoon chili flakes to the seasoning mix. Great for game days.
Herb Garden — Skip the ranch packet. Use 1 tablespoon dried parsley, 1 teaspoon dried dill, 1 teaspoon garlic powder, and 1 teaspoon onion powder. Add a squeeze of lemon juice after roasting for freshness.
BBQ Chickpeas — Use 2 tablespoons BBQ rub instead of ranch. Roast as directed. Sweet, smoky, and addictive.
Curry Chickpeas — Use 1 tablespoon curry powder, ½ teaspoon turmeric, and a pinch of cumin. Great with soft baked banana oatmeal breakfast cookies for a savory-sweet breakfast spread.
Vegan Parmesan — Swap dairy parmesan for nutritional yeast. It’s less crispy but still flavorful. Add 1 tablespoon of tapioca starch to help it bind.
Gluten-Free — Most ranch packets are gluten-free, but check the label. If you make your own mix, use gluten-free oats if you’re using oat flour as a thickener. Otherwise, this is naturally GF.
Low-Sodium — Use no-salt-added chickpeas and make your own ranch mix with no salt. Use herbs and garlic powder for flavor. You control the sodium level.
Serving & Storage
How to Serve: I serve these straight from the container. They’re a finger food. Great for watching movies, snacking while working, or pairing with a cold drink. They also make a great topping for salads. Toss a handful over a green salad for extra crunch and protein. I do this all the time instead of croutons.
Side Dishes: These pair well with anything. Try them with turkey cheddar pinwheels for a party platter. Or serve them with hummus and veggie sticks for a healthy appetizer.
Storage: Store in an airtight container at room temperature for up to 3 days. Do not refrigerate—they’ll get soggy. If they lose crunch, reheat in the oven at 350°F for 5 minutes. Do not microwave.
Freezing: I don’t recommend freezing these. The texture changes, and they become chewy when thawed. Make them fresh. They’re so quick to make that there’s no need to freeze.
Nutrition Information
I’m not a nutritionist, but here’s the breakdown if you’re tracking. These are approximate values per serving (about ½ cup).
- Calories: 120
- Protein: 6g
- Carbs: 14g
- Fiber: 4g
- Sugar: 1g
- Fat: 5g
- Sodium: 250mg (varies by ranch mix)
What’s Good: High in fiber and protein. Low in sugar. No artificial ingredients if you make your own ranch. What to Know: Sodium can be high if you use store-bought ranch mix. Use low-sodium ingredients to control this. It’s not a diet food, but it’s a much better choice than chips.
Final Thoughts
So that’s my go-to crispy baked ranch chickpeas! I’ve probably talked your ear off at this point, but when you make a recipe this often, you have a lot to say about it. These chickpeas have saved me from so many unhealthy snacks. They’re crunchy, savory, and satisfying. They’re my answer to “I’m bored and hungry” when I don’t want to cook.
Make them yours! Try different seasonings, add different cheeses, or experiment with spices. The best recipes are the ones you adapt to your tastes. If you make this, drop a comment and let me know what you think! I love hearing how recipes turn out in your kitchen. And if something doesn’t work, tell me that too—I’m here to help troubleshoot.
Happy snacking! And I hope your kitchen smells half as good as mine does right now.
Frequently Asked Questions
Can I use dry chickpeas instead of canned?
You can, but it takes a lot longer. You’d need to soak them overnight and boil them for an hour until tender. Then you’d still need to dry them thoroughly. For convenience, I stick with canned. The texture is the same once roasted, but the time savings is huge.
Why are my chickpeas soggy?
Usually, it’s because they weren’t dry enough before roasting, or they were overcrowded on the pan. Moisture is the enemy of crispiness. Make sure you pat them dry with a towel, and spread them out in a single layer. Also, check your oven temperature—some ovens run cool.
Can I make these ahead of time?
Yes, but they’re best within 2-3 days. They lose crunch over time. If you make them on Sunday, they’ll still be good by Wednesday. After that, they’ll get soft. Reheat them in the oven to revive the crunch.
Are these gluten-free?
Chickpeas are naturally gluten-free. Most ranch seasoning packets are also gluten-free, but always check the label. If you make your own ranch mix, ensure all your spices are certified gluten-free. This is a great GF snack option.
Can I use air fryer?
Yes! Cook at 375°F (190°C) for 12-15 minutes, shaking the basket every 5 minutes. They cook faster in an air fryer, so keep an eye on them. They get very crispy in the air fryer.
How do I store leftovers?
Store in an airtight container at room temperature. Do not refrigerate. If they get soft, pop them in the oven at 350°F for 5 minutes. They’ll crisp back up.
Can I add other spices?
Absolutely! Try taco seasoning, curry powder, Italian herbs, or everything bagel seasoning. The base recipe is just a starting point. Experiment and find your favorite flavor combo.
Pin This Recipe!
Crispy Baked Ranch Chickpeas: 5-Ingredient Healthy Snack
- Total Time: 35 minutes
- Yield: 3-4 servings 1x
Description
A crunchy, savory, and healthy snack made with just five ingredients. These baked chickpeas are a high-protein, gluten-free alternative to chips that are easy to make and customizable.
Ingredients
- 2 cans (15 oz / 425g each) canned chickpeas (garbanzo beans), low-sodium preferred
- 2 tablespoons olive oil
- 2 tablespoons ranch seasoning mix (dry)
- 1 teaspoon garlic powder
- 1/4 cup freshly grated parmesan cheese
- 1/2 teaspoon salt (optional, depending on ranch seasoning salt content)
Instructions
- Preheat oven to 400°F (200°C). Line two half-sheet baking pans with parchment paper.
- Drain and rinse the chickpeas in a colander until the foam disappears.
- Thoroughly dry the chickpeas using a clean kitchen towel or paper towels. Remove any loose skins for better crispiness.
- Place the dried chickpeas in a large bowl. Drizzle with olive oil and toss to coat evenly.
- Sprinkle ranch seasoning, garlic powder, and salt over the chickpeas. Toss again to ensure an even coating.
- Spread the chickpeas in a single layer on the prepared baking sheets. Do not overcrowd.
- Sprinkle the grated parmesan cheese evenly over the chickpeas and press gently to help it stick.
- Roast for 20 minutes, shaking the pans or stirring with a spatula at the 10-minute mark for even browning.
- Check for crispiness. If needed, roast for an additional 5 minutes until golden brown and crisp.
- Remove from oven and let cool on the pan for 10 minutes. They will crisp up further as they cool.
Notes
Ensure chickpeas are completely dry before roasting to achieve maximum crispiness. Do not overcrowd the pan, as this causes steaming instead of roasting. If using a convection oven, reduce temperature to 375°F (190°C). For a vegan version, substitute parmesan with nutritional yeast. Store in an airtight container at room temperature for up to 3 days. Reheat in the oven at 350°F for 5 minutes if they lose crunch.
- Prep Time: 10 minutes
- Cook Time: 25 minutes
- Category: Snack
- Cuisine: American
Nutrition
- Serving Size: 1/2 cup
- Calories: 120
- Sugar: 1
- Sodium: 250
- Fat: 5
- Saturated Fat: 1
- Carbohydrates: 14
- Fiber: 4
- Protein: 6
Keywords: chickpeas, ranch chickpeas, healthy snack, gluten-free snack, vegan snack, high protein snack, baked chickpeas, crunchy snack, 5-ingredient recipe


