I still remember the exact Tuesday morning that changed our family’s breakfast routine forever. I was standing in front of the open freezer, staring at a half-empty bag of frozen nuggets that had been there since last Thanksgiving. They were gray, freezer-burned, and tasted like old plastic. My seven-year-old, Leo, was already at the table, backpack on, shoes tied, looking at me with that specific mix of hope and skepticism that only a hungry child can muster.
“Can we have nuggets?” he asked. It was a plea, not a request.
I looked at the clock. 7:42 AM. School started in 18 minutes. I looked at the frozen bag. Then I looked at the fresh chicken breasts in the fridge. I didn’t have time to bread and fry them. I didn’t have time to prep anything complex. So, I did the unthinkable. I grabbed the chicken, tossed it in some panko and spices, threw it on a baking sheet, and slid it into the oven at 425°F. By the time Leo finished his juice, I had crispy, golden, hot chicken nuggets that actually tasted like chicken.
That was three years ago. Since then, this recipe for crispy baked chicken nuggets has become the holy grail of our weeknight dinners and school lunches. I’ve made them so many times I can probably do it in my sleep (which is exactly when I’ve made them most often). The best part? They’re not just a treat for Friday nights. They’re reliable, healthy-ish, and most importantly, my kids actually eat them without complaining.
If you’re tired of the frozen stuff, or if you’re just looking for a way to sneak more protein into your kids’ diets without turning dinner into a battle, this is the recipe you need. It’s simple, it’s fast, and it delivers that crunch you crave without the grease. Let’s get cooking.
Why You’ll Love This Recipe
I’ve tried dozens of “healthy” nugget recipes over the years. Some were too dry. Some took forever. Some required ingredients I didn’t have and a chef’s knife skills I definitely don’t possess. This version? It just works. Here’s why it’s become a staple in our kitchen:
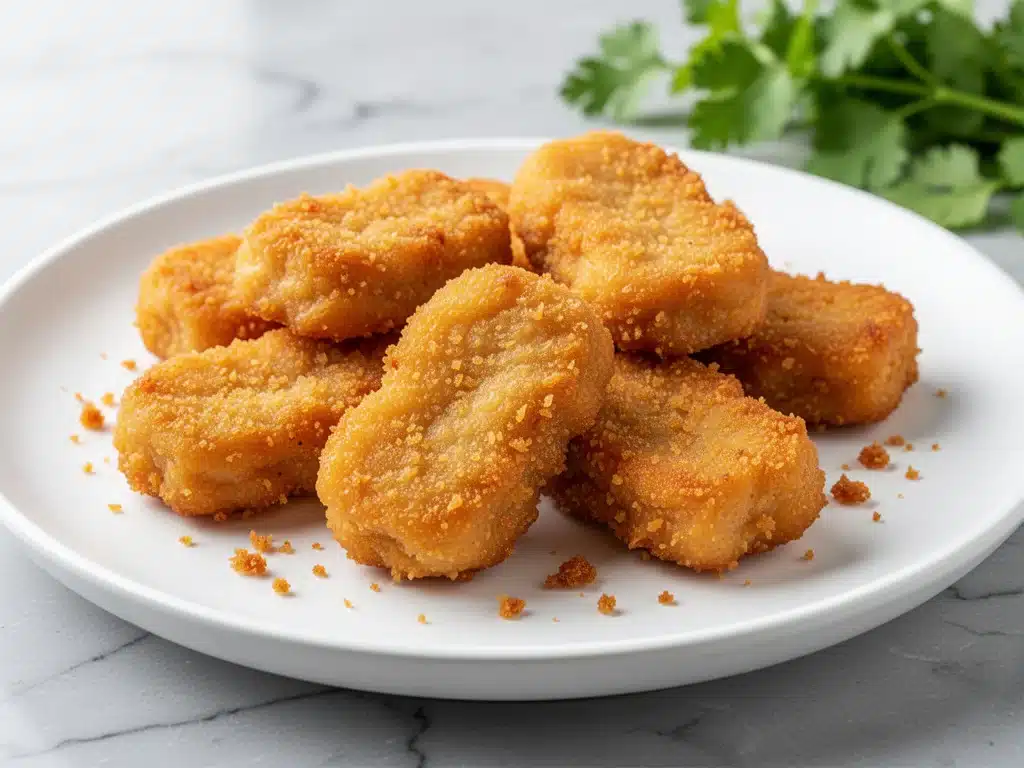
- Actually Crispy — I’m not kidding. These get a real crunch. I’ve done blind taste tests with my husband (he’s a tough critic), and even he couldn’t tell the difference between these and the deep-fried version, except these are way lighter. The secret is the double-coating method, which I’ll show you.
- Under 30 Minutes — From chicken to plate, it takes about 25 minutes. That includes prep. I’ve timed it. If you’re rushing out the door, you can make this. If you’re meal prepping for the week, it’s efficient enough to handle.
- Kid-Approved — My picky eater, Leo, asks for these specifically. My older daughter, who claims to be “too cool” for nuggets, still steals them when she thinks I’m not looking. They’re versatile enough for toddlers who need soft bites and picky eaters who want crunch.
- Meal-Prep Friendly — This is the big one for school lunches. I bake a huge batch on Sunday, store them in the fridge, and reheat them in the air fryer or oven during the week. They stay crispy for days. No soggy lunchbox surprises.
- No Weird Ingredients — Just chicken, breadcrumbs, eggs, and spices. If you can read a grocery list, you can make this. No fancy powders or hard-to-find items.
This recipe has saved me from the frozen aisle more times than I can count. It’s my answer to “what’s for lunch?” when I’m tired, busy, and still want my kids to eat something that doesn’t come in a box.
Ingredients You’ll Need
Here’s the thing about these nuggets: the quality of your ingredients matters more than you’d think. Since there aren’t many of them, each one plays a big role. I’m particular about three things here, and I’ll tell you exactly why.
For the Chicken
Chicken breast (2 pounds / 900g) — I use boneless, skinless chicken breasts. They’re lean and cook evenly. You can use chicken tenderloins if you prefer, but breasts are cheaper and I like to cut them into uniform pieces. Look for fresh, pink meat, not yellow or slimy. If you buy organic, even better, but it’s not strictly necessary.
Buttermilk (1 cup / 240ml) — This is the secret tenderizer. The acid in buttermilk breaks down the proteins, making the chicken juicy. If you don’t have buttermilk, mix 1 cup of milk with 1 tablespoon of lemon juice or white vinegar and let it sit for 10 minutes. It works almost as well.
Eggs (2 large) — Standard large eggs. Just whisk them well. They act as the glue for the breading.
For the Breading

Panko breadcrumbs (2 cups / 200g) — This is non-negotiable. Regular breadcrumbs are too fine and dense. Panko is flaky, airy, and creates that shatteringly crisp crust. I buy the Japanese-style panko, usually the brand Sapporo Ichiban or store brand, but any panko works. Don’t use fine breadcrumbs unless you want dense, doughy nuggets.
Parmesan cheese (½ cup / 50g, grated) — I use freshly grated Parmesan, not the shaker-can stuff. It adds a salty, umami punch that makes the breading taste savory. If you’re lactose intolerant, you can skip this or use nutritional yeast, but you’ll miss out on that depth of flavor.
Garlic powder (1 teaspoon) — I use the powder, not fresh garlic, because fresh garlic can burn in the oven. Powder gives a consistent flavor without the risk of bitter bits.
Onion powder (1 teaspoon) — Again, powder for even flavor. It adds a subtle sweetness that balances the garlic.
Smoked paprika (½ teaspoon) — This is my personal touch. It adds a hint of smokiness that mimics the flavor of fried chicken. If you don’t have smoked paprika, regular paprika works, but it won’t have that same depth.
Salt and black pepper (1 teaspoon each) — Season the breading generously. You want the crust to be flavorful on its own, not just bland crunch.
For Cooking
Avocado oil or olive oil (2 tablespoons) — I spray the nuggets with oil before baking. Avocado oil has a high smoke point, so it doesn’t burn. Olive oil works too, but it has a stronger flavor. You can use a neutral oil like canola if that’s what you have.
Optional: Cooking spray — I like to use a spray like Pam or Wilton because it coats evenly and uses less oil. A brush works too, but spray is faster.
Equipment Needed
You don’t need fancy gadgets for this. Here’s what I actually use, along with some honest opinions on alternatives.
Three shallow bowls — I use glass Pyrex bowls because they’re easy to clean and don’t tip over. You need one for the buttermilk, one for the egg wash, and one for the breading. If you only have two, you can skip the egg wash and dip directly into the buttermilk, but the coating won’t be as thick.
Baking sheets — I use two half-sheet pans. This allows me to bake a large batch at once. Make sure they’re rimmed, so the oil doesn’t drip onto the oven floor. I prefer dark metal pans because they conduct heat better, but light pans work too—just watch the time.
Wire rack — This is optional but recommended. Placing a wire rack on the baking sheet allows air to circulate under the nuggets, making the bottom crispy too. If you don’t have a rack, just line the pan with parchment paper. The bottoms won’t be quite as crispy, but it’s still good.
Pastry brush or spray bottle — For applying the oil. I use a silicone pastry brush because it’s easy to control, but a spray bottle is faster and more even.
Cutting board and sharp knife — For slicing the chicken. A sharp knife makes clean cuts and keeps the chicken pieces uniform, which ensures even cooking. A dull knife will tear the meat and make uneven pieces.
Chef’s knife — For mincing garlic if you’re using fresh (though I recommend powder). Any good chef’s knife will do.
How to Make It: Step-by-Step
Alright, let’s make this! I’m walking you through exactly how I do it, including the little tricks I’ve picked up over the years. It’s simple, but attention to detail makes the difference between okay and amazing.
Step 1: Prep the Chicken (5 minutes)
Start by taking your chicken breasts out of the fridge. Let them sit for 10 minutes while you prep the rest. This helps them cook more evenly. Place the chicken on a cutting board and pat them dry with paper towels. Moisture is the enemy of crispiness, so dry chicken is key.
Using a sharp knife, slice the chicken breasts into 1-inch cubes. Try to keep them uniform in size so they all cook at the same rate. If you have tenderloins, you can leave them whole or slice them in half lengthwise. Set the cut chicken aside.
Step 2: Set Up Your Breading Station (5 minutes)
Take three shallow bowls and line them up. In the first bowl, pour the buttermilk. In the second, whisk the eggs with a pinch of salt and pepper. In the third bowl, combine the panko breadcrumbs, Parmesan cheese, garlic powder, onion powder, smoked paprika, salt, and pepper. Mix the dry ingredients well with a fork.
This is your assembly line. Keep it organized. I like to have all my ingredients measured and ready before I start dipping, so I don’t have to stop mid-process.
Step 3: Bread the Chicken (10 minutes)
This is the fun part. Take a piece of chicken and dip it into the buttermilk, making sure it’s fully coated. Let any excess drip off for a second. Then, drop it into the egg wash, coating it thoroughly. Lift it out, let the excess drip off, and finally, roll it in the panko mixture.
Press the breadcrumbs into the chicken gently to help them stick. I like to do a double-coat for extra crunch: dip it back into the egg wash, then back into the panko. It takes a little longer, but the crust is worth it. Place the breaded nuggets on a clean plate or tray. Repeat with the rest of the chicken.
Pro tip: Keep your hands clean between steps. If your fingers get too coated in egg, wipe them on a paper towel so you don’t make a mess.
Step 4: Preheat and Prep the Pan (2 minutes)
Preheat your oven to 425°F (220°C). If you’re using a wire rack, place it on the baking sheet and spray it lightly with oil. If you’re not using a rack, line the baking sheet with parchment paper and spray that with oil.
Arranging the nuggets on the pan is important. Leave a little space between each piece so they bake instead of steam. If they’re touching, they’ll get soggy. I usually fit about 15-20 nuggets per pan, depending on size.
Step 5: Bake Until Golden (15-18 minutes)
Lightly spray the tops of the nuggets with oil. This helps them brown and get crispy. Put the pan in the oven and bake for 15-18 minutes. Halfway through, flip the nuggets over and spray the other side with oil. This ensures even browning.
You’ll know they’re done when they’re golden brown and crispy, and the internal temperature reaches 165°F (74°C). If you don’t have a thermometer, cut one open to check. The juices should run clear, and the meat should be white, not pink.
Step 6: Cool and Serve (5 minutes)
Remove the nuggets from the oven and let them cool for 2-3 minutes. This helps the coating set so it doesn’t fall off when you eat them. Serve immediately with your favorite dipping sauces.
Total Time: About 30 minutes (5 minutes prep, 25 minutes cook time).
Expert Tips & Tricks
Here’s everything I’ve learned from making these dozens of times. These tips will save you from my mistakes and guarantee success.
Don’t Skip the Buttermilk
I know you can skip it, but the buttermilk tenderizes the chicken and helps the breading stick. If you skip it, the nuggets might be tough and the coating might slide off. If you’re out of buttermilk, use the milk + vinegar trick. It’s not the same, but it’s close.
Use Panko, Not Regular Breadcrumbs
I’ve tried regular breadcrumbs, and they just don’t get the same crunch. They become dense and doughy. Panko is airy and creates those little crispy shards that make these nuggets addictive. It’s worth buying a bag if you don’t have one.
Double the Coat for Extra Crunch
If you want restaurant-quality crunch, do the double-dip method: buttermilk, egg, panko, egg, panko. It takes a minute longer, but the crust is thick and crispy. My kids love this version.
Don’t Overcrowd the Pan
If the nuggets are touching, they steam instead of bake. Leave space between them. If you’re making a large batch, use two pans and bake one at a time, or rotate the pans halfway through.
Spray, Don’t Pour
Spraying the nuggets with oil gives an even coat without making them greasy. Pouring oil can make them soggy. Use a spray bottle or cooking spray for best results.
Cool Before Serving
Letting the nuggets cool for a few minutes helps the coating set. If you serve them immediately, the crust might be soft. A 2-minute rest makes a big difference.
Variations & Substitutions
Once you’ve nailed the basic version, here’s how you can mix it up. I’ve tried all of these, and they’re all winners.
Spicy Nuggets
Add 1 teaspoon of cayenne pepper and 1 teaspoon of chili powder to the breading mix. If you like it hot, add a dash of hot sauce to the buttermilk. These are great for kids who like a kick.
Herb-Infused Nuggets
Add 1 teaspoon of dried thyme, 1 teaspoon of dried oregano, and 1 teaspoon of dried parsley to the breading. It gives a more savory, herbaceous flavor. Great with ranch dipping sauce.
Cheesy Nuggets
Add ¼ cup of shredded cheddar cheese to the breading mix. The cheese melts slightly and adds a gooey richness. My daughter loves this version.
Gluten-Free Option
Use gluten-free panko breadcrumbs. They’re widely available now and work just as well. Just make sure your other ingredients (like Parmesan) are certified gluten-free if you’re strict.
Dairy-Free Option
Replace the buttermilk with oat milk mixed with lemon juice. Replace the Parmesan with nutritional yeast. The flavor will be different, but the texture will still be good.
Chicken Tender Version
Use chicken tenderloins instead of breasts. Skip the cutting step and just bread the whole tenderloin. Cook for 12-15 minutes. Great for younger kids.
Veggie Nuggets
You can use this same breading method for cauliflower florets or zucchini sticks. Just adjust the cooking time (cauliflower takes 10-12 minutes, zucchini takes 8-10 minutes). They’re a great side dish.
Serving & Storage
How to Serve
I usually serve these with a side of marinara sauce for dipping, but they’re great with ranch, honey mustard, or BBQ sauce. They’re also amazing in sandwiches or salads. I’ve even put them in tacos for a fun twist.
Sides to Pair
– Mac and cheese (classic combo)
– Roasted vegetables (broccoli, carrots, green beans)
– Coleslaw (adds crunch and freshness)
– Sweet potato fries (healthy-ish alternative to regular fries)
– Fruit salad (to balance the meal)
Storage Instructions
Store leftover nuggets in an airtight container in the fridge for up to 4 days. They reheat well in the oven or air fryer. Avoid the microwave, as it makes the coating soggy.
Reheating
Preheat your oven to 375°F (190°C). Place the nuggets on a baking sheet and bake for 5-7 minutes, or until heated through and crispy. If you have an air fryer, cook at 350°F for 3-4 minutes. They’ll be just as crispy as when you first made them.
Freezing
Yes, you can freeze these! Bread the nuggets and place them on a baking sheet. Freeze for 1 hour until solid, then transfer to a freezer bag. They’ll keep for up to 3 months. Bake from frozen, adding 5 minutes to the cook time. This is perfect for meal prep.
Meal Prep Strategy
I bake a large batch on Sunday, freeze half, and keep half in the fridge. During the week, I reheat a handful for lunch or dinner. It’s fast, easy, and healthy.
Nutrition Information
I’m not a nutritionist, but here’s the breakdown if you’re tracking. This is per serving (based on 4 servings, 15 nuggets each).
- Calories: 350
- Protein: 30g
- Carbs: 20g
- Fiber: 1g
- Sugar: 2g
- Fat: 15g
- Saturated Fat: 3g
- Cholesterol: 120mg
- Sodium: 450mg
What’s good: High protein, moderate carbs. You can reduce the sodium by using low-sodium broth or less salt. It’s a much healthier alternative to fried nuggets.
What to know: Higher in calories than steamed chicken, but still reasonable. The breading adds carbs, but it’s mostly from whole grains (if you use whole wheat panko). It’s a balanced meal when paired with veggies.
Final Thoughts
So that’s my go-to crispy baked chicken nuggets! I’ve probably talked your ear off at this point, but when you make a recipe this often, you have a lot to say about it. These nuggets have saved our family dinners more times than I can count. They’re my answer to “what’s for lunch?” when I’m tired, busy, and still want my kids to eat something that doesn’t come in a box.
Make it yours! Try different spices, swap in your favorite dipping sauces, or add veggies to the breading. The best recipes are the ones you adapt to your family’s tastes. If you make this, drop a comment and let me know what you think! I love hearing how recipes turn out in your kitchen. And if something doesn’t work, tell me that too—I’m here to help troubleshoot.
Happy cooking! And I hope your kitchen smells half as good as mine does right now.
Frequently Asked Questions
Can I use chicken thighs instead of breasts?
Yes, you can use boneless, skinless chicken thighs. They’re juicier and more flavorful, but they cook a little faster, so check them at 12 minutes. Just make sure to cut them into uniform pieces.
Why did my nuggets come out soggy?
Usually, this means they were overcrowded on the pan, or you didn’t spray them with oil. Make sure to leave space between them and spray the tops well. Also, let them cool for a few minutes before serving so the crust sets.
Can I make these in an air fryer?
Absolutely! Cook at 375°F for 8-10 minutes, flipping halfway through. They’ll be even crispier than baked. Just don’t overcrowd the basket.
How do I store leftovers?
Store in an airtight container in the fridge for up to 4 days. Reheat in the oven or air fryer to keep them crispy. Avoid the microwave.
Can I freeze these?
Yes! Bread the nuggets, freeze them on a baking sheet, then transfer to a freezer bag. They’ll keep for up to 3 months. Bake from frozen, adding 5 minutes to the cook time.
What dipping sauces go best with these?
Marinara, ranch, honey mustard, and BBQ are all classics. I also like them with spicy mayo or sweet chili sauce. Get creative!
Can I use almond flour instead of panko?
You can, but it won’t be as crispy. Almond flour is denser. If you’re doing keto, it’s a good option, but the texture will be different. You might want to add a little baking powder to help it crisp up.
Pin This Recipe!


Crispy Baked Chicken Nuggets: Easy School Lunch Recipe
- Total Time: 33 minutes
- Yield: 4 servings 1x
Description
A quick, kid-approved recipe for crispy baked chicken nuggets that are ready in under 30 minutes. Using a double-coating method with panko and buttermilk, these nuggets offer a healthy-ish alternative to fried versions without sacrificing crunch or flavor.
Ingredients
- 2 pounds boneless, skinless chicken breasts
- 1 cup buttermilk
- 2 large eggs
- 2 cups panko breadcrumbs
- ½ cup freshly grated Parmesan cheese
- 1 teaspoon garlic powder
- 1 teaspoon onion powder
- ½ teaspoon smoked paprika
- 1 teaspoon salt
- 1 teaspoon black pepper
- 2 tablespoons avocado oil or olive oil
- Cooking spray (optional)
Instructions
- Preheat oven to 425°F (220°C).
- Pat chicken breasts dry with paper towels and slice into 1-inch uniform cubes.
- Set up three shallow bowls: one with buttermilk, one with whisked eggs (seasoned with salt and pepper), and one with panko, Parmesan, garlic powder, onion powder, smoked paprika, salt, and pepper.
- Dip chicken pieces into buttermilk, then egg wash, then panko mixture. For extra crunch, repeat the egg and panko steps (double-coat).
- Place breaded nuggets on a wire rack set over a baking sheet or a parchment-lined sheet, ensuring they are not touching.
- Lightly spray the tops of the nuggets with oil.
- Bake for 15-18 minutes, flipping halfway through and spraying the other side with oil, until golden brown and internal temperature reaches 165°F.
- Let cool for 2-3 minutes before serving to allow the coating to set.
Notes
For best results, do not overcrowd the pan to ensure even baking and crispiness. Letting the nuggets cool for a few minutes helps the crust set. You can freeze unbaked nuggets on a tray before bagging them for later use. Reheat in an oven or air fryer to maintain crispiness; avoid the microwave.
- Prep Time: 15 minutes
- Cook Time: 18 minutes
- Category: Main Course
- Cuisine: American
Nutrition
- Serving Size: Approximately 15 nug
- Calories: 350
- Sugar: 2
- Sodium: 450
- Fat: 15
- Saturated Fat: 3
- Carbohydrates: 20
- Fiber: 1
- Protein: 30
Keywords: chicken nuggets, baked chicken, school lunch, kid-friendly recipes, healthy dinner, panko chicken, meal prep, quick recipes


