I have a confession to make. For years, I was terrified of chocolate lava cakes. They looked like the culinary equivalent of a bomb defusal—high stakes, tiny margin for error, and a very public explosion if you got it wrong. I’d stare at recipes that demanded precise oven temperatures, intricate ramekin greasing techniques, and a stopwatch held in your teeth. The result? Usually, a baked chocolate cake with a dry center and a whole lot of disappointment.
Then I stopped trying to be fancy. I stopped worrying about perfect presentation and started focusing on the one thing that actually matters: the ratio of chocolate to butter to eggs. I stripped away the complicated techniques and focused on the simplicity of the ingredients. The result? A chocolate lava cake with molten fudge center you’ll make on repeat. It’s so forgiving that even if you’re not a confident baker, you can pull this off on a random Tuesday night.
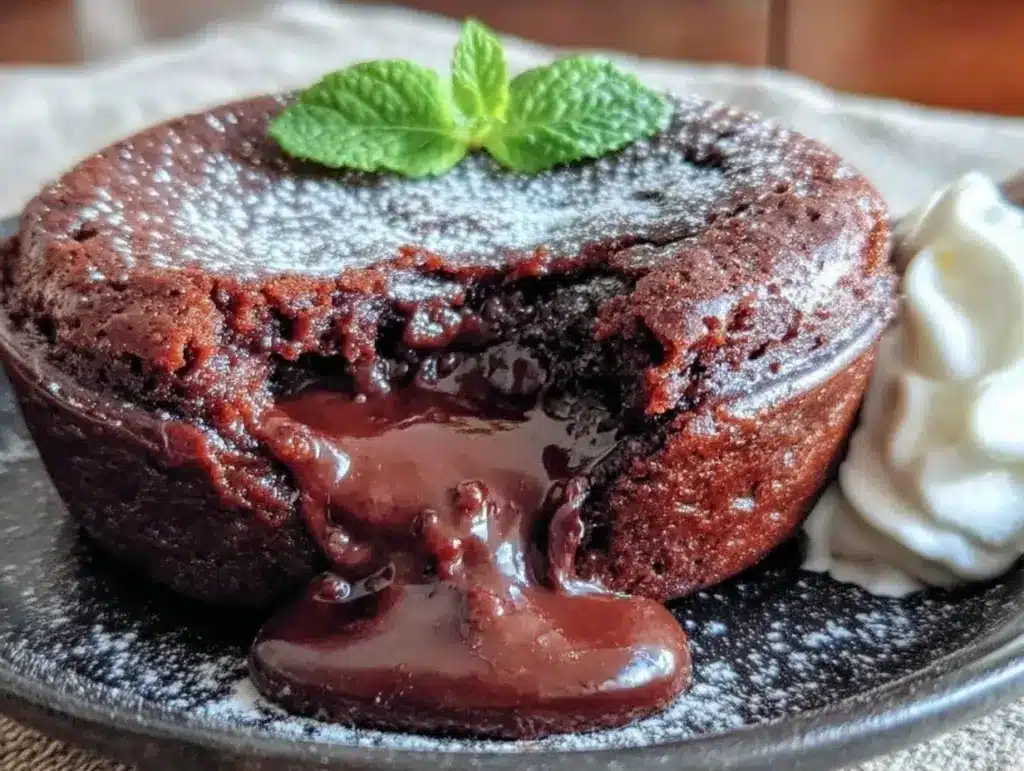
This isn’t about restaurant-style perfection. It’s about that moment when you cut into a warm, dense cake and thick, glossy chocolate spills out like lava. It’s rich, it’s decadent, and it’s surprisingly easy. I’ve made this for dinner parties where I wanted to impress, and I’ve made it for lazy Sundays when I just needed a hug in dessert form. The secret isn’t in the technique—it’s in knowing that you really can’t mess this up if you follow the basics.
Think of this as your “if you can only make one dessert, make this” recipe. It uses ingredients you likely have in your pantry right now. It takes less time than ordering takeout. And the cleanup? One bowl and a whisk. Seriously. Let’s get into why this specific method works so well for beginners and why it has become my go-to comfort dessert.
Why You’ll Love This Chocolate Lava Cake Recipe
There are a dozen reasons I keep coming back to this chocolate lava cake with molten fudge center, but let’s be real: it’s the balance of ease and luxury that keeps me hooked. You don’t need to be a pastry chef to make this. You just need to be willing to wait five minutes for the oven to do its work.
Minimal Ingredients, Maximum Flavor — You need chocolate, butter, eggs, sugar, and a little flour. That’s it. No exotic spices, no hard-to-find gadgets, no fancy vanilla bean (though I won’t judge if you have one). I use whatever chocolate chips or bars I have on hand. The flavor is deep and rich because you’re not diluting it with unnecessary fillers. It’s pure chocolate satisfaction.
Forgiving Timing — I know what you’re thinking. “But lava cakes are all about timing!” Here’s the truth: this recipe is incredibly forgiving. If you pull them out one minute early, the center is gooey (good). If you leave them in one minute late, the center is just slightly less runny (still good). It’s not a delicate soufflé that will collapse if you look at it wrong. It’s a dense, fudgy cake that stays moist. You really can’t mess this up.
Speed — From start to finish, this takes about 20 minutes. That’s 10 minutes of prep and 10 minutes in the oven. I’ve made this after a long day at work when I was too tired to cook dinner, let alone bake. It’s faster than scrolling through delivery apps. And unlike takeout, you get to eat it warm, straight from the ramekin, with zero guilt about the packaging.
Crowd-Pleaser Status — I’ve served this to picky eaters, chocolate snobs, and kids who usually prefer mac and cheese. Everyone loves it. The visual of cutting into it and seeing that molten center is always a hit. It feels fancy, but it’s humble. It’s the kind of dessert that makes people ask, “Did you buy this?” (The answer is always no, and that’s the best part.)
This is my go-to when I want to treat myself without the stress. It’s reliable, it’s delicious, and it’s proof that you don’t need complicated skills to make something special. Once you make this chocolate lava cake with molten fudge center, you’ll understand why I’m obsessed.
Ingredients You’ll Need
Here’s the best part: you probably have most of these ingredients already. This chocolate lava cake with molten fudge center doesn’t require a trip to the specialty store. It relies on simple, pantry-friendly staples that come together to create something luxurious. I’m particular about the chocolate, though—more on that in a second.
Dark Chocolate (6 ounces / 170g) — This is the star. I use semi-sweet chocolate chips or chopped chocolate bars. If you like it really rich, go for 70% cacao. If you prefer it sweeter, milk chocolate works, but it will be less intense. Avoid chocolate with added nuts or caramel in the chips—they don’t melt as evenly. I keep Ghirardelli or Ghirardelli-style chips on hand because they melt smoothly.
Unsalted Butter (½ cup / 113g) — Real butter is non-negotiable here. It provides the fat that makes the center gooey and the crust crisp. Don’t use margarine or butter substitutes. Cut it into cubes before melting—it melts faster and more evenly. I always have salted butter on hand, but unsalted gives you better control over the final taste.
Large Eggs (2 whole + 2 yolks) — Yes, just four components. The whole eggs provide structure, while the extra yolks add richness and that fudgy texture. Room temperature eggs are best because they incorporate into the sugar more easily, but if you’re in a rush, just warm them in a bowl of hot water for a minute. Don’t skip the extra yolks—they’re the secret to the molten center.
Sugar (½ cup / 100g) — Granulated white sugar is standard. It dissolves into the eggs and creates that thin, crisp top layer. You can use brown sugar for a deeper, caramel-like flavor, but it will make the cake denser. I stick to white sugar for the classic look.
All-Purpose Flour (2 tablespoons / 15g) — Just a little bit. This isn’t a cake that needs a lot of flour. It provides just enough structure to hold the shape while keeping the center liquid. Don’t add more, or you’ll get a baked cake instead of a lava cake. Sifting is optional, but I do it to avoid lumps.
Salt (¼ teaspoon) — A pinch of salt enhances the chocolate flavor. Don’t skip it. It makes the chocolate taste more like chocolate.
Optional: Cocoa Powder (1 tablespoon) — If you want an extra chocolate punch, add a tablespoon of unsweetened cocoa powder. It deepens the color and flavor. I use this when I’m having a really serious chocolate craving.
For Greasing the Ramekins: Butter and cocoa powder. I know some people use flour, but cocoa powder doesn’t show up on the dark chocolate, so your ramekins look cleaner. It’s a small trick that makes a big difference in presentation.
Equipment Needed
You don’t need fancy equipment for this. Here’s what I actually use.
4 Ramekins (6-ounce size) — These are the standard size for individual lava cakes. If you don’t have ramekins, you can use a muffin tin lined with paper cups, but the results are slightly different. The ramekins help the cake cook evenly and create that nice edge. I use ceramic ones because they retain heat well, but glass works too.
Microwave-Safe Bowl — For melting the chocolate and butter. I use a large glass bowl because it’s easy to clean and doesn’t scratch. If you don’t have a microwave-safe bowl, use a double boiler on the stove. Low and slow is the key here.
Mixing Bowl — A medium-sized bowl for whisking the eggs and sugar. Any bowl works, but make sure it’s clean and dry.
Whisk — For beating the eggs and sugar until pale. A whisk is better than a spoon because it incorporates air, which helps the cake rise slightly.
Spatula — For folding in the flour. A silicone spatula is best because it scrapes the sides of the bowl clean.
Measuring Cups and Spoons — Standard stuff. Accuracy matters here, especially with the flour. Don’t eyeball it.
Parchment Paper — Optional, but helpful if you’re worried about sticking. I usually just butter and cocoa the ramekins, but if you’re nervous, line the bottoms.
Small Brush — For buttering the ramekins. A pastry brush makes it easy to get into the corners. A paper towel works in a pinch.
How to Make It: Step-by-Step
Alright, let’s make this! I’m walking you through exactly how I do it, including the little tricks I’ve picked up over the years. This chocolate lava cake with molten fudge center is easier than it looks.
Step 1: Prep Your Ramekins (2 minutes)
Butter the inside of each ramekin thoroughly. Use your fingers or a brush to coat every inch, including the rim. Then, dust with cocoa powder. Tap out the excess. This step is crucial for getting the cake out easily. If you skip the cocoa powder, the butter will show up as white streaks on the dark cake. I do this while the oven preheats.
Step 2: Melt the Chocolate and Butter (2 minutes)
Combine the chopped chocolate and butter in a microwave-safe bowl. Microwave in 30-second intervals, stirring between each, until smooth. If you’re using a stove, melt them together over low heat in a double boiler. Don’t let the chocolate get too hot—it can seize. You want it smooth and glossy, not burnt. Set aside to cool slightly.
Step 3: Whisk Eggs and Sugar (2 minutes)
In a medium bowl, whisk the whole eggs, egg yolks, and sugar together. Whisk vigorously for about 2 minutes until the mixture is pale and slightly thickened. This incorporates air and helps the cake rise. It’s a quick step, but it makes a difference in the texture. Don’t rush this part.
Step 4: Combine Chocolate and Egg Mixtures (1 minute)
Pour the melted chocolate and butter into the egg mixture. Stir gently with a spatula until combined. The mixture will look thick and glossy. It’s okay if it looks a bit lumpy at this stage.
Step 5: Fold in Flour and Salt (1 minute)
Add the flour and salt. Gently fold them in until just combined. Do not overmix. You want the flour to disappear, but if you stir too much, you’ll develop gluten and get a tougher cake. The batter will be thick and pourable.
Step 6: Fill Ramekins and Bake (10-12 minutes)
Divide the batter evenly among the 4 ramekins. They should be about ¾ full. Place them on a baking sheet (for easy transfer) and bake in a preheated 425°F (220°C) oven. Bake for 12 minutes. The edges should be set, but the center should still be soft and jiggly when you gently shake the ramekin. This is the critical moment. If you’re unsure, err on the side of underbaking.
Step 7: Cool and Serve (2 minutes)
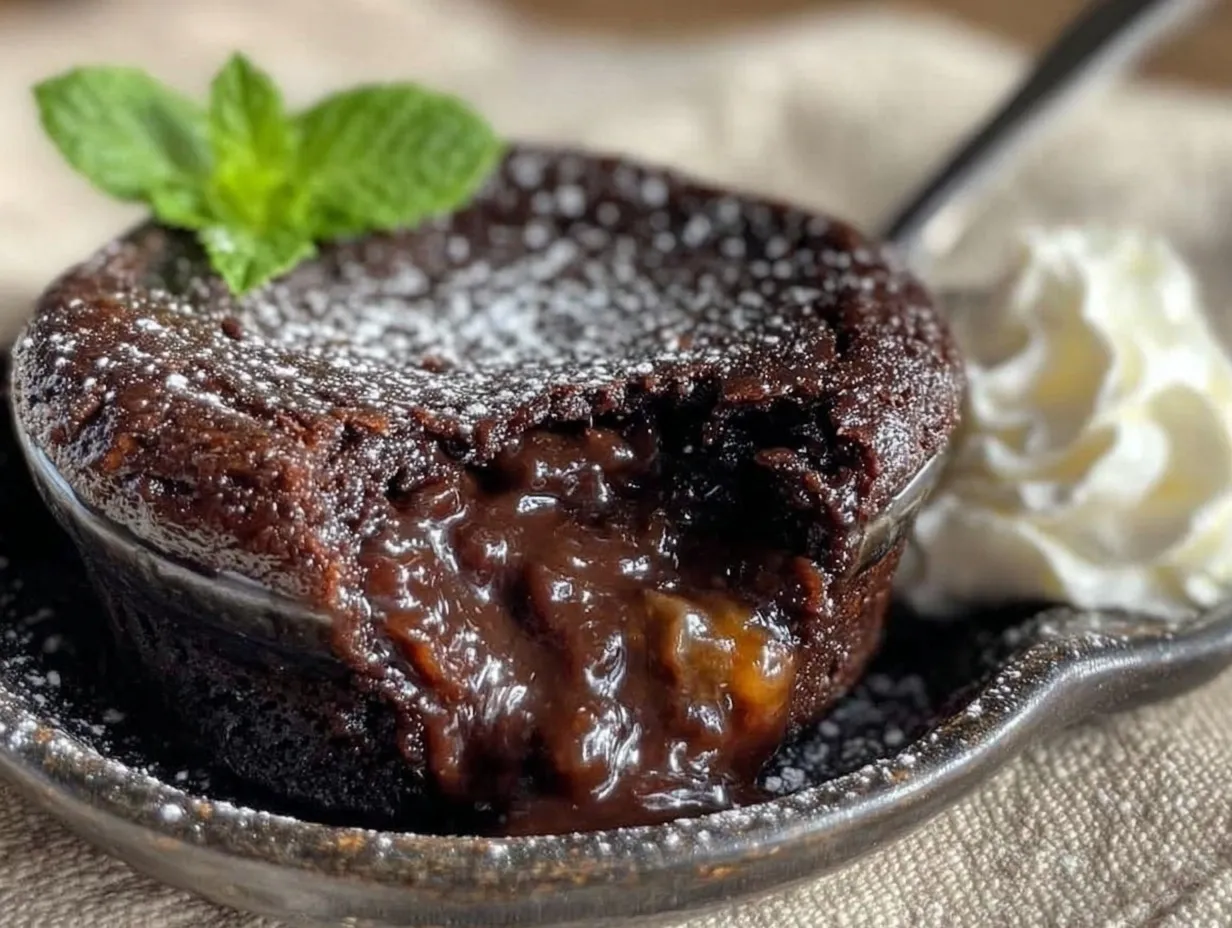
Let the ramekins cool for 1 minute. This allows the cake to set slightly so it doesn’t fall apart when you invert it. Run a knife around the edge to loosen it. Place a plate upside down over the ramekin, flip it over, and gently lift the ramekin off. The cake should slide out cleanly. Dust with powdered sugar and serve immediately. This is the moment of truth.
Expert Tips & Tricks
Here’s everything I’ve learned from making this dozens of times. These tips will save you from my mistakes.
Don’t Overbake
This is the #1 mistake. The cake continues to cook from residual heat even after you take it out of the oven. If you bake it until the center is fully set, it will be a solid cake when it cools. You want it jiggly in the center. Trust me. If you’re nervous, take it out at 11 minutes. It’s better to be slightly under than over.
Room Temperature Ingredients
While not strictly necessary, room temperature eggs and chocolate incorporate more evenly. If your eggs are cold, they can cause the melted chocolate to seize up. Just let them sit on the counter for 15 minutes while you prep.
Use Good Chocolate
Since chocolate is the main ingredient, use the best you can afford. Cheap chocolate chips often have stabilizers that prevent smooth melting. I use Ghirardelli or Lindt squares. If you’re on a budget, semi-sweet chips work, but avoid the ones with added nuts or caramel.
Grease Well
I cannot stress this enough. Butter every nook and cranny of the ramekin. If the cake sticks, it won’t release cleanly. The cocoa powder dusting helps, but the butter is the key. I’ve lost a few cakes to poor greasing. Don’t let that be you.
Make Ahead Option
You can fill the ramekins up to 24 hours in advance. Cover them with plastic wrap and refrigerate. When ready to bake, let them sit at room temperature for 10 minutes, then bake as directed. You may need to add 1-2 minutes to the baking time if they’re cold from the fridge.
Variations & Substitutions
Once you’ve nailed the basic version, here’s how you can mix it up. I’ve tried all of these.
White Chocolate Lava Cake
Swap the dark chocolate for white chocolate chips. The result is sweeter and creamier. I add a teaspoon of vanilla extract for extra flavor. It’s less intense but still delicious.
Coffee-Infused
Add 1 teaspoon of instant espresso powder to the melted chocolate. It deepens the chocolate flavor without making it taste like coffee. It’s a subtle boost that makes the chocolate taste richer.
Chai Spiced
Add ½ teaspoon of chai spice mix to the flour. It adds warmth and complexity. Great for fall.
Gluten-Free
Use gluten-free flour blend instead of all-purpose flour. The result is identical. I’ve used Bob’s Red Mill 1-to-1 blend with no issues.
Vegan
This is harder because the eggs provide structure. You can try flax eggs (1 tablespoon ground flaxseed + 3 tablespoons water per egg), but the texture will be different. I recommend using a vegan chocolate melting wafers and coconut cream. It’s not the same, but it’s still good.
Serving Suggestions
I serve this with a dollop of whipped cream or a scoop of creamy no-churn vanilla bean ice cream. The contrast between hot cake and cold ice cream is magical. You can also add fresh berries for a tart contrast.
Serving & Storage
These chocolate lava cakes are best served immediately. They don’t hold well once they’ve cooled, as the center will continue to set and lose its molten quality.
Storage
If you have leftovers (unlikely, but possible), store them in the fridge for up to 2 days. Reheat in the microwave for 30-45 seconds to restore the gooey center. They won’t be as good as fresh, but they’ll still be tasty.
Freezing
You can freeze the unbaked ramekins. Fill them, cover tightly with plastic wrap and foil, and freeze for up to 3 months. When ready to bake, thaw in the fridge overnight, then bake as directed, adding 2-3 minutes to the baking time.
Make Ahead for Parties
Prepare the batter and fill the ramekins up to 24 hours ahead. Keep them covered in the fridge. When guests arrive, bake them in batches. This lets you enjoy the party instead of being stuck in the kitchen.
Nutrition Information
I’m not a nutritionist, but here’s the breakdown if you’re tracking. Keep in mind that this is a rich, indulgent dessert, so portions matter.
Per Serving (1 cake):
– Calories: 380
– Protein: 6g
– Carbs: 38g
– Fiber: 2g
– Sugar: 28g
– Fat: 24g
– Saturated Fat: 14g
– Cholesterol: 145mg
– Sodium: 120mg
What’s Good:
– High in antioxidants from dark chocolate
– Provides some protein from eggs
– Gluten-free option available
What to Know:
– High in sugar and saturated fat
– Calorie-dense due to chocolate and butter
– Best enjoyed as an occasional treat
My Take:
Look, this is comfort food with chocolate and butter. It’s not a diet recipe. But it’s way better than store-bought desserts, and I know exactly what’s in it. When I want to make it lighter, I use 70% dark chocolate and reduce the sugar slightly. But usually? I just enjoy one and savor it.
Final Thoughts
So that’s my chocolate lava cake with molten fudge center! I’ve probably talked your ear off at this point, but when you make a recipe this often, you have a lot to say about it. This has saved dessert nights more times than I can count. It’s my answer to “what’s for dessert” when I want something special but don’t want to stress.
Make it yours! Try different chocolates, add a pinch of spice, or serve it with your favorite ice cream. The best recipes are the ones you adapt to your tastes. If you make this, drop a comment and let me know what you think! I love hearing how recipes turn out in your kitchen. And if something doesn’t work, tell me that too—I’m here to help troubleshoot.
Happy cooking! And I hope your kitchen smells half as good as mine does right now.
Frequently Asked Questions
Q: Can I make this without ramekins?
A: Yes! You can use a standard muffin tin lined with paper cups. The baking time might be slightly less (check at 10 minutes), and the texture will be slightly different, but it still works. Just be careful when removing them—they’re more delicate.
Q: Why did my lava cake come out solid?
A: You likely baked it too long. Remember, the center should be jiggly when you take it out. It continues to cook from residual heat. Next time, take it out at 11 minutes. Also, ensure your oven is preheated correctly.
Q: Can I use milk chocolate instead of dark chocolate?
A: Yes, but it will be sweeter and less intense. I recommend using semi-sweet or bittersweet chocolate for the best balance. If you use milk chocolate, you might want to reduce the sugar slightly.
Q: How do I reheat leftovers?
A: Microwave for 30-45 seconds. This restores the gooey center. If you’re using an oven, heat at 350°F for 5-7 minutes. Don’t microwave for too long, or the cake will become rubbery.
Q: Can I double this recipe?
A: Absolutely! Just use more ramekins or a larger baking dish. If using a large dish, increase the baking time by 2-3 minutes. Check the center for jiggliness.
Q: What if I don’t have cocoa powder for dusting?
A: You can use flour or skip it entirely. Just make sure you butter the ramekins very well. The cocoa powder is mostly for aesthetics, so it won’t affect the taste.
Pin This Recipe!
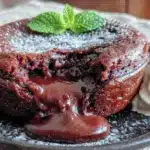
Chocolate Lava Cake: Perfect Molten Fudge Center You Cant Mess Up
- Total Time: 22 minutes
- Yield: 4 servings 1x
Description
A forgiving and easy chocolate lava cake recipe with a molten fudge center that requires minimal ingredients and equipment, perfect for beginners.
Ingredients
- 6 ounces (170g) dark chocolate (semi-sweet chips or chopped bars)
- ½ cup (113g) unsalted butter, cubed
- 2 large eggs
- 2 large egg yolks
- ½ cup (100g) granulated white sugar
- 2 tablespoons (15g) all-purpose flour
- ¼ teaspoon salt
- 1 tablespoon unsweetened cocoa powder (optional, for extra chocolate flavor)
- Butter and cocoa powder (for greasing ramekins)
Instructions
- Preheat oven to 425°F (220°C). Butter the inside of 4 ramekins thoroughly, including the rim, then dust with cocoa powder, tapping out excess.
- Combine chocolate and butter in a microwave-safe bowl. Microwave in 30-second intervals, stirring between each, until smooth. Alternatively, melt over low heat in a double boiler. Set aside to cool slightly.
- In a medium bowl, whisk whole eggs, egg yolks, and sugar vigorously for about 2 minutes until pale and slightly thickened.
- Pour the melted chocolate and butter mixture into the egg mixture and stir gently with a spatula until combined.
- Add flour and salt, folding gently until just combined. Do not overmix.
- Divide batter evenly among the prepared ramekins (filling them about ¾ full). Place ramekins on a baking sheet.
- Bake for 12 minutes. The edges should be set, but the center should still be soft and jiggly.
- Let ramekins cool for 1 minute. Run a knife around the edge to loosen, place a plate upside down over the ramekin, flip it over, and gently lift off the ramekin.
- Dust with powdered sugar and serve immediately.
Notes
Do not overbake; the center should remain jiggly as it continues to cook from residual heat. Room temperature ingredients incorporate better. Can be made ahead by filling ramekins up to 24 hours in advance and refrigerating. If baking from cold, add 1-2 minutes to baking time.
- Prep Time: 10 minutes
- Cook Time: 12 minutes
- Category: Dessert
- Cuisine: French
Nutrition
- Serving Size: 1 cake
- Calories: 380
- Sugar: 28
- Sodium: 120
- Fat: 24
- Saturated Fat: 14
- Carbohydrates: 38
- Fiber: 2
- Protein: 6
Keywords: chocolate lava cake, molten chocolate cake, dessert, baking, easy dessert, fudge center, chocolate dessert