Let me tell you a little secret: for years, I was a coward when it came to ice cream. I’m talking about the old-school, custard-based, double-boiler, constant-stirring kind of ice cream. You know the type. The one where you’re worried about scrambling your eggs, or where you have to babysit a churning machine that sounds like a lawnmower in the garage.
I loved ice cream, but I hated the process. It felt like too much work for a summer treat. I’d buy the tubs from the grocery store, but they always had that weird icy texture or tasted overly sweet, like they were trying too hard to be dessert.
Then, about three summers ago, I was hosting a small dinner party. I had zero time to bake a pie, and the store was out of my favorite flavor. In a panic, I remembered a friend had mentioned a “no-churn” method. I thought it was a joke. No churning? No custard? How could that possibly be creamy?
I whipped up a batch using just heavy cream, sweetened condensed milk, and a whole vanilla bean. I threw it in the freezer and went to bed. The next morning, I scooped it out, half-expecting a block of frozen cream.
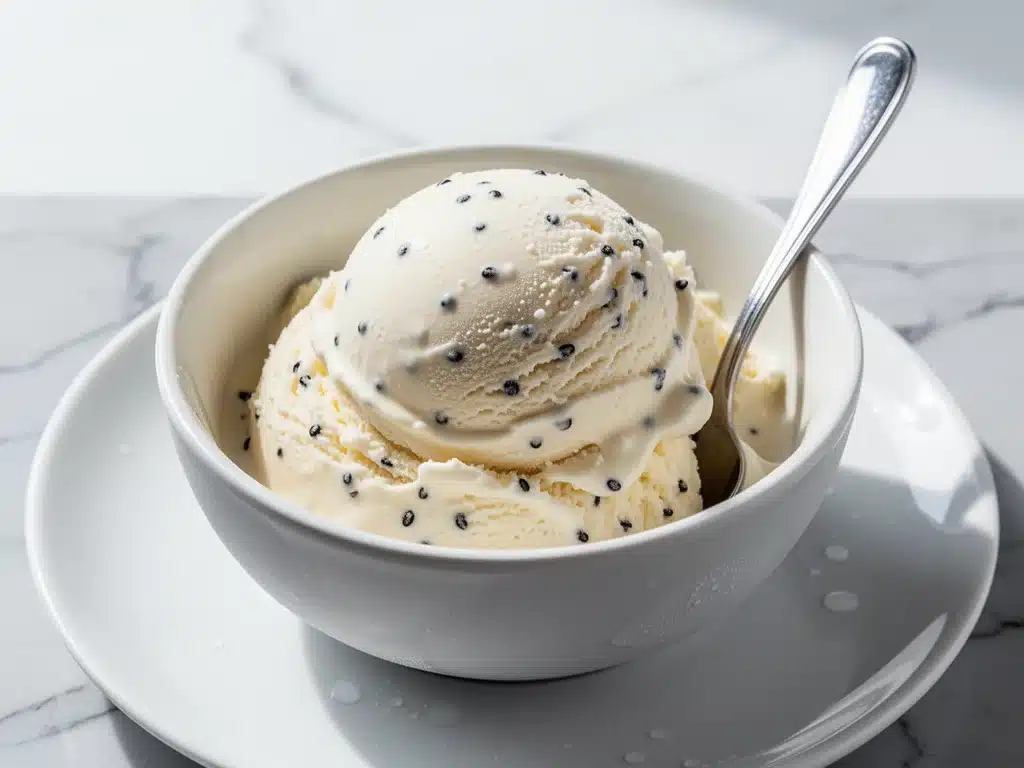
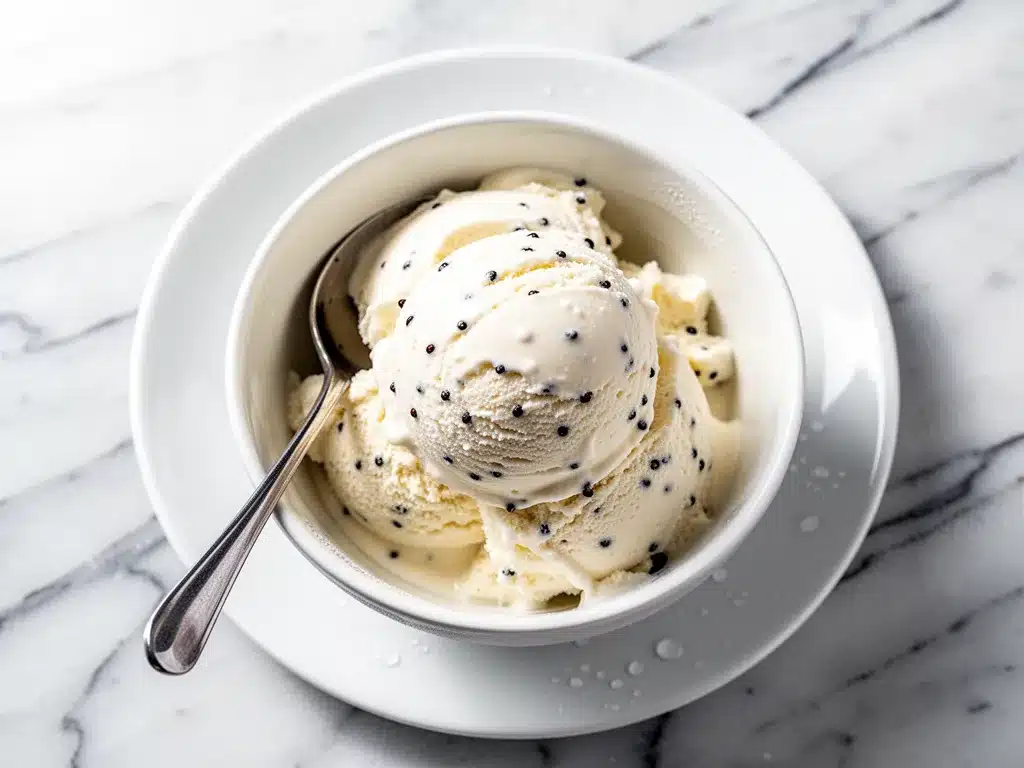
It wasn’t a block. It was silky, rich, and tasted like actual vanilla. Like, the real deal. Not that artificial vanilla extract taste that sits in your cabinet for five years. This was floral, speckled with tiny black seeds, and incredibly smooth. My guests devoured it. And honestly? So did I. I ate a bowl right out of the container while my guests were still talking about the main course.
That was the day I fell in love with this creamy no-churn vanilla bean ice cream. It’s become my go-to for any occasion where I want something special but don’t want to spend my entire evening in the kitchen. It’s simpler than making soft baked banana oatmeal breakfast cookies (which are also easy, but this is easier). It requires no fancy equipment, no thermometer, and no patience for tempering eggs.
If you’ve been intimidated by homemade ice cream, this is your sign to stop buying store-bought and start making this. It’s the ultimate comfort dessert, and it’s going to change how you think about simple ingredients.
Why This No-Churn Vanilla Bean Ice Cream Is a Game-Changer
There are a million ice cream recipes out there. Why this one? Why the vanilla bean version? Here’s the real talk: this is the closest you’ll get to high-end gelato without the equipment or the culinary degree.
Here’s why I keep coming back to this recipe:
It’s Actually Creamy — I know, I know. “No-churn” usually implies “icy” or “grainy.” Not this. The secret is the ratio of heavy cream to condensed milk. When you whip the cream, you’re incorporating tiny air bubbles. Those bubbles get trapped in the fat of the cream. When you fold in the condensed milk, you’re adding sugar (which lowers the freezing point) and milk solids. The result? A texture that melts on your tongue, not on your fingers.
Three Ingredients (Seriously) — You don’t need stabilizers, corn syrup, or weird additives. Just heavy cream, sweetened condensed milk, and vanilla. That’s it. If you can open a can and whip a bowl, you can make this. I’ve made this while watching TV, while on the phone, and even while helping my kids with homework. It’s that foolproof.
The Vanilla Bean Difference — I know vanilla extract is easier. I know it’s what you have in your cabinet. But if you want this to be truly special, use a real vanilla bean. The seeds add visual appeal (those little black specks scream “homemade” and “expensive”) and a depth of flavor that extract just can’t match. Extract tastes like one note; a bean tastes like a symphony. And don’t worry, I’ll show you how to use the pod too, so you waste nothing.
It’s Versatile — Once you master the base, you can turn it into anything. Stir in chocolate chips. Swirl in caramel. Add crushed cookies. But honestly? This pure vanilla bean version is so good, you might not want to change a thing. It’s the blank canvas of desserts.
It Feels Fancy (But Isn’t) — When you serve this at a dinner party, people will assume you bought it from a fancy artisanal shop. They’ll ask, “Where did you get this?” And you’ll smile and say, “I made it in 15 minutes.” It’s a great party trick. Better than making no-bake peanut butter granola bites for snacks, because this feels like a celebration.
Ingredients You’ll Need for the Perfect Base
This recipe is famous for its simplicity, but that simplicity relies on using good quality ingredients. Since there are only three components, each one carries a lot of weight. Here’s what you need and why it matters.
Heavy Cream (2 cups / 480ml)
This is the backbone of your ice cream. You need heavy cream with at least 35% fat content. Whipping cream (which is often lighter) won’t hold the air bubbles well enough, and your ice cream will be dense and icy. Don’t skimp here. Also, make sure your cream is very cold. If it’s warm, it won’t whip. I keep a dedicated carton of heavy cream in the back of the fridge for this.
Sweetened Condensed Milk (1 can / 14 oz / 397g)
This is not evaporated milk. Sweetened condensed milk is thick, syrupy, and very sweet. It provides the sugar and the milk solids that prevent ice crystals from forming. The sugar acts as an antifreeze, keeping the ice cream soft and scoopable even after it’s been in the freezer for days. Use a standard 14-ounce can. If you’re worried about sweetness, you can reduce it slightly, but I don’t recommend it. The balance is key.
Vanilla Bean (1 whole bean)
This is where the magic happens. You’ll split the bean lengthwise and scrape out the seeds. Those seeds go into your mixture. But don’t throw away the pod! I’ll show you how to infuse it into the cream later. If you can’t find fresh vanilla beans, you can use 2 tablespoons of high-quality vanilla extract, but you’ll lose those beautiful speckles and the complex floral notes. Fresh beans are worth the splurge, especially if you make this often.
Pinch of Salt
Even though condensed milk is sweet, a tiny pinch of salt enhances the vanilla flavor and balances the richness. Don’t skip it. It’s the secret ingredient in almost every good dessert.
Equipment You’ll Need
You don’t need a lot of fancy gear for this. In fact, if you have the basics, you’re good to go.
A Stand Mixer or Hand Mixer — This is the only real “tool” you need. You need to whip the heavy cream to stiff peaks. A stand mixer with a whisk attachment is ideal because it does the work for you. A hand mixer works too, but it takes a bit more arm strength. If you’re doing this by hand with a whisk, prepare for a workout. But hey, that’s cardio.
A Large Mixing Bowl — Make sure it’s big enough to hold the whipped cream and the condensed milk without spilling. Glass or stainless steel works best. Plastic bowls can sometimes retain fats that affect whipping, but for this recipe, it’s fine.
A Rubber Spatula — You’ll use this to fold the ingredients together. Folding is gentle. You don’t want to deflate the air you just whipped into the cream. A rubber spatula is flexible and gets into the corners.
A Knife and Cutting Board — To split the vanilla bean and scrape the seeds. A paring knife is perfect for this.
An Airtight Container — You can use a loaf pan lined with parchment paper, or a dedicated ice cream container. The key is that it needs to be airtight to prevent freezer burn and ice crystals from forming on the surface.
How to Make It: Step-by-Step
Alright, let’s get into the kitchen. This process is fast, but it requires a bit of attention. I’m going to walk you through it, including the little tricks that make the difference between good and great.
Step 1: Infuse the Cream with Vanilla (5 minutes)
Before you even think about whipping, you want to get that vanilla flavor deep into the cream. Pour your cold heavy cream into your mixing bowl. Take your vanilla bean and split it in half lengthwise with your knife. Use the back of the knife to scrape out the tiny black seeds. Add both the seeds and the scraped pod to the cream.
This step is optional if you’re in a huge rush, but it’s worth it. The fat in the cream will absorb the vanilla flavor from the pod as you whip. It creates a deeper, more aromatic base. If you don’t want to wait, you can just add the seeds and skip the pod, but I recommend the infusion.
Step 2: Whip the Cream to Stiff Peaks (3-5 minutes)
Using your mixer on medium-high speed, whip the cream. Start slowly to avoid splashing, then crank it up. You’re looking for stiff peaks. What does that mean? When you lift the whisk, the cream should stand up straight, like a sharp peak on a mountain. It shouldn’t droop or slump over.
Be careful not to over-whip. If you whip it too long, it will start to separate and turn into butter. Watch it closely in the last minute. It goes from soft peaks to stiff peaks very quickly. Once you see those stiff peaks, stop. Take about half of the whipped cream and set it aside in a separate bowl. Why? We’re going to use this to lighten the condensed milk first. This is a pro tip that ensures a smooth, lump-free mixture.
Step 3: Lighten the Condensed Milk (2 minutes)
Take the bowl of reserved whipped cream and add the entire can of sweetened condensed milk to it. Stir gently but thoroughly until they are completely combined. This mixture will be thick and smooth. By folding the condensed milk into a portion of the whipped cream first, you’re breaking up the density of the condensed milk, making it easier to incorporate into the rest of the cream without deflating it.
Step 4: Fold in the Rest of the Cream (3 minutes)
Now, take the large bowl of remaining whipped cream and pour your condensed milk mixture on top. This is where the folding technique comes in. Take your rubber spatula and cut down through the center of the cream. Sweep along the bottom and up the side. Rotate the bowl and repeat. You’re not stirring in circles. You’re folding. You want to keep as much air in the mixture as possible. Stop when you see no more white streaks of whipped cream. It should look uniform and fluffy. If you overmix here, your ice cream will be dense.
Step 5: Remove the Vanilla Pod (1 minute)
Now that everything is mixed, take your vanilla pod out of the mixture. It’s done its job. Discard it or save it for later (more on that in the tips section). You should be left with a beautiful, speckled mixture. The black vanilla seeds should be evenly distributed.
Step 6: Freeze and Set (6 hours minimum)
Pour the mixture into your airtight container. Smooth the top with your spatula. Cover tightly with a lid or plastic wrap (press the wrap directly onto the surface of the ice cream to prevent ice crystals). Place it in the freezer.
You need to freeze it for at least 6 hours, but overnight is best. The longer it freezes, the smoother it gets. If you try to eat it after 2 hours, it’ll be too soft. If you leave it for 24 hours, it’ll be rock hard. Aim for that 6-8 hour window for the perfect scoopable texture.
Step 7: Scoop and Serve
When you’re ready to eat, let the container sit on the counter for 5-10 minutes before scooping. This softens it just enough for easy scooping. Serve it in bowls, cones, or waffle cups. Garnish with fresh berries, a drizzle of honey, or chocolate shavings if you’re feeling fancy.
Expert Tips for the Creamiest Texture
I’ve made this recipe dozens of times, and I’ve learned a few things the hard way. Here’s how to avoid common pitfalls.
Cold is Key — Make sure your heavy cream, your bowl, and your whisk attachment are all cold. If your bowl is warm, the cream won’t whip. I sometimes put my bowl in the fridge for 15 minutes before starting. Cold cream whips faster and holds more air. More air equals lighter, creamier ice cream.
Don’t Over-Whip — I cannot stress this enough. Watch your cream like a hawk. Once it forms stiff peaks, stop. If you see it starting to look grainy or clumpy, you’ve gone too far. At that point, it’s turning into butter. If that happens, you can try to rescue it by adding a tiny bit of fresh liquid cream, but it’s risky.
Fold, Don’t Stir — When combining the cream and condensed milk, be gentle. Stirring aggressively pushes the air out. Folding keeps the air in. Air is what gives no-churn ice cream its light texture. Without it, you just have frozen sweet milk.
Use High-Quality Condensed Milk — Not all sweetened condensed milks are created equal. Some brands are thinner or sweeter than others. I’ve used Eagle Brand and it works great. If you’re making this from scratch (which is possible, but takes time), make sure it’s thick and syrupy.
Save the Vanilla Pod — Don’t toss that vanilla pod! Rinse it, dry it, and put it in your jar of sugar. It will infuse the sugar with vanilla flavor, which you can use in coffee, baked goods, or even this ice cream base next time. It’s a great way to get value out of every part of the bean.
Variations and Flavor Twists
Once you’ve mastered the base, you can get creative. Here are some variations I’ve tried and loved.
Chocolate Chip — Stir in 1 cup of semi-sweet chocolate chips right before freezing. The chips stay soft and chewy in the cold, adding little bursts of flavor. This is my kids’ favorite version.
Strawberry Swirl — Blend 1 cup of fresh strawberries with 2 tablespoons of sugar until smooth. Swirl it into the ice cream base before freezing. Don’t overmix the swirl; just create ribbons of pink.
Coffee — Dissolve 1 tablespoon of instant espresso powder into the sweetened condensed milk before mixing. It adds a rich, mocha-like flavor that pairs perfectly with the vanilla.
Salted Caramel — Drizzle homemade or store-bought salted caramel into the base before freezing. Swirl it gently with a knife. This version is dangerously good.
Gluten-Free — This recipe is naturally gluten-free, so you don’t need to change a thing. It’s safe for anyone with celiac disease or gluten sensitivity.
Serving and Storage
How to Serve — This ice cream is best served fresh. It holds up well in the freezer for up to 2 weeks, but after that, it might start to get icy. I usually make a batch on Sunday and eat it throughout the week. Serve it with simple toppings: fresh fruit, whipped cream, or just a spoon. It’s elegant enough for dinner parties but casual enough for a Tuesday night treat.
Storage — Keep it in an airtight container in the freezer. To prevent ice crystals, press plastic wrap directly onto the surface of the ice cream before closing the lid. This blocks air from reaching the surface.
Reheating — You don’t need to reheat it, but if it’s too hard to scoop, let it sit at room temperature for 5-10 minutes. This softens it to the perfect consistency. Do not microwave it, or you’ll melt it into soup.
Nutrition Information
I’m not a nutritionist, but here’s the breakdown if you’re tracking. Keep in mind that this is a rich dessert, so portion control is key.
Per Serving (based on 8 servings):
- Calories: 320
- Fat: 22g
- Saturated Fat: 14g
- Carbohydrates: 28g
- Sugar: 26g
- Protein: 4g
- Sodium: 50mg
What’s Good: — It’s naturally gluten-free and contains no artificial additives. The vanilla bean has antioxidants.
What to Know: — It’s high in sugar and saturated fat because of the condensed milk and heavy cream. It’s a treat, not a health food. Enjoy it in moderation.
Final Thoughts
So there you have it. My creamy no-churn vanilla bean ice cream. It’s simple, it’s delicious, and it’s a game-changer for anyone who loves ice cream but hates the hassle. I hope you try it and enjoy it as much as I do. It’s become a staple in my kitchen, and I think it will become one in yours too.
Make it yours! Add your favorite mix-ins, try different vanilla beans, or just enjoy it plain. The best part is that you made it yourself. There’s a special satisfaction in scooping ice cream that you whipped up from scratch, even if it didn’t involve a churning machine.
If you make this, I’d love to hear how it turns out. Drop a comment below and let me know what variations you tried. And if you have any questions, don’t hesitate to ask. I’m here to help.
Happy scooping! And I hope your kitchen smells like vanilla heaven.
Frequently Asked Questions
Can I use vanilla extract instead of a vanilla bean?
Yes, you can. Use 2 tablespoons of high-quality vanilla extract. Add it to the condensed milk or the cream. You’ll miss the visual appeal of the black seeds, and the flavor won’t be as complex, but it will still be delicious. If you use extract, skip the infusion step and just mix it in.
Why is my ice cream icy?
This usually happens if you didn’t whip the cream enough, or if you overmixed it and deflated the air. Air is what keeps no-churn ice cream soft. Also, make sure your container is airtight. If air gets in, it forms ice crystals. Try pressing plastic wrap directly onto the surface before closing the lid.
Can I make this ahead of time?
Yes! This is perfect for making ahead. You can make it up to 2 weeks in advance. Just keep it in an airtight container in the freezer. It actually gets better after a day or two as the flavors meld together.
Can I use low-fat cream or milk?
No. Low-fat cream won’t whip properly, and low-fat milk doesn’t have the fat content needed to create a creamy texture. You need full-fat heavy cream and full-fat sweetened condensed milk. Substituting will result in a dense, icy product.
How do I store the leftover vanilla pod?
Rinse the pod under warm water to remove any remaining seeds. Pat it dry with a paper towel. Let it air dry completely for a day or two. Once it’s dry and brittle, store it in an airtight container. You can use it to infuse sugar, milk, or cream for future recipes.
Can I add alcohol to this recipe?
You can, but be careful. Alcohol doesn’t freeze, so adding too much can prevent the ice cream from setting. If you want to add a flavor like bourbon or rum, add no more than 1 tablespoon. It will add a subtle kick without ruining the texture.
Pin This Recipe!

Creamy No-Churn Vanilla Bean Ice Cream: 3-Ingredient Easy Dessert
- Total Time: 6 hours 15 minutes
- Yield: 8 servings 1x
Description
A silky, rich, and creamy no-churn vanilla bean ice cream made with just three simple ingredients: heavy cream, sweetened condensed milk, and a real vanilla bean. This foolproof recipe requires no churning machine or custard base.
Ingredients
- 2 cups (480ml) heavy cream, very cold
- 1 can (14 oz / 397g) sweetened condensed milk
- 1 whole vanilla bean
- Pinch of salt
Instructions
- Pour the cold heavy cream into a large mixing bowl. Split the vanilla bean lengthwise, scrape out the seeds, and add both the seeds and the pod to the cream. Let it infuse for a few minutes.
- Using a stand mixer or hand mixer on medium-high speed, whip the cream until stiff peaks form. Be careful not to over-whip. Remove about half of the whipped cream and set it aside in a separate bowl.
- Add the sweetened condensed milk to the reserved half of the whipped cream and stir gently until completely combined to lighten the mixture.
- Pour the condensed milk mixture into the large bowl with the remaining whipped cream. Using a rubber spatula, gently fold the ingredients together until no white streaks remain, being careful not to deflate the air.
- Remove and discard the vanilla pod. Pour the mixture into an airtight container.
- Smooth the top, press plastic wrap directly onto the surface to prevent ice crystals, and freeze for at least 6 hours or overnight.
- Before serving, let the ice cream sit at room temperature for 5-10 minutes to soften slightly for easy scooping.
Notes
Ensure all equipment (bowl, whisk) is cold for best whipping results. Do not over-whip the cream or it will turn to butter. Use high-quality heavy cream with at least 35% fat. The vanilla pod can be dried and used to infuse sugar for future recipes. This recipe is naturally gluten-free.
- Prep Time: 15 minutes
- Cook Time: 0 minutes
- Category: Dessert
- Cuisine: American
Nutrition
- Serving Size: 1 scoop
- Calories: 320
- Sugar: 26
- Sodium: 50
- Fat: 22
- Saturated Fat: 14
- Carbohydrates: 28
- Protein: 4
Keywords: no-churn ice cream, vanilla bean ice cream, easy dessert, 3 ingredient recipe, homemade ice cream, gluten-free dessert, creamy ice cream


