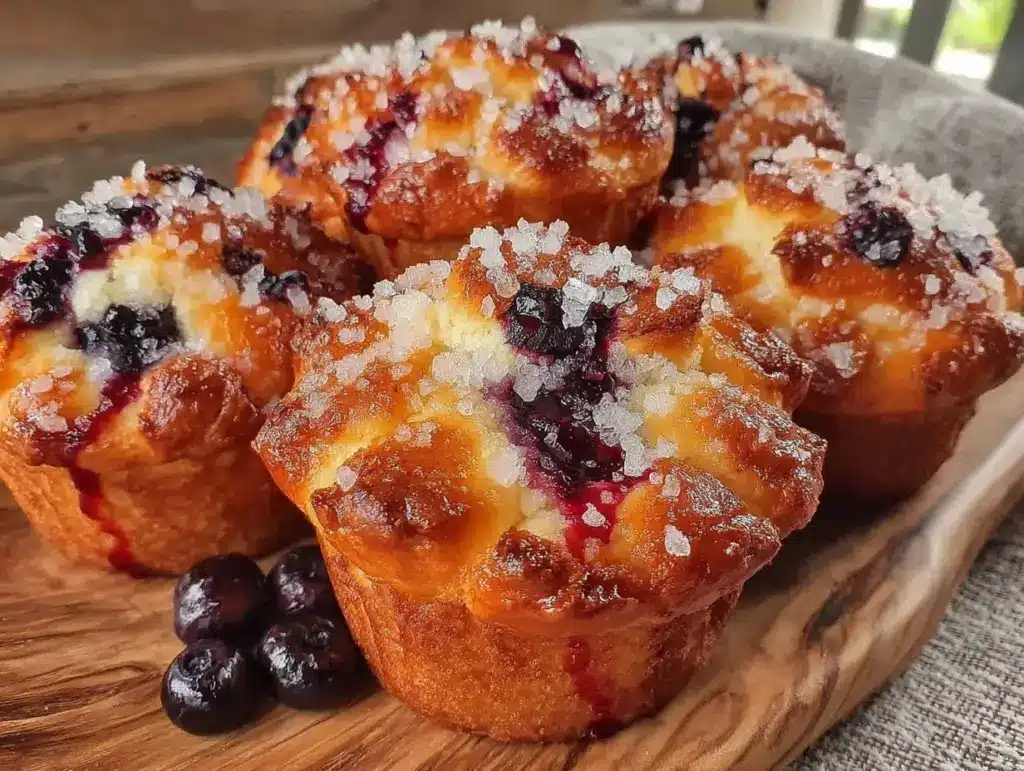
There is a specific kind of magic that happens at 9 AM on a Saturday. The house is quiet, the coffee is brewing, and the smell of vanilla and warm berries starts drifting through the hallway. For years, I thought making those tall, golden, bakery-style blueberry muffins was some sort of professional wizardry reserved for people with expensive ovens and serious temperaments. I bought them from the local shop for a decade. I’d pay the $3.50 premium for that one muffin that was taller than my head and cracked beautifully on top, only to come home and make sad, dense, flat discs that tasted like sweetened bread.
Then, last spring, I decided I was tired of overpaying for breakfast pastries. I pulled out my favorite baking tools and a recipe I’d saved from a magazine I no longer read. The first batch was… okay. Edible. But flat. The second batch was dry. The third batch? I woke up to my kids banging on my bedroom door asking if I’d made the “big ones” again. They were the big ones. The ones with the domed, craggy tops and the juicy blueberry explosions in every bite.
It wasn’t magic. It was just three specific tweaks to the standard method that changed everything. These bakery-style blueberry muffins aren’t just a recipe; they’re a weekend ritual. They’re perfect for lazy mornings, for packing into lunchboxes, or for bringing to a potluck where people pretend they don’t want seconds but definitely do. I’ve tested this method dozens of times, tweaking the flour ratio and the baking temperature until I got it right. Now, I’m sharing the exact process with you.
If you’ve ever struggled with muffins that sink in the middle or taste more like cake than a proper crumbly morning treat, this is the guide for you. We’re going to focus on one major technique that makes the difference: the temperature of your batter. Stick with me, and you’ll never buy a dry muffin from a store again.
Why You’ll Love These Blueberry Muffins
There are a lot of muffin recipes out there. Some are healthy, some are chocolate-covered, and some are just plain boring. But this version? This is the one that gets made every other weekend. Here’s why it has taken up permanent residence in my kitchen rotation.
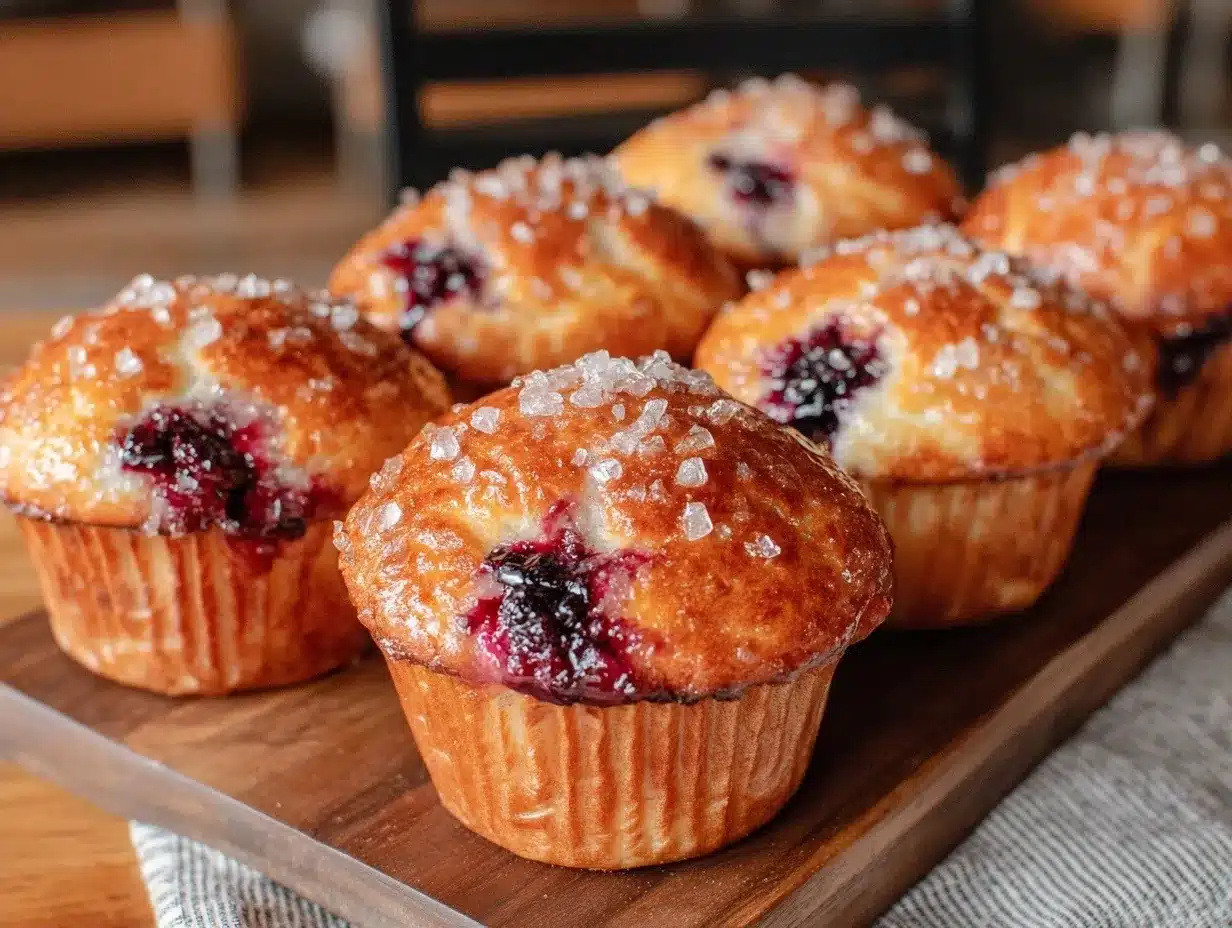
- Those Massive, Cracked Tops — This is the holy grail. Most home muffins bake flat. These rise high and develop that signature bakery-style crack on top. It’s not just for looks; it means the inside is light and airy, not dense and gummy.
- Juicy Blueberry Burst — No dry, mealy berries here. The way we fold these in ensures you get a burst of tart juice in almost every bite. It balances the sweetness of the batter perfectly.
- Stays Fresh for Days — I know, right? Usually, muffins are dry by Monday. Because of the buttermilk and the fat content, these stay moist for up to three days. In fact, my husband swears they taste better on day two after the flavors have melded.
- Simple Ingredients — You don’t need fancy flours or obscure extracts. Just flour, sugar, butter, eggs, buttermilk, and fresh (or frozen) blueberries. If you can boil an egg, you can make these.
- Perfect for Meal Prep — I bake a double batch on Sunday. They freeze beautifully. I’ll grab two in the morning, microwave them for 20 seconds, and I’m set for the week. It’s the ultimate “I’m too tired to cook” hack that actually tastes homemade.
Real talk: these muffins have saved my weekends. They turn a chaotic Saturday morning into a peaceful, aromatic experience. Plus, they pair perfectly with a hot cup of coffee or an iced vanilla chai latte if you’re feeling fancy on a Sunday.
Ingredients You’ll Need
Here’s the best part: you probably have most of this already in your pantry. The secret to bakery-style muffins isn’t exotic ingredients; it’s the ratio of fat to liquid and the quality of your leavening. Let’s break down what you need and why I’m particular about each one.
For the Dry Mix
All-purpose flour (2 cups / 250g) — Don’t go for cake flour or bread flour. All-purpose is the sweet spot. It gives you structure without making the muffin tough. Sift it if you have a sifter, or just whisk it well to aerate it. This helps with that tall rise.
Baking powder (2 teaspoons) — This is your lift. Make sure it’s fresh. If your baking powder has been sitting in the back of the cupboard since last Christmas, toss it. I test it by dropping a teaspoon in hot water—it should fizz violently. If it doesn’t, buy new stuff.
Salt (1 teaspoon) — Essential for flavor. It makes the blueberries taste more like blueberries and the butter taste more like butter. Don’t skip it.
For the Wet Mix
Unsalted butter (½ cup / 115g) — Melted. I use unsalted so I control the salt level. You can use oil, but melted butter gives that rich, bakery smell. Let it cool slightly before adding so you don’t scramble the eggs.
Granulated sugar (¾ cup / 150g) — This is the standard amount. It’s sweet but not cloying. If you like them very sweet, bump it to 1 cup. If you want them more subtle, go with ½ cup. I stick to ¾ for that classic taste.
Eggs (2 large) — Room temperature is best. They emulsify better with the butter and buttermilk. If you forget to take them out, just drop them in a bowl of warm water for 5 minutes.
Vanilla extract (1 teaspoon) — Real vanilla, please. The artificial stuff can taste harsh when baked. A good quality vanilla makes a huge difference in the aroma.
Buttermilk (1 cup / 240ml) — This is the game-changer. The acidity in buttermilk tenderizes the gluten in the flour, keeping the muffins soft. If you don’t have buttermilk, make “sour milk”: add 1 tablespoon of white vinegar or lemon juice to a measuring cup, then fill the rest with regular milk. Let it sit for 5 minutes until it curdles slightly.
The Stars
Fresh blueberries (1 ½ cups / 225g) — Fresh is best for that juicy pop. If you’re using frozen blueberries, do not thaw them! Toss them in the flour before folding them in. This prevents them from sinking to the bottom and turning your batter purple.
Optional: Lemon zest (1 teaspoon) — I love adding a little zest. It cuts through the richness of the butter and brightens up the blueberry flavor. It’s optional, but I highly recommend it.
Equipment Needed
You don’t need fancy gadgets. Just the basics. Here’s what I use.
Muffin Tin — I use a standard 12-cup metal tin. Dark non-stick tins tend to brown the bottoms too fast, so if you have one, you might need to lower the oven temp by 25 degrees. My old, dented aluminum tin works perfectly.
Muffin Liners — Paper liners are easiest for cleanup. But honestly? I sometimes skip them for that crispy, caramelized edge on the bottom. If you skip liners, grease the tin really well with butter or cooking spray.
Mixing Bowls — Two medium bowls. One for dry, one for wet. I like glass bowls because I can see through them, but stainless steel is fine too.
Whisk and Spatula — A balloon whisk for the dry ingredients and a silicone spatula for folding in the berries. Rubber spatulas are great because they scrape the bowl clean.
Cooling Rack — Crucial. If you leave the muffins in the hot pan, they’ll steam and get soggy. Move them to a rack after 5 minutes. I learned this the hard way with a batch of soggy-bottomed muffins that my kids refused to eat.
How to Make It: Step-by-Step
Alright, let’s make these! The process is simple, but the technique is where the magic happens. I’m going to walk you through exactly how I do it, including the one trick that ensures those tall, bakery-style tops.
Step 1: Prep Your Oven and Pan (5 minutes)
Preheat your oven to 400°F (200°C). This high initial heat is the secret to the dome. Most recipes tell you to bake at 350°F, but that’s for cake-like muffins. For bakery-style, you need that shock of heat to make the batter rise fast before the crust sets. Line your muffin tin with liners or grease it well.
Step 2: Mix the Dry Ingredients (2 minutes)
In your medium bowl, whisk together the flour, baking powder, salt, and lemon zest (if using). Whisk it for a full minute. This ensures the baking powder is evenly distributed so you get consistent rise in every muffin. No clumps of baking powder allowed!
Step 3: Mix the Wet Ingredients (2 minutes)
In a separate bowl, whisk the melted butter, sugar, eggs, vanilla, and buttermilk until smooth. The mixture might look slightly separated at first—that’s okay. It will come together when you combine it with the dry ingredients.
Step 4: The One Trick: Combine Gently (1 minute)
Pour the wet ingredients into the dry ingredients. Now, here is the crucial part. Use your spatula to fold the mixture together. Stop as soon as the flour disappears. The batter should look lumpy and shaggy. Do NOT overmix. Overmixing develops gluten, which leads to tough, dense muffins. If you see streaks of flour, stop. The residual heat and movement will finish mixing it. I know it’s tempting to stir just a little more, but trust me—leave it lumpy.
Step 5: Fold in the Blueberries (1 minute)
Gently fold in the blueberries. If using fresh berries, just toss them in. If using frozen, make sure they are coated in a teaspoon of flour first to prevent sinking. Fold until they are just distributed. Again, don’t beat the batter up.
Step 6: Fill the Cups (2 minutes)
Divide the batter among the 12 muffin cups. Fill them almost to the top! I mean it. Fill them until the batter is almost level with the rim of the liner. This gives them room to expand and create that tall dome. If you only fill them halfway, you’ll get flat, flat muffins.
Step 7: Bake (18-20 minutes)
Put the tin in the oven. Bake at 400°F (200°C) for 5 minutes. Then, without opening the door, reduce the heat to 350°F (175°C) and bake for another 13-15 minutes. This two-stage bake is the professional trick. The high heat starts the rise, and the lower heat cooks the center through without burning the top.
Step 8: Cool (5 minutes)
Check for doneness with a toothpick. It should come out clean or with just a few moist crumbs. Do not bake until the toothpick is bone dry, or they’ll be dry muffins. Remove from the oven and let them sit in the pan for 5 minutes. Then, transfer to a cooling rack. Wait at least 10 minutes before eating so the structure sets.
Expert Tips & Tricks
Here’s everything I’ve learned from making these dozens of times. These tips will save you from my mistakes.
The High Heat Start
I cannot stress this enough. The 400°F start is non-negotiable for tall muffins. It creates steam immediately, pushing the batter up. If you bake at 350°F the whole time, they will spread out, not up.
Don’t Overmix
Lumpy batter is good batter. Smooth batter is cake batter. If you want muffins, stop mixing when you see no more dry flour. The muffins will finish cooking in the oven, and any remaining lumps will dissolve.
Room Temperature Eggs
Cold eggs can cause the melted butter to seize up into little chunks. Room temperature ingredients emulsify better, creating a smooth, uniform batter that bakes evenly.
Freezing Strategy
If you’re making a batch to freeze, let the muffins cool completely. Wrap them individually in plastic wrap, then put them in a freezer bag. They’ll last for 3 months. To reheat, unwrap and microwave for 30 seconds. They’ll taste fresh-baked.
Common Mistake: Soggy Bottoms
This happens if you don’t transfer them to a cooling rack. The steam gets trapped under the muffin, making the bottom soggy. Move them! It’s a small step that makes a big difference.
Variations & Substitutions
Once you’ve nailed the basic blueberry version, here’s how you can mix it up. I’ve tried all of these.
Strawberry Rhubarb
Swap the blueberries for chopped rhubarb and strawberries. Add a teaspoon of cinnamon. It’s a classic fall combination.
Lemon Poppy Seed
Skip the berries. Add 1 tablespoon of poppy seeds and the zest of two lemons. Increase the sugar to 1 cup. These are tangy and bright.
Double Chocolate
Replace ¼ cup of flour with cocoa powder. Add ½ cup of chocolate chips. These are for the sweet tooth.
Gluten-Free
Use a 1:1 gluten-free flour blend. The texture will be slightly more tender, but it works well. Make sure your baking powder is certified GF.
Dairy-Free
Use coconut oil instead of butter and oat milk or almond milk with vinegar instead of buttermilk. The flavor will be slightly different, but still delicious.
Mini Muffins
These work great as snacks. Reduce baking time to 10-12 minutes. They’re perfect for kids’ lunches.
Serving & Storage
How to enjoy these bad boys.
Serving Suggestions:
Serve warm with a pat of butter. Or plain, if you’re disciplined (I’m not). They go great with a cup of coffee or an easy weekend brunch spread. I also love serving them alongside a hearty butternut squash soup for a cozy autumn meal.
Storage:
Store in an airtight container at room temperature for up to 3 days. They stay moist! If you live in a humid climate, you might want to refrigerate them, but they’ll be denser. Reheat in the microwave for 15 seconds to soften them up.
Freezing:
As mentioned, these freeze beautifully. Cool completely, wrap tightly, and freeze for up to 3 months. Thaw at room temperature or microwave briefly.
Nutrition Information
I’m not a nutritionist, but here’s the breakdown if you’re tracking. This is based on 12 muffins.
Per Muffin:
Calories: 220
Protein: 4g
Carbs: 32g
Fat: 9g
Sugar: 14g
Fiber: 1g
Look, these are treat muffins. They have butter and sugar. But they also have flour and eggs, so they’re not empty calories. If you want to lighten them up, reduce the sugar to ½ cup and use half the butter, replacing it with applesauce. They’ll be less rich, but still good.
Final Thoughts
So there you have it—my go-to bakery-style blueberry muffins. I’ve probably talked your ear off at this point, but when you make a recipe this often, you have a lot to say about it. These muffins have saved my weekends. They’re my answer to “what’s for breakfast?” when I want something special but don’t want to spend hours in the kitchen.
Make them yours! Try different berries, add nuts, or swap the lemon for orange. The best recipes are the ones you adapt. If you make these, drop a comment and let me know how they turned out! I love hearing from you. And if something doesn’t work, tell me that too—I’m here to help.
Happy baking! And I hope your kitchen smells half as good as mine does right now.
Frequently Asked Questions
Can I use frozen blueberries?
Yes! But do not thaw them. Toss the frozen berries in a tablespoon of flour before folding them into the batter. This absorbs excess moisture and prevents them from sinking to the bottom or bleeding too much purple dye into the batter.
Why did my muffins turn out dense?
Overmixing is the usual culprit. Once you add the wet ingredients to the dry, mix only until the flour disappears. Lumpy batter is good. Also, check your baking powder. If it’s old, it won’t rise properly.
Can I make these ahead of time?
Absolutely. Bake them, let them cool completely, and store them in an airtight container at room temperature for up to 3 days. Or freeze them for longer storage. Reheat in the microwave for 20-30 seconds.
Why are my muffins flat?
This usually happens if the oven temperature is too low. Remember, we start at 400°F to get that initial rise. If you bake at 350°F the whole time, they will spread. Also, make sure you’re filling the cups almost to the top.
Can I substitute buttermilk?
Yes. Make “sour milk” by adding 1 tablespoon of white vinegar or lemon juice to a liquid measuring cup, then filling the rest with regular milk. Let it sit for 5-10 minutes until it thickens slightly. It works just as well.
How do I store leftovers?
Keep them in an airtight container at room temperature for up to 3 days. If you live in a very hot or humid climate, refrigerate them. They will last up to 5 days in the fridge.
Can I add chocolate chips?
Of course! You can do half blueberries, half chocolate chips, or just chocolate chips. Add them at the same step as the berries. Just be aware that chocolate chips melt differently, so you might get more gooey pockets.
Pin This Recipe!


Bakery-Style Blueberry Muffins: 3 Tips for Fluffy Tops
- Total Time: 30 minutes
- Yield: 12 servings 1x
Description
These bakery-style blueberry muffins feature massive, cracked tops and juicy blueberry bursts. The secret lies in a high-heat start and gentle mixing to ensure a light, airy texture that stays fresh for days.
Ingredients
- 2 cups (250g) all-purpose flour
- 2 teaspoons baking powder
- 1 teaspoon salt
- 1 teaspoon lemon zest (optional)
- ½ cup (115g) unsalted butter, melted and cooled slightly
- ¾ cup (150g) granulated sugar
- 2 large eggs, room temperature
- 1 teaspoon vanilla extract
- 1 cup (240ml) buttermilk
- 1 ½ cups (225g) fresh or frozen blueberries
Instructions
- Preheat oven to 400°F (200°C). Line a 12-cup muffin tin with liners or grease well.
- In a medium bowl, whisk together flour, baking powder, salt, and lemon zest for a full minute to aerate and distribute leavening.
- In a separate bowl, whisk melted butter, sugar, eggs, vanilla, and buttermilk until smooth.
- Pour wet ingredients into dry ingredients. Fold gently with a spatula until just combined; the batter should remain lumpy. Do not overmix.
- Gently fold in blueberries. If using frozen berries, toss them in a teaspoon of flour first to prevent sinking.
- Divide batter among muffin cups, filling them almost to the top to allow for expansion.
- Bake at 400°F (200°C) for 5 minutes. Without opening the door, reduce heat to 350°F (175°C) and bake for another 13-15 minutes.
- Check doneness with a toothpick (should have moist crumbs). Let muffins sit in pan for 5 minutes, then transfer to a cooling rack to cool completely.
Notes
For frozen blueberries, do not thaw; toss in flour before folding to prevent sinking. The high initial heat (400°F) is crucial for tall, domed tops. Do not overmix the batter to avoid dense muffins. Transfer to a cooling rack immediately after baking to prevent soggy bottoms.
- Prep Time: 10 minutes
- Cook Time: 20 minutes
- Category: Breakfast
- Cuisine: American
Nutrition
- Serving Size: 1 muffin
- Calories: 220
- Sugar: 14
- Sodium: 300
- Fat: 9
- Saturated Fat: 5
- Carbohydrates: 32
- Fiber: 1
- Protein: 4
Keywords: blueberry muffins, bakery style, fluffy muffins, breakfast recipe, weekend baking, muffin tips


