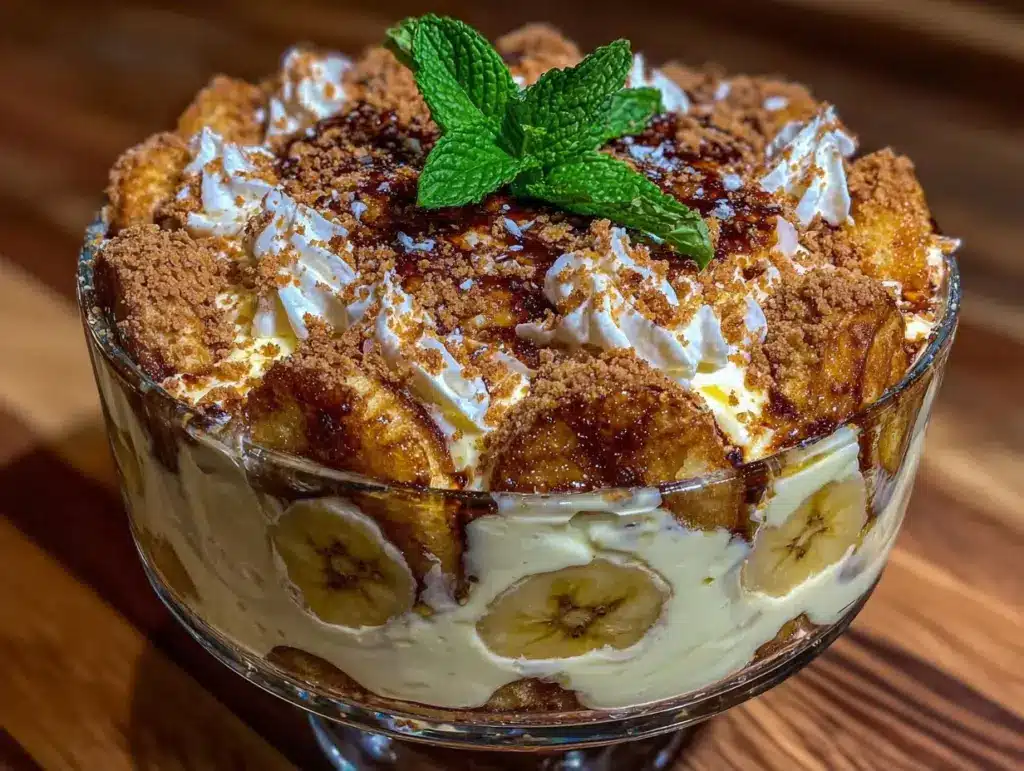
I have a confession to make. For years, I was a banana pudding snob. Not the fancy, baked-with-meringue kind, but the kind that comes in a glass bowl at a church potluck or a Southern dinner table. You know the one: layers of soft vanilla wafers, ripe bananas, and that creamy, custard-like filling that tastes like a hug from your grandma. I always thought making it from scratch was a nightmare of temperamental custards and soggy wafers. So, I bought the boxes. The instant pudding mix, the canned whipped topping, the pre-sliced bananas from the store. It was easy. It was fast. And honestly? It tasted like artificial vanilla and cardboard.
Then, last summer, I decided to try one more time. I wasn’t trying to reinvent the wheel or create some gourmet dessert that required a culinary degree. I just wanted something that tasted real. Something that tasted like the banana pudding I remembered from childhood, but with ingredients I actually recognized. I threw together a simple trifle using just a few pantry staples and some fresh fruit. I put it in the fridge and forgot about it for four hours. When I finally dug in, I stopped mid-bite. It was creamy, not gloopy. The wafers had softened just enough to be tender but still held their shape. The bananas were sweet and bright. It was better than takeout better than anything I’d ever bought in a container. It was that good.
That was three years ago. Since then, I’ve made this banana pudding trifle with vanilla wafers probably fifty times. Maybe more. It’s become my go-to dessert for everything from casual weeknight treats to family gatherings. I’ve tweaked it a little over time, but the core method remains the same: keep it simple, respect the ingredients, and let the flavors do the work. If you can only make one dessert this month, make this. You really can’t mess it up.
Why You’ll Love This Banana Pudding Trifle
There are a lot of dessert recipes out there that promise to be easy but end up requiring a dozen bowls, a stand mixer, and a trip to the specialty store for obscure ingredients. This banana pudding trifle is the opposite. It’s honest, straightforward, and incredibly rewarding. Here’s why it’s earned a permanent spot in my kitchen rotation.
Foolproof Simplicity — Seriously, no cooking required
Most traditional banana pudding recipes call for making a custard from scratch on the stovetop. That means tempering eggs, watching the heat so it doesn’t curdle, and dealing with a temperamental sauce. This trifle skips all that. We use a simple mix of whipped cream, sweetened condensed milk, and vanilla pudding mix to create a filling that’s rich, stable, and impossible to break. If you can fold whipped cream, you can make this dessert. I’ve made it for my teenage son, and he nailed it on his first try.
Minimal Ingredients — You probably have most of it
Let’s be real: the fewer ingredients, the less stress. This recipe uses just five main components: ripe bananas, vanilla wafers, heavy cream, sweetened condensed milk, and instant vanilla pudding mix. That’s it. No exotic spices, no hard-to-find dairy, no fancy garnishes. It’s a pantry-friendly dessert that feels special without requiring a special grocery run. It’s the kind of recipe that makes you feel like a genius because you created something delicious with what you already had.
Make-Ahead Friendly — Tastes better the next day
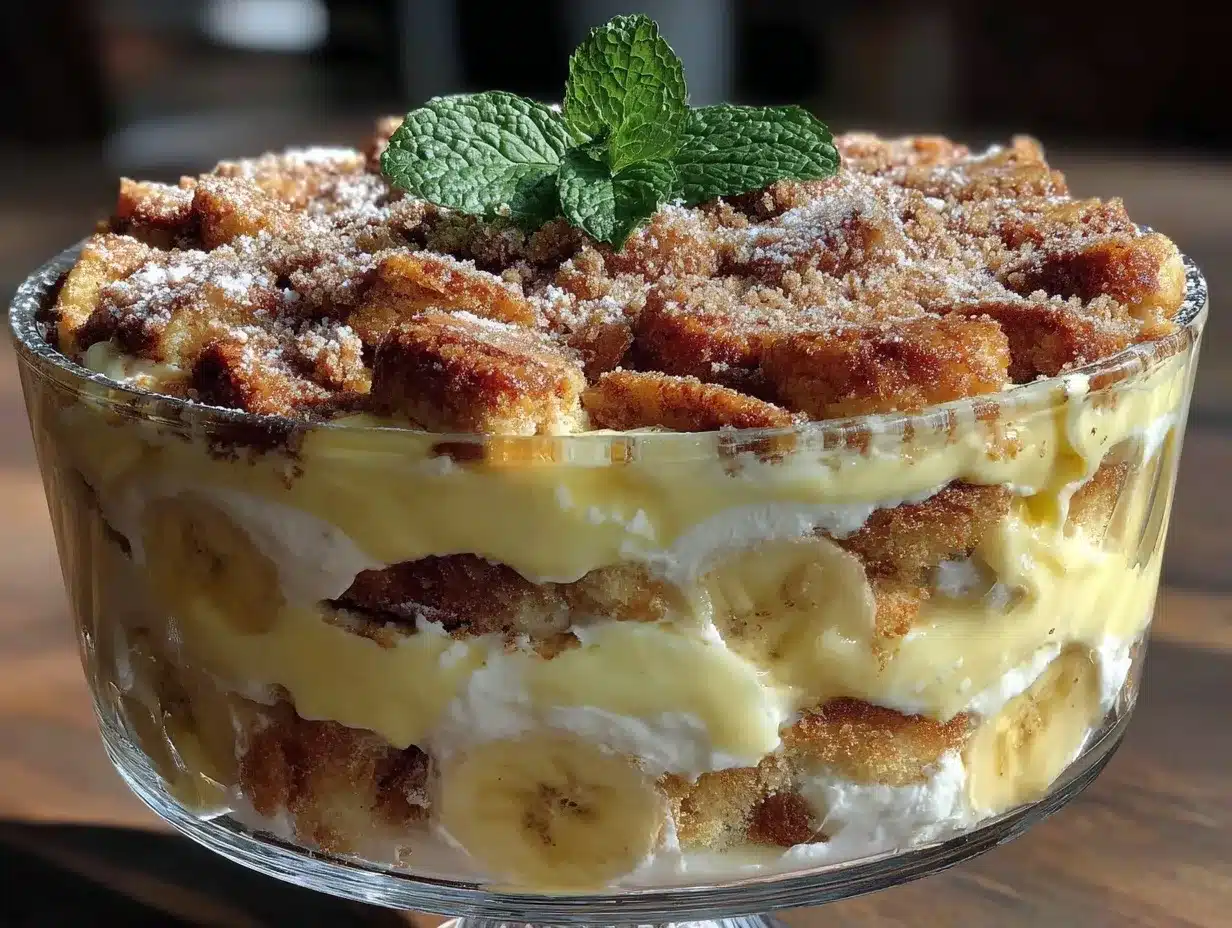
One of the best things about this trifle is that it’s not a rush-job dessert. In fact, it’s better when it’s patient. The flavors meld together in the fridge, the wafers soften into something almost cake-like, and the bananas infuse the cream with their natural sweetness. I often make this the night before a party, and it’s always the first thing people ask for when they walk in. It’s the ultimate stress-free dessert because it does all the work while you’re sleeping.
Crowd-Pleasing Nostalgia — Everyone loves it
I’ve served this to picky eaters, dessert lovers, and people who claim they “don’t really like pudding.” Every single person has loved it. It hits that perfect balance of sweet, creamy, and fruity without being overwhelming. It reminds people of simpler times, and that emotional connection is hard to beat. Plus, it’s visually stunning in a glass trifle dish or even mason jars, making it feel fancy without any extra effort.
So basically, this is the dessert you make when you want something impressive but don’t want to spend hours in the kitchen. It’s reliable, delicious, and guaranteed to disappear. I make this whenever I need a win, and it never fails.
Ingredients You’ll Need
Here’s the best part: this list is short. I’m not asking you to buy anything weird. I’m particular about a few things here, mostly because they make a huge difference in texture and flavor, but substitutions are easy if you need them.
For the Filling
Heavy cream (2 cups / 480ml) — This is non-negotiable. You need the fat content to get that light, airy texture. Half-and-half or milk will make the filling dense and heavy. Cold cream whips better, so keep it in the fridge until the last minute.
Sweetened condensed milk (1 can / 14oz / 397g) — This is the secret weapon. It adds sweetness, creaminess, and stability to the filling. It’s thicker than regular milk, which helps the trifle hold its layers. Don’t substitute with evaporated milk; it’s not sweet enough and will change the texture.
Instant vanilla pudding mix (2 boxes / 3.4oz each) — Use the instant kind, not the cook-and-serve. It sets faster and has a smoother texture. I usually use Jell-O or a store brand, but any brand works. Don’t skip this; it’s what gives the pudding its classic flavor.
Vanilla extract (2 teaspoons) — Use real vanilla extract, not imitation. It makes a noticeable difference in the flavor profile. If you have vanilla bean paste, that’s even better, but extract works perfectly fine.
For the Layers
Ripe bananas (4-5 large) — This is crucial. You want bananas that are yellow with a few brown spots. They’re sweet and soft, which contrasts nicely with the crisp wafers. If they’re too green, they’ll be starchy and bland. If they’re too brown (mushy), they’ll turn to sludge. Aim for perfect ripeness.
Vanilla wafers (1 package / 14.7oz) — Nilla Wafers are the classic choice. They’re sturdy enough to hold up to the cream but soft enough to absorb it. Don’t use shortbread cookies; they’re too rich and won’t absorb the moisture the same way. If you can’t find vanilla wafers, ladyfingers work, but the flavor will be different.
Lemon juice (1 tablespoon) — This is optional but highly recommended. A little lemon juice tossed with the sliced bananas prevents them from browning and adds a bright note that cuts through the sweetness. It’s a small step that makes a big difference.
For the Topping (Optional but Recommended)
Whipped cream (1 cup / 240ml) — I usually whip up a little extra cream with a teaspoon of sugar and a splash of vanilla to pipe or dollop on top. It adds a beautiful finish and makes the dessert look professional.
Crushed vanilla wafers (½ cup) — Sprinkle these on top for texture. It’s like a cookie crumble and adds a nice crunch against the soft layers.
Chocolate shavings (¼ cup) — If you’re feeling fancy, a few dark chocolate shavings on top add a sophisticated touch. It’s not traditional, but it’s delicious.
Equipment Needed
You don’t need fancy equipment for this. Here’s what I actually use, along with some alternatives.
Large mixing bowl — I use a 4-quart stainless steel bowl. It needs to be big enough to whip the cream comfortably. A glass bowl works too, but it can get slippery.
Hand mixer or stand mixer — A hand mixer is perfect for this. It’s quick and easy to clean. If you have a stand mixer, use the whisk attachment. Don’t try to whip cream by hand unless you have strong arms and a lot of time.
Measuring cups and spoons — Standard stuff. I use a set of nesting cups and spoons. They’re cheap and work fine.
Knife and cutting board — For slicing the bananas. A serrated knife works best for bananas because it doesn’t crush them as much. A dull knife will mash the fruit, which is not what we want.
Spatula — A silicone spatula is best for folding the whipped cream into the pudding mixture. It’s gentle and gets all the mixture out of the bowl.
Trifle dish or serving bowls — A glass trifle dish is traditional and looks beautiful. But you can also use individual mason jars or small glass bowls if you’re serving people separately. It’s more Instagram-friendly, too.
Optional: Pastry bag or zip-top bag — If you want to pipe the topping, a pastry bag is nice. But if you’re lazy (like me), just cut the corner off a zip-top bag and use that.
How to Make It: Step-by-Step
Alright, let’s make this! I’m walking you through exactly how I do it, including the little tricks I’ve picked up over the years. It’s straightforward, so don’t overthink it.
Step 1: Prep Your Bananas (5 minutes)
Peel the bananas and slice them into half-inch rounds. Don’t slice them too thin, or they’ll disappear into the cream. Don’t slice them too thick, or they’ll be chunky. Half-inch is the sweet spot. Toss the sliced bananas with the lemon juice in a bowl. This keeps them bright yellow and adds a little tang. Set them aside.
Step 2: Whip the Cream (3 minutes)
In your large mixing bowl, pour the cold heavy cream. Beat it with your hand mixer on medium-high speed until you see soft peaks. This means when you lift the beaters, the cream forms a peak that droops slightly. Don’t overbeat it into stiff peaks, or it’ll be grainy. You want it light and airy. This should take about 2-3 minutes.
Step 3: Make the Pudding Mixture (5 minutes)
In a separate large bowl, combine the instant vanilla pudding mix and the sweetened condensed milk. Whisk them together until smooth. It will be thick and sweet, which is perfect. Then, gently fold in the whipped cream. Use your spatula and fold gently—don’t stir vigorously, or you’ll deflate the cream. Fold until the mixture is uniform in color and texture. It should look like a thick, airy mousse. Add the vanilla extract and fold it in.
Step 4: Layer the Trifle (10 minutes)
Now for the fun part. In your trifle dish or serving bowls, start with a layer of vanilla wafers. Don’t be shy with the wafers; they’re the base. Next, add a layer of sliced bananas. Then, add a generous layer of the pudding mixture. Repeat the layers: wafers, bananas, pudding. You’ll usually get 3-4 layers, depending on the size of your dish. The last layer should be pudding.
Step 5: Chill and Set (4 hours or overnight)
Once you’ve layered everything, cover the dish with plastic wrap or a lid. Put it in the fridge. This is the most important step. The trifle needs time to set. The wafers will absorb the cream and soften, and the flavors will meld. I usually let it chill for at least 4 hours, but overnight is best. If you’re impatient and eat it too soon, the wafers will still be crunchy, and the layers won’t be cohesive.
Step 6: Top and Serve (5 minutes)
When you’re ready to serve, whip up a little extra cream if you want to top it. Dollop it on top of the trifle. Sprinkle with crushed vanilla wafers for texture. If you’re feeling fancy, add some chocolate shavings or a few whole banana slices. Cut into squares or scoop with a spoon, making sure to get a bit of everything in each serving. Serve immediately.
Expert Tips & Tricks
Here’s everything I’ve learned from making this dozens of times. These tips will save you from my mistakes.
Don’t Skip the Lemon Juice
I know it seems like a tiny detail, but the lemon juice prevents the bananas from turning brown and adds a brightness that balances the sweetness. Without it, the trifle can taste one-dimensional. Just a tablespoon is enough. It’s a small step that makes a big difference.
Use Ripe Bananas
This can’t be stressed enough. Ripe bananas are sweeter and softer, which integrates better with the cream. If your bananas are too green, they’ll be starchy and bland. If they’re too brown, they’ll turn to mush. Look for bananas that are yellow with a few brown spots. If you have bananas that are too ripe, use them in the next batch of banana bread instead.
Fold, Don’t Stir
When combining the whipped cream and pudding mix, be gentle. Stirring vigorously will deflate the cream, resulting in a dense, heavy filling. Fold slowly and deliberately, scraping the bottom of the bowl to ensure everything is incorporated. You want to keep as much air in the cream as possible.
Let It Chill
I know it’s tempting to dig in immediately, but patience pays off. The trifle needs at least 4 hours to set properly. If you eat it right after assembling, the wafers will be hard, and the layers will be separate. Overnight is ideal. The flavors meld, and the texture becomes uniformly creamy. If you’re in a rush, at least let it chill for 2 hours, but know that it won’t be as good.
Customize Your Layers
While the classic layers are wafers, bananas, and pudding, you can get creative. Add a layer of crushed cookies (like Oreos or graham crackers) for a twist. Add a layer of fresh berries (strawberries or raspberries) for a fruity contrast. Add a layer of caramel sauce for extra sweetness. The base recipe is flexible, so don’t be afraid to experiment.
Variations & Substitutions
Once you’ve nailed the basic version, here’s how you can mix it up. I’ve tried all of these, and they’re all delicious.
Chocolate Banana Trifle
Swap the vanilla pudding mix for chocolate pudding mix. Add a layer of chocolate chips or chocolate shavings between the layers. Top with whipped chocolate cream. It’s like a banana split in a bowl. My kids love this version.
Caramel Banana Trifle
Drizzle caramel sauce between the layers. Use salted caramel for a sweet-salty contrast. Top with a drizzle of caramel and a pinch of sea salt. It’s rich and indulgent, perfect for special occasions.
Coconut Banana Trifle
Replace the heavy cream with coconut cream. Use coconut-flavored pudding mix if you can find it, or add a teaspoon of coconut extract to the vanilla pudding. Top with toasted coconut flakes. It’s tropical and refreshing.
Gluten-Free Version
Use gluten-free vanilla wafers. Most brands work well, but check the texture—they can be more fragile. The rest of the recipe is naturally gluten-free. I’ve used Gluten Free Everything vanilla wafers, and they hold up nicely.
Dairy-Free Version
Replace the heavy cream with full-fat coconut cream. Use dairy-free vanilla pudding mix (or make your own with cornstarch and plant milk). Replace the sweetened condensed milk with sweetened condensed coconut milk. It’s different but still creamy and delicious. My lactose-intolerant friend requests this version often.
Lighter Version
Replace the heavy cream with whipped topping (like Cool Whip) or Greek yogurt mixed with a little honey. Use skim milk pudding mix. It’s thinner and less rich, but still tasty. I make this when I’m trying to be “healthy,” but honestly, the full-fat version is just better.
Serving & Storage
How to Serve:
I usually serve this straight from the trifle dish, scooping out generous portions. It looks rustic and stays cool. But here are other ways I’ve enjoyed it:
- Individual Jars: Layer everything in mason jars for a portable, Instagram-worthy dessert. Great for parties.
- With Coffee: A cup of black coffee or espresso pairs perfectly with the sweetness. It’s a great after-dinner treat.
- With Ice Cream: Add a scoop of vanilla ice cream on the side for extra richness. It’s like a banana split.
Toppings Bar:
When I have guests, I put out: extra whipped cream, crushed vanilla wafers, chocolate shavings, caramel sauce, and fresh banana slices. Everyone customizes their bowl.
Storage Instructions:
Refrigerator:
Store in an airtight container or covered with plastic wrap for up to 3 days. The trifle will continue to soften in the fridge, which is fine. It’s best eaten within 2 days, as the bananas may start to break down.
Reheating:
Do not reheat this dessert. It’s meant to be served cold. Reheating will melt the cream and make the texture strange.
Freezing:
Honestly, this doesn’t freeze well. The cream will separate, and the bananas will become mushy when thawed. Make it fresh or store in the fridge for up to 3 days.
Pro tip:
If the trifle looks a little dry on top after chilling, add a dollop of fresh whipped cream before serving. It brings back the creamy texture.
Nutrition Information
I’m not a nutritionist, but here’s the breakdown if you’re tracking. Keep in mind that this is a rich dessert, so portion control is key.
Per Serving (based on 8 servings):
| Nutrient | Amount |
|---|---|
| Calories | 380 |
| Protein | 5g |
| Carbs | 45g |
| Fiber | 2g |
| Sugar | 30g |
| Fat | 20g |
| Saturated Fat | 12g |
| Cholesterol | 50mg |
| Sodium | 250mg |
What’s Good:
– Decent protein from the dairy
– Calcium from the cream and pudding
– Bananas add potassium and fiber
What to Know:
– Higher in calories and sugar from the condensed milk and pudding mix
– Contains dairy and gluten
– Moderate sodium
My Take:
Look, this is a dessert. It’s sweet, creamy, and indulgent. It’s not a health food. But it’s way better than store-bought pudding, and you know exactly what’s in it. When I want to make it lighter, I use the Greek yogurt version and reduce the sugar. But usually? I just enjoy a reasonable portion and savor it. It’s a treat, and treats are meant to be enjoyed.
Final Thoughts
So that’s my banana pudding trifle with vanilla wafers! I’ve probably talked your ear off at this point, but when you make a recipe this often, you have a lot to say about it. This has saved my dessert game more times than I can count. It’s my answer to “what can I bring to the potluck?” or “what can I make for a quick sweet tooth craving?” My kids love it, my husband loves it, and I love it because it’s so easy to make.
Make it yours! Try different toppings, swap in your favorite cookies, or add a different fruit. The best recipes are the ones you adapt to your family’s tastes. If you make this, drop a comment and let me know what you think! I love hearing how recipes turn out in your kitchen. And if something doesn’t work, tell me that too—I’m here to help troubleshoot.
Happy cooking! And I hope your kitchen smells half as good as mine does right now.
Frequently Asked Questions
Can I use homemade whipped cream instead of heavy cream?
You can, but you’ll need to whip the heavy cream first to make the whipped cream. The recipe calls for whipping the cream yourself, so if you buy pre-whipped cream, it might already be too soft or contain stabilizers that change the texture. If you have homemade whipped cream, you can fold it into the pudding mix, but be gentle to keep it airy.
Why did my trifle turn out watery?
This usually happens if the bananas were too wet or if the cream was overbeaten and separated. Make sure to pat the bananas dry if they’re very juicy. Also, don’t overbeat the cream into stiff peaks, as this can cause it to break down. If the trifle is watery, chill it for a few more hours; sometimes the wafers absorb the excess liquid.
Can I make this ahead for a party?
Absolutely! This is actually better when made ahead. Assemble it the night before and let it chill overnight. The flavors will meld, and the wafers will soften perfectly. Just add the toppings right before serving to keep them crisp.
Can I use fresh vanilla pudding instead of instant?
You can, but it will change the texture. Fresh pudding is heavier and denser, and it takes longer to set. If you use fresh pudding, you’ll need to chill the trifle for longer, and the layers might not be as distinct. The instant mix is key to the light, airy texture of this trifle.
How long do the bananas stay fresh in the trifle?
The lemon juice helps, but bananas will still brown over time. If you’re making this more than a day in advance, consider adding a thin layer of whipped cream between the banana layer and the pudding layer to create a barrier. This helps protect the bananas from air exposure.
Can I use other cookies instead of vanilla wafers?
Yes! Ladyfingers, shortbread, or even ginger snaps work well. Just keep in mind that different cookies will absorb moisture at different rates. Ladyfingers are very absorbent, so they’ll soften quickly. Shortbread is more buttery and might stay slightly crumbly. Experiment to find your favorite!
Is there a way to make this less sweet?
Sweetened condensed milk is very sweet, so if you want to reduce sugar, you can try using a reduced-sugar version if you can find it. You can also reduce the amount of pudding mix or use a less sweet cookie. Adding a tart fruit like raspberries or strawberries between the layers can also balance the sweetness.
Pin This Recipe!
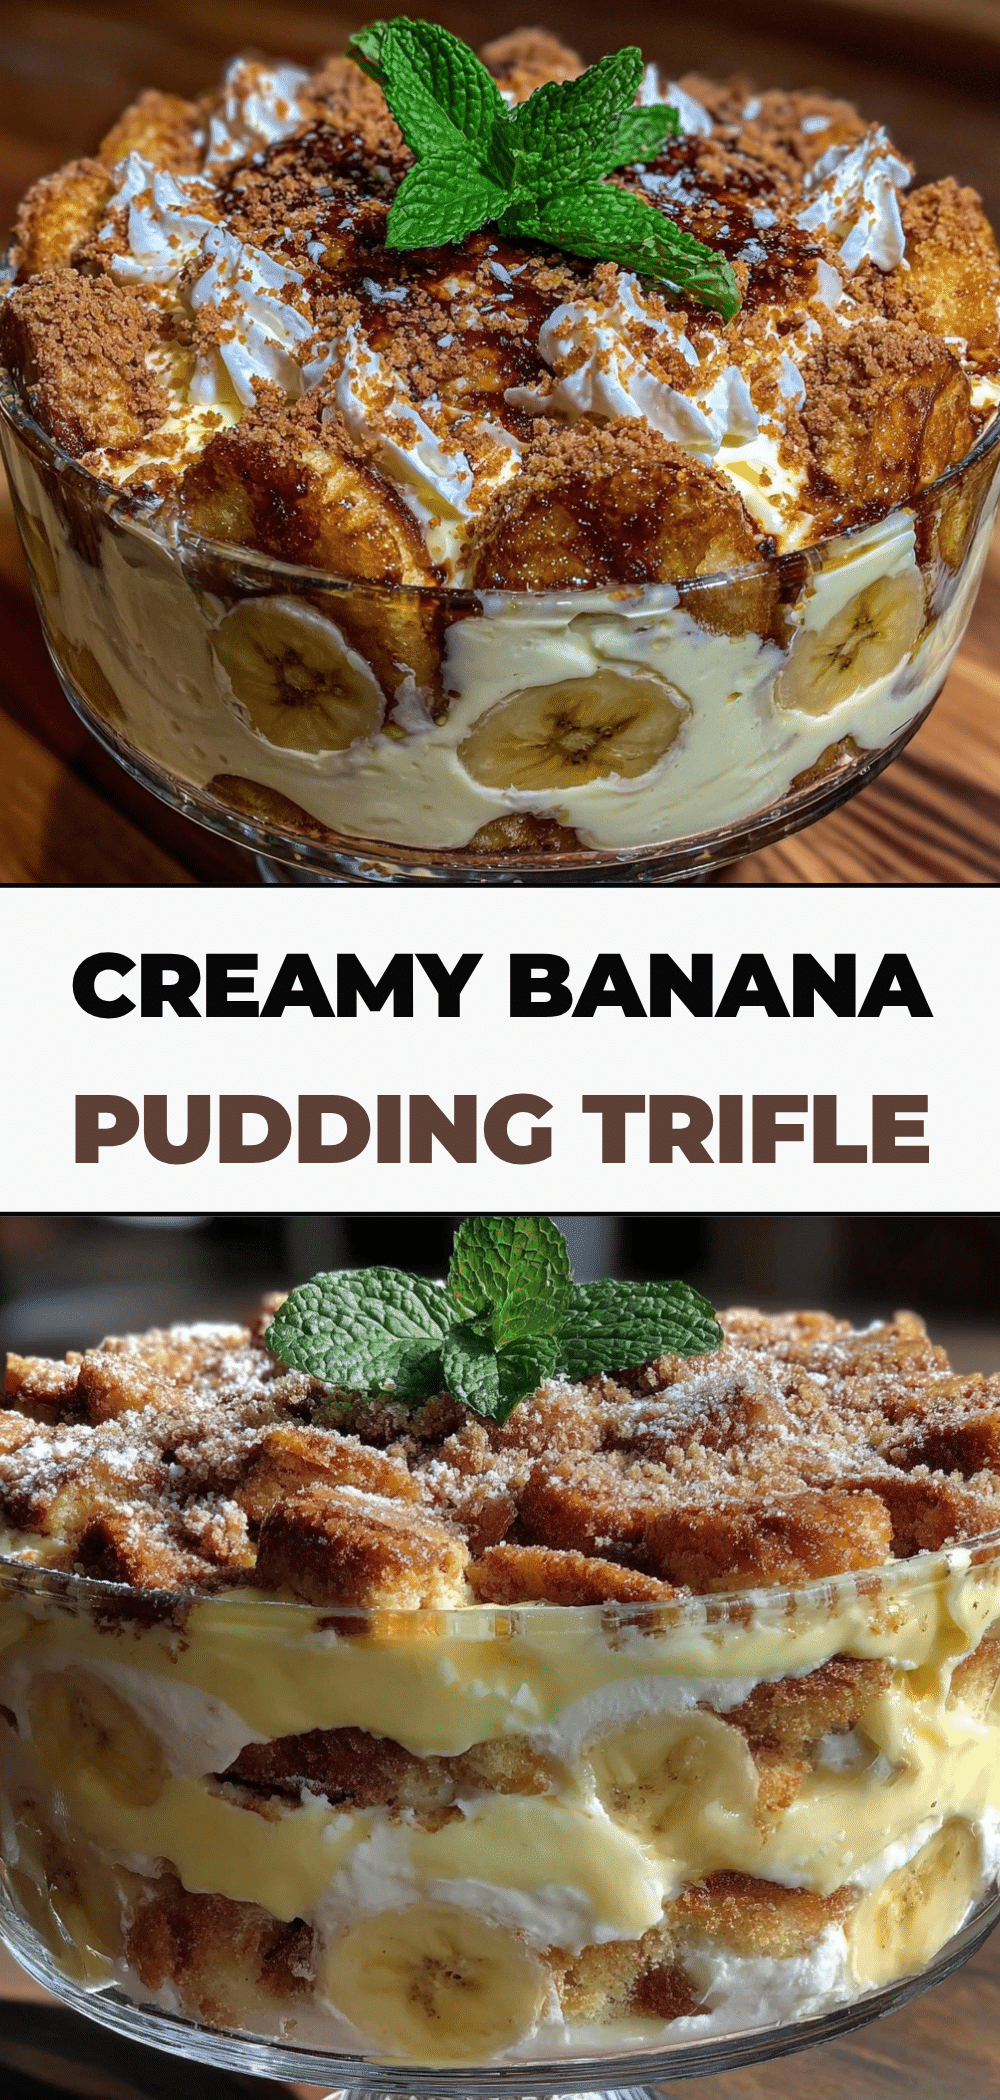
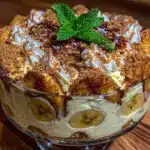
Banana Pudding Trifle: The Easiest, Foolproof Dessert
- Total Time: 4 hours 23 minutes
- Yield: 8 servings 1x
Description
A simple, no-cook banana pudding trifle that layers ripe bananas, vanilla wafers, and a creamy custard-like filling made from whipped cream, sweetened condensed milk, and instant pudding mix. It is make-ahead friendly and requires minimal ingredients.
Ingredients
- 2 cups heavy cream (cold)
- 1 can (14oz / 397g) sweetened condensed milk
- 2 boxes (3.4oz each) instant vanilla pudding mix
- 2 teaspoons vanilla extract
- 4–5 large ripe bananas
- 1 package (14.7oz) vanilla wafers
- 1 tablespoon lemon juice
- 1 cup heavy cream (for topping, optional)
- 1 teaspoon sugar (for topping, optional)
- ½ cup crushed vanilla wafers (for topping, optional)
- ¼ cup chocolate shavings (for topping, optional)
Instructions
- Peel and slice bananas into half-inch rounds. Toss with lemon juice and set aside.
- In a large mixing bowl, whip the cold heavy cream on medium-high speed until soft peaks form (about 2-3 minutes).
- In a separate bowl, whisk together the instant vanilla pudding mix and sweetened condensed milk until smooth.
- Gently fold the whipped cream into the pudding mixture until uniform. Stir in the vanilla extract.
- In a trifle dish or serving bowls, create layers: start with vanilla wafers, then sliced bananas, then the pudding mixture. Repeat for 3-4 layers, ending with pudding.
- Cover and refrigerate for at least 4 hours or overnight to allow flavors to meld and wafers to soften.
- Before serving, top with additional whipped cream, crushed vanilla wafers, and/or chocolate shavings if desired.
- Serve chilled.
Notes
Use ripe bananas with yellow skin and brown spots for best sweetness and texture. Do not overbeat the cream into stiff peaks to maintain a light texture. The trifle tastes best when made ahead and chilled overnight. Do not freeze as the texture will suffer.
- Prep Time: 23 minutes
- Cook Time: 0 minutes
- Category: Dessert
- Cuisine: American
Nutrition
- Serving Size: 1 slice or scoop
- Calories: 380
- Sugar: 30
- Sodium: 250
- Fat: 20
- Saturated Fat: 12
- Carbohydrates: 45
- Fiber: 2
- Protein: 5
Keywords: banana pudding, trifle, no bake dessert, easy dessert, southern dessert, vanilla wafers, make ahead dessert