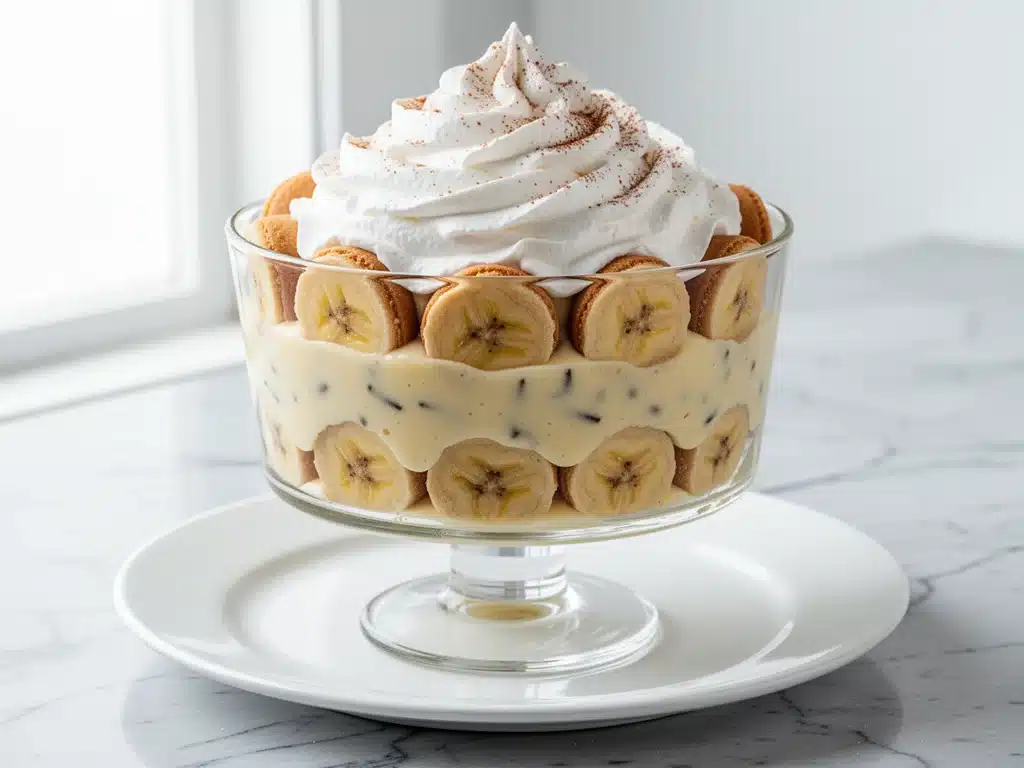
There is a specific, heavy silence that falls over a Southern dining room when the dessert course arrives. It’s not a bad silence. It’s the silence of anticipation. It’s the sound of twenty people leaning forward, forks in hand, waiting for the spoon to hit the bottom of the glass dish.
For me, that moment happened last August at my cousin’s wedding rehearsal dinner. The table was long, the sun was setting, and there sat a 9×13 Pyrex dish, glowing under the string lights. My aunt, who has been making this Classic Southern Banana Pudding with Vanilla Wafers since before I was born, set it down without a word. No fanfare. Just a quiet placement of a masterpiece.
I took one bite, and honestly? I stopped talking. The vanilla wafer had softened just enough to be cake-like but still held a tiny bit of structure. The bananas were sweet and creamy, almost melting into the custard. The whipped cream was light as air. It was perfect. Too perfect. I asked for the recipe right then and there, expecting a complicated list of ingredients and a degree in pastry science.
Instead, my aunt laughed. She told me it was just three things: bananas, vanilla wafers, and a pudding made from scratch (or from a box, if you’re feeling lazy). She told me the secret wasn’t in the ingredients. It was in the patience.
I’ve made this dessert dozens of times since that night. I’ve tweaked it, tested it, and even tried to “improve” it (don’t worry, I stopped doing that). And I can tell you this: it is hands-down the most comforting, nostalgic dessert you will ever make. It’s not flashy like a sheet pan sausage dinner might be for dinner. It doesn’t have the complex spice profile of maple pecan pie bars. It’s simpler. It’s purer. And it’s the kind of dessert that makes people close their eyes and remember their childhood.
If you’re looking for a show-stopping treat that requires zero baking skills but maximum heart, this is it. Let’s get into why this Classic Southern Banana Pudding with Vanilla Wafers is about to become your new obsession.
Why You’ll Love This Recipe
I know what you’re thinking. “Banana pudding? That’s basic.” But this isn’t your average grocery store tub dessert. This is the real deal. The kind of dessert that tastes like a hug from your grandmother. Here’s why I keep making it on repeat:
It’s a Nostalgia Bomb — Seriously, this tastes like Sunday dinners. It smells like vanilla and comfort. I’ve served this to teenagers who claim they don’t like “old people food,” and within ten minutes, they’re asking for the recipe. It bridges the gap between generations.
Zero Baking Required — If you can layer ingredients in a bowl, you can make this. No oven preheating. No worrying about burnt edges. No standing over a stove stirring custard for an hour (unless you want to, which is an option I’ll share). It’s the perfect make-ahead dessert for holidays or potlucks.
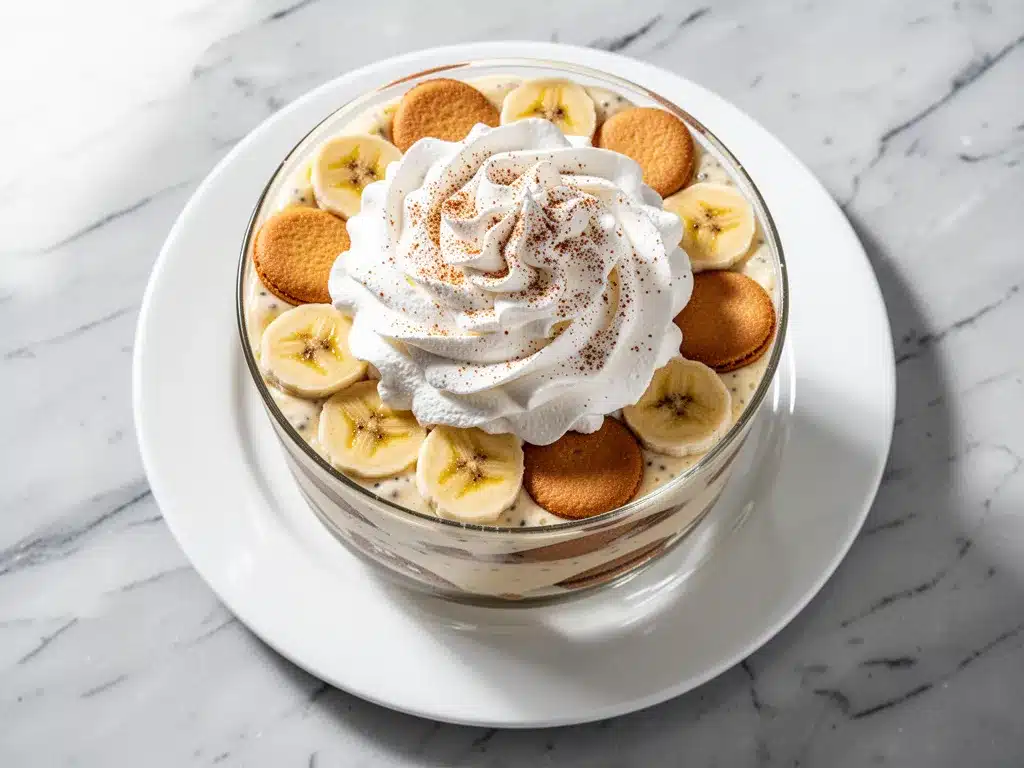
The Texture is Everything — The magic happens in the waiting. Those vanilla wafers absorb the pudding and cream, transforming from crisp cookies into something akin to a soft, vanilla sponge cake. The bananas soften but don’t turn to mush. It’s a textural dream.
It’s Cheap and Feeds a Crowd — Bananas are one of the cheapest fruits in the store. Vanilla wafers are pantry staples. Heavy cream is basic. You can feed 12 people for under $15. That’s party math I can get behind. It’s way more budget-friendly than something like a fancy charcuterie board and just as impressive.
Leftovers Actually Taste Better — This isn’t like pizza where it’s best fresh. This pudding gets better overnight. The flavors meld. The layers settle. I deliberately make two dishes—one to eat tonight and one to save for tomorrow. The second day is often better than the first.
This is my go-to when I need to impress without stress. It’s reliable, delicious, and always disappears.
Ingredients You’ll Need
Here’s the best part: you probably have most of this already. This isn’t a recipe that requires a trip to three different specialty stores. It’s built on simple, high-quality basics. I’m particular about a few things here, though. Quality matters more than quantity in this one.
For the Pudding Base:
Instant Vanilla Pudding Mix (2 boxes / 3.4 oz each) — I use Jell-O or a store brand. Don’t cook it on the stove! Instant pudding is designed to thicken with cold milk. It’s faster and easier. Some people swear by homemade custard, but for this specific Southern style, the instant mix gives that distinct, sweet, creamy texture we love.
Whole Milk (4 cups / 960ml) — Do not use skim or 1%. You need the fat for richness. If you want it extra decadent, use half whole milk and half heavy cream, but whole milk is the traditional choice. Cold milk is crucial for the instant pudding to set properly.
Heavy Whipping Cream (2 cups / 480ml) — This is what makes it light and airy. You’re going to whip this separately. Use fresh, cold heavy cream. If it’s warm, it won’t whip. I keep my bowl in the fridge for 15 minutes before whipping to be safe.
Confectioners’ Sugar (½ cup / 60g) — Just a little bit to sweeten the whipped cream. You don’t want it too sweet, as the pudding mix and bananas are already sugary. I taste as I go.
Vanilla Extract (1 teaspoon / 5ml) — Pure vanilla, please. I know it’s pricey, but it makes a difference. I use the brown bottle stuff. If you use imitation vanilla, the flavor will be flat. Trust me.
For the Layers:
Vanilla Wafers (1 package / 14.7 oz) — Nilla Wafers are the gold standard. They are crisp, sweet, and hold up well. Do not substitute with shortbread or sugar cookies—they have the wrong texture and flavor profile. You need that specific Nilla Wafer crunch (that turns soft later).
Ripe Bananas (6-8 medium) — This is the most important ingredient. They need to be ripe but not brown. Yellow with a few brown spots is perfect. If they’re green, they’re tart. If they’re black, they’re mushy. Find that sweet spot. I use about 6 for a strong banana flavor, or 8 if you want it lighter.
Lemon Juice (1 tablespoon / 15ml) — This is the secret weapon. Squeezing lemon juice over the banana slices prevents them from browning (oxidizing) and adds a tiny hint of brightness that cuts through the sweetness. It’s subtle, but you’ll miss it if you skip it.
Optional Toppings:
Meringue — Traditional Southern pudding sometimes tops with torched meringue. I skip this because it’s fussy and melts quickly. But if you want to go fancy, it’s an option.
Whipped Cream Rosettes — Extra whipped cream piped on top for presentation. Looks great for photos.
Chocolate Shavings — A modern twist. Dark chocolate pairs surprisingly well with vanilla and banana. I add this sometimes for a bit of contrast.
Common Questions About Ingredients
Can I use frozen bananas? — No. Frozen bananas thaw into mush. You want fresh, firm bananas that slice cleanly.
Can I use Cool Whip? — You can, but it’s not the same. Fresh whipped cream is lighter and less sweet. Cool Whip has a waxy mouthfeel. I’ve made it with Cool Whip when I was in a rush, and it was okay, but fresh cream is worth the 5 minutes.
Equipment Needed
You don’t need fancy gadgets for this. Here’s what I actually use. Most of this is stuff you already have in your kitchen.
9×13 Glass Baking Dish — Pyrex is best because you can see the layers. It also looks beautiful on the table. You can use a ceramic dish, but glass is traditional and lets you show off your layering skills.
Two Large Mixing Bowls — One for the pudding, one for the whipped cream. Make sure they’re big enough. The pudding mix expands when you add milk.
Electric Hand Mixer or Stand Mixer — To whip the cream. You can do it by hand, but it takes effort. I use my hand mixer because it’s fast. If you’re making a lot of whipped cream, a stand mixer is great.
Sharp Knife — For slicing bananas. A dull knife will crush the bananas and make them bruise faster. I use my chef’s knife for this.
Peeler or Knife — To peel the bananas. Simple.
Spatula — For folding the whipped cream into the pudding. A rubber spatula is best because it gets into the corners of the bowl.
Measuring Cups and Spoons — Standard stuff. Accuracy matters more here than in baking, but you don’t need to be surgical. Eyeballing is fine for the milk and sugar.
Serving Spoons — Use a nice spoon. This dessert is elegant. A plastic spoon from the dishwasher doesn’t do it justice.
How to Make It: Step-by-Step
Alright, let’s make this! I’m walking you through exactly how I do it. It’s simple, but there’s a method to the madness. Follow these steps, and you’ll get that perfect, restaurant-quality result.
Step 1: Prep Your Bananas (5 minutes)
Peel the bananas and slice them into ¼-inch rounds. As you slice, toss them in a bowl with the lemon juice. This coats every slice and stops them from turning brown. I do this first because once you start assembling, you want everything ready to go. If you let the bananas sit out, they’ll darken, and it looks unappetizing.
Step 2: Make the Pudding (5 minutes)
In your large mixing bowl, combine the instant vanilla pudding mix and the cold whole milk. Whisk vigorously for about 2 minutes. I use a whisk, not a spoon, because it incorporates the powder faster and removes lumps. Let it sit for 5 minutes. The pudding will thicken up. It should be thick, creamy, and spreadable. If it’s too thin, let it sit longer. If it’s too thick, add a splash more milk.
Step 3: Whip the Cream (3 minutes)
In a separate cold bowl, pour the heavy whipping cream, confectioners’ sugar, and vanilla extract. Whip on medium-high speed until you form stiff peaks. This means when you lift the beaters, the cream stands up straight. Don’t over-whip it into butter! Watch it closely. It goes from perfect to grainy in seconds.
Step 4: Fold the Cream into the Pudding (2 minutes)
Add about half of the whipped cream to the pudding and stir it in gently. This lightens the pudding, making it easier to fold in the rest. Then, add the remaining whipped cream. Use a spatula to gently fold it in. Fold from the bottom up, like you’re folding a letter. You want to keep as much air in the cream as possible. The mixture should be fluffy, pale yellow, and uniform. Do not stir vigorously.
Step 5: Assemble the Layers (10 minutes)
Now for the fun part. Take your 9×13 dish. Start with a layer of vanilla wafers. Cover the bottom completely. If you have gaps, break a wafer to fill them. You don’t need to overlap them much; they’ll soften and spread.
Next, add a layer of banana slices. Arrange them in a single layer over the wafers. Try to cover the wafers as much as possible. Bananas are the star, so don’t skimp.
Then, spoon a generous layer of the pudding mixture over the bananas. Spread it out with a spatula to cover the bananas completely. This seals the bananas from the air, keeping them fresh.
Repeat the layers: Wafers, Bananas, Pudding. You’ll usually get 3 layers. Some people do 4, but 3 is the sweet spot for structure. If you do too many layers, the bottom wafers might get too soggy before you serve it.
Finish with a final layer of pudding. Smooth the top. It doesn’t need to be perfect; rustic looks good.
Step 6: The Wait (Crucial Step!)
Cover the dish tightly with plastic wrap. Press the plastic directly onto the surface of the pudding to prevent a skin from forming. Refrigerate for at least 4 hours, but ideally overnight. This is where the magic happens. The wafers absorb the moisture and become soft. The flavors meld. If you eat it right away, the wafers will be hard and the bananas sharp. Patience is key.
Step 7: Serve
Remove from the fridge. If you want, add a dollop of extra whipped cream on top. Serve with a nice spoon. Watch your guests’ faces. It’s worth it.
Total Time: 25 minutes active, plus 4+ hours chilling.
Expert Tips & Tricks
Here’s everything I’ve learned from making this dozens of times. These tips will save you from my mistakes.
Don’t Skip the Lemon Juice
I know, it’s banana pudding. Why lemon? Because bananas oxidize fast. The lemon juice keeps them bright yellow. It also adds a tiny zing that balances the sweetness. It’s subtle, but it makes the flavor pop. Use fresh lemon, not bottled.
Keep Your Cream Cold
If your heavy cream is warm, it won’t whip. I keep my bowl in the fridge. If I’m in a rush, I put the bowl in the freezer for 10 minutes. Cold cream whips faster and holds its shape better. Warm cream turns to soup.
Use Ripe Bananas
Green bananas are tart and starchy. Overripe (black) bananas are mushy and have a fermented taste. Look for bananas that are yellow with brown speckles. They’re sweet and aromatic. If they’re too green, buy them a few days ahead and keep them on the counter.
Press the Wafers Down
When you layer the wafers, press them down gently with your hand. This ensures they’re flat and will absorb the pudding evenly. If they’re bumpy, you’ll get dry spots.
Don’t Over-Fold
When mixing the cream and pudding, be gentle. If you stir too hard, you’ll deflate the whipped cream. The pudding will be dense and heavy. You want it light and airy. Fold, don’t stir.
Chill the Dish
If you can, put your 9×13 dish in the fridge for 15 minutes before assembling. A cold dish helps the pudding set faster and keeps the cream stable. It’s a small step that makes a difference.
Common Mistakes
Mistake: The pudding is runny.
Fix: You didn’t whisk the instant pudding enough, or the milk was warm. Make sure the milk is ice-cold and whisk for a full 2 minutes. Let it sit for 5 minutes to thicken.
Mistake: The wafers are soggy.
Fix: You ate it too soon. The wafers need time to soften. Wait at least 4 hours. If you’re making it for a party, make it the day before.
Mistake: The bananas are brown.
Fix: You didn’t use enough lemon juice, or you let them sit out too long before layering. Coat them immediately after slicing.
Pro Tricks
For Extra Flavor
Add a teaspoon of almond extract to the whipped cream. It pairs beautifully with banana and vanilla. It’s a subtle change that tastes fancy.
For Presentation
Use a clear glass dish. People love seeing the layers. It’s Instagram-worthy. If you’re serving it at a potluck, bring a sign that says “Classic Southern Banana Pudding.” It adds to the allure.
Variations & Substitutions
Once you’ve nailed the basic version, here’s how you can mix it up. I’ve tried all of these, and they’re all good.
Chocolate Banana Pudding
Swap the vanilla pudding mix for chocolate pudding mix. Keep the rest the same. It’s like a dessert sandwich. My kids love this version. It’s rich and indulgent.
Banana Split Pudding
Add a layer of maraschino cherries between the banana and pudding layers. Add a drizzle of chocolate syrup on top. It’s a pudding version of a banana split. Fun for birthdays.
Cookie Swap
If you can’t find Nilla Wafers, use vanilla wafers from a bakery or homemade shortbread. But note: the texture will be different. Shortbread is buttery and crumbly. Nilla Wafers are crisp and dry. The crispness is what makes the traditional version work.
Lighter Version
Use skim milk for the pudding and Greek yogurt instead of half the heavy cream. It’s lighter but still creamy. The texture won’t be as rich, but it’s a good option if you’re watching calories. I make this for my health-conscious friends.
Gluten-Free
Use gluten-free vanilla wafers. Most brands work well. Make sure the pudding mix is certified gluten-free (most are, but check). Everything else is naturally gluten-free.
Dairy-Free
Use coconut milk for the pudding and coconut cream for the whipped cream. Use dairy-free vanilla wafers. It’s a good option for vegans. The flavor is slightly coconutty, but it’s delicious. My lactose-intolerant cousin loves it.
Serving & Storage
How to Serve:
I usually serve this straight from the dish. It looks rustic and inviting. But here are other ways I’ve enjoyed it:
Side Dishes:
This is a dessert, so it stands alone. But if you’re serving it after a meal, pair it with iced vanilla chai lattes or coffee. The bitterness of coffee cuts the sweetness perfectly. You could also serve it with a simple green salad if you want a light end to a heavy meal, but that’s rare for pudding.
Toppings Bar:
When I have guests, I put out: extra whipped cream, chocolate shavings, crushed Nilla Wafers, and caramel sauce. Everyone customizes their bowl. It’s fun and interactive.
Storage Instructions:
Refrigerator:
Store in an airtight container or covered with plastic wrap for up to 3 days. The wafers will continue to soften, so it gets creamier. It’s best within 48 hours. After that, the texture might get too mushy.
Reheating:
Do not reheat banana pudding. It’s a cold dessert. Eating it warm is not recommended. The texture will be weird, and the bananas will turn brown.
Freezing:
I don’t recommend freezing this. The bananas will become watery and mushy when thawed. The cream will separate. It’s not worth it. Make it fresh or store in the fridge.
Meal Prep:
This is the ultimate meal prep dessert. Make it on Sunday, store it in the fridge, and grab a bowl all week. It actually gets better each day. I pack it in a Tupperware for lunch sometimes. It’s like eating dessert for breakfast. No judgment here.
Nutrition Information
I’m not a nutritionist, but here’s the breakdown if you’re tracking. Keep in mind, this is a dessert, so it’s indulgent.
Per Serving (based on 12 servings):
– Calories: 320
– Protein: 4g
– Carbs: 42g
– Fiber: 2g
– Sugar: 28g
– Fat: 14g
– Saturated Fat: 8g
– Cholesterol: 35mg
– Sodium: 180mg
What’s Good:
It’s not a health food, but it does have some protein from the milk and cream. The bananas add potassium. It’s a treat, not a meal.
What to Know:
High in sugar from the pudding mix and bananas. Contains dairy and gluten. Moderate sodium. If you’re watching sugar, use the lighter version with Greek yogurt and less sugar.
My Take:
Look, this is comfort food. It’s sweet, creamy, and satisfying. It’s not a diet recipe. But it’s way better than store-bought pudding cups, and it’s easy to control portions. When I want to make it lighter, I use the Greek yogurt version. But usually? I just eat a reasonable portion and enjoy it. Life is short. Eat the pudding.
Final Thoughts
So that’s my go-to Classic Southern Banana Pudding with Vanilla Wafers! I’ve probably talked your ear off at this point, but when you make a recipe this often, you have a lot to say about it.
This has saved dessert nights more times than I can count. It’s my answer to “what’s for dessert” when I’m tired, don’t want to bake, and still want something that tastes really good. My family is happy, my guests are happy, and I’m happy because I’m not stressed about cooking.
Make it yours! Try different toppings, swap in your favorite cookies, adjust the sweetness. The best recipes are the ones you adapt to your family’s tastes. If you want to try something else, check out my peanut butter chocolate chip cookie cups for a quick no-bake option.
If you make this, drop a comment and let me know what you think! I love hearing how recipes turn out in your kitchen. And if something doesn’t work, tell me that too—I’m here to help troubleshoot.
Happy cooking! And I hope your kitchen smells half as good as mine does right now.
Frequently Asked Questions
Can I make this ahead of time?
Yes! This is actually best made ahead. It needs at least 4 hours to set, but overnight is ideal. Make it the day before you plan to serve it. It keeps well in the fridge for up to 3 days.
Why did my pudding turn out runny?
Usually, this means the milk wasn’t cold enough, or you didn’t whisk the instant pudding mix long enough. Instant pudding needs cold milk and vigorous whisking to thicken. Also, make sure you’re using instant pudding, not cook-and-serve. Cook-and-serve needs to be boiled to thicken.
Can I use ripe bananas that are already brown?
If they’re just spotted, yes. If they’re completely black and mushy, no. They’ll turn the pudding brown and have a fermented taste. Look for bananas that are yellow with brown spots. They’re sweet and aromatic.
How do I prevent the bananas from browning?
Use lemon juice. Toss the sliced bananas in lemon juice immediately after slicing. This coats them and prevents oxidation. You can also use pineapple juice, but lemon is traditional and adds a nice brightness.
Can I freeze this pudding?
I don’t recommend it. The bananas will become watery and mushy when thawed. The cream will separate. It’s not worth the risk. Make it fresh or store in the fridge.
What kind of vanilla wafers should I use?
Nilla Wafers are the standard. They are crisp, sweet, and dry, which is perfect for absorbing the pudding. Avoid soft vanilla cookies or shortbread, as they will disintegrate too quickly.
Can I use homemade whipped cream?
Absolutely. In fact, I prefer it. Homemade whipped cream is lighter and less sweet than Cool Whip. Just make sure to whip it to stiff peaks and fold it gently into the pudding.
How long does this last in the fridge?
It lasts up to 3 days in an airtight container. After that, the wafers get too soggy and the bananas may brown. It’s best eaten within 48 hours.
Pin This Recipe!
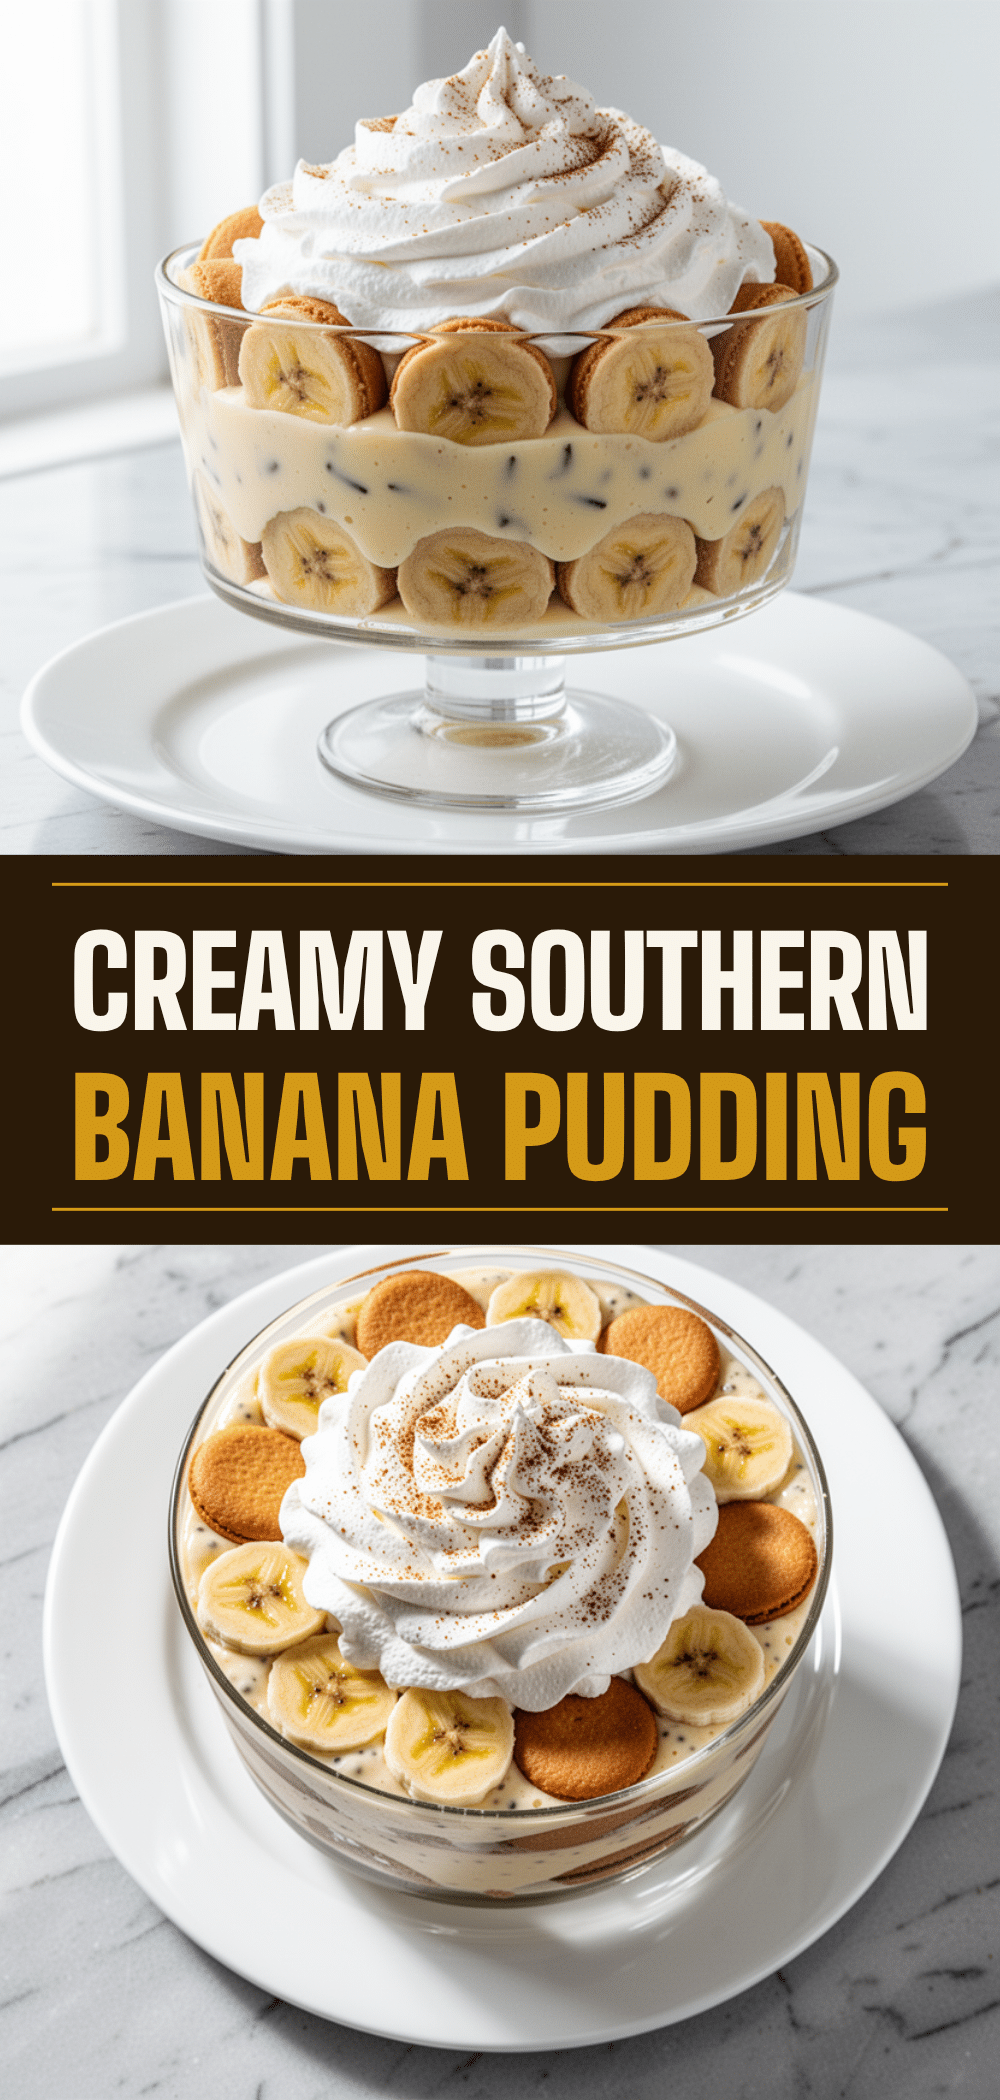
Classic Southern Banana Pudding with Vanilla Wafers
- Total Time: 4 hours 25 minutes
- Yield: 12 servings 1x
Description
A nostalgic, no-bake Southern dessert featuring layers of vanilla wafers, ripe bananas, and a creamy pudding made from instant mix and freshly whipped cream. It requires patience to set but delivers a comforting, melt-in-your-mouth texture.
Ingredients
- 2 boxes (3.4 oz each) Instant Vanilla Pudding Mix
- 4 cups (960ml) Cold Whole Milk
- 2 cups (480ml) Heavy Whipping Cream
- ½ cup (60g) Confectioners’ Sugar
- 1 teaspoon (5ml) Pure Vanilla Extract
- 1 package (14.7 oz) Vanilla Wafers (Nilla Wafers)
- 6–8 medium Ripe Bananas
- 1 tablespoon (15ml) Lemon Juice
Instructions
- Peel bananas and slice into ¼-inch rounds. Toss slices with lemon juice to prevent browning.
- In a large mixing bowl, whisk instant vanilla pudding mix and cold whole milk vigorously for 2 minutes. Let sit for 5 minutes until thickened.
- In a separate cold bowl, whip heavy cream, confectioners’ sugar, and vanilla extract on medium-high speed until stiff peaks form.
- Fold half of the whipped cream into the pudding to lighten it, then gently fold in the remaining whipped cream until uniform and fluffy.
- In a 9×13 glass dish, create layers: start with vanilla wafers, then banana slices, then pudding mixture. Repeat for 3 layers total, finishing with pudding.
- Cover tightly with plastic wrap pressed directly onto the surface. Refrigerate for at least 4 hours, ideally overnight, to allow wafers to soften.
- Serve chilled with optional toppings like extra whipped cream or chocolate shavings.
Notes
Patience is key; the pudding must chill for at least 4 hours to allow the wafers to soften. Use cold milk and cold cream for best results. Bananas should be ripe but not brown. Do not freeze, as the texture will suffer.
- Prep Time: 25 minutes
- Cook Time: 0 minutes
- Category: Dessert
- Cuisine: Southern
Nutrition
- Serving Size: 1 slice from a 9x13
- Calories: 320
- Sugar: 28
- Sodium: 180
- Fat: 14
- Saturated Fat: 8
- Carbohydrates: 42
- Fiber: 2
- Protein: 4
Keywords: banana pudding, southern dessert, vanilla wafers, no-bake dessert, comfort food, make-ahead dessert, nostalgic dessert


