My husband has this habit. You know the one? He’ll stare into the fridge at 6:30 PM like it’s going to suddenly produce a gourmet meal out of thin air. Last Tuesday, it was just half a bag of onions, three bruised apples, and some chicken thighs he’d forgotten about in the back of the freezer. I was already dreading the “what’s for dinner” conversation because I knew he was in one of those moods where he wants something fancy but has zero energy to cook it.
So I did what I always do. I grabbed a sheet pan, threw everything on there, and told him to go watch a movie. I figured it would be a decent fallback. Maybe a little dry chicken, maybe some mushy apples. But then the smell hit me about twenty minutes in. It wasn’t just “dinner.” It smelled like my grandmother’s kitchen in October. Like cinnamon, caramelized sugar, and savory herbs.
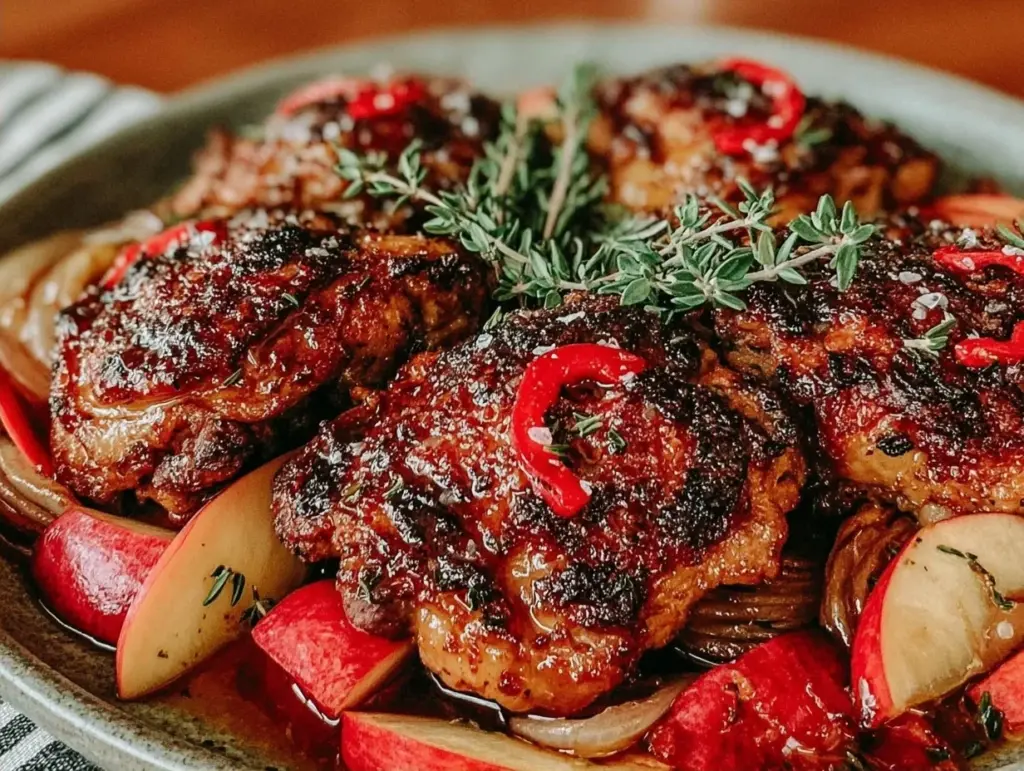
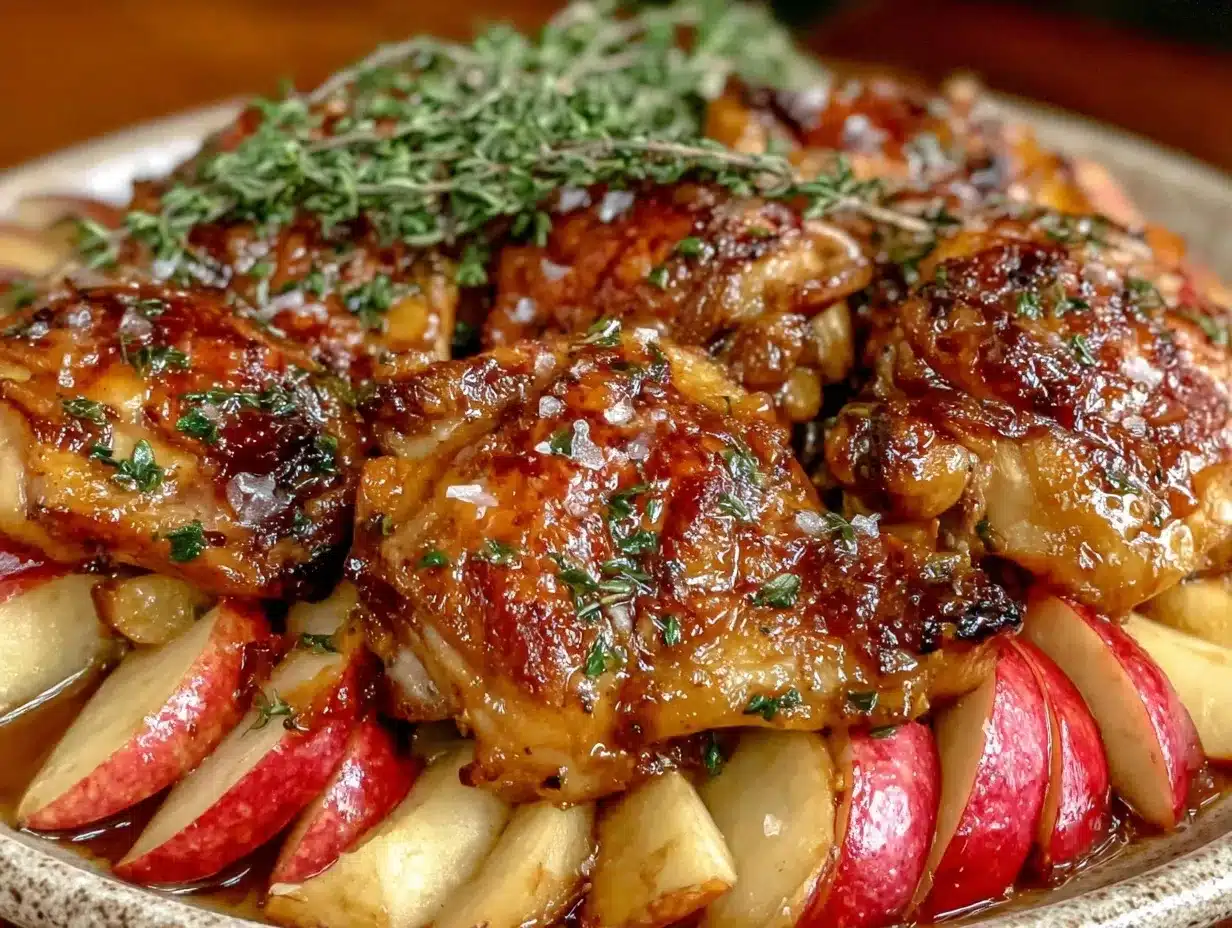
When I pulled the pan out, the apples had turned into sweet, tender confetti. The onions were jammy and soft. And the chicken? Crispy skin, juicy meat, and coated in this sticky, sweet-savory glaze. My husband took one bite, paused, and said, “We need to make this every week.” I laughed. We both know he’s joking. But honestly? He’s not wrong. This Cozy Fall Chicken Thighs with Roasted Apples and Onions is the kind of meal that makes you feel like a competent cook even if you’ve never touched a roasting pan before.
I’ve tested this recipe about eight times in the last month alone. I’ve used Honeycrisp, Gala, and Granny Smith apples. I’ve used bone-in and boneless thighs. I’ve even added a splash of cider once (which was good, but not necessary). The version I’m sharing with you today is the winner. It’s simple. It’s forgiving. It’s basically foolproof. If you can chop an apple and sprinkle salt, you can make this. And if you can only make one thing this season, make this.
Why You’ll Love This Recipe
There are about ten reasons I keep coming back to this sheet pan dinner, but let’s be real—you don’t need ten reasons. You need three solid ones. Here’s why this Cozy Fall Chicken Thighs with Roasted Apples deserves a spot in your weekly rotation.
It’s Actually Simple — Seriously. We’re talking four main ingredients. Maybe five if you count the oil. I don’t want you hunting for exotic spices or buying three types of vinegar just to make dinner. You probably have everything in your pantry right now. The beauty of this recipe lies in its simplicity, but don’t let that fool you into thinking it’s boring. It’s not.
It’s Forgiving — I’ve made this when I was tired, distracted, and distractedly left the oven on for an extra ten minutes. The result? Still delicious. The apples get softer, the onions get sweeter. You can’t really mess this up. Unlike crispy air fryer chicken thighs where timing is everything, sheet pan roasting is much more relaxed. If your chicken is a little overcooked, it’s still tender. If your apples are a little mushy, they’re just extra sweet. It’s hard to fail here.
It Feels Fancy Without the Effort — This looks like something you’d order at a nice bistro for $25. But it costs about $15 to make at home, and you only have to wash one pan afterwards. My kids, who usually pick at their food, ask for seconds because they love the sweet and savory combo. It’s a total crowd-pleaser. Plus, it’s naturally gluten-free if you use cornstarch instead of flour, which is a huge win for my gluten-sensitive neighbor.
This is my go-to when I need dinner to just work. No complicated techniques, no weird ingredients, just reliable, delicious food that makes everyone happy. It’s the definition of “set it and forget it” but with way more flavor than a casserole.
Ingredients You’ll Need
Here’s the best part: you probably have most of this already. I’m not asking you to go to three different stores for this. Just grab these basics.
For the Chicken and Veggies
Chicken thighs (2 pounds / 900g) — Bone-in, skin-on is best here. The skin gets crispy and renders fat that flavors the apples. Boneless works, but they cook faster and can dry out if you’re not watching closely. I always buy the family pack from Costco. If you’re in a pinch, you can use drumsticks, but thighs are juicier.
Apples (3 medium, chopped / about 600g) — This is where you have fun. I love using a mix. Honeycrisp for structure, Gala for sweetness. Avoid Red Delicious—they turn to mush. You want apples that hold their shape a bit but get tender. Granny Smith is good if you like tartness, but I prefer sweeter apples for this glaze. Core them and chop into 1-inch chunks.
Onions (2 large, sliced / about 300g) — Yellow onions are my go-to. They caramelize beautifully. Sweet onions like Vidalia are also great if you’re in that part of the country. Just slice them into half-moons. Don’t dice them; you want them to roast, not burn.
Olive oil (2 tablespoons) — Regular olive oil is fine. You don’t need fancy extra virgin for roasting. Just enough to coat the chicken and veggies so they crisp up.
Salt and pepper — Generous amounts. Sea salt is nice, but table salt works. Black pepper adds the right amount of bite.
For the Glaze
Butter (3 tablespoons / 45g) — Unsalted is better so you control the salt. This melts down and mixes with the brown sugar to create that sticky glaze.
Brown sugar (2 tablespoons / 25g) — Light or dark brown sugar both work. Dark has more molasses flavor, which is nice, but light is fine. This is what makes the apples sticky and sweet.
Dried thyme (1 teaspoon) — Thyme and apples are a classic pairing. If you don’t have thyme, rosemary works too, but thyme is more subtle. Fresh thyme is better if you have it, but use twice the amount.
Garlic (2 cloves, minced) — Fresh garlic only. No jarred stuff here. It gets aromatic and sweet as it roasts.
Optional: Apple Cider (¼ cup / 60ml) — I added this in my 8th test and loved it. Pour it in at the end to deglaze the pan and make more sauce. It’s not essential, but it’s a nice touch if you have it.
Substitutions
Can’t find thyme? Use Italian seasoning. No brown sugar? White sugar mixed with a teaspoon of molasses works. Need it dairy-free? Swap the butter for olive oil or coconut oil. It won’t be as rich, but it’ll still taste good.
Equipment Needed
You don’t need fancy equipment for this. Here’s what I actually use.
Sheet pan (18×13 inch) — I use a half-sheet pan. It’s the standard size. Make sure it’s big enough so the chicken isn’t crowded. If you crowd the pan, the chicken steams instead of roasts. Two smaller pans work if you don’t have a big one.
Baking dish (8×8 inch or similar) — For melting the butter and brown sugar. Any small oven-safe dish works. Or just use a microwave-safe bowl.
Tongs — For flipping the chicken. Forks work, but tongs are easier.
Knife and cutting board — For chopping apples and onions. A sharp knife makes chopping apples way less scary.
Whisk or fork — For mixing the glaze. Doesn’t need to be fancy.
How to Make It: Step-by-Step
Alright, let’s make this! I’m walking you through exactly how I do it, including the little tricks I’ve picked up.
Step 1: Prep the Oven and Pan (5 minutes)
Preheat your oven to 400°F (200°C). Line your sheet pan with parchment paper. I know you can just grease the pan, but parchment makes cleanup zero. And let’s be honest, cleanup is half the battle with dinner. Just toss the paper in the trash after.
Step 2: Season the Chicken (5 minutes)
Pat the chicken thighs dry with paper towels. This is important. Wet chicken doesn’t crisp. Lay them on the sheet pan, skin-side up. Sprinkle generously with salt and pepper. Rub it in. Don’t be shy with the salt. The skin needs flavor.
Step 3: Prep the Fruits and Veggies (5 minutes)
While the oven heats, chop your apples and slice your onions. Toss them in a bowl with 1 tablespoon of olive oil, a pinch of salt, and a pinch of pepper. Spread them out on the sheet pan around the chicken. Don’t pile them on top of the chicken; let the air circulate. They need to roast, not steam.
Step 4: Make the Glaze (2 minutes)
In your small baking dish or microwave-safe bowl, combine the butter, brown sugar, minced garlic, and dried thyme. Microwave for 30-45 seconds until the butter is melted. Whisk it together until it’s smooth and bubbly. It should look like a thick, fragrant syrup.
Step 5: Roast the Chicken (20 minutes)
Put the pan in the oven. Roast for 20 minutes. The chicken skin should start to crisp up, and the apples should be getting tender. Check them after 15 minutes if you’re worried.
Step 6: Add the Glaze and Finish (15 minutes)
Take the pan out. Spoon the butter-brown sugar glaze over the chicken thighs. Make sure to get it under the skin if you can. Then, flip the apples and onions so they’re coated in any juices. Put it back in the oven for another 15-20 minutes. The chicken is done when it reaches 165°F internally, but thighs are forgiving and can go to 175°F for extra tenderness. The apples should be soft enough to pierce with a fork.
Step 7: Rest and Serve
Take the pan out. Let the chicken rest for 5 minutes. This keeps the juices in. While it rests, if you used apple cider, pour it into the hot pan and scrape up the brown bits. Pour that over everything. Serve immediately. The skin will stay crispy if you eat it right away.
Total Time: About 50 minutes (15 active, 35 mostly hands-off)
Expert Tips & Tricks
Here’s everything I’ve learned from making this dozens of times. These tips will save you from my mistakes.
Don’t Skip the Paper Towels
I know it’s annoying, but drying the chicken skin is the #1 secret to crispy skin. If it’s wet, it steams. Wet chicken = sad chicken. Pat it until it’s dry. Trust me.
Choose the Right Apple
This is where people mess up. If you use Red Delicious, you’ll get mush. If you use Granny Smith, you might find them too tart for some palates. Honeycrisp, Fuji, or Gala are the sweet spots. They hold shape but get soft. If you’re unsure, ask your fruit guy. “What’s good for roasting?”
Watch the Sugar
Brown sugar burns. If your oven runs hot, check the pan at the 35-minute mark. If the apples look like they’re getting too dark, cover them loosely with foil. Better safe than sorry.
Rest the Chicken
I want to serve it immediately, but I know you’re hungry. Wait 5 minutes. It’s hard, but it makes a huge difference in texture. The meat reabsorbs its juices. If you cut into it right away, all the juice runs out, and you lose flavor.
Make-Ahead Strategy
You can chop the apples and onions up to 2 days ahead. Store them in an airtight container in the fridge. Season the chicken the night before too. Just assemble and put it in the oven when you get home. It saves so much stress.
Variations & Substitutions
Once you’ve nailed the basic version, here’s how you can mix it up. I’ve tried all of these.
Spicy Version
Add a pinch of cayenne pepper or red pepper flakes to the glaze. It adds a nice kick that cuts through the sweetness. I like this with a cold beer.
Maple Version
Swap the brown sugar for pure maple syrup. It’s more natural and adds a different depth of flavor. Use 2 tablespoons of maple syrup instead of brown sugar. It’s my favorite variation for autumn mornings, but it works for dinner too.
Herb Swap
No thyme? Use rosemary or sage. Sage and apples are a classic combo. Just use fresh sage leaves if you have them—toss them in whole. It looks pretty and tastes amazing.
Vegetarian Option
Skip the chicken. Roast more apples and onions, maybe add some butternut squash cubes. Drizzle with the glaze. It’s a delicious side dish or light meal. Serve over rice or quinoa.
Dairy-Free
Use olive oil instead of butter in the glaze. It loses a little richness, but it’s still tasty. Add a splash of apple cider vinegar for brightness.
Serving & Storage
How to Serve:
I usually serve this straight from the sheet pan at the dinner table. It’s rustic and stays warm. But here are other ways I’ve enjoyed it:
Side Dishes:
- Cauliflower rice (low-carb option)
- Mashed potatoes (to soak up the glaze)
- Green beans sautéed with garlic
- A simple arugula salad with lemon vinaigrette
Toppings Bar:
When I have guests, I put out: chopped parsley, extra thyme, crushed pecans. Everyone customizes their bowl. The pecans add a nice crunch.
Storage Instructions:
Refrigerator:
Store in an airtight container for up to 3 days. The chicken skin will get soft in the fridge. That’s normal. Reheating in the oven or air fryer restores the crispiness. Microwave makes it soggy.
Reheating:
Best method: Oven at 350°F for 10-15 minutes. Or air fryer at 350°F for 5 minutes. This brings back the crispy skin. Microwave only works if you don’t care about texture.
Freezing:
Honestly, this doesn’t freeze well. The apples turn mushy when thawed. The chicken is okay, but the texture changes. Make it fresh or store in the fridge for up to 3 days.
Meal Prep:
Make the glaze ahead. Store in the fridge. Chop veggies ahead. Assemble and roast when ready. It’s super fast on weeknights.
Nutrition Information
I’m not a nutritionist, but here’s the breakdown if you’re tracking.
Per Serving (based on 4 servings with 2 thighs and 1 cup veggies):
- Calories: 450
- Protein: 35g
- Carbs: 25g
- Fiber: 3g
- Sugar: 18g
- Fat: 22g
- Saturated Fat: 6g
- Cholesterol: 140mg
- Sodium: 400mg
What’s Good:
- High protein from chicken
- Fiber from apples and onions
- Naturally gluten-free
What to Know:
- Higher in sugar from apples and brown sugar
- Contains dairy (butter)
- Moderate sodium (use low-sodium broth if you add it)
My Take:
Look, this is comfort food with sugar and butter. It’s not a diet recipe. But it’s way better than takeout, costs less, and I know exactly what’s in it. When I want to make it lighter, I use less brown sugar and add more veggies. But usually? I just eat a reasonable portion and enjoy it.
Final Thoughts
So that’s my go-to Cozy Fall Chicken Thighs with Roasted Apples and Onions! I’ve probably talked your ear off at this point, but when you make a recipe this often, you have a lot to say about it.
This has saved weeknight dinners more times than I can count. It’s my answer to “what’s for dinner” when I’m tired, don’t want takeout, and still want something that tastes really good. My kids are happy, my husband’s happy, and I’m happy because I’m not stressed about cooking.
Make it yours! Try different apples, swap in your favorite herbs, adjust the sugar (though more is always better in my opinion). The best recipes are the ones you adapt to your family’s tastes.
If you make this, drop a comment and let me know what you think! I love hearing how recipes turn out in your kitchen. And if something doesn’t work, tell me that too—I’m here to help troubleshoot.
Happy cooking! And I hope your kitchen smells half as good as mine does right now.
Frequently Asked Questions
Can I use boneless chicken thighs?
You can, but they cook faster. Reduce the cooking time by about 5-10 minutes. Check them at 30 minutes total. Boneless thighs can dry out if you overcook them, so keep an eye on them. Bone-in, skin-on is still my recommendation for the best texture.
What’s the best apple for roasting?
Honeycrisp is my top pick. It balances sweet and tart and holds its shape well. Gala and Fuji are also great. Avoid Red Delicious or McIntosh—they get too soft. If you like tartness, mix Granny Smith with Honeycrisp.
Can I make this in the slow cooker?
Not really. The whole point is the crispy skin and caramelized apples. Slow cooking makes everything soft and steamed. If you want slow cooker chicken, try my slow cooker honey garlic chicken instead. It’s delicious, but it’s a different dish.
Why did my apples turn to mush?
You probably used the wrong type of apple or cut them too small. Use firm apples like Honeycrisp or Gala, and cut them into 1-inch chunks. Also, don’t stir them too much during roasting. Let them caramelize on one side.
Can I add other vegetables?
Yes! Carrots, sweet potatoes, or Brussels sprouts work great. Add them at the same time as the onions if they’re dense. If they’re delicate like spinach, add them in the last 5 minutes.
How do I reheat leftovers without losing crispiness?
Don’t use the microwave. Use an air fryer or oven. Air fry at 350°F for 3-5 minutes. Oven at 350°F for 10-15 minutes. This restores the crispy skin. Microwave makes it soggy and rubbery.
Is this recipe gluten-free?
Yes, naturally. Just make sure your brown sugar and spices are certified gluten-free if you’re sensitive. Cross-contamination is rare, but possible. I always check my labels just to be safe.
Pin This Recipe!


Cozy Fall Chicken Thighs with Roasted Apples
- Total Time: 50 minutes
- Yield: 4 servings 1x
Description
A simple, forgiving 4-ingredient sheet pan dinner featuring crispy chicken thighs, sweet roasted apples, and caramelized onions in a sticky brown sugar glaze.
Ingredients
- 2 pounds chicken thighs (bone-in, skin-on preferred)
- 3 medium apples (Honeycrisp, Gala, or Fuji), cored and chopped into 1-inch chunks
- 2 large yellow onions, sliced into half-moons
- 2 tablespoons olive oil (divided)
- Salt and black pepper (generous amounts)
- 3 tablespoons unsalted butter
- 2 tablespoons brown sugar
- 1 teaspoon dried thyme
- 2 cloves garlic, minced
- Optional: ¼ cup apple cider
Instructions
- Preheat oven to 400°F (200°C). Line a half-sheet pan with parchment paper.
- Pat chicken thighs dry with paper towels. Place skin-side up on the pan and season generously with salt and pepper.
- Toss chopped apples and sliced onions with 1 tablespoon olive oil, salt, and pepper. Spread around the chicken on the pan.
- In a small microwave-safe bowl, combine butter, brown sugar, minced garlic, and thyme. Microwave for 30-45 seconds until melted. Whisk until smooth.
- Roast chicken and vegetables for 20 minutes.
- Remove pan from oven. Spoon the glaze over the chicken, getting under the skin if possible. Flip apples and onions to coat in juices.
- Return to oven and roast for another 15-20 minutes, until chicken reaches 165°F-175°F and apples are tender.
- Let chicken rest for 5 minutes before serving. If using apple cider, deglaze the pan with it while chicken rests and pour over the dish.
Notes
Dry the chicken skin thoroughly for crispiness. Avoid Red Delicious apples as they turn to mush. If your oven runs hot, check the pan at 35 minutes to prevent burning. This recipe is naturally gluten-free. For dairy-free, swap butter for olive oil.
- Prep Time: 15 minutes
- Cook Time: 35 minutes
- Category: Main Course
- Cuisine: American
Nutrition
- Serving Size: 2 thighs and 1 cup v
- Calories: 450
- Sugar: 18
- Sodium: 400
- Fat: 22
- Saturated Fat: 6
- Carbohydrates: 25
- Fiber: 3
- Protein: 35
Keywords: chicken thighs, roasted apples, sheet pan dinner, fall recipes, easy dinner, gluten-free, one pan meal


