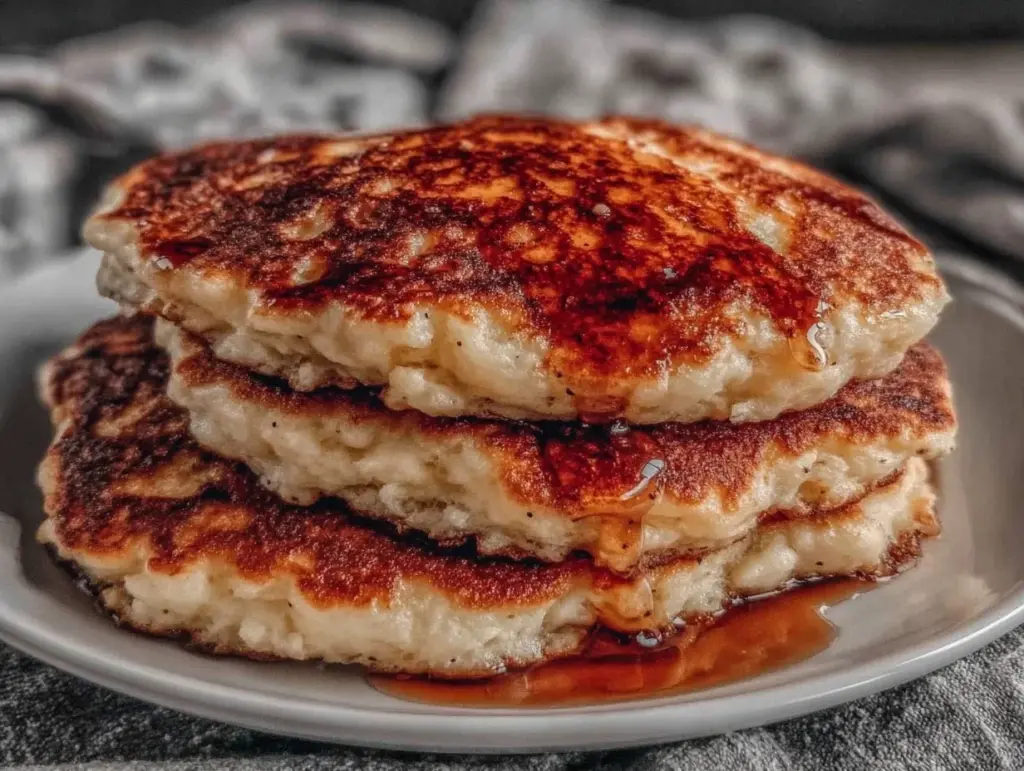
Let’s be real for a second. I used to buy the box mix. You know the one—the blue canister with the smiling cartoon character on it. It was convenient, sure. But when you’re eating alone, trying to keep your weekly grocery bill from spiraling into the red, that box mix is a trap. You buy it for $2.50, make maybe three pancakes (because let’s face it, one person isn’t making a stack of ten), and then you’re left with half a canister of stale powder sitting in your cupboard for six months.
I did the math last month. If I bought a box every two weeks, that’s $13 a month on breakfast. For $13, I could buy enough flour, sugar, baking powder, eggs, and milk to make pancakes for breakfast, lunch, and dinner for an entire month. And they’d taste better. Way better.
This recipe for Extra-Fluffy Buttermilk Pancakes isn’t just about saving money; it’s about realizing that “fancy” breakfast doesn’t require a fancy pantry. In fact, the secret to those restaurant-style fluffy pancakes isn’t some expensive imported ingredient—it’s just two things: buttermilk and patience. And the good news? You can make your own buttermilk with regular milk and vinegar for pennies.
I’ve tested this recipe at least twenty times, tweaking the ratios until I hit that sweet spot where the pancake is crispy on the edges, soft in the middle, and costs less than $0.15 each. This isn’t a recipe for a Sunday brunch with ten guests. This is a recipe for you, your wallet, and your morning routine. It’s simple, it’s cheap, and it’s the only breakfast I make anymore.
Why You’ll Love This Budget-Friendly Buttermilk Pancake Recipe
There are a million pancake recipes out there. Most of them call for buttermilk, yes, but also butterscotch chips, vanilla bean paste, or three types of flour. This one strips it all back. It’s about quality over quantity. Here’s why this specific method works for the solo cook on a budget:
Stupid Simple Ingredients — Seriously, you probably have four of these five ingredients already. Flour, sugar, baking powder, salt, eggs, milk, vinegar, and butter. If you have a fridge and a pantry, you have this recipe. No trips to three different specialty stores.
Actually Fluffy (Not Dense) — Most budget pancakes turn out like rubber disks. Not this one. The key is separating the egg yolk and white (or just whipping the whole egg vigorously) and not overmixing the batter. I’ve ruined batches by being impatient, and I’ve perfected the technique. The result? Towering, air-filled pancakes that actually feel like a treat.
Zero Waste — Since you’re making these from scratch, you’re using up the ingredients you already have. That half-carton of milk? Use it. The eggs that are on the edge of their expiration date? Perfect. This recipe helps you clear out your fridge without throwing anything away. It’s the ultimate solo-cook hack.
Cost Per Serving — Let’s talk numbers. Flour is roughly $0.01 per pancake. Eggs are $0.03. Milk/vinegar buttermilk is $0.02. Butter is $0.05. That’s roughly $0.11 per pancake. If you make a batch of six, you’re paying less than $1 for a full breakfast. Compare that to $5 for a diner order or $3 for a box mix that makes less food. The math is undeniable.
This is my go-to when I’m feeling fancy but broke. It’s comforting, it’s cheap, and it makes my tiny kitchen smell like a bakery instead of a dorm room.
Ingredients You’ll Need (And How to Stretch Them)
Here’s the best part: you probably have most of this already. I’m not asking you to buy anything special. In fact, I’m asking you to buy less. Here’s the breakdown for a batch that serves one person (or two if you’re sharing, but let’s be honest, I’m eating all of this).
For the Dry Mix:
All-Purpose Flour (1 cup / 120g) — This is your base. Don’t get fancy with bread flour; it’ll make them tough. All-purpose is perfect for that tender crumb. Buy the big bag; it lasts forever and costs pennies per ounce.
Baking Powder (2 teaspoons) — The lift agent. Check your expiration date. Old baking powder makes flat pancakes. If yours is more than six months old, buy a new can. It’s cheap, and it’s the difference between fluffy and sad.
Granulated Sugar (2 tablespoons) — Just a little bit for sweetness and browning. You don’t need a lot. If you’re watching sugar, you can drop this to 1 tablespoon, but the edges won’t get that nice golden crust.
Salt (½ teaspoon) — Essential. It balances the sweetness and enhances the flavor. Don’t skip it, even if you’re on a low-sodium diet. A pinch goes a long way.
For the Wet Mix:
Milk (¾ cup / 180ml) — Any kind works. Whole milk is best for richness, but 2% or even skim will work in a pinch. This is where you use up that carton you’ve been ignoring.
Vinegar (1 tablespoon) — White vinegar or apple cider vinegar. This is your secret weapon. It reacts with the baking powder to create bubbles. It’s basically homemade buttermilk. It costs fractions of a penny.
Egg (1 large) — Room temperature is best, but if you’re lazy, straight from the fridge works too. Just whisk it well. One egg is plenty for this amount of flour.
Melted Butter (2 tablespoons) — Or oil if you’re out of butter. Butter adds flavor, but vegetable oil works too. Melt it in the microwave for 30 seconds. Don’t use hot butter, or it’ll cook the egg.
Optional Flavor Boosters (Pantry Staples):
Vanilla Extract (1 teaspoon) — If you have it, add it. It smells amazing. If not, skip it. The pancakes will still be good.
Cinnamon (½ teaspoon) — Adds warmth. Great if you’re eating these with coffee. I keep a tiny jar just for this.
Pro Tip: If you want to add fruit, use frozen berries. They’re cheaper than fresh, often more flavorful, and they don’t spoil if you leave them in the freezer for months. I throw a handful of frozen blueberries right into the batter.
Equipment Needed
You don’t need fancy gadgets. I’m not going to lie to you and say you need a digital scale or a stand mixer. You don’t.
Two Medium Bowls — One for dry, one for wet. I use ceramic bowls because they’re heavy and don’t slip. If you only have one bowl, just mix dry, dump it in wet, and stir. But two bowls is easier.
Whisk — A simple wire whisk. If you don’t have one, a fork works. I use a fork when I’m being lazy.
Non-Stick Skillet or Griddle — This is the most important tool. I use a 10-inch non-stick skillet. It heats evenly and nothing sticks. If you have a flat griddle, great, but a skillet is easier to control for one person.
Spatula — A thin metal spatula is best for flipping. Silicone works too, but metal gets under the pancake better. I use a cheap one from the dollar store that I don’t mind scratching.
Measuring Cups and Spoons — Standard stuff. I use the nested set. If you don’t have them, use a standard coffee mug (roughly 1 cup) and a teaspoon from your drawer. It’s not perfect, but it works.
Microwave-Safe Cup — For melting the butter. Or just use a small saucepan on the stove. Whatever is faster.
How to Make It: Step-by-Step
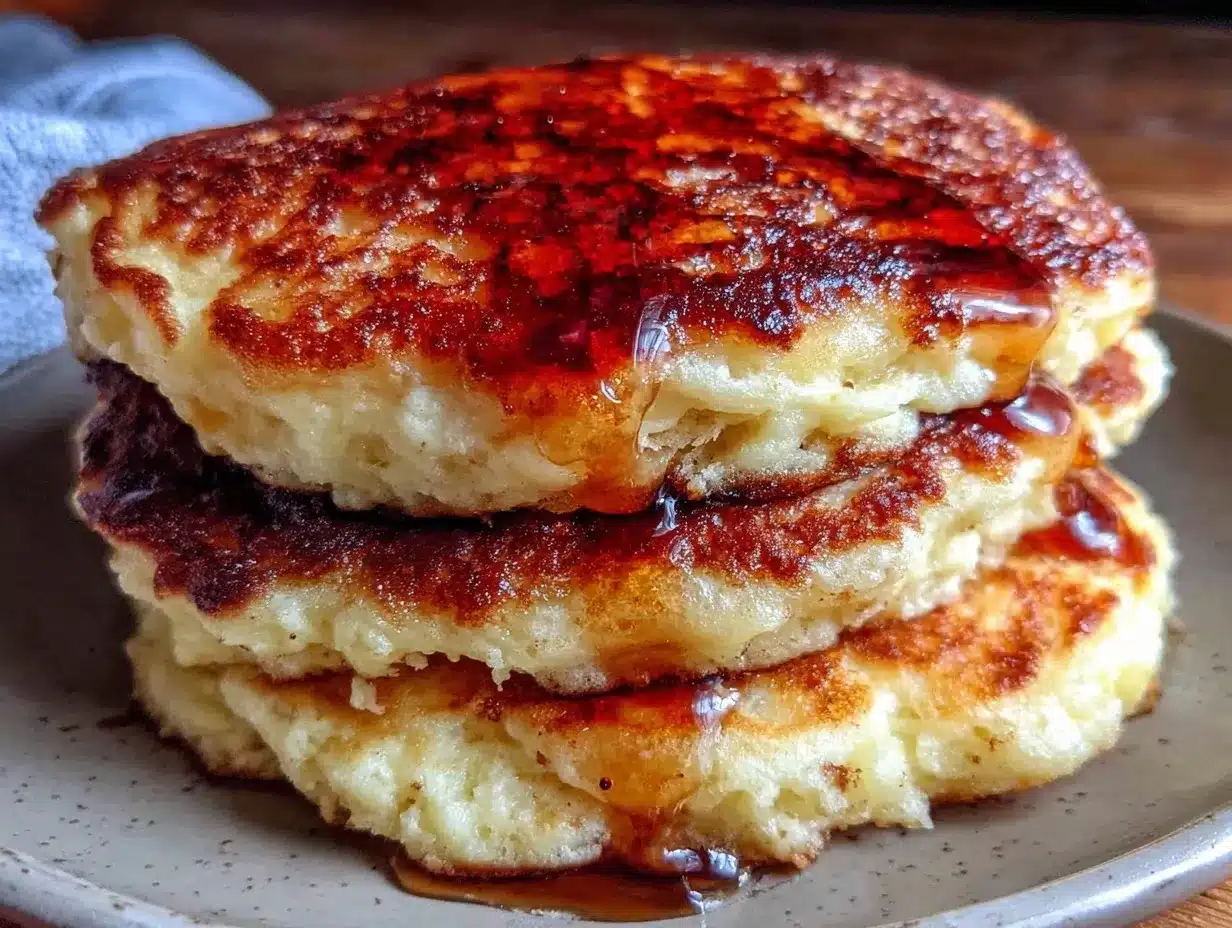
Alright, let’s make this! I’m walking you through exactly how I do it, including the little tricks I’ve picked up so you don’t end up with rubbery disks.
Step 1: Make Your “Buttermilk” (2 minutes)
Take your ¾ cup of milk and pour it into a measuring cup or bowl. Add the 1 tablespoon of vinegar. Stir it once and let it sit for 5-10 minutes. You’ll see it curdle slightly and thicken. This is your homemade buttermilk. It’s sour, tangy, and perfect for pancakes. If you forget this step, your pancakes will be flat. Don’t skip it.
Step 2: Mix the Dry Ingredients (1 minute)
In a separate bowl, whisk together the flour, baking powder, sugar, and salt. Make sure there are no clumps of baking powder. If you bite into a clump, it tastes bitter. Whisk it until it’s uniform.
Step 3: Combine Wet and Dry (1 minute)
Make a well in the center of the dry ingredients. Pour in the curdled milk, the egg, and the melted butter. Whisk gently. Here’s the critical part: DO NOT OVERMIX. Stop mixing as soon as you no longer see dry flour. The batter should be lumpy. Lumpy is good. Smooth means tough. If you mix it until it’s smooth, you’re developing gluten, and you’ll get chewy pancakes. We want tender.
Step 4: Rest the Batter (5-10 minutes)
Set the bowl aside and let it rest. This allows the flour to hydrate and the baking powder to start working. It makes the pancakes lighter. I use this time to melt the butter if I haven’t already, or to prep my skillet. If you’re impatient and cook immediately, the pancakes will be denser. Trust the rest.
Step 5: Heat the Skillet (3 minutes)
Place your non-stick skillet over medium heat. Let it warm up for 2-3 minutes. To test if it’s ready, flick a few drops of water onto the surface. If they sizzle and evaporate, it’s ready. If they dance around like little puddles, it’s hot enough. If they just sit there, it’s too cold.
Step 6: Cook the Pancakes (3-4 minutes each)
Reduce heat to medium-low. Lightly grease the pan with a paper towel dipped in oil or a small pat of butter. Pour about ¼ cup of batter for each pancake. Don’t crowd the pan. Cook one or two at a time.
Watch the edges. When the edges look set and dry, and bubbles form on the surface and pop, leaving little holes that don’t immediately fill back in, it’s time to flip. This takes about 2-3 minutes. Flip gently. Cook the other side for 1-2 minutes until golden brown.
If the first pancake is too dark or too light, adjust your heat. The first pancake is always a test. Don’t be mad at it. It’s teaching you.
Step 7: Serve Immediately
Eat them right off the griddle. They lose their fluffiness if they sit too long. Stack them on a plate, add a pat of butter, and maybe a drizzle of syrup. Or, if you’re like me and trying to save calories, just eat them plain. They’re that good.
Total Time: About 20 minutes (5 minutes prep, 15 minutes cook). That’s faster than ordering takeout.
Expert Tips & Tricks for Solo Success
Here’s everything I’ve learned from making these dozens of times. These tips will save you from my mistakes.
The “First Pancake” Rule
I know it’s annoying, but the first pancake is always a failure. The pan isn’t at the perfect temperature yet. Make it small. Eat it quickly. Then adjust your heat and cook the rest properly. It’s a rite of passage.
Keep Them Warm
If you’re making a stack for yourself, put the finished pancakes on a baking sheet in a 200°F (95°C) oven while you cook the rest. They stay warm and moist. Don’t stack them on a plate immediately, or they’ll steam and get soggy.
Don’t Press Down
When you flip the pancake, don’t press down on it with the spatula. You’re squeezing out the air bubbles you worked so hard to create. Let it be fluffy.
Leftover Batter
If you have leftover batter, it thickens as it sits. Add a splash of milk to loosen it up before cooking the next batch. It won’t be as fluffy as the first batch, but it’s still good.
Freezing for Later
If you make a big batch (maybe you have a guest, or you’re meal prepping for a lazy week), freeze the pancakes. Lay them flat on a baking sheet in the freezer for an hour, then transfer to a bag. They reheat perfectly in the toaster. No microwave needed. They stay fluffy.
Variations & Substitutions
Once you’ve nailed the basic version, here’s how you can mix it up without spending extra money.
Banana Pancakes
Mash half a ripe banana into the wet ingredients. It adds sweetness and moisture. You can skip the sugar if you want. This is great for using up bananas before they go brown.
Cinnamon Sugar
Mix 1 teaspoon cinnamon with 1 tablespoon sugar. Sprinkle it on the pancakes right after you flip them. It creates a crunchy, sweet crust. It’s like a cinnamon roll without the dough.
Frozen Berry Pancakes
Toss a handful of frozen blueberries or raspberries into the batter just before cooking. Don’t thaw them first, or they’ll bleed color into the whole batter. They’ll get hot and juicy inside.
Gluten-Free
Use a 1:1 gluten-free flour blend. Most brands work well in pancakes. Add an extra ½ teaspoon of baking powder to help with the rise. They might be slightly more fragile, so be gentle with the flip.
Dairy-Free
Swap the butter for coconut oil or vegetable oil. Use oat milk or almond milk instead of dairy milk. The vinegar still works with plant milks. They’ll be slightly less rich, but still fluffy.
Serving & Storage
How to Serve:
I usually eat these with a simple drizzle of maple syrup. But if you want to get fancy (and cheap), top them with whipped cream made from heavy cream (or coconut cream for dairy-free). Or just eat them with a side of crispy bacon. I linked to my breakfast sandwich with fried egg and crispy bacon recipe if you want to add protein to this meal.
Reheating:
Leftovers? Reheat in a toaster. Yes, a toaster. It makes them crispy again. If you use the microwave, they’ll get chewy. Add a tiny splash of water to the pancake before microwaving if you must, but the toaster is better.
Storage:
Store leftover batter in the fridge for up to 2 days. Stir it before using. Cooked pancakes store in the fridge for 3 days, but they’re best fresh. If you freeze them, they last 2 months.
Nutrition Information
I’m not a nutritionist, but here’s the breakdown if you’re tracking. This is per pancake (assuming 6 pancakes from the recipe).
| Nutrient | Amount |
|---|---|
| Calories | 180 |
| Protein | 6g |
| Carbs | 24g |
| Fat | 7g |
| Fiber | 1g |
| Sugar | 4g |
It’s comfort food, so it’s not a salad. But it’s better than boxed mix, and it’s cheaper than a diner. If you’re looking for more healthy-ish breakfast ideas, check out my best egg white breakfast bowl for a lighter option.
Final Thoughts
So that’s my go-to extra-fluffy buttermilk pancake recipe! It’s simple, it’s cheap, and it tastes like a weekend treat even on a Tuesday night. I’ve made this recipe so many times that I can do it in my sleep. And honestly, that’s what cooking should be—effortless, rewarding, and affordable.
Make it yours! Add cinnamon, add berries, add chocolate chips if you’re feeling indulgent. But start with the basics. Master the batter. Then experiment. If you make this, drop a comment and let me know how it turned out. I love hearing how recipes work in your kitchen. And if something doesn’t work, tell me that too—I’m here to help.
Happy cooking! And I hope your kitchen smells half as good as mine does right now.
Frequently Asked Questions
Can I use regular milk instead of buttermilk?
You can, but they won’t be as fluffy or tangy. The acid in buttermilk reacts with the baking powder to create lift. If you use regular milk, add 1 tablespoon of vinegar or lemon juice to the milk and let it sit for 5 minutes. That’s basically homemade buttermilk. It works perfectly.
Why are my pancakes dense?
Two reasons: overmixing the batter or old baking powder. If you mix the batter until it’s smooth, you’re developing gluten, which makes them chewy. Stop mixing when you see lumps. Also, check your baking powder. If it’s old, it won’t rise.
Can I make the batter ahead of time?
You can, but the pancakes will be flatter the next day. The baking powder loses its potency over time. If you must make it ahead, store it in the fridge and stir in a little extra baking powder before cooking. Or, better yet, cook them, freeze them, and reheat later.
How do I know when to flip?
Look for bubbles on the surface. When they pop and leave holes that don’t fill back in, and the edges look set and dry, it’s time to flip. If you wait too long, the bottom will burn. If you flip too early, the top will be raw.
Can I use oil instead of butter?
Yes. Vegetable oil, canola oil, or even melted coconut oil work fine. Butter adds flavor, but oil makes the pancakes slightly more tender. It’s a matter of preference. I use butter because it tastes better, but oil is cheaper and has a longer shelf life.
What if I don’t have a non-stick skillet?
You can use a stainless steel or cast iron skillet, but you’ll need to grease it more generously. Use butter or oil, and make sure the pan is hot before adding the batter. It might stick a little, but it’ll still work. Just be gentle when flipping.
Can I double this recipe?
Absolutely. Double all the ingredients and use a larger bowl. The cooking time stays the same. I do this when I have guests or when I want to meal prep. Just make sure your skillet is big enough to cook more than one pancake at a time.
Pin This Recipe!
Extra-Fluffy Buttermilk Pancakes: 3 Cheap Ingredients
- Total Time: 20 minutes
- Yield: 6 servings 1x
Description
A budget-friendly, extra-fluffy buttermilk pancake recipe using simple pantry staples. Perfect for solo cooks, this recipe costs less than $0.15 per pancake and delivers restaurant-style texture without the expense.
Ingredients
- 1 cup (120g) All-Purpose Flour
- 2 teaspoons Baking Powder
- 2 tablespoons Granulated Sugar
- ½ teaspoon Salt
- ¾ cup (180ml) Milk
- 1 tablespoon Vinegar (white or apple cider)
- 1 large Egg
- 2 tablespoons Melted Butter (or oil)
- 1 teaspoon Vanilla Extract (optional)
- ½ teaspoon Cinnamon (optional)
Instructions
- Make homemade buttermilk by stirring 1 tablespoon of vinegar into ¾ cup of milk. Let it sit for 5-10 minutes until it curdles and thickens.
- In a separate bowl, whisk together the flour, baking powder, sugar, and salt until uniform and free of clumps.
- Make a well in the center of the dry ingredients. Pour in the curdled milk, egg, and melted butter.
- Whisk gently until just combined. The batter should be lumpy; do not overmix to avoid tough pancakes.
- Let the batter rest for 5-10 minutes to allow the flour to hydrate and baking powder to activate.
- Heat a non-stick skillet over medium heat for 2-3 minutes. Test readiness by flicking water drops onto the surface; they should sizzle.
- Reduce heat to medium-low. Lightly grease the pan with oil or butter.
- Pour about ¼ cup of batter per pancake. Cook for 2-3 minutes until bubbles form on the surface and pop, leaving holes that don’t fill back in.
- Flip gently and cook the other side for 1-2 minutes until golden brown.
- Serve immediately with butter and syrup, or store in a 200°F oven to keep warm.
Notes
The first pancake is often a test for heat adjustment. Keep finished pancakes warm in a 200°F oven rather than stacking them on a plate to prevent sogginess. Do not press down on pancakes when flipping. Leftover batter can be stored in the fridge for up to 2 days. Cooked pancakes freeze well for up to 2 months and reheat best in a toaster.
- Prep Time: 5 minutes
- Cook Time: 15 minutes
- Category: Breakfast
- Cuisine: American
Nutrition
- Serving Size: 1 pancake
- Calories: 180
- Sugar: 4
- Sodium: 350
- Fat: 7
- Saturated Fat: 3
- Carbohydrates: 24
- Fiber: 1
- Protein: 6
Keywords: pancakes, buttermilk pancakes, budget breakfast, cheap recipes, fluffy pancakes, solo cooking, homemade buttermilk, easy breakfast


