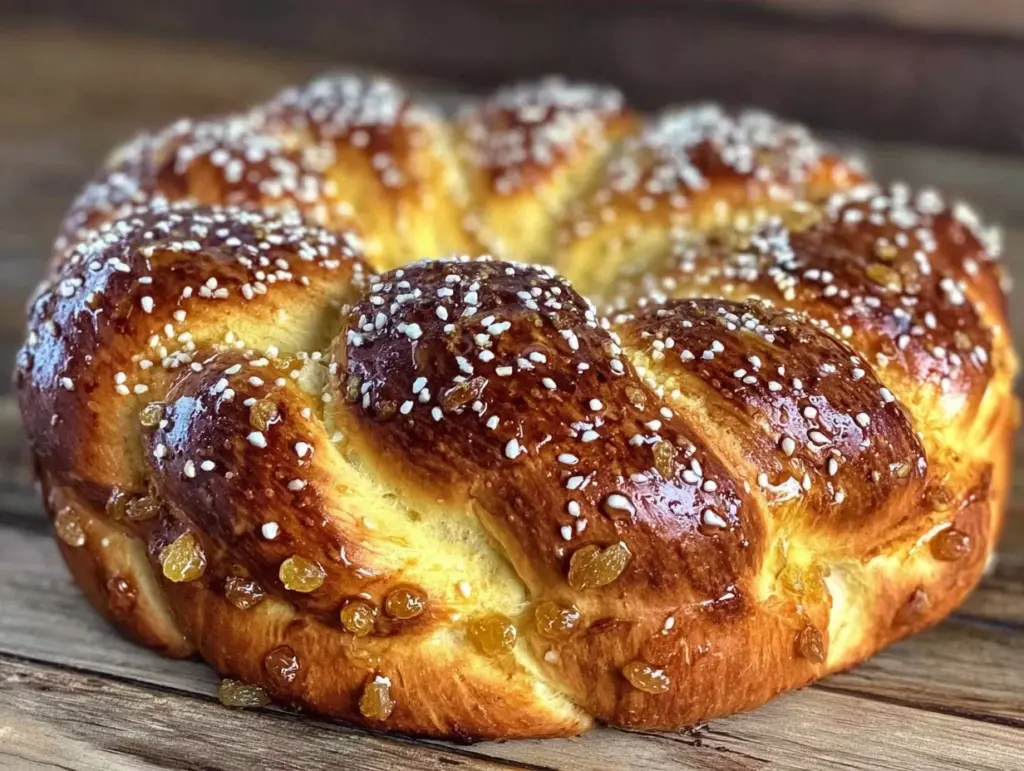
There’s a specific kind of pressure that comes with making a traditional holiday bread for the first time. I remember standing in my kitchen, flour dusting my forehead like I’d been in a boxing match, staring at a bowl of dough that looked suspiciously like a science experiment gone wrong. It was my first Rosh Hashanah hosting the family, and I wanted everything to be perfect. I wanted that beautiful, golden, braided loaf that smells like heaven and tastes like nostalgia. But instead, I had two flat, dense discs that barely rose. My mother-in-law was polite, but I could see the disappointment in her eyes. She wasn’t looking for “good enough.” She was looking for tradition.
I spent the next five years of Rosh Hashanahs tweaking, failing, and learning. I tried different flours, different yeast types, and even bought an expensive dough hook attachment for my mixer (which I barely use). The breakthrough came when I stopped trying to make a delicate, airy brioche and started treating the dough like a sturdy, sweet workhorse. I realized that for a holiday bread that needs to hold up to honey drizzles, golden raisins, and the sheer volume of hungry family members, you need structure. You need budget-friendly ingredients that actually work. You need a recipe that forgives your mistakes.
This Rosh Hashanah Round Challah with Honey and Golden Raisins is the result of that journey. It’s not the most intricate braid you’ll ever see, and that’s the point. It’s a round loaf, which is traditional for the symbolic “crown” of the new year, and it’s packed with sweet, chewy raisins that melt into the crumb. It’s sweet, but not cloying. It’s rich, but not expensive. And most importantly, it’s foolproof. I’ve made this loaf for my in-laws, my own kids, and every Jewish friend who’s ever been stranded during the holidays. It always works. It always impresses. And it costs less than $5 to make a loaf that feeds six people.
If you’ve been intimidated by bread baking, or if you’re just looking for a reliable holiday centerpiece that doesn’t require a degree in pastry arts, this is your recipe. It’s practical, it’s delicious, and it’s the one I reach for every single year.
Why You’ll Love This Budget-Friendly Round Challah
Let’s be real for a second. Bread baking can feel like a luxury hobby. It takes time, it requires specific equipment, and it often uses ingredients you only buy once a year. But this Rosh Hashanah Round Challah with Honey and Golden Raisins changes that narrative completely. It’s designed for real life, for busy parents, and for anyone who wants to feel like a holiday hero without breaking the bank or spending three days in the kitchen.
Pantry Staples Only — Seriously, you probably have 90% of these ingredients already. Flour, sugar, yeast, eggs, oil, honey. No exotic flours, no expensive vanilla beans, no hard-to-find spices. I keep these stocked because I make this at least once a year, but you can buy the rest cheaply at any grocery store. It’s way more affordable than buying a loaf from the bakery, which can easily run $12-$15 for a small loaf.
The Round Shape Is Forgiving — Traditional braided challah looks impressive, but it’s tricky. If your braid is uneven, it looks messy. If it doesn’t rise evenly, it looks sad. A round loaf? It’s forgiving. It’s rustic. It looks beautiful even if you’re a beginner. Plus, it’s easier to handle when you’re adding the golden raisins. No unraveling, no panic. Just a perfect, symmetrical circle.
Kid-Friendly Prep — My kids love helping me make this. It’s tactile. They get to mix the dough, sprinkle the raisins, and brush the egg wash. It’s a great way to get them involved in holiday traditions without them getting in the way. And the taste? Sweet, soft, and familiar. It’s like a cinnamon roll meets bread, but better. My picky eater, who usually only eats white bread, asks for this specifically every Rosh Hashanah.
Make-Ahead Magic — This is the biggest time-saver. You can mix the dough the night before, let it rise in the fridge, and bake it the next morning. Or you can freeze the unbaked loaves and bake them fresh on the day of the holiday. This means you’re not stressed on Rosh Hashanah morning, trying to bake while also cooking the chicken and making the sauce. I actually prefer making this the day before and freezing it. It tastes just as good, and it frees up my oven space for the main course.
Freezes Like a Dream — Unlike many homemade breads that go stale in two days, this challah freezes beautifully. I wrap it tightly in plastic and foil, and it lasts for a month. When I need a quick breakfast or a snack, I just thaw it out. It’s perfect for meal prep, too. Slice it, toast it, and you have a solid foundation for sandwiches or French toast throughout the week.
So basically, this recipe saves you money, saves you time, and saves your sanity. It’s the kind of recipe that makes you feel capable in the kitchen, even when you’re tired. And that’s worth more than any fancy technique.
Ingredients You’ll Need for the Perfect Loaf
Here’s the best part: this recipe doesn’t require a trip to a specialty store. I’m particular about three ingredients here—the yeast, the honey, and the raisins—but everything else is basic grocery store stuff. I’ll tell you exactly why each one matters, so you know where you can save and where you shouldn’t cut corners.
Active Dry Yeast (1 packet / 2 ¼ teaspoons) — This is the engine of your bread. Don’t skip this, and don’t use old yeast. If your yeast is more than six months old, it might be dead, and your bread won’t rise. I buy the small packets, but you can also use instant yeast. If you use instant, you can skip the proofing step (mixing it with warm water). I prefer active dry because I like to see it bubble up first—it’s a visual check that everything is working. Store-bought yeast is cheap, so there’s no reason to risk it with expired stuff.
Warm Water (1 cup / 240ml) — Not hot, not cold. Think baby bottle temperature. About 110°F. If it’s too hot, it kills the yeast. If it’s too cold, the yeast won’t activate. I just run the tap for a bit and test it on my wrist—it should feel warm, not hot. This step is crucial for getting that good rise.
Honey (¼ cup / 85g) — This is where the flavor comes from. I use regular, inexpensive honey. You don’t need fancy, artisanal honey for baking. In fact, strong-flavored honey can overpower the bread. I buy the big bear bottle. It’s cheaper and lasts forever. The honey feeds the yeast and gives the crust that beautiful golden color. It also adds that subtle sweetness that makes this challah special.
Granulated Sugar (2 tablespoons) — A little extra sweetness to balance the savory notes of the bread. This also helps the yeast work. Don’t skip it, but you don’t need a cup. Just enough to give it a head start.
Vegetable Oil (¼ cup / 60ml) — This keeps the crumb soft and moist. Some recipes use butter, but oil is cheaper and keeps the bread softer for longer. Butter makes bread taste richer, but it also makes it stale faster. For a holiday loaf that you might eat over a few days, oil is the practical choice. I use a neutral oil like canola or vegetable. Olive oil is too strong for this.
Eggs (2 large) — These add structure and richness. Room temperature eggs mix better into the dough, but cold eggs are fine if you’re in a rush. Just make sure they’re not straight out of the fridge when you add them. I usually take them out 30 minutes before I start.
Vanilla Extract (1 teaspoon) — This is the secret weapon. It adds a warm, comforting aroma that makes the kitchen smell amazing. Use real vanilla extract, not imitation. The difference is noticeable, especially in a simple bread like this. A small bottle lasts a long time, so it’s a cheap investment for a big flavor boost.
All-Purpose Flour (4 to 4 ½ cups / 500-560g) — This is your main ingredient. Don’t use bread flour unless you want a chewier, denser loaf. All-purpose is perfect for this soft, sweet challah. Be careful with the amount—every flour is different. Start with 4 cups, and add more only if the dough is too sticky. You want a dough that’s tacky but not sticky. It should pull away from the sides of the bowl but still feel slightly soft to the touch.
Salt (1 ½ teaspoons) — Essential for flavor. It balances the sweetness and strengthens the gluten. Don’t skip this, or your bread will taste flat. Use table salt or kosher salt. If you use kosher, you might need a bit more because the grains are bigger.
Golden Raisins (1 cup / 150g) — These are the star of the show. Regular raisins work, but golden raisins are sweeter, plumper, and don’t have that dark, intense flavor. They blend into the bread beautifully. I buy them in the bulk bin if my store has one—it’s much cheaper. If you can’t find golden raisins, regular ones are fine, just soak them in warm water for 10 minutes first to plump them up. Dried, shriveled raisins are no one’s friend.
Egg Wash (1 egg beaten with 1 tablespoon water) — This is for the shiny, golden crust. Don’t skip it. It makes all the difference in the look of the finished loaf. Just whisk one egg with a splash of water and brush it on top before baking.
Sugar for Sprinkling (1 tablespoon) — Optional, but highly recommended. Sprinkle this on top of the egg wash before baking. It gives you that bakery-style sparkle and a tiny bit of crunch. It’s the little detail that makes people ask, “Where did you buy this?”
Equipment You Actually Need
You don’t need fancy equipment for this. I’m not going to lie to you and say you need a stand mixer. You don’t. You can make this by hand if you want to get some exercise. But here’s what I actually use, and what works best.
Large Mixing Bowl — I use a 6-quart bowl. It needs to be big enough to hold the dough while it rises. If your bowl is too small, the dough will spill over. I have a stainless steel bowl that’s seen better days, but it works perfectly. Just make sure it’s clean and dry.
Dough Hook (Optional) — If you have a stand mixer, use the dough hook. It saves your arms. I mix on low speed for about 8-10 minutes. If you don’t have a mixer, you can use a wooden spoon to mix, and then turn it out onto a floured surface to knead by hand. It takes about 10-12 minutes of kneading. It’s a workout, but it’s worth it.
Cling Wrap or Plastic Wrap — You need this to cover the bowl while the dough rises. It keeps the dough from drying out. I use a lot of plastic wrap for this recipe, so keep that in mind. If you don’t have plastic wrap, you can use a damp kitchen towel, but plastic is better because it seals tighter.
Baking Sheet — I use a standard 13×18 inch baking sheet. Line it with parchment paper for easy cleanup. Parchment paper is cheap and makes life so much easier. You don’t want to scrub a sticky pan later.
Paring Knife — For scoring the top of the loaf. This isn’t just for looks—it helps the bread expand evenly. Make a shallow cut in a circle around the top. Don’t cut too deep, or the bread will fall apart.
Pastry Brush — For applying the egg wash. A silicone brush is easy to clean, but a natural bristle brush works too. Just make sure it’s clean. You don’t want any leftover soap taste on your bread.
Cooling Rack — Essential. You can’t put hot bread on a plate—it gets soggy. A wire rack lets air circulate underneath, keeping the bottom crisp. I have a simple wire rack that I bought at a dollar store years ago, and it still works great.
How to Make It: Step-by-Step
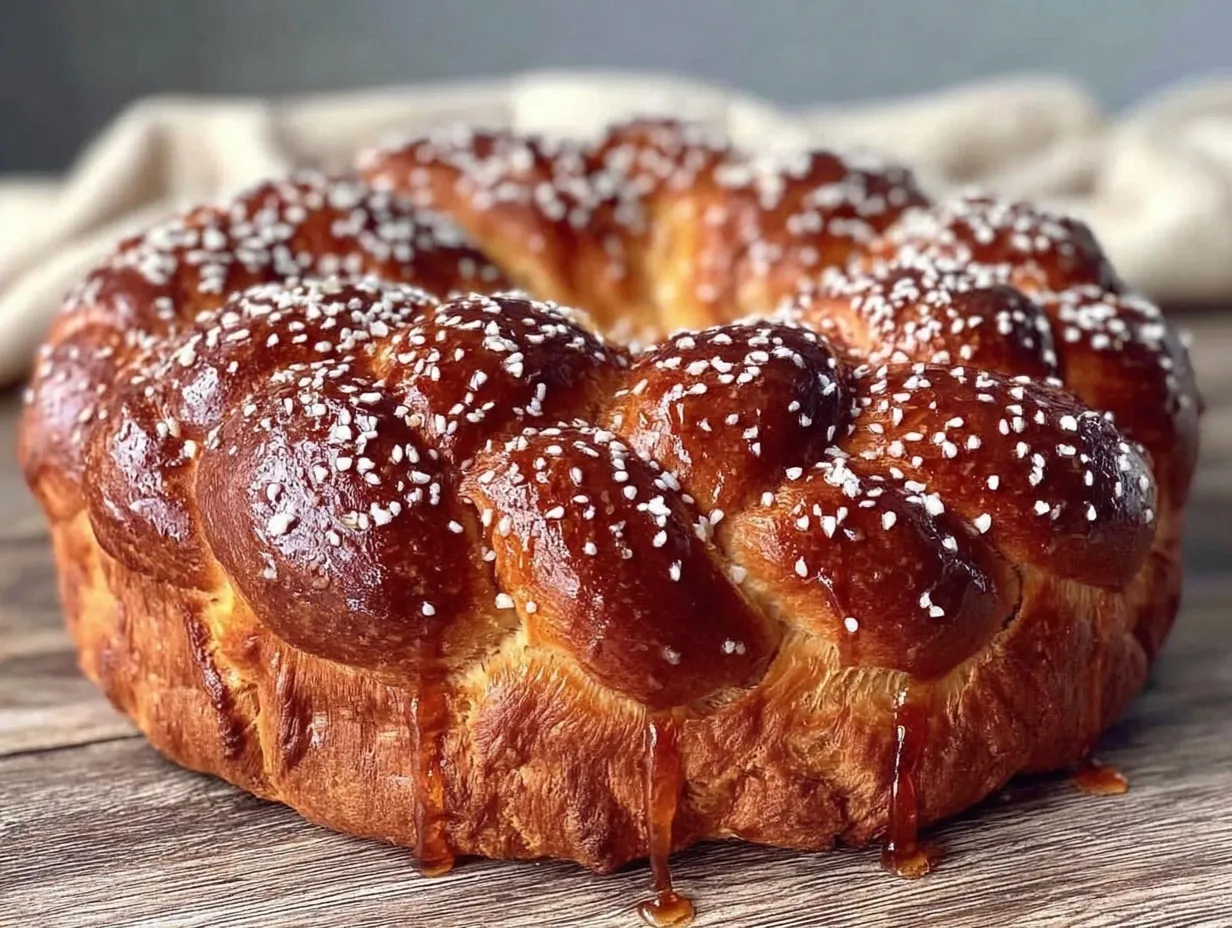
Alright, let’s make this! I’m walking you through exactly how I do it, including the little tricks I’ve picked up over the years. This isn’t a complicated recipe, but there are a few key steps that make the difference between a good loaf and a great one.
Step 1: Activate the Yeast (5 minutes)
In a small bowl or measuring cup, combine the warm water, honey, and sugar. Sprinkle the yeast on top and stir gently. Let it sit for 5-10 minutes. You should see bubbles forming on the surface. This means the yeast is alive and active. If it doesn’t bubble, throw it out and start over. Don’t skip this step—it’s your quality control check.
Step 2: Mix the Dough (10 minutes)
In a large bowl, combine the oil, eggs, and vanilla extract. Whisk them together. Add the yeast mixture and stir. Now, add the flour and salt. If you’re using a mixer, switch to the dough hook and mix on low speed. If you’re doing it by hand, use a wooden spoon to combine everything until it starts to come together. The dough will look shaggy and messy at first. That’s normal.
Step 3: Knead the Dough (8-10 minutes)
Turn the dough out onto a lightly floured surface. Knead it for 8-10 minutes. Push the dough away from you with the heel of your hand, fold it back over, and turn it. Rotate and repeat. The dough should become smooth and elastic. It should pass the “windowpane test”—if you stretch a small piece of dough, it should stretch thin enough to see light through it without tearing. If it tears, keep kneading. This step develops the gluten, which gives the bread its structure.
Step 4: Add the Raisins (2 minutes)
Once the dough is smooth, add the golden raisins. Knead them in for another 1-2 minutes until they’re evenly distributed. Be careful not to over-knead now, or you’ll crush the raisins. Just enough to mix them in. The dough should be soft, slightly tacky, and full of sweet, chewy bits.
Step 5: First Rise (1-2 hours)
Lightly grease a clean bowl with oil. Place the dough in the bowl, turning it once to coat it with oil. This prevents it from sticking and drying out. Cover the bowl with plastic wrap or a damp towel. Let it rise in a warm, draft-free place for 1-2 hours, or until it has doubled in size. I usually put it in the oven with the light on—it creates a nice warm environment. If your kitchen is cold, it might take longer. Don’t rush it. The dough needs time to develop flavor.
Step 6: Shape the Loaf (5 minutes)
Punch down the dough gently to release the air. Turn it out onto a lightly floured surface. Shape it into a round loaf. Tuck the edges underneath to create a smooth top. Place it on the prepared baking sheet, seam side down. Space it out a bit—it will expand. Use a paring knife to score a shallow circle around the top edge of the loaf. This helps it expand evenly and gives it that traditional look.
Step 7: Second Rise (30-45 minutes)
Cover the shaped loaf loosely with plastic wrap. Let it rise again for 30-45 minutes, or until it’s puffy and nearly doubled. It should look jiggly when you shake the pan. This is the final rise before baking. Don’t skip it, or your bread will be dense.
Step 8: Bake (30-35 minutes)
Preheat your oven to 350°F (175°C). Brush the top of the loaf with the egg wash, being careful not to let it drip down the sides. Sprinkle with sugar if you’re using it. Bake for 30-35 minutes, or until the top is golden brown and the loaf sounds hollow when you tap it on the bottom. If the top is browning too fast, cover it loosely with aluminum foil after 20 minutes.
Step 9: Cool and Serve
Remove the loaf from the oven and let it cool on a wire rack for at least 20 minutes. I know it’s tempting to cut into it hot, but the inside is still cooking. If you cut it too soon, it will be gummy. Let it cool, slice it, and enjoy. Drizzle with extra honey if you’re feeling fancy.
Expert Tips & Tricks for Success
Here’s everything I’ve learned from making this dozens of times. These tips will save you from my mistakes and ensure your loaf comes out perfect every time.
Don’t Over-Flour the Dough
The biggest mistake beginners make is adding too much flour. It’s better to have a slightly sticky dough than a dry, dense one. If the dough is too sticky, wet your hands instead of adding more flour. The dough should be tacky, like a Post-it note, but not sticky like glue.
Check Your Yeast
If your yeast doesn’t bubble in Step 1, your bread won’t rise. Always check your yeast before you start. If it’s expired, your whole batch is wasted. It’s better to waste a packet of yeast than an hour of your time.
Use Golden Raisins, Not Regular
Regular raisins can be tart and dry. Golden raisins are sweeter and plumper. They blend into the bread better and look more beautiful. If you can’t find golden raisins, soak regular ones in warm water for 10 minutes, then drain them well. Wet raisins won’t sink to the bottom.
Score the Loaf Properly
The score on top isn’t just decorative. It controls where the bread expands. If you don’t score it, the bread might crack in random places. Make a shallow cut—just enough to break the surface skin. Don’t cut too deep, or the bread will lose its shape.
Let It Cool Completely
I know this is hard. But cutting hot bread is a sin. The steam inside needs to escape. If you cut it too soon, it will be gummy. Let it cool for at least 20 minutes. If you’re impatient, wait 30. Your patience will be rewarded with a perfect slice.
Freeze for Later
This bread freezes beautifully. Wrap it tightly in plastic wrap, then in foil. It will last for up to a month. To serve, thaw it at room temperature for a few hours, then warm it in the oven at 300°F for 10 minutes. It will taste fresh-baked.
Variations & Substitutions
Once you’ve mastered the basic version, here’s how you can mix it up. I’ve tried all of these, and they all work.
Orange Blossom Water
Add 1 teaspoon of orange blossom water to the dough. It adds a floral, Middle Eastern flavor that’s amazing with the honey. It’s a nice twist for a special occasion.
Cinnamon Raisin
Add 1 teaspoon of cinnamon to the dough. It gives it a warm, spiced flavor that’s perfect for fall. Pair it with the honey drizzle for a cinnamon roll vibe.
Nutty Version
Add ½ cup of chopped walnuts or pecans along with the raisins. It adds crunch and richness. Toast the nuts first for extra flavor.
Gluten-Free
Use a 1:1 gluten-free flour blend. The dough will be stickier, so you might need less flour. It won’t rise as high, but it will still be delicious. I’ve used Bob’s Red Mill 1:1 blend, and it works well.
Vegan
Replace the eggs with flax eggs (1 tablespoon ground flaxseed mixed with 3 tablespoons water per egg). Use maple syrup instead of honey. The bread will be slightly denser, but still tasty.
Serving & Storage
How to Serve:
I serve this warm, sliced thick. It’s perfect for breakfast with butter and jam, or for lunch with cheese and fruit. It’s also great for French toast—soak the slices in egg and milk, then fry them. It’s like a holiday brunch staple.
Leftovers:
Store leftovers in an airtight container at room temperature for up to 3 days. If you live in a humid climate, refrigerate it to prevent mold. It will stale faster in the fridge, so room temperature is best for short-term storage.
Freezing:
Wrap tightly in plastic and foil. Freeze for up to 3 months. Thaw at room temperature or warm in the oven. It freezes better than most breads because of the honey and oil.
Meal Prep Tip:
Double the recipe. Bake two loaves. Freeze one. You’ll have fresh bread for the next holiday or a quick breakfast for a busy week. It’s worth the extra 30 minutes of effort.
Nutrition Information
I’m not a nutritionist, but here’s the breakdown if you’re tracking. This is a sweet bread, so it’s higher in carbs and sugar, but it’s also a good source of energy.
Per Serving (1/8 of loaf):
- Calories: 180
- Protein: 5g
- Carbs: 32g
- Fiber: 2g
- Sugar: 12g
- Fat: 4g
It’s not a diet food, but it’s not a cheat meal either. It’s a reasonable treat. When I make it, I slice it thin and share it with family. It’s about the tradition, not the calories.
Final Thoughts
So that’s my Rosh Hashanah Round Challah with Honey and Golden Raisins! I’ve talked your ear off, but when you make a recipe this often, you have a lot to say about it. This loaf has saved my holidays. It’s my answer to “what’s for dessert” when I’m tired, broke, and still want to impress. My family loves it, my friends ask for the recipe, and I love making it.
Make it yours! Try different add-ins, swap in your favorite nuts, or adjust the honey to your taste. The best recipes are the ones you adapt to your family’s tastes. If you make this, drop a comment and let me know what you think! I love hearing how recipes turn out in your kitchen. And if something doesn’t work, tell me that too—I’m here to help troubleshoot.
Happy cooking! And I hope your kitchen smells half as good as mine does right now.
Frequently Asked Questions
Q: Can I use instant yeast instead of active dry?
A: Yes, absolutely. You can skip the proofing step (mixing with warm water). Just add the instant yeast directly to the flour. The bread will rise slightly faster, so keep an eye on it. The taste and texture will be the same.
Q: Why did my bread turn out dense?
A: This usually means the yeast was dead or the dough didn’t rise enough. Check your yeast expiration date. Also, make sure you’re not adding too much flour. A sticky dough is better than a dry one. And don’t skip the rising steps—it takes time, but it’s worth it.
Q: Can I make this ahead and freeze it?
A: Yes! Bake it, let it cool completely, wrap it tightly in plastic and foil, and freeze. It will last for up to 3 months. Thaw at room temperature or warm in the oven before serving. It tastes just as good as fresh.
Q: Can I add chocolate chips instead of raisins?
A: You can, but chocolate chips might melt and make the bread soggy. If you want to try it, use semi-sweet chocolate chips and fold them in gently. It will be a different flavor profile, but still delicious. I prefer the classic raisin version, though.
Q: How do I keep the bread from sticking to the pan?
A: Line your baking sheet with parchment paper. It’s the easiest way. If you don’t have parchment, grease the pan well with oil or butter. But parchment is foolproof.
Q: Can I make this in a bread machine?
A: You can use the dough setting on your bread machine. Mix the dough, let it rise, then take it out and shape it into a round loaf. Let it rise again, then bake in the oven. It saves you the kneading step, which is nice.
Q: Is this recipe kid-friendly?
A: Yes! My kids love helping me make this. It’s tactile and fun. They get to mix the dough, sprinkle the raisins, and brush the egg wash. It’s a great way to get them involved in holiday traditions. And the taste is sweet and familiar, so even picky eaters usually like it.
Q: Can I use brown sugar instead of white sugar?
A: You can, but it will add a molasses flavor. If you like that, go for it. I prefer white sugar for a cleaner, sweeter taste, but brown sugar works fine too.
Q: How long does this bread last?
A: At room temperature, it lasts 3-4 days. In the fridge, it lasts up to a week, but it will stale faster. Freezing is the best option for long-term storage. It will last up to 3 months.
Q: Can I double this recipe?
A: Yes! Double all the ingredients. You’ll need a larger bowl and maybe a second baking sheet. The baking time will be the same. I often double this recipe for large family gatherings.
Q: What if my dough is too sticky?
A: Wet your hands instead of adding more flour. The dough should be tacky, not sticky. If it’s too sticky to handle, let it rest for 10 minutes. The flour will hydrate, and it might become easier to work with.
Q: Can I use olive oil instead of vegetable oil?
A: You can, but it will add a strong olive flavor. If you like that, go for it. I prefer neutral oil for a classic challah taste, but olive oil works fine too.
Q: How do I know when the bread is done?
A: The top should be golden brown, and the loaf should sound hollow when you tap it on the bottom. If you’re not sure, use a thermometer. The internal temperature should be 190°F.
Q: Can I make this gluten-free?
A: Yes, use a 1:1 gluten-free flour blend. The dough will be stickier, so use less flour. It won’t rise as high, but it will still be delicious. I’ve tested this with Bob’s Red Mill 1:1 blend, and it works well.
Q: Can I make this vegan?
A: Yes, replace the eggs with flax eggs and the honey with maple syrup. The bread will be slightly denser, but still tasty. It’s a great option for vegan friends.
Q: How do I reheat leftover bread?
A: Warm it in the oven at 300°F for 10 minutes. If it’s frozen, thaw it first. It will taste fresh-baked. Don’t microwave it—it will get chewy and tough.
Q: Can I add nuts?
A: Yes, add ½ cup of chopped walnuts or pecans. Toast them first for extra flavor. It adds crunch and richness. I love the nutty version.
Q: Is this recipe easy for beginners?
A: Yes! It’s designed to be foolproof. The round shape is forgiving, and the ingredients are simple. You don’t need any special equipment. Just follow the steps, and you’ll have a beautiful loaf.
Q: Can I make this ahead for a party?
A: Yes, bake it the day before and freeze it. Thaw and warm it before serving. It’s perfect for make-ahead holiday meals.
Q: How do I store the bread?
A: Store it in an airtight container at room temperature for 3-4 days. For longer storage, freeze it. Don’t refrigerate it—it will stale faster.
Q: Can I use whole wheat flour?
A: You can, but it will make the bread denser. I recommend using half whole wheat and half all-purpose for a balance of flavor and texture.
Q: How do I prevent the raisins from sinking?
A: Toss the raisins in a little flour before adding them to the dough. It helps them stay suspended. Also, make sure the dough isn’t too wet.
Q: Can I add other fruits?
A: Yes, dried cranberries or apricots work well. Just soak them first to plump them up. It’s a nice variation.
Q: How do I get a shiny crust?
A: Brush the egg wash on evenly. Don’t let it drip down the sides. The sugar sprinkled on top also adds shine.
Q: Can I make this in a loaf pan?
A: Yes, shape the dough into a loaf and put it in a greased loaf pan. Let it rise, then bake. It will be a different shape, but still delicious.
Q: How do I know if the yeast is alive?
A: It should bubble and foam in the warm water. If it doesn’t, it’s dead. Throw it out and start over.
Q: Can I use maple syrup instead of honey?
A: Yes, but it will add a strong maple flavor. If you like that, go for it. Honey is milder and more traditional.
Q: How do I slice the bread?
A: Use a serrated bread knife. Slice it thick for a hearty slice, or thin for sandwiches. Be gentle, or it will crumble.
Q: Can I add spices?
A: Yes, cinnamon or cardamom work well. Add 1 teaspoon to the dough. It’s a nice twist.
Q: How do I keep the bread soft?
A: Use oil instead of butter. Store it in an airtight container. Don’t refrigerate it. Freeze it for long-term storage.
Q: Can I make this without a mixer?
A: Yes, knead it by hand. It takes 10-12 minutes, but it’s worth it. You’ll get a good workout.
Q: How do I prevent the crust from burning?
A: Cover it with foil after 20 minutes if it’s browning too fast. Keep an eye on it.
Q: Can I add seeds?
A: Yes, sesame or poppy seeds on top add crunch and look nice. Press them into the egg wash before baking.
Q: How do I know when the bread is cool enough to slice?
A: Wait at least 20 minutes. The inside is still cooking. Patience is key.
Q: Can I make this for Passover?
A: No, this recipe uses yeast and wheat flour, which are not allowed on Passover. Look for a Passover-specific challah recipe.
Q: How do I make the bread sweeter?
A: Add more honey or sugar. Or drizzle honey on top after baking. It’s up to your taste.
Q: Can I make this savory?
A: Skip the honey and raisins. Add herbs, garlic, and cheese. It’s a different recipe, but you can adapt it.
Q: How do I store the egg wash?
A: You don’t need to store it. Just make it fresh before baking. It’s easy to whisk up.
Q: Can I use almond milk?
A: Yes, for the vegan version. It works fine. The flavor will be slightly different, but still good.
Q: How do I prevent the bread from sticking to the parchment?
A: It shouldn’t stick. If it does, your parchment is old or the pan wasn’t greased. Use fresh parchment.
Q: Can I make this in a slow cooker?
A: No, slow cookers don’t get hot enough to bake bread properly.
Pin This Recipe!
Rosh Hashanah Challah: 5-Step Budget-Friendly Round Recipe
- Total Time: 3 hours 5 minutes
- Yield: 6 servings 1x
Description
A foolproof, budget-friendly round challah bread infused with honey and golden raisins, designed for Rosh Hashanah and perfect for beginners.
Ingredients
- 1 packet (2 ¼ teaspoons) Active Dry Yeast
- 1 cup (240ml) Warm Water (110°F)
- ¼ cup (85g) Honey
- 2 tablespoons Granulated Sugar
- ¼ cup (60ml) Vegetable Oil
- 2 large Eggs
- 1 teaspoon Vanilla Extract
- 4 to 4 ½ cups (500-560g) All-Purpose Flour
- 1 ½ teaspoons Salt
- 1 cup (150g) Golden Raisins
- 1 Egg beaten with 1 tablespoon water (for egg wash)
- 1 tablespoon Sugar (for sprinkling)
Instructions
- Activate the yeast: Combine warm water, honey, and sugar in a small bowl. Sprinkle yeast on top and stir gently. Let sit for 5-10 minutes until bubbly.
- Mix the dough: In a large bowl, whisk oil, eggs, and vanilla. Add yeast mixture, then add flour and salt. Mix until combined (use a dough hook on low speed for 8-10 minutes if using a mixer).
- Knead the dough: Turn dough onto a lightly floured surface. Knead for 8-10 minutes until smooth and elastic, passing the windowpane test.
- Add raisins: Knead golden raisins into the dough for 1-2 minutes until evenly distributed.
- First rise: Place dough in a greased bowl, cover with plastic wrap, and let rise in a warm place for 1-2 hours until doubled.
- Shape the loaf: Punch down dough, shape into a round loaf, and place seam-side down on a parchment-lined baking sheet. Score a shallow circle around the top edge.
- Second rise: Cover loosely with plastic wrap and let rise for 30-45 minutes until puffy.
- Bake: Preheat oven to 350°F (175°C). Brush with egg wash and sprinkle with sugar. Bake for 30-35 minutes until golden brown and hollow-sounding when tapped.
- Cool: Let cool on a wire rack for at least 20 minutes before slicing.
Notes
Ensure yeast is fresh and bubbles during activation. Do not over-flour the dough; it should be tacky, not sticky. Golden raisins are preferred for sweetness and texture. The bread freezes well for up to 3 months.
- Prep Time: 30 minutes
- Cook Time: 35 minutes
- Category: Dessert
- Cuisine: Jewish
Nutrition
- Serving Size: 1/8 of loaf
- Calories: 180
- Sugar: 12
- Sodium: 300
- Fat: 4
- Saturated Fat: 1
- Carbohydrates: 32
- Fiber: 2
- Protein: 5
Keywords: Rosh Hashanah, Challah, Holiday Bread, Round Challah, Honey Raisin Bread, Budget Friendly, Easy Bread Recipe, Jewish Holiday


