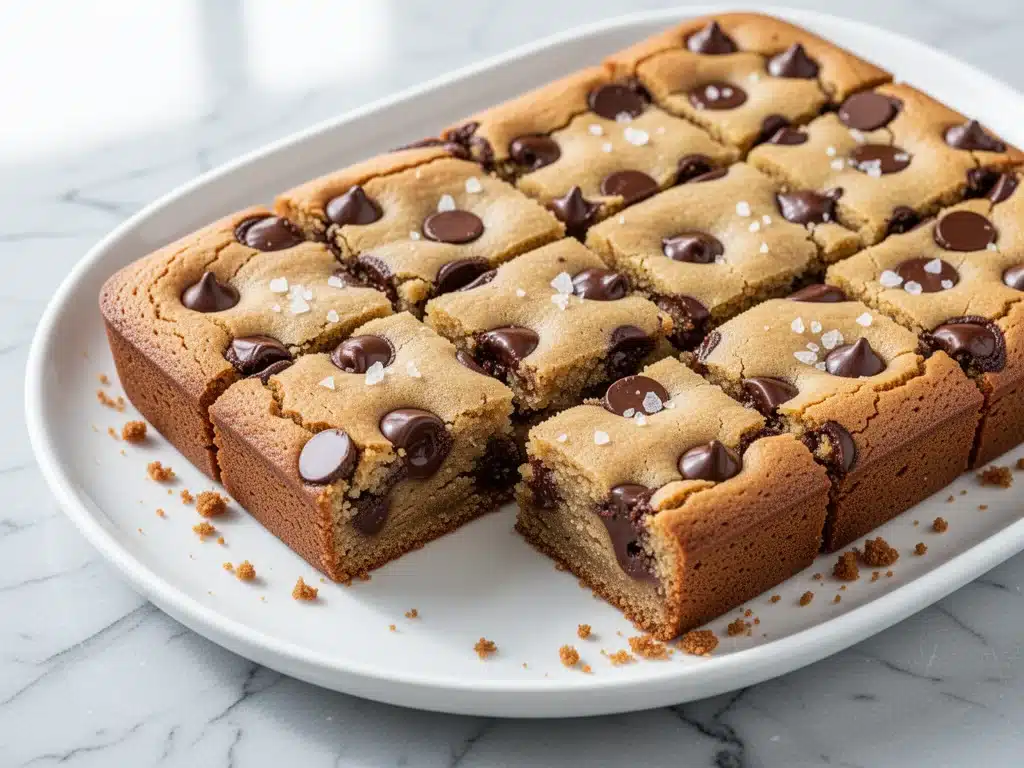
Last Tuesday, I was standing in my kitchen at 6:45 PM, staring into the abyss of my pantry. My husband was due home from work in 15 minutes, the kids had just finished soccer practice, and I had zero energy for anything requiring more than ten minutes of active effort. I didn’t want to order pizza. I didn’t want to make a complicated dinner. I just wanted something sweet, something that felt homemade, and something that wouldn’t require washing a dozen bowls.
That was the moment these soft-baked chocolate chip cookie bars saved my sanity.
I’ve been making these cookie bars for about three years now, but they’ve officially become my “emergency dessert” go-to. There is something magical about taking the classic comfort of a chocolate chip cookie and pressing it into a baking sheet. It’s less fussy than rolling dough balls, less messy than stacking cookies, and honestly? It tastes even better. The edges get slightly caramelized and chewy while the center stays soft and cakey. It’s the best of both worlds.
Before I started making these, I was the person who bought the pre-made dough from the tube. Don’t judge me—I was tired! But after one lazy Sunday where I mixed up a batch of these bars and cut them into squares for the week, I was hooked. Now, I make a batch every other week. Sometimes I eat them straight out of the pan with a spoon (don’t tell my kids). Sometimes I pack them for lunches. Sometimes I just eat them for breakfast because, let’s be real, it’s still a cookie.
What I love most about these soft-baked chocolate chip cookie bars is how forgiving they are. If you forget to cream the butter and sugar until fluffy? They still turn out great. If you add a little extra chocolate? Even better. It’s a recipe that allows you to be imperfect and still get a delicious result. And that’s exactly what I need on a busy Tuesday night.
I’ve tested this recipe dozens of times—adjusting the flour, tweaking the brown sugar ratio, and figuring out the perfect bake time so they don’t dry out. The result is a bar that’s chewy, gooey, and incredibly easy to make. You really don’t need any fancy equipment or rare ingredients. Just a mixing bowl, a baking sheet, and about 30 minutes of your life. Let’s get into why these are about to become your new best friend.
Why You’ll Love These Soft-Baked Chocolate Chip Cookie Bars
Look, I’m not here to sell you on the idea that baking is always a serene, Instagram-perfect experience. Sometimes it’s chaotic. Sometimes it’s messy. But these bars? They just work. Here’s why I keep coming back to this recipe instead of reaching for takeout or ice cream:
- One-Bowl Wonder — Seriously. You don’t need a stand mixer. You don’t need multiple bowls. I just dump everything into one large mixing bowl and whisk it by hand. If you can whisk, you can make these. I’ve made them while my toddler sat on my hip. It works.
- Ready in 30 Minutes — From preheating the oven to the first bite, it takes about 30 minutes. The prep is 10 minutes, the bake is 15-18 minutes, and the rest is just waiting (which is the hardest part). This is perfect for when you need a treat *now*.
- Chewy, Not Crispy — I have a love-hate relationship with traditional cookies. I never like the ones that are too crunchy or burnt at the edges. These bars are distinctly soft-baked. They have a tender crumb and a chewy texture that feels like a warm hug. They stay soft for days if stored properly.
- Endless Customization — Got nuts? Add them. Love white chocolate? Swap half the chips. Want to add a pinch of sea salt on top? Do it. These bars are a canvas. I’ve made them with peanut butter chips, macadamia nuts, and even a swirl of caramel. They’re forgiving and flexible.
- Budget-Friendly — You probably have most of these ingredients already. Flour, sugar, butter, eggs, chocolate chips. It costs less than $5 to make a batch that serves 12-16. That’s cheaper than a single slice of cake at a bakery.
- Perfect for Meal Prep — Because they’re bars, they cut neatly. I pack them in lunchboxes, take them to picnics, or just keep them in the fridge for a quick afternoon snack. They don’t get soggy or stale as quickly as loose cookies.
This recipe has saved me more times than I can count. It’s my answer to “what’s for dessert?” when I’m tired, broke, or just too lazy to do anything complicated. It’s reliable, delicious, and makes my kitchen smell amazing without any stress.
Ingredients You’ll Need
Here’s the best part: this ingredient list is short, simple, and likely already in your pantry. I’m not asking you to go on a specialty shopping trip. Just grab these basics:
For the Dough
Unsalted butter (½ cup / 115g) — I use unsalted so I can control the saltiness. Melt it first! Don’t bother with room temperature butter for this recipe. Melted butter makes the cookies chewier and denser, which is exactly what we want for bars. Microwave it in 15-second bursts until just melted.
Granulated sugar (½ cup / 100g) — This adds sweetness and helps with the crisp edges. Don’t skip it for all brown sugar, or they’ll be too cakey.
Brown sugar (½ cup, packed / 115g) — This is the secret to the chewiness. The molasses in brown sugar keeps the bars moist. Light or dark brown sugar both work, but I prefer dark for a deeper caramel flavor.
Large egg (1) — Just one egg. Don’t add more or they’ll turn out too cakey. Room temperature is ideal, but if you’re in a hurry, just drop the egg in a bowl of warm water for 5 minutes.
Vanilla extract (1 teaspoon) — Use real vanilla, not imitation. It makes a huge difference in flavor. I keep a bottle of Nielsen-Massey on hand.
All-purpose flour (1 ½ cups / 190g) — Don’t use cake flour or self-rising flour. All-purpose is standard. Measure it correctly! Spoon it into the cup and level it off. Scooping directly from the bag packs it down and leads to dry cookies.
Baking soda (½ teaspoon) — This helps them spread and brown. Make sure it’s not old; if it’s been in your cabinet for over 6 months, toss it and get fresh.
Salt (½ teaspoon) — Even though we’re using unsalted butter, salt is crucial to balance the sweetness. It makes the chocolate taste more chocolatey.
For the Mix-Ins
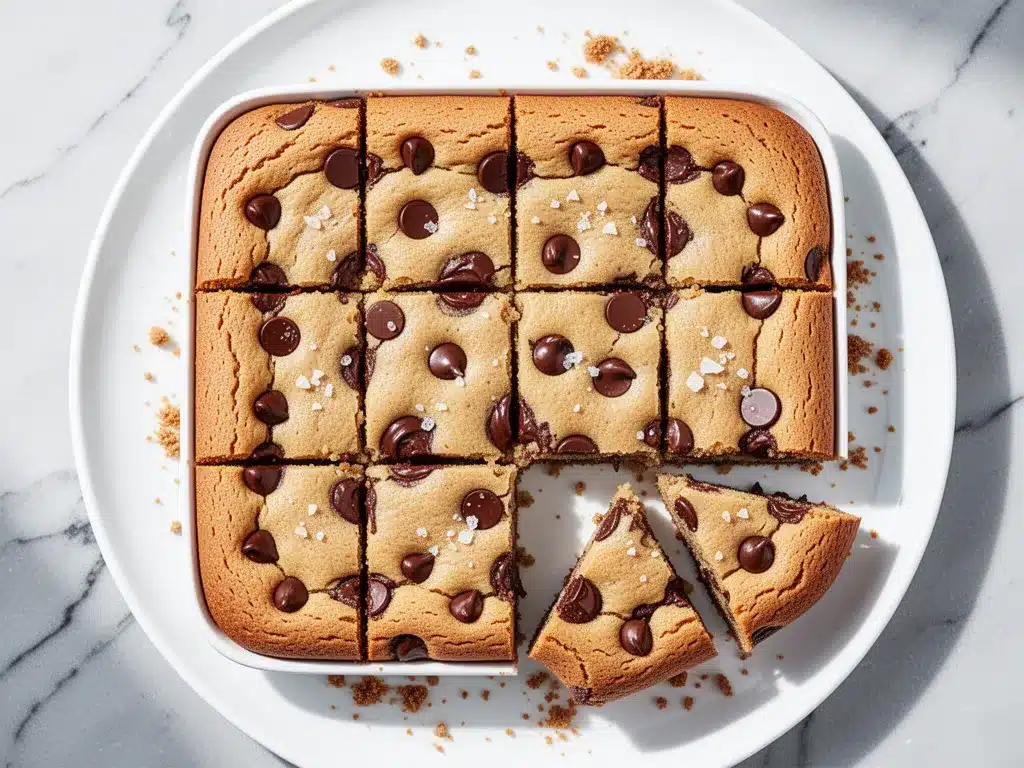
Semi-sweet chocolate chips (1 cup / 170g) — I use Ghirardelli or Nestlé Toll House. Both work great. If you want a more gourmet taste, chop up a chocolate bar instead of using chips. It creates those beautiful uneven chunks.
Optional: White chocolate chips (½ cup) — I love mixing white and semi-sweet chips for a fun look and extra sweetness.
Optional: Chopped walnuts or pecans (½ cup) — If you like crunch, add nuts. Toast them first in a dry pan for 2 minutes for extra flavor.
Flaky sea salt (for topping) — This is my favorite trick. Sprinkle a little Maldon sea salt on top right after they come out of the oven. The salt crystals melt slightly and add a savory contrast to the sweet dough. It sounds weird if you’ve never tried it, but it’s a game-changer.
Equipment Needed
You don’t need fancy gadgets for this. Here’s what I actually use:
Large mixing bowl — Any bowl that’s big enough to hold all the ingredients and let you whisk comfortably. Glass or stainless steel works best.
Whisk or wooden spoon — I use a whisk because it incorporates the flour faster, but a sturdy spoon works fine too.
9×9 inch baking pan — This is the standard size for bars. You can use a 9×13 if you want thinner bars, but they’ll bake faster and might dry out. Stick to 9×9 for that perfect thick, chewy bar.
Parchment paper — This is non-negotiable for easy cleanup. Line the pan with parchment, leaving an overhang on the sides. You’ll use the overhang to lift the entire block of bars out of the pan once they cool. No more scraping stuck cookies out of a greased pan!
Microwave-safe bowl — For melting the butter. If you don’t have one, use a small saucepan on the stove over low heat.
How to Make Soft-Baked Chocolate Chip Cookie Bars
Alright, let’s get cooking! This is super straightforward. I’m walking you through exactly how I do it, including the little tricks I’ve picked up over the years.
Step 1: Prep the Pan and Oven (2 minutes)
First, preheat your oven to 350°F (175°C). While it’s heating up, line your 9×9 inch baking pan with parchment paper. I like to cross-hatch the parchment—place one sheet lengthwise and one widthwise, then trim the excess. This gives you a nice handle to lift the bars out later. Lightly grease the parchment with cooking spray or a tiny bit of butter. This ensures nothing sticks.
Step 2: Melt the Butter (1 minute)
Melt the butter in the microwave or on the stove. You want it fully liquid but not hot. If it’s boiling hot, it might cook the egg when you add it. Let it cool for about a minute. It should be warm to the touch, not hot.
Step 3: Mix the Wet Ingredients (2 minutes)
In your large mixing bowl, combine the melted butter, granulated sugar, and brown sugar. Whisk vigorously for about a minute. You want the sugars to dissolve slightly into the butter. This step is crucial for those chewy edges. Add the egg and vanilla extract. Whisk again until everything is smooth and combined. The mixture might look a little separated at first—that’s normal.
Step 4: Add the Dry Ingredients (1 minute)
Add the flour, baking soda, and salt to the wet mixture. Switch to a spatula or wooden spoon now. Gently fold the dry ingredients into the wet until just combined. Do not overmix! Once you see no more streaks of flour, stop. Overmixing develops gluten, which makes the bars tough instead of tender. It should take about 30 seconds of folding.
Step 5: Fold in the Chocolate Chips (1 minute)
Pour in your chocolate chips (and nuts, if using). Fold them in gently. Make sure you scrape the bottom of the bowl so you get an even distribution. Some people like to reserve a handful of chips to press on top before baking for a pretty presentation. I always do this.
Step 6: Bake (15-18 minutes)
Spread the dough evenly into your prepared pan. Use a spatula to press it down into the corners. Bake for 15-18 minutes. Here’s the key: you want the edges to be golden brown, but the center should still look slightly soft and underbaked. They will continue to cook on the hot pan after you take them out. If you bake them until the center looks firm, they’ll be dry and cakey when cooled.
Step 7: Cool and Slice (15 minutes)
Remove from the oven and immediately sprinkle with flaky sea salt if you’re using it. Let them cool in the pan for at least 15 minutes. This is the hardest part—waiting. But if you try to cut them hot, they’ll fall apart. Once they’ve cooled slightly, use the parchment paper overhang to lift the entire block out of the pan. Place it on a cutting board and slice into squares. I usually cut them into 12 or 16 pieces, depending on how much self-control I have.
Expert Tips & Tricks
Here’s everything I’ve learned from making these dozens of times. These tips will save you from my mistakes.
Don’t Overbake — This is the #1 mistake. Take them out when the center looks slightly soft. They firm up as they cool. If you wait until they look perfectly done in the oven, they’ll be dry by the time you eat them.
Chill the Dough (Optional but Recommended) — If you have time, chill the dough in the fridge for 30 minutes before baking. This solidifies the butter, which helps the bars hold their shape better and develops a deeper flavor. It’s not necessary, but it’s a nice upgrade.
Use High-Quality Chocolate — Since chocolate is the star, use good chips. I love Ghirardelli 60% Cacao chips. If you use cheap, waxy chips, the whole bar suffers. It’s worth the extra dollar.
Measure Flour Correctly — I can’t stress this enough. If you scoop the flour directly from the bag with the measuring cup, you’re packing it down. This leads to dry, crumbly bars. Spoon the flour into the cup and level it off with a knife. It makes a huge difference.
Room Temperature Egg — If your egg is cold, it can cause the melted butter to seize up slightly. Just let the egg sit on the counter for 10 minutes before using it. Or, drop it in warm water for 5 minutes.
Storage is Key — These bars stay soft if stored in an airtight container at room temperature for up to 4 days. If you live in a humid climate, add a slice of bread to the container—the bread absorbs moisture and keeps the bars soft.
Variations & Substitutions
Once you’ve nailed the basic version, here’s how you can mix it up. I’ve tried all of these:
Double Chocolate — Add 2 tablespoons of cocoa powder to the dry ingredients. Use dark chocolate chips for a rich, fudgy bar.
Peanut Butter Chip — Swap the semi-sweet chips for peanut butter chips. Add ½ cup of creamy peanut butter to the wet ingredients for extra richness.
LEGO Cookie Bars — Add 1 cup of mini marshmallows and a handful of colorful candies (like LEGO bricks or sprinkles) right before baking. Great for kids’ parties.
Gluten-Free — Use a 1:1 gluten-free flour blend. Make sure it contains xanthan gum, or add ½ teaspoon. The texture will be slightly more delicate, but still delicious.
Dairy-Free — Use dairy-free butter (like Miyoko’s or Earth Balance) and dairy-free chocolate chips. They work surprisingly well in bars because the moisture content is similar.
Vegan — Replace the egg with a flax egg (1 tablespoon ground flaxseed + 3 tablespoons water, let sit for 5 minutes). Use vegan butter and vegan chocolate chips. They hold together well.
Serving & Storage
How do I serve these? Usually, I just cut them into squares and leave them on a plate on the counter. They’re that casual. But here are some other ways I enjoy them:
With Coffee — These are perfect with a morning coffee or an afternoon tea. The sweetness pairs well with the bitterness of dark roast.
With Ice Cream — Serve a warm bar with a scoop of vanilla ice cream on top. Drizzle with caramel sauce if you’re feeling fancy. It’s like a deconstructed s’mores bar.
For Lunchboxes — Cut them into smaller squares and pack them in bento boxes. They travel well and don’t crumble easily.
Storage: Store in an airtight container at room temperature for up to 4 days. They can also be frozen! Wrap individual squares in plastic wrap and place them in a freezer bag. They last for 3 months. Thaw at room temperature for 30 minutes before eating.
Reheating: If you want them warm, microwave a square for 10-15 seconds. It makes the chocolate gooey and the texture soft. Do not bake them again.
Nutrition Information
I’m not a nutritionist, but here’s the breakdown if you’re tracking. Keep in mind that these are bars, so a single square is a decent-sized treat.
Per serving (based on 12 bars):
- Calories: 220
- Protein: 2g
- Carbs: 30g
- Fat: 11g
- Sugar: 20g
Look, this is a treat. It’s sweet, it’s buttery, and it’s chocolate. It’s not a health food. But it’s homemade, so you know exactly what’s in it. When I want to make it lighter, I reduce the sugar by 2 tablespoons and add more nuts for protein. But usually? I just enjoy a square and move on. Balance is key.
Final Thoughts
So that’s my go-to soft-baked chocolate chip cookie bars! I’ve probably talked your ear off at this point, but when you make a recipe this often, you have a lot to say about it. These bars have saved me more weeknights than I can count. They’re my answer to “I need something sweet” when I’m tired, busy, or just don’t feel like baking a complex cake.
Make it yours! Try different chips, add nuts, or sprinkle sea salt. The best recipes are the ones you adapt to your tastes. If you make these, drop a comment and let me know what you think! I love hearing how they turn out in your kitchen. And if something doesn’t work, tell me that too—I’m here to help troubleshoot.
Happy baking! And I hope your kitchen smells half as good as mine does right now.
Frequently Asked Questions
Can I use a 9×13 pan instead of 9×9?
You can, but the bars will be thinner. They’ll bake faster, so check them at 12 minutes. They might be crispier around the edges because of the increased surface area. For that thick, chewy bar texture, stick with the 9×9.
Why did my bars turn out cakey instead of chewy?
This usually happens if you overmeasure the flour or overmix the dough. Make sure you spoon and level your flour, and stop mixing as soon as the flour disappears. Also, using too much egg can make them cakey—stick to one egg.
Can I freeze the dough?
Yes! You can scoop the dough into the pan, cover it tightly with plastic wrap, and freeze it. When you’re ready to bake, let it thaw in the fridge overnight, then bake as directed. You might need to add 1-2 minutes to the bake time if the dough is still cold.
Do I have to use melted butter?
Yes, for this specific soft-baked bar recipe, melted butter is key. It creates a denser, chewier texture. Creamed butter (room temperature) is for traditional puffy cookies. Melted butter is for chewy bars.
Can I add nuts?
Absolutely. Walnuts, pecans, or macadamia nuts all work great. Add ½ cup for a nice crunch. If you’re sensitive to nuts, just skip them—they’re optional.
How do I know when they’re done?
The edges should be golden brown, and the center should look slightly soft. They will firm up as they cool. If the center looks set and firm in the oven, they’re overbaked.
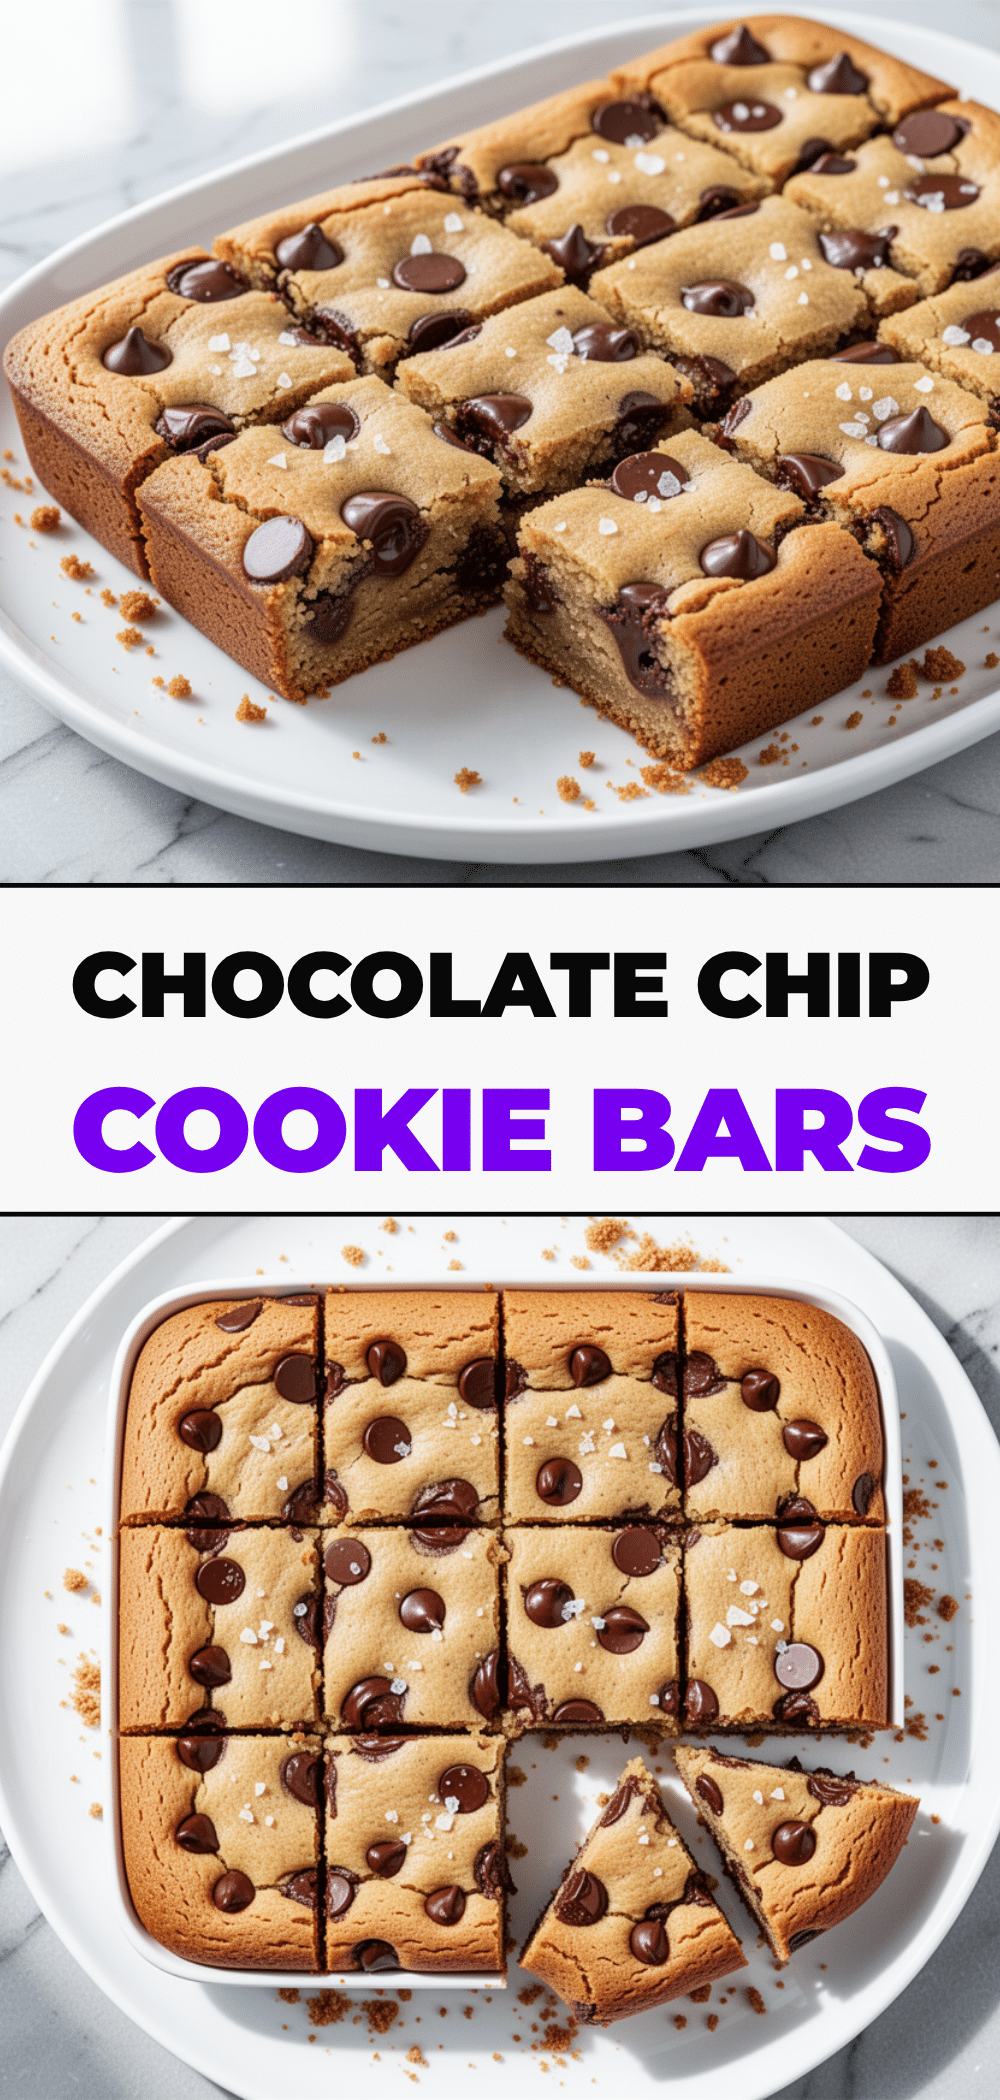
Pin This Recipe!
Soft-Baked Chocolate Chip Cookie Bars: 5 Easy Weeknight Treat
- Total Time: 30 minutes
- Yield: 12-16 servings 1x
Description
These soft-baked chocolate chip cookie bars are a one-bowl, emergency dessert that is chewy, gooey, and ready in just 30 minutes. Perfect for busy weeknights, they offer the comfort of a cookie with the ease of a bar.
Ingredients
- 1/2 cup (115g) unsalted butter, melted
- 1/2 cup (100g) granulated sugar
- 1/2 cup (115g) packed brown sugar
- 1 large egg
- 1 teaspoon vanilla extract
- 1 1/2 cups (190g) all-purpose flour
- 1/2 teaspoon baking soda
- 1/2 teaspoon salt
- 1 cup (170g) semi-sweet chocolate chips
- Optional: 1/2 cup white chocolate chips
- Optional: 1/2 cup chopped walnuts or pecans
- Flaky sea salt for topping
Instructions
- Preheat oven to 350°F (175°C). Line a 9×9 inch baking pan with parchment paper, leaving an overhang on the sides, and lightly grease.
- Melt the butter in the microwave or on the stove until liquid but not hot. Let it cool for about a minute.
- In a large mixing bowl, whisk together the melted butter, granulated sugar, and brown sugar for about a minute until slightly dissolved.
- Add the egg and vanilla extract to the butter mixture and whisk until smooth.
- Add the flour, baking soda, and salt. Gently fold in with a spatula or wooden spoon until just combined. Do not overmix.
- Fold in the chocolate chips (and nuts if using). Reserve a handful of chips to press on top if desired.
- Spread the dough evenly into the prepared pan, pressing into the corners.
- Bake for 15-18 minutes, until edges are golden brown but the center still looks slightly soft.
- Remove from oven and immediately sprinkle with flaky sea salt if using.
- Let cool in the pan for at least 15 minutes before lifting out using the parchment overhang and slicing into squares.
Notes
Do not overbake; the center should look slightly soft as it will firm up while cooling. For chewier bars, use melted butter rather than creamed butter. Measure flour by spooning it into the cup and leveling it off to avoid dry bars. Can be stored in an airtight container at room temperature for up to 4 days or frozen for 3 months.
- Prep Time: 10 minutes
- Cook Time: 15-18 minutes
- Category: Dessert
- Cuisine: American
Nutrition
- Serving Size: 1 square
- Calories: 220
- Sugar: 20
- Sodium: 150
- Fat: 11
- Saturated Fat: 7
- Carbohydrates: 30
- Fiber: 1
- Protein: 2
Keywords: chocolate chip cookie bars, soft baked cookies, easy dessert, weeknight treat, one bowl recipe, chewy bars, emergency dessert


