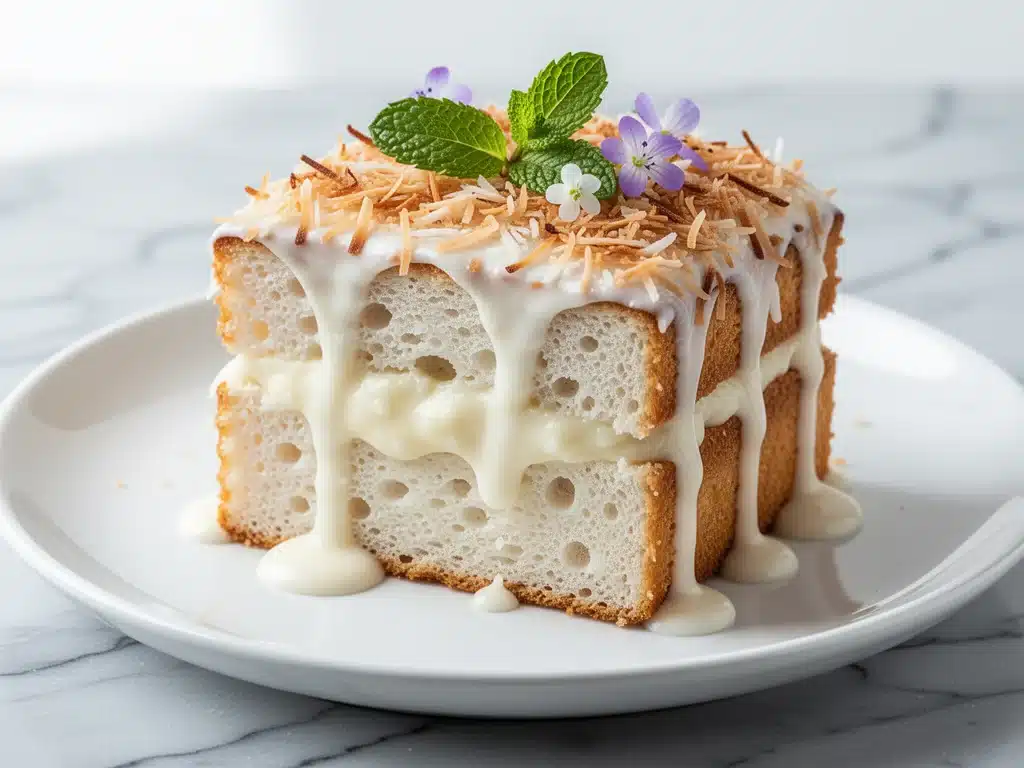
Last summer, I was stuck in a heatwave that seemed to last until October. The kind of heat where the air conditioning hums like a broken refrigerator and your kitchen feels more like an oven than a place to cook. I was desperate for dessert, but the idea of turning on the oven felt impossible. I needed something cold, something tropical, and something that didn’t require standing over a stove for hours. That’s when I stumbled onto the idea of a poke cake, but with a twist. I wanted to skip the artificial flavors and go for something that tasted like a vacation.
I started tinkering with a simple box cake mix and a can of sweetened condensed milk, but it felt… plain. Just sweet. Too sweet. Then, I remembered the bag of shredded coconut sitting in my pantry that I’d bought for a failed baking project months ago. I toasted it until it was golden brown and fragrant, then folded it into a coconut cream filling. The result? A cake that was moist, deeply flavorful, and completely refreshing. It became my secret weapon for hot days.
This toasted coconut cream poke cake has been made on repeat in my house for the last two years. It’s not just because it’s easy—though it is stupid simple—but because it tastes like it came from a high-end bakery. The contrast between the warm, buttery toasted coconut and the cool, tangy cream is addictive. I’ve tested this recipe so many times that I can make it with my eyes closed. It’s the kind of dessert that disappears in minutes, leaving everyone asking for the recipe. If you’re looking for a show-stopping treat that doesn’t require advanced skills, this is it. It’s moist, it’s creamy, and it’s going to become your new favorite.
Why You’ll Love This Recipe
There are about ten reasons I keep coming back to this toasted coconut cream poke cake, but here are the big ones that will win you over immediately.
- Three Main Ingredients — Seriously. The cake base is just a box mix, the poke liquid is sweetened condensed milk, and the topping is coconut cream. You don’t need a degree in pastry arts to pull this off. I’ve made this with my teenage son, and he didn’t even burn the toast. If you can open a can and pour, you can make this.
- Make-Ahead Friendly — This cake actually gets better as it sits. I love making it the night before a party because the flavors meld together overnight. The cake absorbs all that sweetened condensed milk, becoming incredibly moist. It’s perfect for potlucks where you need to prep early.
- Texture Heaven — Most poke cakes can get soggy if you’re not careful. But the toasted coconut on top? That’s the game-changer. It adds a crunchy, nutty contrast to the soft, creamy filling. It’s like getting a little piece of a macaroon in every bite.
- Impressive but Lazy — I’ve served this at dinner parties and brunches, and people always assume I spent all day baking. They don’t realize that the “hard” part was just waiting for the cake to cool. It’s the ultimate hack for looking like a pro chef without the stress.
- Customizable — While the classic version is perfect, I love adding a drizzle of caramel or a sprinkle of sea salt on top. It elevates the sweetness and makes it feel gourmet. But honestly? The simple version is hard to beat.
This is my go-to dessert when I want to impress guests without spending hours in the kitchen. It’s reliable, delicious, and always a crowd-pleaser. No one complains about this cake. Ever.
Ingredients You’ll Need
Here’s the best part: you probably have most of these ingredients already. This recipe relies on pantry staples and a few key items that do all the heavy lifting. I’m particular about the coconut, though. Use unsweetened shredded coconut for the toasting part; sweetened coconut will burn too quickly and get too cloying.
For the Cake Base
Yellow or Vanilla Cake Mix (1 box / 15.25 oz) — I stick to yellow cake mix for that classic, buttery flavor. White cake works too, but yellow has more richness. Don’t use chocolate; this isn’t a chocolate cake. Follow the box instructions for the batter, but use water instead of milk for a lighter crumb that absorbs the liquid better.
Eggs (3 large) — Standard stuff. Room temperature eggs mix better, but if you’re in a hurry, just drop them in warm water for 5 minutes.
Vegetable Oil (½ cup / 120ml) — Oil keeps cakes moist longer than butter. I use a neutral oil like canola or vegetable. Olive oil would be too strong here.
Water (1 cup / 240ml) — Again, follow the box. Water helps the cake bake up lighter and airy, which is crucial for poking holes.
For the Poke Filling
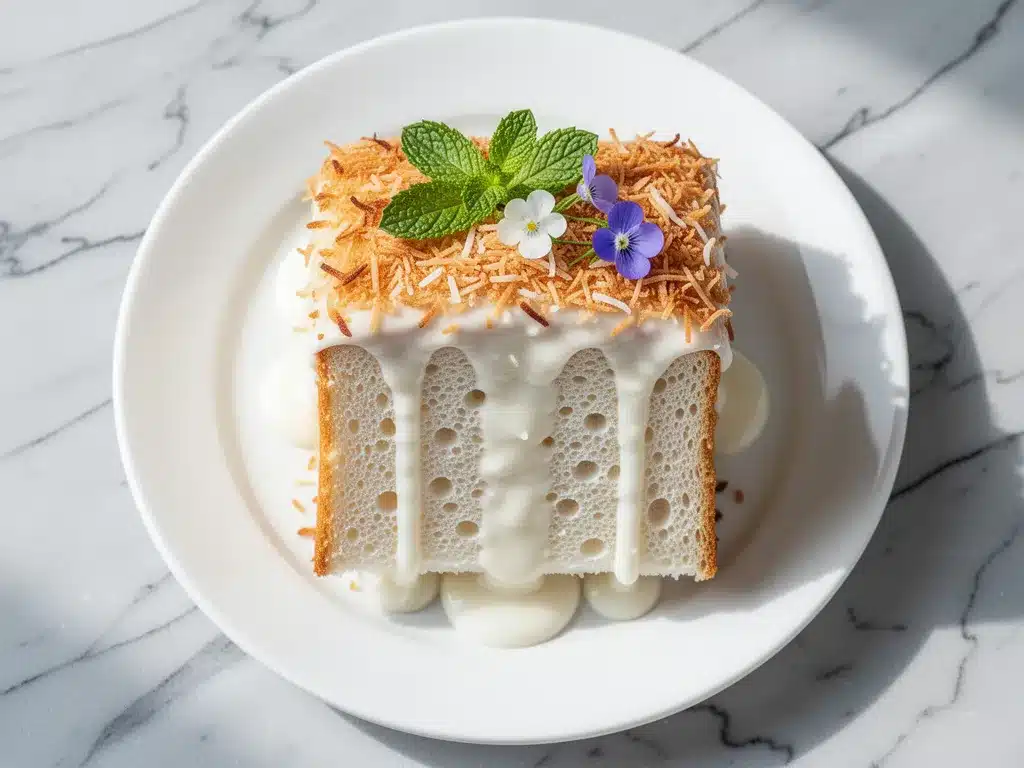
Sweetened Condensed Milk (1 can / 14 oz) — This is the magic ingredient. It’s thick, sweet, and rich. Do not confuse this with evaporated milk. They look similar but are totally different. Condensed milk is sugary; evaporated milk is just cooked milk. You need the sugar and thickness.
For the Topping
Heavy Cream (1 cup / 240ml) — You need full-fat heavy whipping cream for this. Half-and-half won’t whip up stiff enough. Make sure your bowl and beaters are cold; it helps the cream whip faster and hold its shape.
Coconut Extract (1 teaspoon) — This gives that intense tropical flavor. Almond extract works in a pinch, but coconut is the star here. Don’t skip it. If you can’t find it, use 2 teaspoons of vanilla, but it won’t be the same.
Unsweetened Shredded Coconut (1 cup / 40g) — This is for toasting. Look for the fine or medium shred. Large flakes are too hard to toast evenly. This adds the crunch and the coconut flavor to the top.
Salt (pinch) — A tiny pinch of salt in the whipped cream balances the sweetness. It’s a pro tip that makes the coconut taste more like coconut and less like sugar.
Optional Add-Ins
White Chocolate Chips (½ cup) — Fold these into the whipped cream for extra sweetness and texture. Or melt them and drizzle over the top.
Macadamia Nuts (¼ cup, chopped) — Toasted macadamias pair beautifully with coconut. Add them to the topping for a nutty crunch.
Mango Puree (½ cup) — Swirl this into the whipped cream for a tropical twist. It adds a nice tang and color.
Equipment Needed
You don’t need fancy equipment for this. Here’s what I actually use.
9×13 Inch Baking Pan — A standard glass or metal pan works best. Glass heats more evenly, which helps the cake bake uniformly. I use my trusty Pyrex pan.
Mixer — Electric hand mixer or stand mixer. You need this for the whipped cream. Doing it by hand is possible but takes arm strength. I’d rather save my arms.
Large Spoon or Chopstick — For poking holes. A wooden spoon handle works great. It creates holes that are wide enough for the condensed milk to flow into.
Baking Sheet — For toasting the coconut. Line it with parchment paper or a silicone mat for easy cleanup.
Whisk or Spatula — For mixing the batter and folding in the coconut.
Measuring Cups and Spoons — Standard stuff. Accuracy matters less with this recipe since it’s forgiving, but measuring the condensed milk correctly is important for the right sweetness level.
Offset Spatula — Optional, but makes spreading the whipped cream much easier and neater. I use mine to get those pretty swirls on top.
How to Make It: Step-by-Step
Alright, let’s make this! I’m walking you through exactly how I do it, including the little tricks I’ve picked up over the years.
Step 1: Prep and Bake the Cake (30 minutes)
Preheat your oven to 350°F (175°C). Grease your 9×13 inch pan with butter or non-stick spray. In a large bowl, combine the cake mix, eggs, oil, and water. Beat on medium speed for 2 minutes until smooth. The batter should be thick but pourable.
Pour the batter into the prepared pan and spread it evenly. Bake for 20-25 minutes, or until a toothpick inserted in the center comes out clean. The cake should spring back when you touch it gently. Important: Do not overbake. We want a moist cake that can absorb the liquid. Let it cool in the pan for 10 minutes, then remove it to a wire rack to cool completely. If you poke holes while the cake is warm, they’ll close up. Wait until it’s room temperature.
Step 2: Toast the Coconut (5-8 minutes)
While the cake cools, toast the coconut. This step is non-negotiable for flavor. Preheat your oven to 350°F (175°C) or use a skillet on the stove. Spread the unsweetened shredded coconut in a single layer on a baking sheet. Bake for 5-7 minutes, stirring every 2 minutes, until golden brown and fragrant. Watch it closely! Coconut goes from perfect to burnt in seconds. Let it cool completely before using. Burnt coconut tastes bitter and will ruin the cake.
Step 3: Poke the Holes (2 minutes)
Once the cake is completely cool, use the handle of a wooden spoon to poke holes all over the surface. Space them about 1 inch apart. Go all the way to the bottom of the pan. Don’t be shy—poke generously. The more holes, the more flavor. I like to do rows, moving the spoon systematically across the cake so I don’t miss any spots.
Step 4: Add the Sweetened Condensed Milk (2 minutes)
Pour the entire can of sweetened condensed milk over the poked cake. Use a spatula to gently spread it around, ensuring it fills the holes. You might need to tilt the pan slightly to help it distribute. Let the cake sit for at least 30 minutes, or ideally overnight, so the milk absorbs fully. This is what makes the cake incredibly moist and sweet.
Step 5: Whip the Cream (5 minutes)
In a chilled bowl, whip the heavy cream, coconut extract, and salt until stiff peaks form. Be careful not to over-whip, or it will turn into butter. The cream should hold its shape when you lift the beaters. Fold in the cooled toasted coconut gently. You want to keep the coconut pieces distinct for texture.
Step 6: Assemble and Chill (1 hour)
Spread the coconut whipped cream evenly over the cake. Use an offset spatula to create swirls or peaks for a professional look. Cover the cake and refrigerate for at least 1 hour before serving. This allows the cream to set and the flavors to meld. The longer it chills, the better it tastes.
Step 7: Serve
Slice and serve cold. Garnish with extra toasted coconut or a drizzle of caramel if you’re feeling fancy. This cake is best eaten the day it’s made, but it keeps well in the fridge for up to 3 days.
Expert Tips & Tricks
Here’s everything I’ve learned from making this dozens of times. These tips will save you from my mistakes.
Cool Completely Before Poking
I’ve made the mistake of poking the cake while it’s still warm, and the holes closed up, leaving the condensed milk sitting on top. It’s a mess. Let the cake cool to room temperature, then refrigerate it for 30 minutes to firm up the crust. It’s easier to poke and the holes stay open.
Toast Coconut in Small Batches
If you have a large quantity of coconut, toast it in batches. Crowding the pan leads to uneven toasting. You want every piece to be golden, not some burnt and some pale.
Chill Your Bowl
For the whipped cream, put your mixing bowl in the freezer for 15 minutes before starting. Cold cream whips faster and holds its shape better. This is especially important in humid weather.
Don’t Skimp on the Extract
Coconut extract is potent. A little goes a long way. If you use too much, it can taste chemical. Start with 1 teaspoon and adjust to taste. Fresh coconut flavor is subtle, so the extract bridges the gap.
Use a Sharp Knife for Slicing
To get clean slices, use a sharp knife dipped in hot water. Wipe it dry between cuts. This prevents the cream from smearing and keeps the layers distinct.
Variations & Substitutions
Once you’ve nailed the basic version, here’s how you can mix it up. I’ve tried all of these.
Chocolate Coconut Poke Cake
Use chocolate cake mix instead of yellow. Add a layer of chocolate ganache under the whipped cream. It’s rich and decadent. Great for chocolate lovers.
Tropical Fruit Poke Cake
Add crushed pineapple or mango chunks to the whipped cream. Or, pour a can of crushed pineapple over the cake before the condensed milk. It adds a tangy sweetness that cuts the richness.
Macadamia Nut Crunch
Chop macadamia nuts and mix them with the toasted coconut. Toast them together for extra nutty flavor. This is my personal favorite variation.
Dairy-Free Version
Use a dairy-free cake mix, coconut milk (full-fat) instead of heavy cream, and dairy-free sweetened condensed milk (available in Asian markets or online). The texture will be slightly different, but still delicious.
Gluten-Free
Use a gluten-free yellow cake mix. Most major brands work well. Follow the package instructions for liquid ratios, as GF mixes can vary.
Serving & Storage
How to Serve:
I usually serve this straight from the fridge. It’s cold, creamy, and refreshing. Pair it with a cup of coffee or tea for a complete dessert experience. It also goes well with a glass of chilled white wine or a coconut latte.
Side Dishes:
This cake is rich, so keep sides light. A simple green salad or some fresh berries work well if you’re serving it as part of a larger meal. But honestly, it’s best enjoyed on its own.
Storage Instructions:
Store the cake in the refrigerator, covered with plastic wrap or in an airtight container, for up to 3 days. The cake will continue to absorb moisture, so it might get softer over time. It’s still good, just different.
Freezing:
I don’t recommend freezing this cake. The whipped cream can separate and become grainy when thawed. The texture won’t be the same. It’s best made fresh.
Meal Prep:
This is perfect for meal prep. Make the cake the night before, and you’re set for the day. It’s a great option for potlucks or parties where you need to prep ahead.
Nutrition Information
I’m not a nutritionist, but here’s the breakdown if you’re tracking. Keep in mind that this is a sweet, rich dessert, so portion control is key.
Per Serving (based on 12 slices):
- Calories: 450
- Protein: 4g
- Carbs: 55g
- Fiber: 1g
- Sugar: 40g
- Fat: 24g
- Saturated Fat: 15g
What’s Good:
It’s satisfying and provides energy. The coconut offers some medium-chain triglycerides (MCTs), which are a quick source of energy.
What to Know:
High in sugar and saturated fat due to the condensed milk and cream. Use sparingly if you’re watching your intake. The cake mix also contains refined sugars.
My Take:
Look, this is a treat. It’s not a health food. But it’s homemade, so you know exactly what’s in it. When I make it, I enjoy a small slice and savor it. It’s worth the calories for the flavor boost.
Final Thoughts
So that’s my toasted coconut cream poke cake! I’ve probably talked your ear off at this point, but when you make a recipe this often, you have a lot to say about it. This cake has saved me more times than I can count. It’s my answer to “what’s for dessert” when I’m tired, don’t want to bake a complicated cake, and still want something that tastes really good. My kids are happy, my guests are impressed, and I’m happy because I’m not stressed about cooking.
Make it yours! Try different add-ins, swap in your favorite fruits, or adjust the sweetness. The best recipes are the ones you adapt to your family’s tastes. If you make this, drop a comment and let me know what you think! I love hearing how recipes turn out in your kitchen. And if something doesn’t work, tell me that too—I’m here to help troubleshoot.
Happy cooking! And I hope your kitchen smells half as good as mine does right now.
Frequently Asked Questions
Can I use fresh coconut instead of shredded coconut?
You can, but it’s harder to toast evenly. Fresh coconut has high moisture content, so it will take longer to toast and might steam instead of brown. If you use fresh coconut, chop it finely and spread it thinly on the baking sheet. Shredded coconut is easier and more consistent. I stick with shredded for reliability.
Why did my cake turn out soggy?
This usually happens if you poke the cake while it’s still warm, or if you use too much condensed milk. Make sure the cake is completely cool before poking. Also, don’t add extra condensed milk beyond the can. The cake is designed to absorb exactly one can. If you want more moisture, let it sit longer, but don’t add more liquid.
Can I make this ahead for a dinner party?
Absolutely. This cake is actually better made ahead. Make it the night before and let it chill overnight. The flavors meld, and the cake becomes incredibly moist. It’s perfect for parties because you can prep it days in advance. Just add the whipped cream topping the day of serving to keep it fresh.
Why did my whipped cream turn out runny?
Usually, the bowl or cream wasn’t cold enough. Make sure your heavy cream is very cold, and chill your mixing bowl and beaters in the freezer for 15 minutes before starting. Also, don’t over-whip, or it will separate. Stop when you see stiff peaks. If it’s already runny, you can try chilling it again and whipping briefly, but it might not hold as well.
Can I use coconut milk instead of heavy cream?
You can, but the texture will be different. Coconut milk (the canned kind) is thicker than regular milk but doesn’t whip up like heavy cream. You can chill the can overnight, scoop out the solidified cream, and whip that. It works, but it’s less fluffy. Heavy cream gives that light, airy texture that contrasts with the dense cake.
How long does this cake last?
It lasts up to 3 days in the refrigerator. After that, the cake might start to get too soft or the cream might separate. It’s best eaten within the first 2 days for optimal texture and flavor. Don’t freeze it, as the texture suffers.
Can I use a different type of cake mix?
Yes, but yellow or vanilla is best. Chocolate cake mix works well, but the flavor profile changes completely. White cake mix is lighter but less flavorful. Avoid spice or fruit-flavored mixes, as they might clash with the coconut. Stick to the classics for the best result.
Pin This Recipe!
Toasted Coconut Cream Poke Cake
- Total Time: 1 hour 30 minutes
- Yield: 12 servings 1x
Description
A moist, refreshing poke cake made with just three main ingredients: box cake mix, sweetened condensed milk, and coconut cream. Topped with buttery toasted coconut, this easy dessert is perfect for hot days and make-ahead entertaining.
Ingredients
- 1 box (15.25 oz) yellow or vanilla cake mix
- 3 large eggs
- 1/2 cup (120ml) vegetable oil
- 1 cup (240ml) water
- 1 can (14 oz) sweetened condensed milk
- 1 cup (240ml) heavy whipping cream
- 1 teaspoon coconut extract
- 1 cup (40g) unsweetened shredded coconut
- 1 pinch salt
- Optional: 1/2 cup white chocolate chips, 1/4 cup chopped macadamia nuts, or 1/2 cup mango puree
Instructions
- Preheat oven to 350°F (175°C). Grease a 9×13 inch baking pan.
- In a large bowl, combine cake mix, eggs, oil, and water. Beat on medium speed for 2 minutes until smooth.
- Pour batter into the prepared pan and spread evenly. Bake for 20-25 minutes until a toothpick comes out clean.
- Let the cake cool in the pan for 10 minutes, then transfer to a wire rack to cool completely to room temperature.
- While the cake cools, spread shredded coconut on a baking sheet. Toast at 350°F (175°C) for 5-7 minutes, stirring every 2 minutes, until golden brown. Let cool completely.
- Once the cake is completely cool, poke holes all over the surface using the handle of a wooden spoon, spacing them about 1 inch apart.
- Pour the entire can of sweetened condensed milk over the poked cake. Use a spatula to spread it and ensure it fills the holes.
- Let the cake sit for at least 30 minutes (or overnight) to allow the milk to absorb.
- In a chilled bowl, whip heavy cream, coconut extract, and salt until stiff peaks form.
- Gently fold the cooled toasted coconut into the whipped cream.
- Spread the coconut whipped cream evenly over the cake.
- Refrigerate for at least 1 hour before serving to allow the cream to set.
Notes
Ensure the cake is completely cool before poking holes, otherwise they will close up. Chill your mixing bowl and beaters in the freezer for 15 minutes before whipping the cream for best results. Toast the coconut in small batches to ensure even browning. This cake is best eaten within 2-3 days of making.
- Prep Time: 30 minutes
- Cook Time: 30 minutes
- Category: Dessert
- Cuisine: American
Nutrition
- Serving Size: 1 slice
- Calories: 450
- Sugar: 40
- Fat: 24
- Saturated Fat: 15
- Carbohydrates: 55
- Fiber: 1
- Protein: 4
Keywords: poke cake, coconut cake, easy dessert, summer dessert, make-ahead dessert, box cake mix recipe, toasted coconut


