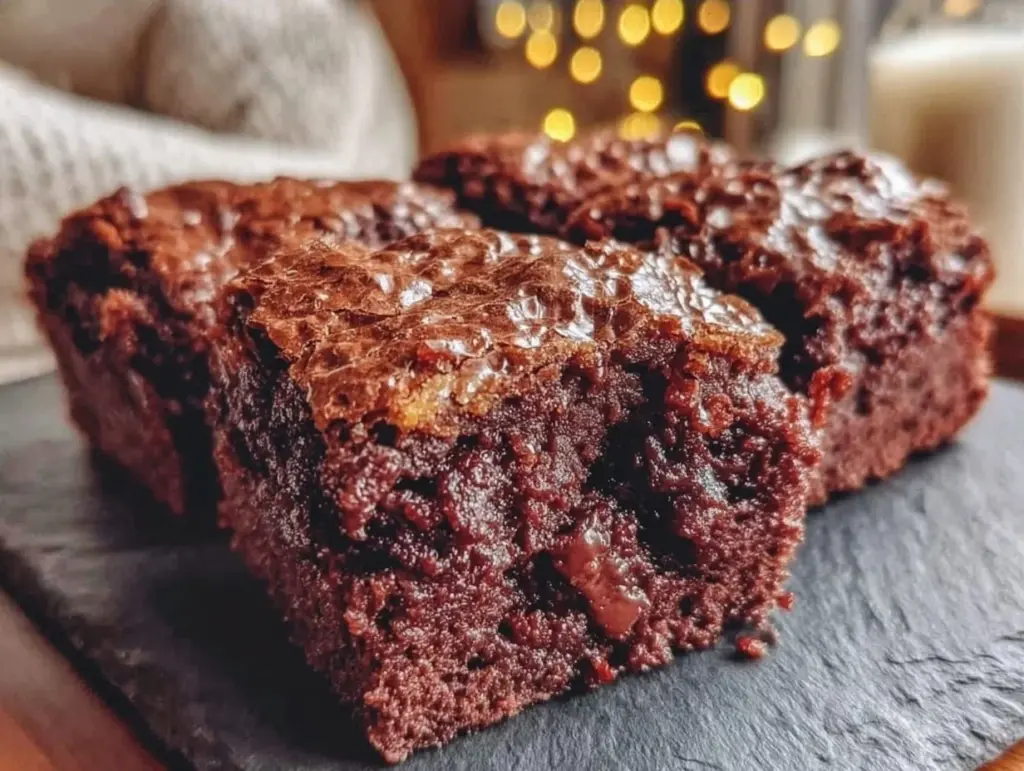
Last Saturday, my kitchen looked like a flour explosion had taken place. There was cocoa powder on the counter, a smear of chocolate on the dog’s nose (don’t judge him, he’s a good boy), and my six-year-old standing on a step stool, eyes wide, watching the batter turn into magic. We were making small batch fudgy brownies with crackly tops. Usually, weekends are for errands and laundry, but this Saturday was different. This was our baking time. And honestly? It’s become the highlight of our week.
I’ve always been a big believer in baking with kids. It’s not about the brownies themselves—though these are pretty amazing—it’s about the sticky hands, the shared giggles, and the pride of eating something you helped create. But let’s be real: big batch recipes can be overwhelming for little helpers. Too much to mix, too many steps to lose track of, and too many leftovers that go stale before anyone finishes them.
That’s why I developed this small batch version. It’s designed for a 8×8 inch pan, which is perfect for a family of three or four, or even just you and your mini-chef. It yields just enough brownies to satisfy the sweet tooth without leaving you with a tray of stale squares for days. Plus, the crackly top? That’s the part kids love the most. They love peeling it off like a crispy candy shell. It’s edible confetti.
I’ve tested this recipe dozens of times, tweaking the ratio of butter to sugar to get that signature shiny, crinkly crust. I’ve also simplified the steps so they’re safe and easy for kids to handle. From melting the butter to sprinkling the sea salt, every step is a chance for your little one to get involved. If you’re looking for a way to spend quality time together while getting a delicious treat out of it, this is it. Trust me, once you try these, you’ll be making small batch fudgy brownies with crackly tops on repeat.
Why You’ll Love This Recipe
There are a million brownie recipes out there, but this one is special. It’s not just about the taste (though it’s rich, chocolatey, and fudgy). It’s about the experience. Here’s why this recipe has earned a permanent spot in our family’s rotation.
Perfect for Little Hands — This recipe is intentionally scaled down. You’re not mixing 10 pounds of flour in a giant bowl. It’s a manageable amount that fits easily in a medium mixing bowl. My kids can help stir the batter without needing a ladder or a spotter. It’s safe, simple, and satisfying for them.
The Crackly Top Factor — Let’s talk about that crust. It’s thin, shiny, and slightly crisp, contrasting with the dense, gooey center. It’s the kind of texture that makes people stop mid-bite and say, “Wait, how did you do that?” It’s a total showstopper, and kids are obsessed with the sound it makes when they bite into it.
Quick Cleanup — Because it’s a small batch, there’s less mess. Just one bowl, one pan, and a few utensils. As a parent, I appreciate not having to wash a mountain of dishes after dessert. It encourages us to bake more often because the barrier to entry is so low.
Make-It-Yourself Toppings — The recipe is a blank canvas. Do you like nuts? Walnuts are classic. Do you like extra chocolate? Stir in chocolate chips. Do you like a little crunch? Flake sea salt on top. Letting kids choose their add-ins gives them ownership over the final product. My daughter loves hers with mini chocolate chips, while my son insists on nothing but the pure brownie.
Freezes Like a Dream — Even though it’s a small batch, sometimes you bake too much. These brownies freeze beautifully. I wrap them in plastic wrap and store them in a freezer bag. When we need a quick snack or a lunchbox treat, I just pull one out. They thaw in about 20 minutes and taste just as fresh as the day they were made.
This recipe is my go-to when I want to connect with my kids. It’s not rushed, it’s not complicated, and it results in something delicious that we can enjoy together. If you’re looking for a way to make memories in the kitchen, start here.
Ingredients You’ll Need
One of the best things about this small batch fudgy brownies with crackly tops recipe is that you probably already have most of these ingredients in your pantry. It’s a classic chocolate base, but the ratios are key to getting that fudgy texture. Here’s what you’ll need, and why each part matters.
For the Brownie Base
Unsalted Butter (½ cup / 113g) — We’re using unsalted so we can control the saltiness. Melted butter gives us that dense, fudgy texture rather than a cakey one. Don’t use margarine; it doesn’t have the same fat content and can make the brownies greasy.
Granulated Sugar (1 cup / 200g) — This is the secret to the crackly top. The sugar dissolves into the melted butter, creating a thin layer that crisps up in the oven. Don’t substitute with brown sugar here; it adds moisture and will prevent the crust from forming properly.
Eggs (2 large) — Room temperature eggs mix in more easily and create a smoother batter. They provide structure and richness. Crack them directly into the bowl while the butter is still warm—it helps them incorporate faster.
Vanilla Extract (1 teaspoon) — Pure vanilla extract is a must. It enhances the chocolate flavor and adds a warm, aromatic note. I use a good quality brand because you can really taste the difference in a recipe with so few ingredients.
All-Purpose Flour (⅔ cup / 85g) — Just enough flour to hold everything together. We don’t want a cakey brownie, so we keep the flour low. Sift it if you have lumps, but don’t overmix once it’s added.
Cocoa Powder (⅓ cup / 30g) — Use unsweetened cocoa powder. Dutch-processed cocoa gives a deeper, darker color and richer flavor, but regular natural cocoa works too. Just make sure it’s not “processed with alkali” if you want that classic brownie taste.
Salt (½ teaspoon) — Salt is crucial. It balances the sweetness and makes the chocolate flavor pop. I use fine sea salt for mixing into the batter.
For the Crackly Top Finish
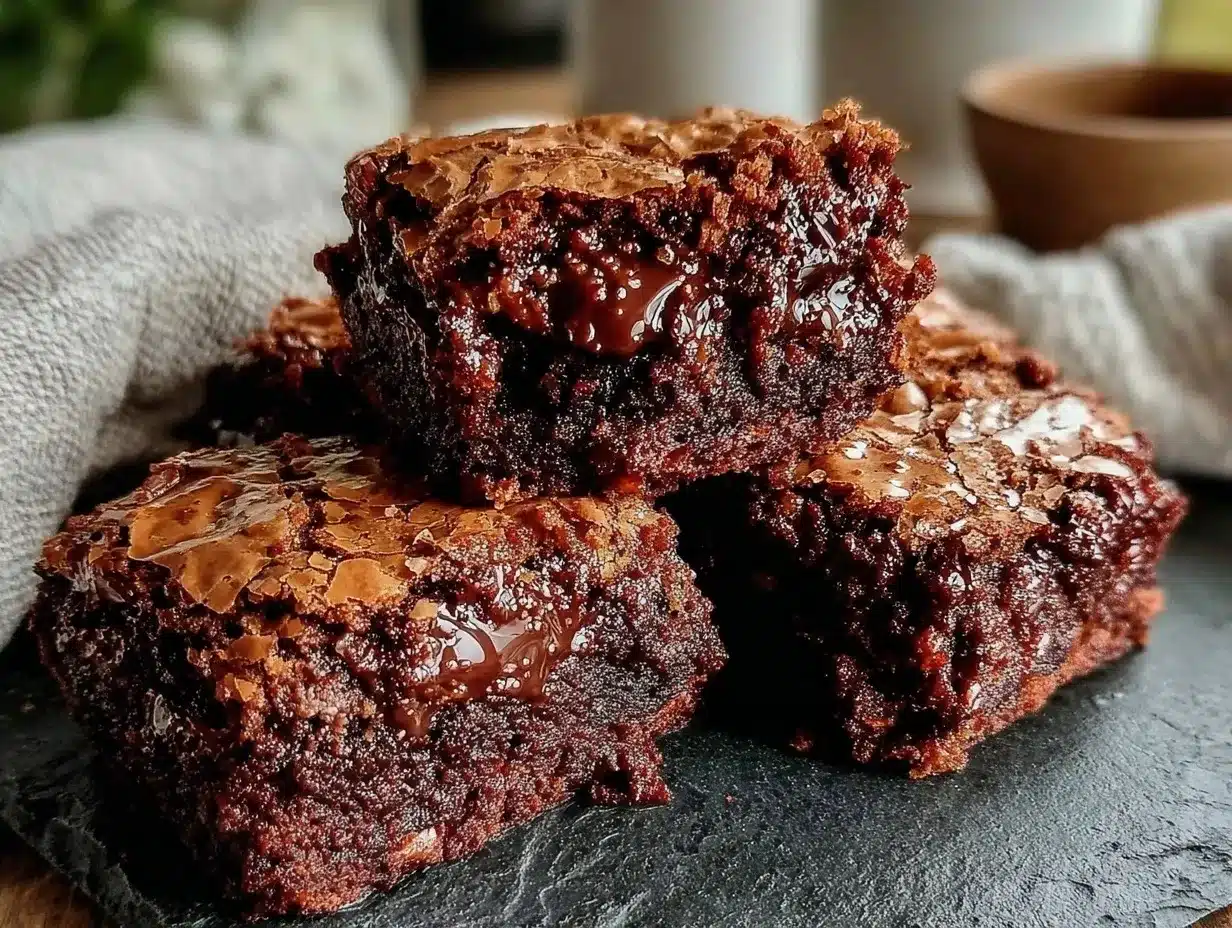
Coarse Sea Salt (optional, for sprinkling) — This is the final touch. Sprinkling flaky sea salt on top right after baking contrasts the sweet with a savory crunch. It’s fancy but so easy. If you don’t have sea salt, kosher salt works too.
Optional Add-Ins
Chocolate Chips (½ cup) — For extra chocolatey goodness. Fold these in gently at the end. My kids love these, but they’re optional if you want pure brownie flavor.
Walnuts or Pecans (½ cup, chopped) — If you like nutty brownies, add these in. Toasting the nuts first brings out their flavor, but it’s not necessary for this recipe.
Pro Tip: Measure your flour carefully! Scooping it directly from the bag packs it down, leading to dry brownies. Spoon it into the measuring cup and level it off with a knife. It’s a small step that makes a big difference.
Equipment Needed
You don’t need fancy gadgets for this. Here’s what I actually use, and what you can substitute if you don’t have it.
8×8 Inch Baking Pan — This is the standard size for small batch brownies. Line it with parchment paper for easy removal. I leave a little overhang on the sides so you can lift the brownies out once they cool. If you don’t have parchment, grease the pan well with butter or non-stick spray.
Microwave-Safe Bowl — To melt the butter. I prefer the microwave because it’s fast and easy. You can use a double boiler on the stove, but it takes more effort. Just be careful not to overheat the butter; you want it melted, not boiling.
Mixing Bowl — A medium-sized bowl is perfect. It needs to be big enough to whisk the eggs and sugar together vigorously. I use a glass bowl because I can see through it and make sure everything is well combined.
Whisk — Essential for creating that crackly top. You need to whisk the eggs and sugar together until they’re pale and fluffy. A fork works in a pinch, but a whisk is much easier and gets the job done faster.
Spatula — A silicone spatula is great for folding in the flour and chocolate chips. It scrapes the sides of the bowl clean, so you don’t waste any batter.
Cooling Rack — Letting the brownies cool completely is important for clean cuts. If you cut them while they’re hot, they’ll fall apart. A wire rack allows air to circulate underneath, cooling them evenly.
Knife or Bench Scraper — For cutting the brownies into squares. I like to use a sharp knife for clean edges. Wipe the knife between cuts to keep them neat.
How to Make It: Step-by-Step
Alright, let’s make these small batch fudgy brownies with crackly tops! I’m walking you through exactly how I do it, including the little tricks that make the difference between good and great. And remember, this is a great project for kids—let them help with the steps that are safe and fun!
Step 1: Prep Your Pan and Oven (5 minutes)
Preheat your oven to 350°F (175°C). Line your 8×8 inch baking pan with parchment paper. Leave a little overhang on the sides so you can lift the brownies out later. Grease the parchment paper with a little butter or non-stick spray. This ensures they don’t stick. While the oven heats up, get your mixing bowl and whisk ready.
Step 2: Melt the Butter (2 minutes)
Melt the butter in a microwave-safe bowl. I do this in 30-second intervals, stirring in between, until it’s completely liquid. Don’t let it boil over! Let it cool for a minute so it’s warm but not hot. If it’s too hot, it will cook the eggs when we add them. Kids can help stir the melting butter—it’s safe and satisfying.
Step 3: Whisk Sugar and Eggs (3-4 minutes)
This is the most important step for the crackly top. Add the granulated sugar and eggs to the melted butter. Whisk vigorously! I mean really whisk. You want the mixture to become pale, thick, and slightly fluffy. This takes about 3-4 minutes of arm work. It’s a great exercise for little arms, and you’ll see the color change from dark brown to a lighter, glossy tan. This step incorporates air and dissolves the sugar, which creates that shiny crust. Encourage your kids to take turns whisking—it’s like a workout!
Step 4: Add Vanilla and Dry Ingredients (2 minutes)
Stir in the vanilla extract. Then, add the flour, cocoa powder, and salt. Use a spatula to fold these ingredients in gently. Mix just until the flour disappears. Do not overmix! Overmixing develops gluten, which makes the brownies cakey instead of fudgy. Stop as soon as you don’t see streaks of flour. If you’re adding chocolate chips or nuts, fold them in now. Kids love sprinkling in the chocolate chips—let them do it!
Step 5: Bake (25-30 minutes)
Pour the batter into the prepared pan and spread it out evenly with your spatula. Bake for 25-30 minutes. The brownies are done when the top looks set and crackly, and a toothpick inserted into the center comes out with a few moist crumbs attached (not wet batter). If you want cakier brownies, bake them longer. For fudgy brownies, pull them out when they’re slightly underdone—they’ll continue to cook as they cool. The crackly top should be shiny and thin. Let the kids watch the oven—there’s nothing quite like seeing the crust form!
Step 6: Cool and Cut (30 minutes)
Let the brownies cool in the pan for at least 30 minutes. This is the hardest part, I know. But if you cut them too soon, they’ll be messy. Once they’re cool, lift them out of the pan using the parchment paper overhang. Place them on a cutting board and slice into squares. Sprinkle with coarse sea salt if you’re using it. Watch their faces light up when they see the crackly top and the salt flakes. It’s a moment of pure joy.
Total Time: About 45 minutes (10 minutes prep, 25 minutes bake, 10 minutes cool).
Expert Tips & Tricks
Here’s everything I’ve learned from making these brownies dozens of times. These tips will save you from my mistakes and ensure your small batch fudgy brownies with crackly tops are perfect every time.
Whisk Like You Mean It
I can’t stress this enough. The crackly top comes from vigorously whisking the eggs and sugar. If you skip this step, you’ll get a matte top, not a shiny one. It takes effort, but it’s worth it. If you’re baking with kids, make it a game: “Who can whisk the fastest?” or “Let’s whisk until the bowl feels warm.”
Don’t Overbake
Fudgy brownies are underbaked. I know it feels wrong to pull them out when they look slightly raw in the center, but they’ll set as they cool. If you bake them until the toothpick comes out clean, they’ll be dry and cakey. Aim for moist crumbs on the toothpick. The residual heat will finish the cooking process.
Use Good Chocolate
Since cocoa powder is the main flavor, use a good quality brand. Ghirardelli or Hershey’s Special Dark are reliable choices. Avoid cheap cocoa powder; it tastes dusty and bitter. Your brownies will taste richer and more chocolatey.
Room Temperature Eggs
If you’re in a hurry, you can warm your eggs by placing them in a bowl of warm water for 5 minutes. Room temperature eggs emulsify better with the butter and sugar, creating a smoother batter. Cold eggs can cause the butter to seize up, leading to a lumpy mix.
Cool Completely
I know it’s tempting to dig in, but patience pays off. Warm brownies are messy and crumbly. Let them cool completely for clean cuts and the best texture. If you can’t wait, let them cool for at least 20 minutes.
Add Sea Salt at the End
Don’t mix sea salt into the batter. Sprinkle it on top after baking. This gives you those beautiful, crunchy salt flakes that contrast with the sweet brownie. It’s a small detail that makes a big impact.
Variations & Substitutions
Once you’ve nailed the basic version, here’s how you can mix it up. I’ve tried all of these, and they’re all delicious.
Peanut Butter Swirl
After pouring the batter into the pan, drop spoonfuls of peanut butter on top. Use a knife to swirl it into the batter. It’s a classic combination, and kids love the marbled look.
Double Chocolate
Add ½ cup of chocolate chips to the batter. For an extra chocolate hit, use chocolate cocoa powder instead of regular. My kids call these “chocolate on chocolate” brownies.
Gluten-Free
Use a 1:1 gluten-free flour blend. Most blends work well in brownies because the texture is forgiving. Just make sure the blend contains xanthan gum, or add ¼ teaspoon to the dry ingredients.
Dairy-Free
Substitute the butter with a dairy-free butter alternative or coconut oil. Coconut oil will add a slight coconut flavor, which pairs well with chocolate. Use dairy-free chocolate chips if you’re adding those.
Vegan
Replace the eggs with flax eggs (2 tablespoons ground flaxseed mixed with 6 tablespoons water, let sit for 5 minutes). Replace the butter with coconut oil. The texture will be slightly different, but still delicious.
Flavor Twists
Add 1 teaspoon of espresso powder to the dry ingredients. It enhances the chocolate flavor without making the brownies taste like coffee. Or add a pinch of cinnamon for a warm, spicy kick.
Serving & Storage
These small batch fudgy brownies with crackly tops are best enjoyed fresh, but they’re also great for storing. Here’s how to keep them at their best.
How to Serve
I usually serve these plain, but they’re also amazing with a glass of cold milk or a scoop of vanilla ice cream. For a fancy touch, drizzle them with caramel sauce or serve them with whipped cream. My kids love them plain, though—especially with the crackly top.
Storage Instructions
Room Temperature: Store in an airtight container for up to 3 days. They’ll stay fudgy and moist. If your kitchen is hot, the crackly top might soften, but they’ll still taste great.
Refrigerator: You can store them in the fridge for up to a week. Let them come to room temperature before eating for the best texture. Cold brownies can be a bit firm.
Freezer: Wrap individual brownies in plastic wrap and store them in a freezer bag for up to 3 months. Thaw at room temperature for 20 minutes before eating. They freeze beautifully and taste just as good as fresh.
Pro Tip: If the brownies seem dry after storing, microwave them for 10-15 seconds. It brings back the fudgy texture and warms the chocolate.
Nutrition Information
I’m not a nutritionist, but here’s the breakdown if you’re tracking. Keep in mind that these are rich, decadent brownies, so enjoy them in moderation.
Per Serving (based on 12 brownies):
- Calories: 180
- Protein: 3g
- Carbs: 24g
- Fiber: 1g
- Sugar: 18g
- Fat: 10g
- Saturated Fat: 6g
- Cholesterol: 35mg
- Sodium: 120mg
These brownies are a treat, not a health food. But they’re made with simple ingredients, and you know exactly what’s in them. When I want to make them slightly lighter, I reduce the sugar by 2 tablespoons, though the crackly top might not form as well. For most occasions, I just stick to the original recipe and enjoy a square or two.
Final Thoughts
So that’s my go-to small batch fudgy brownies with crackly tops! I’ve talked a lot about the baking process, but when you make a recipe this often, you realize it’s about more than just the food. It’s about the time spent together, the laughter, and the shared accomplishment.
This recipe has saved our weekends. It’s my answer to “What can we do together?” when we’re looking for a simple, fun activity. My kids are happy because they get to help make something delicious, and I’m happy because I get to spend quality time with them. Plus, the brownies are just plain good.
Make it yours! Try different add-ins, swap in your favorite nuts, or adjust the salt to your taste. The best recipes are the ones you adapt to your family’s tastes. If you make these brownies, I’d love to hear how they turn out. Drop a comment and let me know what your kids added to the mix. And if something doesn’t work, tell me—I’m here to help troubleshoot.
Happy baking! And I hope your kitchen smells half as good as mine does right now. If you’re looking for more kid-friendly treats, check out our peanut butter chocolate chip cookie cups or our cherry almond crumble bars. They’re just as fun to make and eat!
Frequently Asked Questions
Why didn’t my brownies get a crackly top?
The crackly top is all about the sugar and the whisking. If you didn’t whisk the eggs and sugar vigorously enough, the sugar won’t dissolve properly, and you won’t get that shiny crust. Make sure you whisk for at least 3-4 minutes until the mixture is pale and thick. Also, make sure you’re using granulated sugar, not brown sugar.
Can I use a different pan size?
You can, but the baking time will change. If you use a 9×9 inch pan, the brownies will be thinner, so bake them for 20-25 minutes. If you use a loaf pan, the brownies will be thicker, so bake them for 35-40 minutes. Keep an eye on them and use the toothpick test to check for doneness.
Can I make these ahead of time?
Yes! These brownies actually taste better the next day as the flavors meld together. You can make them up to 2 days ahead and store them in an airtight container. They also freeze beautifully, so you can make a batch and freeze individual pieces for quick snacks.
My brownies are too cakey. What did I do wrong?
Too much flour or overmixing the batter can lead to cakey brownies. Make sure you’re measuring your flour correctly (spoon and level) and stop mixing as soon as the flour disappears. Also, don’t overbake them. Pull them out when the toothpick has moist crumbs, not when it’s clean.
Can I add nuts to this recipe?
Absolutely! Walnuts or pecans are classic additions. Fold ½ cup of chopped nuts into the batter after you’ve added the flour. If you’re baking with kids, let them chop the nuts (with supervision) or sprinkle them in. Just make sure they’re finely chopped so they distribute evenly.
Is there a way to make these gluten-free?
Yes! Use a 1:1 gluten-free flour blend. Most blends work well in brownies because the texture is forgiving. Just make sure the blend contains xanthan gum, or add ¼ teaspoon to the dry ingredients. The rest of the recipe stays the same.
How do I store leftovers?
Store leftovers in an airtight container at room temperature for up to 3 days. For longer storage, wrap individual brownies in plastic wrap and freeze them for up to 3 months. Thaw at room temperature before eating.
Pin This Recipe!
Small Batch Fudgy Brownies with Crackly Tops
- Total Time: 45 minutes
- Yield: 12 servings 1x
Description
A kid-friendly, small-batch brownie recipe that yields rich, fudgy brownies with a signature shiny, crackly crust. Perfect for baking with children and easy to clean up.
Ingredients
- 1/2 cup (113g) unsalted butter, melted
- 1 cup (200g) granulated sugar
- 2 large eggs, room temperature
- 1 teaspoon vanilla extract
- 2/3 cup (85g) all-purpose flour
- 1/3 cup (30g) unsweetened cocoa powder
- 1/2 teaspoon fine sea salt
- Optional: 1/2 cup chocolate chips
- Optional: 1/2 cup chopped walnuts or pecans
- Optional: Coarse sea salt for sprinkling on top
Instructions
- Preheat oven to 350°F (175°C). Line an 8×8 inch baking pan with parchment paper, leaving an overhang on the sides for easy removal. Grease the parchment lightly.
- Melt the butter in a microwave-safe bowl in 30-second intervals, stirring until liquid. Let it cool for a minute so it is warm but not hot.
- Add the granulated sugar and eggs to the melted butter. Whisk vigorously for 3-4 minutes until the mixture is pale, thick, and slightly fluffy. This step is crucial for the crackly top.
- Stir in the vanilla extract. Add the flour, cocoa powder, and fine sea salt. Fold gently with a spatula just until the flour disappears. Do not overmix. Fold in optional add-ins like chocolate chips or nuts if using.
- Pour the batter into the prepared pan and spread evenly. Bake for 25-30 minutes, or until the top looks set and crackly. A toothpick inserted into the center should come out with moist crumbs attached, not wet batter.
- Let the brownies cool in the pan for at least 30 minutes. Lift them out using the parchment overhang, place on a cutting board, and slice into squares. Sprinkle with coarse sea salt if desired.
Notes
Whisking the eggs and sugar vigorously is the key to achieving the crackly top. Do not overmix the batter once flour is added to keep the brownies fudgy rather than cakey. For best results, use room temperature eggs and measure flour by spooning it into the cup and leveling it off. Brownies freeze well for up to 3 months.
- Prep Time: 10 minutes
- Cook Time: 25 minutes
- Category: Dessert
- Cuisine: American
Nutrition
- Serving Size: 1 brownie square
- Calories: 180
- Sugar: 18
- Sodium: 120
- Fat: 10
- Saturated Fat: 6
- Carbohydrates: 24
- Fiber: 1
- Protein: 3
Keywords: small batch brownies, fudgy brownies, crackly top brownies, kid-friendly baking, easy dessert, chocolate brownies, gluten-free option


