Last Tuesday, I was standing in my kitchen at 7:30 PM, staring into the open fridge like it held the secrets to the universe. My toddler was climbing the cabinets, my partner was asking “what’s for dinner?” for the third time, and I had zero energy to bake anything complicated. I wanted something sweet. Something warm. Something that didn’t require a dozen bowls, a mixer, or twenty minutes of prep.
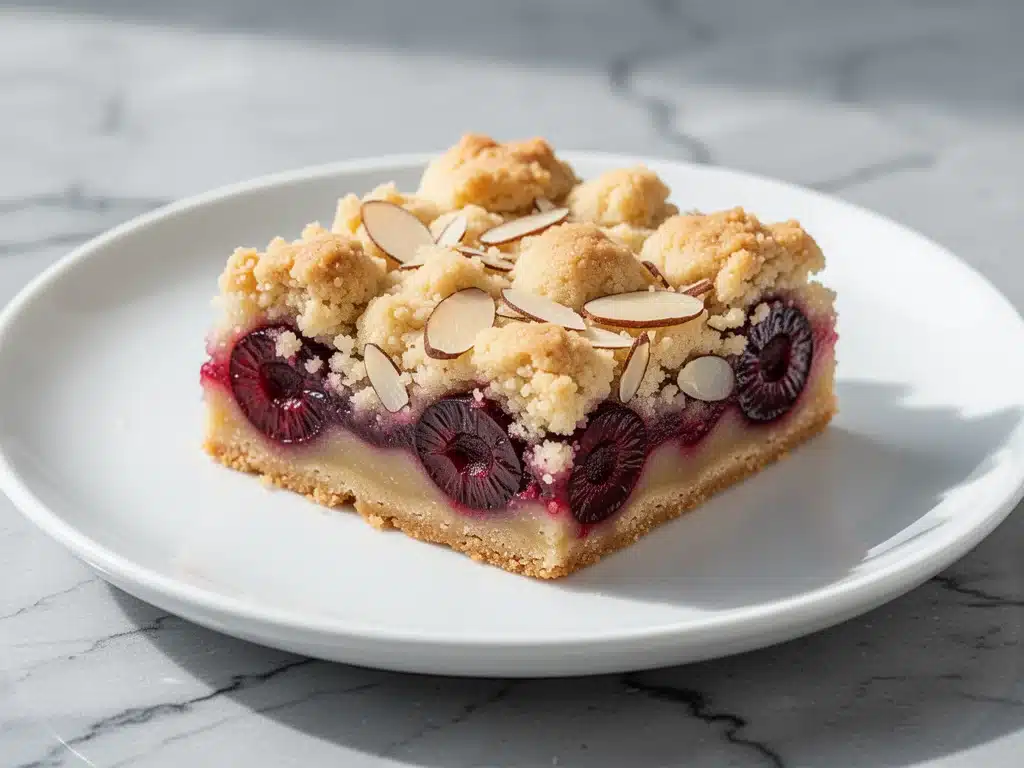
So I did what I always do when I’m desperate: I raided the pantry. I found a can of cherry pie filling, a bag of sliced almonds, some butter, brown sugar, and flour. I threw them together in a messy experiment, hoping for the best. What came out of the oven thirty minutes later? Honestly? It was better than anything I could have bought at a bakery. Chewy, gooey, nutty, and bursting with bright cherry flavor.
That accidental Tuesday disaster turned into a permanent fixture in our house. These Cherry Almond Crumble Bars have become my go-to solution for those chaotic weeknights when I need a dessert that feels homemade but takes almost no effort. It’s the kind of recipe that makes you look like a hero without actually doing any heavy lifting.
I’ve made these bars at least a dozen times since that night. I’ve tweaked the almond quantity (more is better), tested different cherry fillings (always use the pie filling, trust me), and even tried adding a pinch of cinnamon for warmth. But at its core, this recipe is stubbornly simple. It’s five ingredients. Five. That’s it. No fancy techniques, no special equipment, just pure, comforting dessert magic.
If you’re tired of complicated desserts that take all weekend to make, or if you’re like me and just want something sweet that happens in the time it takes to cook dinner, you need to try these. They’re perfect for after-school snacks, last-minute dinner party guests, or just because you deserve a treat on a random Wednesday.
Why You’ll Love This Recipe
There are about a million dessert recipes out there, but this one sticks around for a reason. It’s not just because it tastes good—though it absolutely does. It’s because it fits into real life. Here’s why these cherry almond crumble bars have earned a permanent spot in my weekly rotation.
Five Ingredients, Zero Excuses — Seriously. Five. You probably already have four of them in your pantry right now. This isn’t a recipe that requires a special trip to the store. I’ve made this on nights when I literally had nothing else, and it still turned out amazing. It’s the ultimate pantry rescue mission.
Lightning Fast Prep — From opening the cans to pulling the pan out of the oven, it takes less than 15 minutes of active work. The rest is just waiting. I can throw this together while my kids do homework, and by the time they’re done, it’s baking. No standing over a stove, no whisking, no kneading. Just layer and bake.
Perfectly Chewy Texture — I’ve tried too many “crumble” recipes that turn out dry or crumbly like sand. These bars are different. The bottom layer gets crisp and buttery, while the top stays soft and chewy with pockets of gooey cherry filling. It’s the kind of texture that makes you close your eyes when you take the first bite.
Make-Ahead Friendly — These bars actually taste better the next day. The flavors meld together, the almonds toast a little more in the residual heat, and the cherry filling gets even more intense. I often make a batch on Sunday and keep them in the fridge for the week. They’re great cold, at room temperature, or warmed up for 30 seconds in the microwave.
Gluten-Free Friendly — If you swap the flour for a 1:1 gluten-free blend, these are naturally gluten-free. I’ve made them for my celiac friend using Bob’s Red Mill flour, and she couldn’t tell the difference. It’s a huge win for accommodating dietary needs without making a separate dessert.
This is my answer to “can we have dessert?” when I’m tired, broke, or just lazy. It’s reliable, delicious, and makes everyone happy. No complicated techniques, no weird ingredients, just simple, sweet comfort food.
Ingredients You’ll Need
Here’s the best part: you probably have most of this already. I’m being serious. This isn’t a recipe that requires you to hunt down exotic spices or expensive specialty items. It’s basic, honest ingredients that work together to create something special.
For the Base Layer
Butter (½ cup / 113g, melted) — This is the foundation. Use real butter, not margarine. The flavor difference is huge. I use unsalted so I can control the saltiness, but if you only have salted, just reduce any added salt in the recipe. Melt it in the microwave or on the stove—doesn’t matter.
Flour (1 cup / 120g, all-purpose) — Standard all-purpose flour works perfectly. If you’re making this gluten-free, use a 1:1 gluten-free baking blend. I’ve tested with both King Arthur and Bob’s Red Mill, and both work great. Don’t try to use almond flour here—it changes the texture too much.
Brown Sugar (½ cup / 100g, packed) — This gives the crust its chewiness and deep, caramel-like flavor. Light or dark brown sugar both work. I prefer dark for a more robust taste, but light is fine if that’s what you have. Pack it tightly into the measuring cup for accuracy.
Salt (¼ teaspoon) — Just a pinch. It might seem small, but it balances the sweetness and brings out the cherry flavor. Don’t skip it, even if you’re watching sodium.
For the Filling
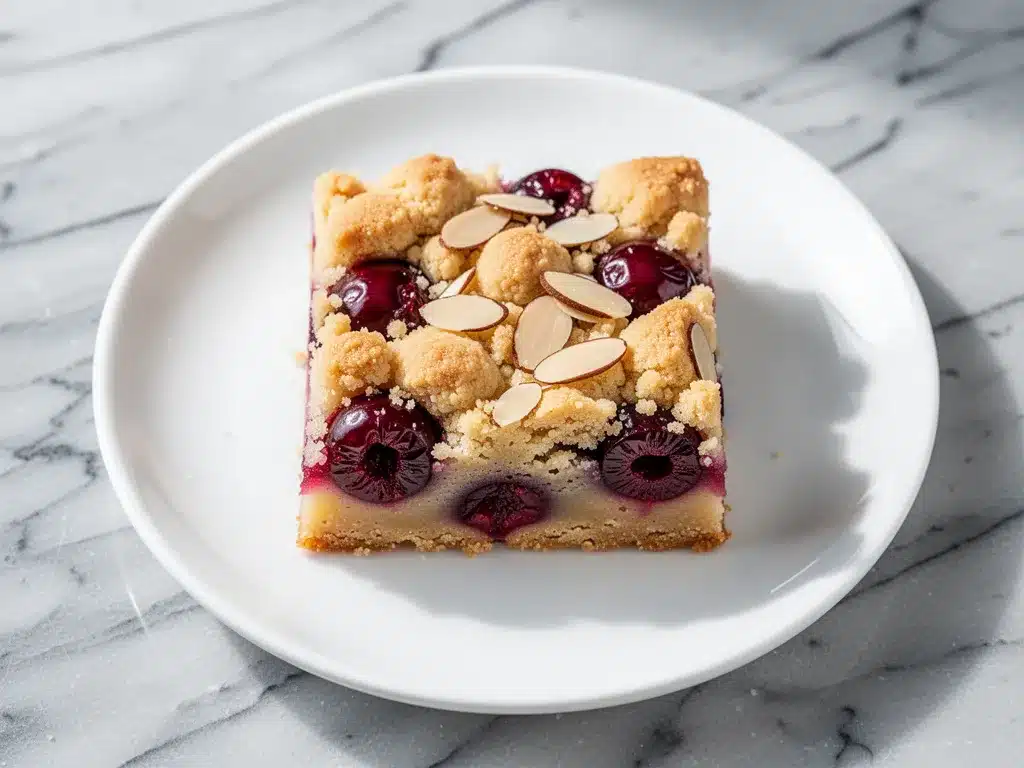
Cherry Pie Filling (21 oz / 600g can) — Yes, the canned kind. Do not try to substitute fresh cherries unless you want to make a whole different recipe. The pie filling is pre-sweetened and thickened, which is exactly what you need for this bar structure. I use the regular sweetened kind, not the “light” version, because the sugar helps with the texture. Stovemonkey or Bakers’ Best are my go-to brands.
Sliced Almonds (½ cup / 45g) — This is where the magic happens. The almonds add crunch, nuttiness, and visual appeal. Use slivered or sliced almonds, not whole ones. Whole almonds are too hard to bite through in a bar. Toasting them first (optional) adds even more flavor, but raw works fine too.
Extra Almonds for Topping (½ cup / 45g) — I like to sprinkle more on top for that beautiful, crunchy finish. It makes it look fancy, even though it’s just sprinkling.
Optional Add-Ins
Vanilla Extract (1 teaspoon) — I sometimes add this to the butter mixture for extra warmth. It’s not traditional, but I love it. Try it if you want a more complex flavor.
Chopped Dark Chocolate (¼ cup) — Cherry and chocolate is a classic combo. Stir this into the filling before baking for a fudgy surprise. My kids go crazy for this version.
Cinnamon (½ teaspoon) — Just a pinch adds warmth and makes it taste like fall. I add this when I want the bars to feel cozier.
Pro Tip: I keep a stash of cherry pie filling in my pantry specifically for nights like this. It’s one of those ingredients that sounds weird until you use it, and then you wonder why you never bought it before.
Equipment Needed
You don’t need fancy equipment for this. Here’s what I actually use, and what you can skip.
8×8 Inch Baking Pan — This is the perfect size. It gives you nice, thick bars that are easy to cut and serve. If you only have a 9×9, that works too, but the bars will be thinner and bake faster. Keep an eye on them. I use a glass Pyrex pan because I like to see the bottom browning, but metal works fine.
Mixing Bowl — Any medium-sized bowl works. I use a ceramic one because it doesn’t slide around on the counter. You just need to mix the butter, flour, sugar, and salt.
Fork or Pastry Cutter — To mix the crust ingredients. I use a fork because it’s faster and easier to clean. A pastry cutter is overkill for this.
Spatula — For spreading the cherry filling. I use a silicone spatula because it scrapes the bowl clean. A regular spoon works, but you’ll waste filling.
Cooling Rack — Essential. You need to let the bars cool completely before cutting, or they’ll fall apart. I learned this the hard way with a messy, gooey disaster on my counter.
Cheese Knife or Pizza Cutter — For cutting the bars. A pizza cutter makes clean, even cuts without squishing the bars. A sharp knife works too, but you have to saw a bit.
Parchment Paper — Optional but recommended. Line the pan with parchment, leaving an overhang on the sides. This makes it easy to lift the entire block of bars out of the pan for cutting. No parchment? Grease the pan well with butter or non-stick spray.
How to Make It: Step-by-Step
Alright, let’s make this! I’m walking you through exactly how I do it, including the little tricks I’ve picked up. This is so simple that you’ll wonder why you ever stressed about dessert.
Step 1: Prep Your Pan and Oven (2 minutes)
Preheat your oven to 350°F (175°C). This needs to be hot before you put the bars in, so start it now. Line your 8×8 inch baking pan with parchment paper, leaving a slight overhang on the long sides. This is the secret to getting the bars out intact. If you don’t have parchment, grease the pan thoroughly with butter or cooking spray.
Step 2: Make the Crust (3 minutes)
In your mixing bowl, combine the melted butter, flour, brown sugar, and salt. Mix with a fork or your hands until it looks like wet sand. It should be clumpy but hold together when you squeeze it. Don’t overmix—it doesn’t need to be smooth. Just combine everything.
Step 3: Press Half the Crust (2 minutes)
Take half of the crumble mixture and press it firmly into the bottom of the prepared pan. Use your fingers or the bottom of a measuring cup to pack it down evenly. You want a solid, flat base. This is what gives the bars their structure. Don’t skip this step—loose crust means messy bars.
Step 4: Add the Cherry Filling (1 minute)
Open the can of cherry pie filling and pour it evenly over the crust. Use a spatula to spread it out to the edges. Try to keep it in a single layer if possible, but it’s okay if it’s a little lumpy. The filling will bubble and spread as it bakes.
Step 5: Top with Remaining Crust and Almonds (2 minutes)
Scatter the remaining crumble mixture over the cherry filling. Don’t try to make it perfectly even—rustic is good. Then, sprinkle the sliced almonds evenly over the top. I like to press them in slightly so they don’t just slide off. This is the layer that gets crunchy and golden.
Step 6: Bake (30-35 minutes)
Place the pan in the preheated oven and bake for 30-35 minutes. You’ll know it’s done when the top is golden brown and the cherry filling is bubbling vigorously around the edges. The crust should be set, not jiggly. If the top is browning too fast, cover it loosely with foil for the last 10 minutes.
Step 7: Cool Completely (1 hour)
This is the hardest part. Let the bars cool in the pan on a wire rack for at least 30 minutes, but ideally 1 hour. They need to set. If you cut them while hot, they’ll be a gooey mess. I know, I know, it’s tempting. But patience pays off. Once cooled, lift them out using the parchment overhang and cut into squares.
Expert Tips & Tricks
Here’s everything I’ve learned from making these dozens of times. These tips will save you from my mistakes.
Don’t Skip the Cooling Time
I cannot stress this enough. The bars are hot, gooey, and delicious. But if you cut them now, they will fall apart. Let them cool completely. The filling needs to set, and the crust needs to firm up. I usually let them cool overnight in the fridge, and they’re even easier to cut.
Toast Your Almonds (Optional but Recommended)
If you have an extra minute, toast the sliced almonds in a dry skillet over medium heat for 2-3 minutes until fragrant. This brings out their nutty flavor and adds extra crunch. It’s a small step that makes a big difference.
Use the Right Cherry Filling
Stick with the canned cherry pie filling. Fresh cherries have too much water and will make the bars soggy. If you must use fresh, cook them down with sugar and cornstarch first, but that defeats the purpose of this easy recipe. The canned stuff is perfect for a reason.
Press the Crust Firmly
When you press the bottom crust into the pan, make sure it’s packed down tight. Loose crust means the bars will crumble apart when you cut them. Use the bottom of a glass or measuring cup to get it even and compact.
Store Properly
These bars keep well at room temperature for up to 3 days in an airtight container. If it’s hot outside, keep them in the fridge. They’re great cold, but they taste best at room temperature. Don’t freeze them—the texture changes too much.
Common Mistake: Greasy Bottom
If your bottom crust is greasy, you didn’t press it firmly enough, or the butter was too hot when you mixed it. Let the melted butter cool slightly before mixing, and pack the crust down hard.
Pro Trick: Add a Drizzle
Once the bars are cooled, drizzle them with melted white chocolate or a simple powdered sugar glaze. It’s not traditional, but it makes them look fancy and adds extra sweetness. Perfect for gifting or dinner parties.
Variations & Substitutions
Once you’ve nailed the basic version, here’s how you can mix it up. I’ve tried all of these, and they all work.
Blueberry Almond Version
Swap the cherry pie filling for blueberry pie filling. Blueberries and almonds are a classic combo. This is my second favorite version, and my kids prefer it for school lunches.
Raspberry White Chocolate
Use raspberry pie filling and stir white chocolate chips into the crumble topping. The tartness of the raspberries balances the sweetness of the white chocolate. It’s fancy but still easy.
Peach Ginger
Peach pie filling with a teaspoon of ground ginger in the crust. This tastes like summer. Add some chopped pecans instead of almonds for a different crunch.
Gluten-Free
Use a 1:1 gluten-free flour blend in the crust. Everything else is naturally gluten-free. I use Bob’s Red Mill, and it works perfectly. The texture is slightly more tender, but still great.
Dairy-Free
Replace the butter with coconut oil or a dairy-free butter alternative. The flavor will be slightly different (coconut taste), but the texture is the same. My lactose-intolerant friend loves this version.
Nut-Free
Skip the almonds entirely, or substitute with sunflower seeds or pepitas. The bars won’t have the same crunch, but they’re still delicious. Just sprinkle some seeds on top for texture.
Mini Bars
Use a muffin tin instead of a baking pan. Fill each cup with the crust, filling, and topping. Bake for 15-18 minutes. Perfect for portion control and lunchboxes. These are great alongside my no-bake peanut butter granola bites for a sweet snack plate.
Serving & Storage
How to Serve:
I usually serve these warm, right out of the oven or warmed up in the microwave for 15 seconds. They’re great with a scoop of vanilla ice cream or a dollop of whipped cream. But honestly? They’re perfect on their own. I serve them at room temperature, cut into 16 squares. They look rustic and homemade, which is exactly the vibe I want.
Side Dishes:
These bars are a complete dessert, so you don’t need much else. But if you’re hosting a dinner, they pair well with a simple green salad or roasted vegetables. I often serve them after crispy baked chicken nuggets for a kid-friendly meal that everyone loves.
Storage Instructions:
Store in an airtight container at room temperature for up to 3 days. If your kitchen is hot, keep them in the fridge. They’ll last up to 5 days refrigerated. Do not freeze them—the filling becomes watery when thawed.
Reheating:
Warm in the microwave for 15-20 seconds. Or pop them in a 300°F oven for 5 minutes. They’re best warm, not hot. Cold bars are still good, but the texture is firmer.
Pro Tip:
If you’re meal-prepping, make a double batch on Sunday. They keep well all week, and having dessert ready to go saves you from impulse takeout orders. It’s one of my favorite healthy-ish dessert hacks for busy weeks.
Nutrition Information
I’m not a nutritionist, but here’s the breakdown if you’re tracking. Keep in mind this is an estimate, and values will vary based on specific brands and exact measurements.
Per Serving (based on 16 bars):
– Calories: 180
– Protein: 2g
– Carbs: 28g
– Fiber: 1g
– Sugar: 18g
– Fat: 7g
– Saturated Fat: 3g
– Cholesterol: 10mg
– Sodium: 90mg
– Calcium: 20mg
What’s Good:
– Low in protein (not a protein source)
– Contains some fiber from almonds
– Relatively low sodium
What to Know:
– High in sugar from the pie filling
– Contains gluten (unless GF flour used)
– Contains dairy (unless dairy-free butter used)
– Contains tree nuts (almonds)
My Take:
Look, this is a dessert. It’s sweet, buttery, and indulgent. It’s not a health food. But it’s better than store-bought cookies, and you know exactly what’s in it. When I make it for the kids, I keep portions small. When I make it for myself, I enjoy a whole bar. Balance is key.
Final Thoughts
So that’s my cherry almond crumble bars! I’ve probably talked your ear off at this point, but when you make a recipe this often, you have a lot to say about it. These bars have saved weeknight desserts more times than I can count. They’re my answer to “can we have something sweet?” when I’m tired, don’t want to order out, and still want something that tastes really good.
My kids are happy, my husband is happy, and I’m happy because I’m not stressed about cooking. It’s that simple. Make it yours! Try different fillings, swap in your favorite nuts, or add chocolate chips. The best recipes are the ones you adapt to your family’s tastes.
If you make this, drop a comment and let me know what you think! I love hearing how recipes turn out in your kitchen. And if something doesn’t work, tell me that too—I’m here to help troubleshoot. Happy baking! And I hope your kitchen smells half as good as mine does right now.
Frequently Asked Questions
Can I use fresh cherries instead of pie filling?
You can, but it’s not recommended. Fresh cherries have too much water and will make the bars soggy. If you must use fresh, cook them down with sugar and cornstarch first to remove excess liquid. But honestly, the canned pie filling is easier and works perfectly.
Why did my bars fall apart when I cut them?
Most likely, you didn’t let them cool completely. The filling needs time to set, and the crust needs to firm up. Let them cool for at least 1 hour, preferably overnight in the fridge. Also, make sure you pressed the bottom crust firmly into the pan.
Can I double this recipe?
Absolutely! Double everything and use a 9×13 inch baking pan. Increase the bake time to 35-40 minutes. Keep an eye on them, as larger pans can bake faster in the center. I double this recipe when I’m feeding a crowd or meal-prepping.
How do I store leftover bars?
Store in an airtight container at room temperature for up to 3 days. If it’s hot outside, keep them in the fridge. They’ll last up to 5 days refrigerated. Do not freeze them—the texture changes too much.
Can I make these gluten-free?
Yes! Simply swap the all-purpose flour for a 1:1 gluten-free baking blend. I use Bob’s Red Mill, and it works perfectly. Everything else is naturally gluten-free. The texture might be slightly more tender, but it’s still delicious.
Can I use slivered almonds instead of sliced?
Yes, slivered almonds work fine. They’re just smaller, so you might want to use slightly more for the same crunch. Chopped almonds also work if that’s what you have. Just avoid whole almonds—they’re too hard to bite through.
Why is the bottom crust greasy?
This happens if the butter was too hot when you mixed it, or if you didn’t press the crust firmly enough. Let the melted butter cool slightly before mixing, and pack the crust down hard with the bottom of a glass or measuring cup.
Pin This Recipe!
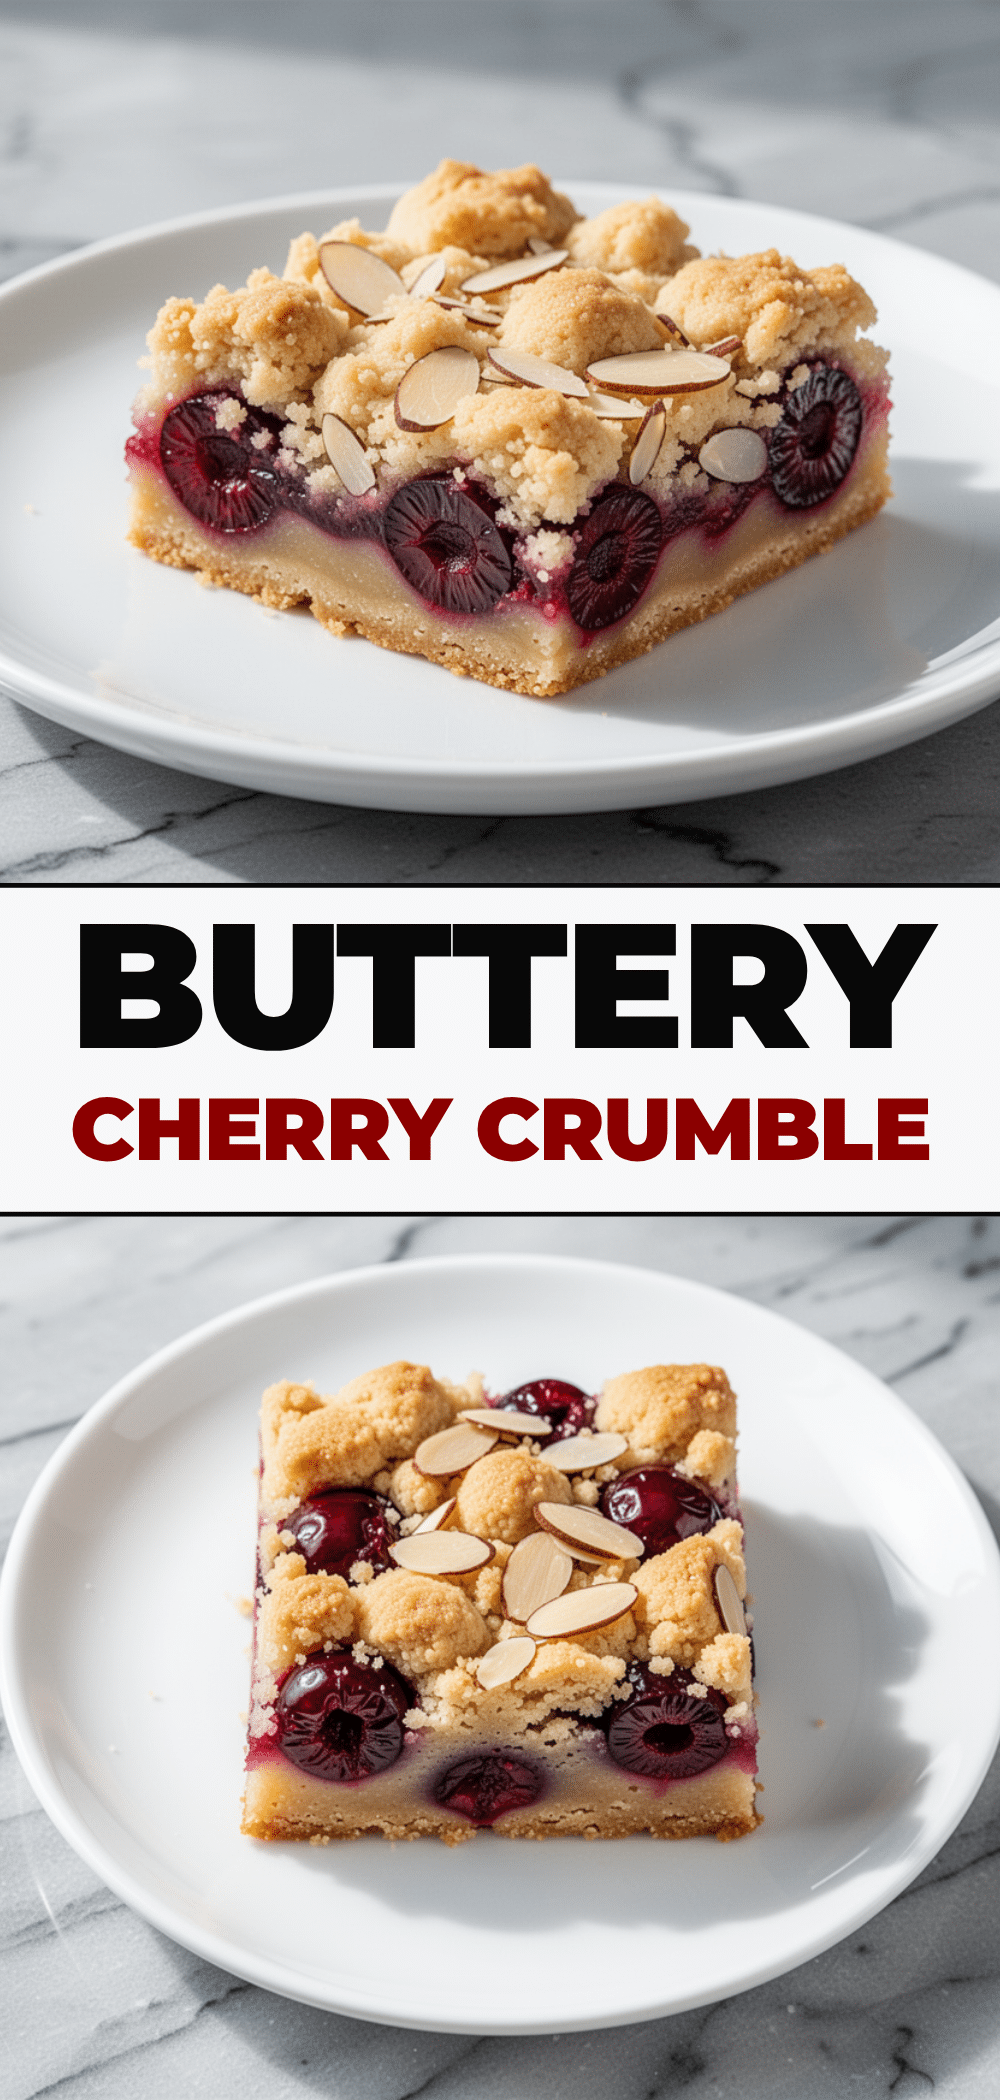
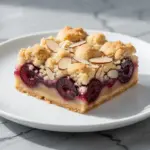
Cherry Almond Crumble Bars: 5-Ingredient Easy Dessert
- Total Time: 45 minutes
- Yield: 16 servings 1x
Description
A simple, chewy, and gooey dessert made with just five ingredients. These bars are perfect for busy weeknights, requiring minimal prep time and offering a comforting blend of buttery crust, cherry filling, and toasted almonds.
Ingredients
- 1 cup all-purpose flour (or 1:1 gluten-free blend)
- 1/2 cup unsalted butter, melted
- 1/2 cup packed brown sugar
- 1/4 teaspoon salt
- 21 oz can cherry pie filling
- 1/2 cup sliced almonds
- 1/2 cup extra sliced almonds for topping
Instructions
- Preheat oven to 350°F (175°C). Line an 8×8 inch baking pan with parchment paper, leaving an overhang on the sides, or grease thoroughly.
- In a mixing bowl, combine the melted butter, flour, brown sugar, and salt. Mix with a fork or hands until the mixture resembles wet sand and holds together when squeezed.
- Press half of the crumble mixture firmly into the bottom of the prepared pan to create an even, compact base.
- Pour the cherry pie filling evenly over the crust layer and spread to the edges.
- Scatter the remaining crumble mixture over the cherry filling. Sprinkle the 1/2 cup of sliced almonds evenly on top, pressing them in slightly.
- Bake for 30-35 minutes, or until the top is golden brown and the filling is bubbling vigorously around the edges.
- Cool the bars completely in the pan on a wire rack for at least 1 hour to allow the filling to set and the crust to firm up.
- Lift the bars out using the parchment overhang and cut into 16 squares.
Notes
For best results, ensure the bottom crust is pressed firmly into the pan to prevent crumbling. Do not cut the bars while hot, as they will fall apart. They taste better the next day as flavors meld. Can be made gluten-free by using a 1:1 gluten-free flour blend. Can be made dairy-free by substituting butter with coconut oil or dairy-free butter alternative.
- Prep Time: 15 minutes
- Cook Time: 30 minutes
- Category: Dessert
- Cuisine: American
Nutrition
- Serving Size: 1 bar
- Calories: 180
- Sugar: 18
- Sodium: 90
- Fat: 7
- Saturated Fat: 3
- Carbohydrates: 28
- Fiber: 1
- Protein: 2
Keywords: cherry almond bars, easy dessert, 5 ingredient recipe, cherry pie filling dessert, gluten-free dessert, quick baking, weeknight dessert, crumble bars