It’s 6:30 PM on a Tuesday. You’ve just finished cooking a lovely, modest meal for one or two people. Maybe it’s that mediterranean shrimp pasta you made last week, or perhaps a simple roasted chicken. The plates are cleared, the dishes are soaking, and you’re standing in the kitchen feeling that familiar pang of guilt. Why? Because you bought a loaf of bread to go with dinner, and now half of it is sitting on the counter, slowly going stale because you don’t eat enough carbs to finish it before it turns into a brick.
I used to hate this feeling. For years, I was a “bake a big batch or don’t bother at all” kind of baker. I’d make 24 dinner rolls every Sunday because that’s what every recipe online seemed to demand. And sure, they were delicious. But then I’d have twelve leftover rolls for Monday, eight for Tuesday, and by Wednesday, they were either freezer-bound or stale. It felt like a waste. It felt like cooking for an army when I was just cooking for myself.
Last month, I decided I was done with the excess. I wanted soft, pillowy, buttery garlic bread rolls, but I only wanted four. Just four. I spent three weeks testing small-batch yeast doughs, adjusting hydration, and figuring out how to get that bakery-style rise without needing a massive proofing box or a kitchen table covered in flour. I finally cracked the code.
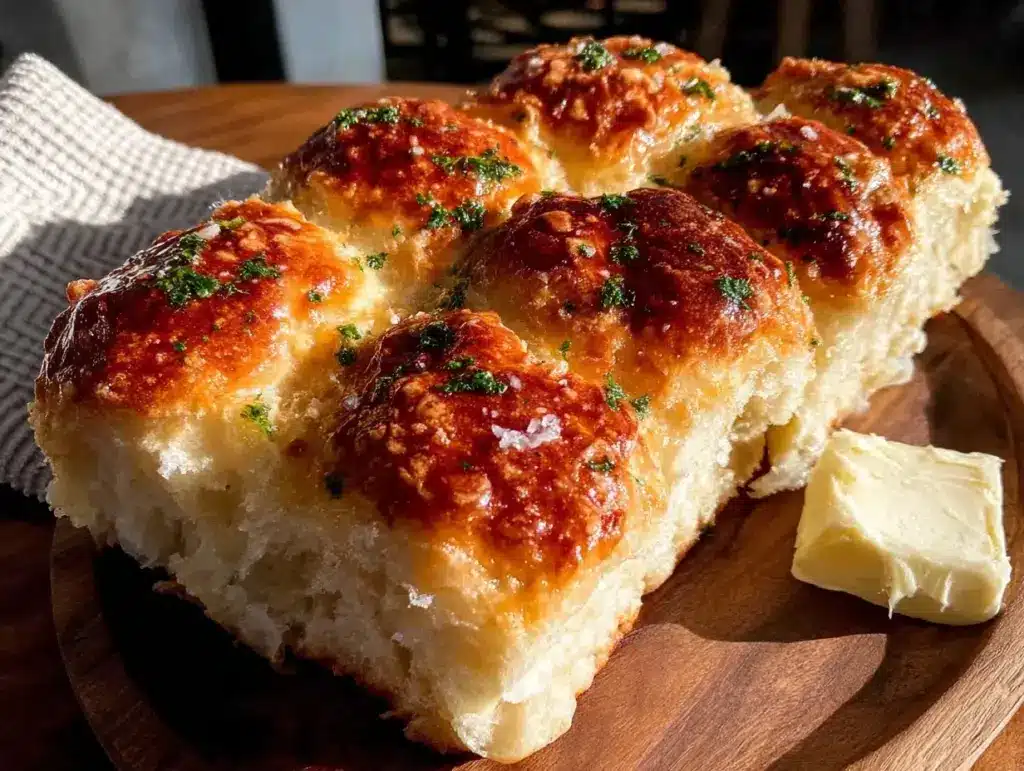
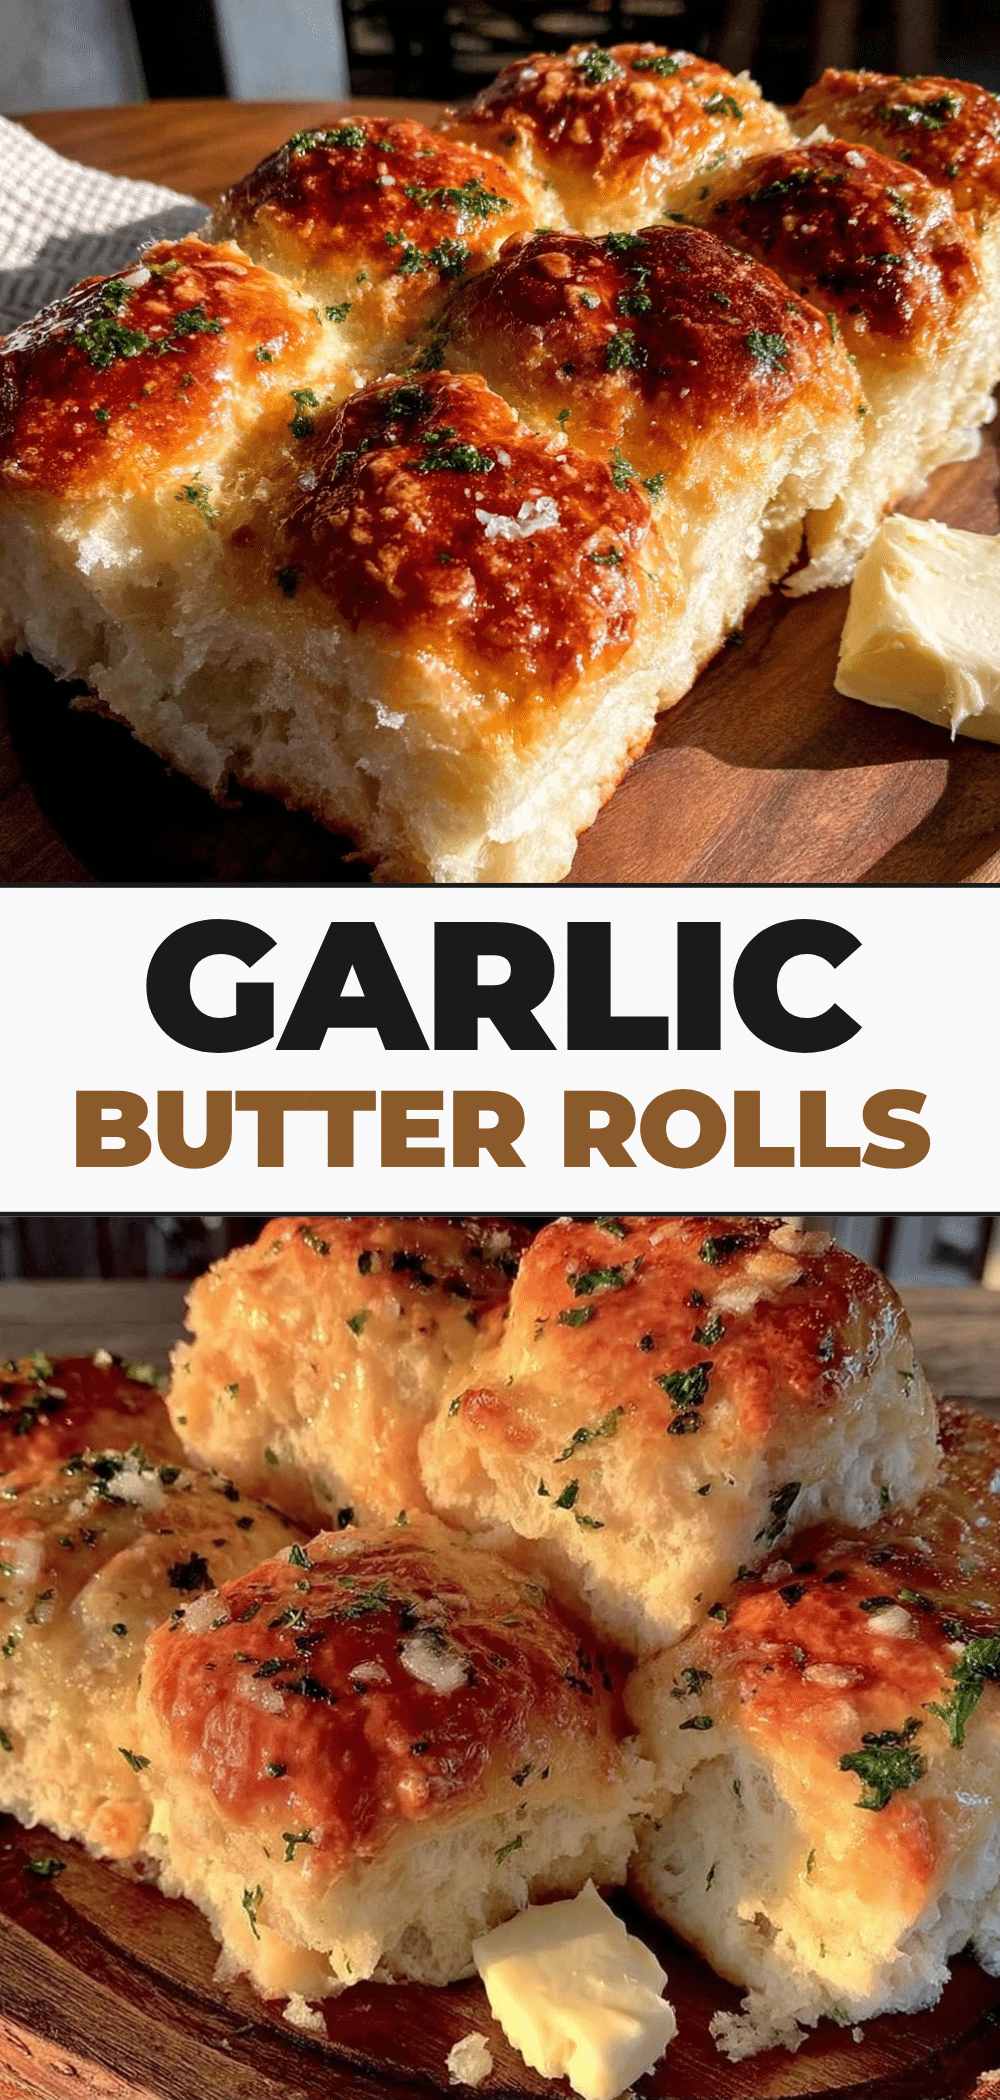
These soft garlic butter dinner rolls for small batches are the answer. They make exactly four perfect, golden-brown rolls. They take about 90 minutes from start to finish (mostly waiting), and the garlic butter topping is so good you’ll want to dip your entire meal into it. No waste. No leftovers. Just fresh, warm bread right when you need it. If you’ve been avoiding baking because you think you need to feed a crowd, this is your permission slip to bake just for you.
Why You’ll Love This Small-Batch Garlic Roll Recipe
There are about ten reasons I keep making these four rolls, but here are the big ones that changed my weeknight dinner game.
Zero Waste, All Flavor — Seriously. You make four rolls. You eat four rolls. The end. No freezing, no stale crusts, no wondering if you should make garlic bread toast with the leftovers. It’s the cleanest baking experience I’ve ever had.
Actually Soft — I’ve tried so many “small batch” recipes that result in dense, bready puckers. These are different. By adjusting the liquid-to-flour ratio for such a small mass, I got a dough that stays soft for days (if you can keep them that long, which you won’t). They have that light, airy crumb you get from big bakery batches, just scaled down.
Fast Enough for Weeknights — Yes, yeast needs time to rise. But with this small quantity, the proofing happens faster than you’d expect. You can have these on the table in under two hours, which is perfect for a Tuesday night when you’re tired but still want something homemade.
Garlic Butter Glory — The topping isn’t an afterthought. It’s a generous slather of browned butter, fresh parsley, and roasted garlic that soaks into the warm crust. It’s the kind of side dish that makes people ask for seconds. I pair these with everything from healthy vegetarian chili to simple soups, and they are always the highlight.
Forgiving Dough — Small batches are easier to handle. There’s less dough to knead, less flour to dust, and less mess to clean up. If you mess up the shape, nobody will know. It’s just four rolls. You can’t fail.
This is my go-to when I need dinner to just work. No complicated techniques, no weird ingredients, just reliable, delicious food that makes a simple meal feel special.
Ingredients You’ll Need
Here’s the best part: you probably have most of this already. Since we’re only making four rolls, the ingredient list is short and sweet. No need to buy a giant bag of yeast or a 5-pound sack of flour.
For the Dough
All-purpose flour (1 cup / 125g) — I use regular all-purpose. You don’t need bread flour for this; the small batch keeps them tender enough. If you only have cake flour, it’ll work but they’ll be even softer, almost like buns.
Warm milk (¼ cup / 60ml) — This needs to be warm, not hot. Think bathwater temperature. If you don’t have milk on hand, water works too, but milk gives that rich, soft crumb. Skim milk is fine, but whole milk is better for flavor.
Active dry yeast (2 teaspoons / 7g) — That’s one standard packet. I know, that’s a lot of yeast for one cup of flour, right? It’s necessary because the dough is small and we want it to rise quickly. Don’t use instant yeast if you can help it; active dry needs that sugar bath to wake up.
Sugar (1 tablespoon) — This feeds the yeast and helps with browning. White granulated sugar works best. Brown sugar adds a nice depth, but white is more traditional for dinner rolls.
Salt (½ teaspoon) — Essential for flavor. Don’t skip it, or the rolls will taste flat.
Egg (1 large, beaten) — This acts as a binder and adds richness. I use a standard large egg. If you’re egg-free, you can substitute with a flax egg (1 tbsp ground flax + 3 tbsp water), but the texture will be slightly denser.
Butter (2 tablespoons, melted and cooled) — Unsalted butter is best so you control the salt. Melt it and let it cool slightly so it doesn’t kill the yeast.
For the Garlic Butter Topping

Butter (3 tablespoons) — This is where you can be fancy. Use good quality European-style butter if you have it. It makes the topping richer.
Garlic (3 cloves, minced) — Yes, three cloves. Don’t be shy. Fresh garlic is non-negotiable here. Jarred garlic has a metallic taste that ruins the delicate butter flavor.
Parsley (1 tablespoon, fresh chopped) — Flat-leaf parsley is best. It adds that pop of green and fresh flavor. Dried parsley works in a pinch, but use half the amount.
Parmesan cheese (1 tablespoon, grated) — Optional, but I love the salty, umami kick it adds. If you’re strictly garlic butter, skip it. But if you want a twist, add it.
Pinch of salt — To balance the richness of the butter.
Common Questions
Can I use instant yeast? Yes, but reduce the amount to 1 ½ teaspoons. Instant yeast doesn’t need to be proofed in milk first, so you can mix it directly with the flour.
Where do I find this much yeast? It comes in small jars or packets. You won’t use it all, so store the leftovers in the fridge or freezer. They last for months.
Equipment Needed
You don’t need fancy equipment for this. Here’s what I actually use.
Small mixing bowl — A 2-quart bowl is perfect. I use a ceramic one because it holds heat well.
Measuring cups and spoons — Standard stuff. Dollar store versions work fine.
Fork or small whisk — For beating the egg and mixing the initial dough.
8×8 inch baking pan — This is key. Four rolls fit perfectly in an 8×8 square pan. If you use a round 8-inch pan, they’ll be taller. If you use a 9×9, they’ll be flatter. Stick to 8×8 for the best shape.
Pastry brush — For brushing on the garlic butter. A silicone one is easiest to clean.
Cling wrap or damp towel — To cover the rolls while they rise.
Oven thermometer — (Optional but recommended) Ovens lie. If your oven runs hot, your rolls will burn before they cook. A $10 thermometer saves headaches.
How to Make It: Step-by-Step
Alright, let’s make this! I’m walking you through exactly how I do it, including the little tricks I’ve picked up.
Step 1: Proof the Yeast (5 minutes)
Start by warming your milk. It should be about 110°F (43°C). If you don’t have a thermometer, microwave it for 30-45 seconds and test it on your wrist—it should feel warm, not hot. In a small bowl, combine the warm milk, sugar, and yeast. Stir gently and let it sit for 5-10 minutes. You’ll know it’s ready when it looks foamy and bubbly, like a beer head. If it doesn’t bubble, your yeast is dead. Throw it out and start over. Don’t skip this step.
Step 2: Mix the Dough (5 minutes)
In a medium bowl, whisk together the flour and salt. Make a well in the center and pour in the yeast mixture, the beaten egg, and the melted butter. Stir with a wooden spoon or your hands until a shaggy dough forms. It will look messy and sticky. That’s okay. Turn it out onto a lightly floured surface.
Step 3: Knead the Dough (5-7 minutes)
Knead the dough for about 5-7 minutes. Push it away from you with the heel of your hand, fold it back over, and turn it. Add a tiny sprinkle of flour if it’s sticking, but don’t over-flour. You want a soft, slightly tacky dough, not a dry ball. If you poke it, it should spring back slowly. This develops the gluten that makes the rolls soft. I usually listen to a podcast while I knead—it’s meditative.
Step 4: First Rise (45 minutes)
Lightly grease your mixing bowl with a little oil or butter. Place the dough in the bowl, turning it once to coat the top. Cover with plastic wrap or a damp kitchen towel. Let it rise in a warm, draft-free spot for 45 minutes. It should double in size. Since it’s a small batch, it rises faster than a big one. Check it at 30 minutes.
Step 5: Shape the Rolls (5 minutes)
Gently punch down the dough to release air bubbles. Divide it into four equal pieces. I weigh them if I’m being precise (about 50g each), but eyeballing it works fine. Shape each piece into a tight ball. Pinch the seams underneath so they don’t unravel. Place them in your greased 8×8 baking pan. They should fit snugly but not touch too much. Leave a little space for expansion.
Step 6: Second Rise (30 minutes)
Cover the pan again and let the rolls rise for another 30 minutes. They should puff up and almost touch each other. This is crucial for soft rolls. If they don’t rise enough, they’ll be dense. While they rise, preheat your oven to 375°F (190°C).
Step 7: Make the Garlic Butter (5 minutes)
While the rolls rise, make the topping. Melt the 3 tablespoons of butter in a small saucepan over medium heat. Let it bubble and listen for the sizzling sound. Once the bubbles subside and the butter smells nutty, remove it from the heat. Stir in the minced garlic, parsley, parmesan (if using), and a pinch of salt. Let it cool for a minute so the garlic doesn’t burn.
Step 8: Bake (15-18 minutes)
Brush the tops of the risen rolls generously with the garlic butter. Bake for 15-18 minutes until they are golden brown. If they start browning too fast, tent them with foil. They are done when they sound hollow when tapped on the bottom, or when an instant-read thermometer reads 190°F (88°C) in the center.
Step 9: Finish and Serve
As soon as they come out of the oven, brush them with a little more garlic butter if you have it left. Let them cool in the pan for 5 minutes, then eat them immediately. Warm rolls are the best rolls.
Total Time: About 1 hour 40 minutes (20 minutes active, 1 hour 20 minutes rising)
Expert Tips & Tricks
Here’s everything I’ve learned from making this dozens of times. These tips will save you from my mistakes.
Don’t Overbake — Small rolls bake fast. Check them at 12 minutes. If they’re dark brown, they’re done. Overbaking dries them out, and you want them soft.
Use Warm Ingredients — Cold dough rises slower. If your kitchen is cold, put the shaped rolls in a turned-off oven with just the light on. The heat from the bulb creates a perfect proofing environment.
Brush Immediately — The garlic butter soaks into the crust best when the rolls are hot out of the oven. Don’t wait for them to cool completely. That’s when you get that soft, flavorful crust.
Store Properly — If you have leftovers (unlikely, but possible), store them in an airtight container at room temperature for up to 2 days. Reheat in the microwave for 10 seconds to soften them up. They don’t freeze well because the texture changes.
Customize the Garlic — If you’re a garlic lover, roast the cloves first. Roasted garlic is sweeter and milder. Sautéed garlic is sharper. Use whatever you prefer. I usually sauté mine for 30 seconds in the butter to mellow the bite.
Don’t Skip the Second Rise — This is the step people rush. The second rise is what makes the rolls light and airy. If you bake them immediately after shaping, they’ll be dense bricks. Be patient.
Variations & Substitutions
Once you’ve nailed the basic version, here’s how you can mix it up. I’ve tried all of these.
Herb Butter Rolls — Skip the garlic. Mix the butter with dried thyme, rosemary, and oregano. Perfect for roasted chicken or maple dijon roasted chicken.
Cheese Rolls — Add ¼ cup shredded cheddar or gruyère to the dough before shaping. Or sprinkle cheese on top before baking. Great for soup.
Onion Rolls — Sauté ¼ cup finely diced onion until soft, let cool, and mix into the dough. Sweet and savory.
Whole Wheat Rolls — Swap half the all-purpose flour for whole wheat. They’ll be denser but nuttier. Add an extra tablespoon of water if the dough feels dry.
Gluten-Free — Use a 1:1 gluten-free flour blend with xanthan gum. The dough will be stickier, so handle it with wet hands. They won’t rise as much, but they’re still good.
Vegan — Use plant milk (soy or oat works best) and coconut oil instead of butter. The topping will be less rich, but still tasty.
Serving & Storage
How to Serve: I usually serve these straight out of the pan. They look rustic and homemade. Pair them with cozy fall butternut squash soup for a complete meal. Or serve them alongside a simple salad and grilled fish.
Side Dishes: These go with almost anything. Soups, stews, pasta, roasted meats, or just a glass of wine and some cheese. They’re versatile.
Storage: Store in an airtight container at room temperature for up to 2 days. Do not refrigerate—they’ll go stale faster. If you need to keep them longer, freeze them in a freezer bag for up to 1 month. Thaw at room temperature and warm in the oven.
Reheating: Microwave for 10-15 seconds. Or warm in a 300°F oven for 5 minutes. If you microwave them, wrap them in a damp paper towel to keep them moist.
Nutrition Information
I’m not a nutritionist, but here’s the breakdown if you’re tracking. These are estimates for one roll.
Per Roll (1 of 4):
- Calories: 220
- Protein: 5g
- Carbs: 32g
- Fiber: 1g
- Sugar: 4g
- Fat: 8g
- Saturated Fat: 5g
- Cholesterol: 35mg
- Sodium: 280mg
What’s Good: Decent carbs for energy. Low in sugar. The garlic and parsley add some antioxidants.
What to Know: Higher in calories from the butter and flour. Contains gluten and dairy. Moderate sodium.
My Take: Look, this is bread with butter. It’s comfort food. It’s not a diet recipe. But it’s way better than store-bought, and you control the ingredients. When I want to make it lighter, I reduce the butter in the dough and use less for the topping. But usually? I just enjoy one roll and savor it.
Final Thoughts
So that’s my go-to soft garlic butter dinner rolls! I’ve probably talked your ear off at this point, but when you make a recipe this often, you have a lot to say about it.
This has saved weeknight dinners more times than I can count. It’s my answer to “what’s for dinner” when I’m tired, don’t want takeout, and still want something that tastes really good. My kids are happy, my husband’s happy, and I’m happy because I’m not stressed about cooking or dealing with leftovers.
Make it yours! Try different herbs, add cheese, or adjust the garlic. The best recipes are the ones you adapt to your family’s tastes. And remember, you don’t need to bake a big batch to enjoy homemade bread. Four rolls are enough.
If you make this, drop a comment and let me know what you think! I love hearing how recipes turn out in your kitchen. And if something doesn’t work, tell me that too—I’m here to help troubleshoot.
Happy cooking! And I hope your kitchen smells half as good as mine does right now.
Frequently Asked Questions
Can I double this recipe?
You can, but you’ll need a larger baking dish (like a 9×13 pan) and the dough will be harder to handle. I recommend making two separate batches if you need more than eight rolls. Small batches are easier to manage.
Why did my rolls turn out dense?
Usually, this means the yeast was dead or the dough didn’t rise enough. Make sure your milk is warm, not hot. Also, don’t skip the second rise. If the rolls don’t puff up before baking, they’ll be dense.
Can I make the dough ahead?
Yes! After the first rise, punch down the dough, shape the rolls, and refrigerate them overnight. In the morning, let them come to room temperature and rise for 30-45 minutes before baking. This is great for breakfast.
Why did my sauce get grainy/lumpy?
Wait, this is a bread recipe! If you’re talking about the garlic butter, it might have separated if the butter was too hot. Let the butter cool slightly before mixing in the garlic. If it’s already separated, just whisk it vigorously.
Can I use jarred garlic?
You can, but fresh tastes so much better in this recipe. Jarred garlic has a weird metallic taste that really shows up in the butter. If you must use it, use half the amount because it’s stronger. But honestly, mincing 3 cloves takes like 1 minute. Buy pre-peeled garlic cloves if you want to save time.
How do I reheat leftovers without them getting dry?
Add a splash of milk or cream to a skillet, add your leftover pasta, and heat gently over low heat, stirring frequently. The extra liquid brings back the creamy texture. Microwave sort of works but tends to dry it out. If you do microwave, definitely add a splash of milk first and heat in short bursts, stirring between.
Can I freeze these rolls?
Yes, but they’re best fresh. If you have leftovers, freeze them in an airtight bag for up to 1 month. Thaw at room temperature and warm in the oven for 5 minutes. They won’t be quite as soft as fresh, but they’re still good.
Pin This Recipe!
Soft Garlic Butter Dinner Rolls: Small Batch & Zero Waste
- Total Time: 1 hour 40 minutes
- Yield: 4 servings 1x
Description
A small-batch recipe for soft, pillowy garlic butter dinner rolls that makes exactly four servings, eliminating food waste while delivering bakery-style flavor in under two hours.
Ingredients
- 1 cup (125g) all-purpose flour
- 1/4 cup (60ml) warm milk (110°F/43°C)
- 2 teaspoons (7g) active dry yeast
- 1 tablespoon sugar
- 1/2 teaspoon salt
- 1 large egg, beaten
- 2 tablespoons unsalted butter, melted and cooled
- 3 tablespoons butter (for topping)
- 3 cloves garlic, minced
- 1 tablespoon fresh parsley, chopped
- 1 tablespoon parmesan cheese, grated (optional)
- Pinch of salt (for topping)
Instructions
- Proof the yeast: Warm milk to 110°F. In a small bowl, combine warm milk, sugar, and yeast. Let sit for 5-10 minutes until foamy.
- Mix the dough: In a medium bowl, whisk flour and salt. Add yeast mixture, beaten egg, and melted butter. Stir until a shaggy dough forms.
- Knead the dough: Turn dough onto a lightly floured surface and knead for 5-7 minutes until soft and slightly tacky.
- First rise: Place dough in a greased bowl, cover, and let rise in a warm spot for 45 minutes until doubled.
- Shape the rolls: Punch down dough and divide into four equal pieces. Shape into tight balls and place in a greased 8×8 inch baking pan.
- Second rise: Cover pan and let rolls rise for 30 minutes until puffy and nearly touching. Preheat oven to 375°F (190°C).
- Make garlic butter: Melt 3 tablespoons butter in a saucepan. Once nutty, remove from heat and stir in garlic, parsley, parmesan, and salt.
- Bake: Brush rolls with garlic butter. Bake for 15-18 minutes until golden brown and internal temperature reaches 190°F.
- Serve: Brush with remaining garlic butter immediately after baking. Cool for 5 minutes before serving.
Notes
Ensure milk is warm but not hot to avoid killing yeast. Do not skip the second rise for soft texture. Rolls are best eaten fresh but can be stored in an airtight container at room temperature for up to 2 days. For gluten-free version, use a 1:1 gluten-free flour blend with xanthan gum.
- Prep Time: 20 minutes
- Cook Time: 18 minutes
- Category: Side Dish
- Cuisine: American
Nutrition
- Serving Size: 1 roll
- Calories: 220
- Sugar: 4
- Sodium: 280
- Fat: 8
- Saturated Fat: 5
- Carbohydrates: 32
- Fiber: 1
- Protein: 5
Keywords: small batch dinner rolls, garlic butter rolls, zero waste baking, soft dinner rolls, yeast rolls, weeknight dinner, homemade bread


