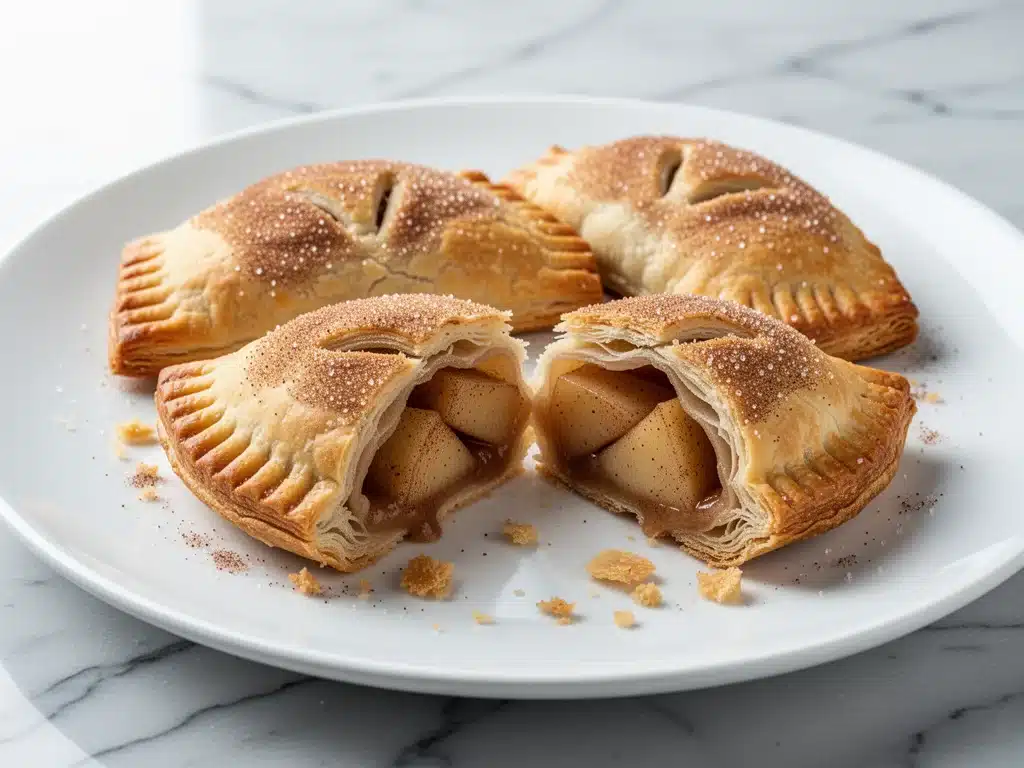
It was 6:30 PM on a Tuesday, and my kitchen looked like a disaster zone. I had just come home from work, the kids were hungry, and the fridge was mostly empty except for a bag of apples that had seen better days. I was staring at the clock, knowing that in twenty minutes, everyone would be asking “what’s for dessert?” and I had absolutely nothing planned. I was too tired to bake a pie. I was too exhausted to make cookies. And I definitely didn’t have the energy to clean up a massive baking sheet if something went wrong.
So, I did what any stressed-out parent does: I raided the freezer.
I pulled out a box of pre-made pie crusts and a bowl of those bruised, overripe apples I’d been meaning to use for weeks. I figured, why not? I chopped the apples, tossed them with sugar and cinnamon, wrapped them in the dough, and shoved them in the oven. Ten minutes later, the smell of warm cinnamon and baked pastry filled the house. My kids came running. They didn’t care that the edges were a little messy or that the filling leaked slightly onto the pan. They just loved it.
That was the moment I realized I didn’t need a complicated recipe to make something special. I needed Cinnamon Sugar Apple Hand Pies. And honestly? I’ve never looked back. I’ve made these at least a dozen times since that chaotic Tuesday, tweaking the sugar ratio and testing different crusts, until I landed on the perfect version. It’s not just easier than store-bought; it’s better. It’s warm, it’s personal, and it tastes like actual comfort food, not the cardboard-tasting pastries you get at the grocery store.
These hand pies are my secret weapon for busy weeknights. They take 30 minutes from start to finish, use ingredients I already have on hand, and make my house smell like a bakery without the stress. If you’re tired of the same old dinner routine or need a quick treat that doesn’t involve a mountain of dishes, you need to try this. It’s simple, it’s delicious, and it’s going to save your weeknight sanity.
Why You’ll Love This Recipe
There are plenty of dessert recipes out there, but these Cinnamon Sugar Apple Hand Pies have earned a permanent spot in my weekly rotation. Here’s why they’re different from the rest:
- Stupid Simple Ingredients — Seriously, if you can chop an apple and roll out dough, you can make this. I use just three main components: crust, apples, and cinnamon sugar. No fancy spices, no complicated fillings. Just basic stuff you probably have right now.
- Lightning Fast — 30 minutes from start to finish. That’s 15 minutes of prep and 15 minutes of baking. I make these on weeknights when I get home at 7 PM and need something done before bedtime. It’s faster than ordering takeout.
- Uses Up “Ugly” Fruit — This is my favorite part. I use bruised, soft, or slightly overripe apples. They break down beautifully in the filling, creating a jammy texture that’s way better than crisp, raw apple chunks. It’s zero-waste cooking at its finest.
- Crowd-Pleaser — I’ve served these to my picky eater son, my food-snob sister, and my neighbor’s kids. Everyone loves them. They’re sweet, buttery, and feel like a treat, even though they’re basically just warm pastry and fruit.
- Easy Cleanup — One bowl for the filling, one baking sheet for the pies, and a quick rinse. That’s it. No dirty mixer bowls, no extra pans. My husband actually helped with cleanup once, which is a miracle.
- Budget-Smart — Feeds 4-6 people for under $10. That’s cheaper than a box of store-bought pastries and tastes a million times better. Plus, using cheaper, softer apples keeps the cost down.
This is my go-to when I need dessert to just work. No complicated techniques, no weird ingredients, just reliable, delicious food that makes everyone happy. It’s the kind of recipe that turns a regular Tuesday into something special.
Ingredients You’ll Need
Here’s the best part: you probably have most of this already. I’m particular about a few things here, and I’ll tell you exactly why they matter. This looks like a short list, but that’s the beauty of it.
For the Crust
Refrigerated pie crusts (2 boxes / 2 packages) — I use store-bought double-crust pie shells. I know, purists might cringe, but for weeknight ease, this is non-negotiable. I prefer brands like Pillsbury or Store Brand, but any brand works. Let them sit on the counter for 10 minutes while you preheat the oven so they’re pliable and easy to roll. Don’t try to roll frozen crust; it’ll crack and tear.
For the Filling
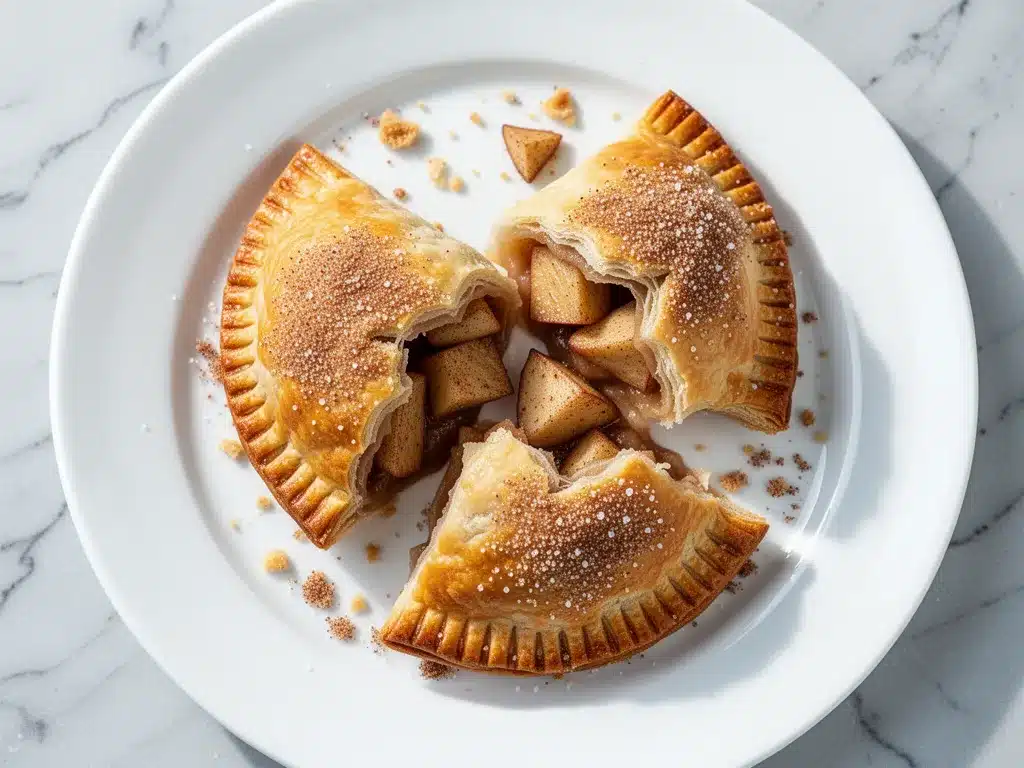
Apples (3 medium, peeled and diced / about 450g) — I use a mix of Granny Smith and Honeycrisp for the best balance of tart and sweet. But really, any apple works. I often use the “ugly” apples that are too soft for snacking. They cook down into a perfect filling. Dice them small—about ½-inch cubes—so they cook quickly and fit inside the pies.
Granulated sugar (3 tablespoons / 35g) — This sweetens the apples and helps create that sticky, jammy texture. I use white sugar because it caramelizes nicely. Brown sugar works too, but it makes the filling darker and chewier. I prefer the lighter crunch of white sugar.
Ground cinnamon (1 teaspoon / 5g) — The star of the show. Don’t skimp on this. It’s what makes it taste like apple pie. I use McCormick or any standard ground cinnamon. If you have a really fresh jar, even better. Old cinnamon loses its punch.
Lemon juice (1 teaspoon / 5ml) — Optional, but I always add it. It prevents the apples from browning while you prep and adds a tiny bit of brightness to cut through the sweetness. Just a squeeze is enough.
For the Topping
Extra cinnamon sugar (2 tablespoons sugar + 1 teaspoon cinnamon) — This is what goes on top before baking. It creates that crunchy, sparkly crust that makes these look like they came from a bakery. Mix it in a small bowl.
Butter (1 tablespoon, melted) — Brush the tops lightly with melted butter before sprinkling the cinnamon sugar. It helps the sugar stick and gives the crust a golden, glossy finish. You can skip this if you’re being lazy, but the butter makes a difference.
Vanilla ice cream or whipped cream (for serving) — Not an ingredient in the pie, but essential for the experience. Warm pie + cold ice cream = perfection. I keep vanilla bean ice cream on hand specifically for this.
Equipment Needed
You don’t need fancy equipment for this. Here’s what I actually use.
Baking sheets — I use two large sheet pans. You need space between the pies so the air can circulate and the bottoms get crispy. If you only have one pan, bake in batches. Don’t crowd them.
Pastry brush — For brushing the melted butter. A silicone brush works best because it’s easy to clean. A regular pastry brush works too, but you’ll need to wash it separately.
Mixing bowl — Any medium-sized bowl works for tossing the apples with sugar and cinnamon. I use a ceramic bowl because it’s heavy and doesn’t slide around.
Knife and cutting board — For peeling and dicing the apples. A sharp chef’s knife makes this way faster. Dull knives make you cry—learned this the hard way with onions, and it applies here too.
Paring knife — For trimming excess dough and making little steam vents. A small, sharp paring knife gives you more control.
Fork — To crimp the edges. A fork works perfectly for sealing the pies. It also creates a decorative pattern that looks nice. No need for fancy tongs or crimpers.
Pastry wheel (optional) — If you want those cute little crimped edges, a pastry wheel is fun. But honestly, a fork is easier and faster. I only use the wheel when I’m feeling fancy or having guests over.
How to Make It: Step-by-Step
Alright, let’s make this! I’m walking you through exactly how I do it, including the little tricks I’ve picked up over the years. This is straightforward, but there are a few key steps to get it right.
Step 1: Prep Your Oven and Pans (5 minutes)
Preheat your oven to 375°F (190°C). Line two large baking sheets with parchment paper or silicone mats. This is crucial for easy cleanup and preventing sticking. I never bake these on bare metal pans because the sugar drips and burns, creating a mess that’s hard to scrub. Parchment paper is your friend.
Step 2: Make the Apple Filling (5 minutes)
Peel and dice the apples into ½-inch cubes. You want them small enough to cook through quickly but not so small that they turn into applesauce. Toss the diced apples in a mixing bowl with the granulated sugar, ground cinnamon, and lemon juice. Let them sit for 5-10 minutes while you roll out the dough. This draws out some of the moisture, which helps prevent a soggy bottom. If you skip this step, the filling might be too watery.
Step 3: Roll Out the Crust (5 minutes)
Take your refrigerated pie crusts out of the box. Unroll them carefully onto a lightly floured surface. If the dough is stiff, let it sit for a few minutes to soften. Roll each crust slightly to smooth out any creases, but don’t roll it too thin—you want it sturdy enough to hold the filling. Cut each round in half to make two large semi-circles, or cut into four smaller circles depending on how big you want your hand pies. I prefer larger ones for a better bite.
Step 4: Assemble the Hand Pies (10 minutes)
Place a spoonful of the apple mixture (about 2-3 tablespoons) in the center of each dough circle. Don’t overfill them! If you pack too much filling, the pies will burst open in the oven. Leave a ½-inch border around the edges. Fold the dough over the filling to create a half-moon shape. Press the edges firmly with your fingers, then use a fork to crimp them shut. This seals the pie so the filling doesn’t leak. Make a small slit in the top of each pie with a paring knife to let steam escape. This prevents the pies from puffing up too much and bursting.
Step 5: Add the Topping (2 minutes)
Brush the tops of the pies lightly with melted butter. This helps the cinnamon sugar stick and promotes browning. Sprinkle generously with the cinnamon sugar mixture. Make sure you cover the tops evenly. The sugar will melt and caramelize in the oven, creating that crunchy, sweet crust.
Step 6: Bake (15 minutes)
Place the baking sheets in the preheated oven. Bake for 15-18 minutes, or until the crust is golden brown and the filling is bubbly. Keep an eye on them after 12 minutes. If the edges are browning too quickly, you can tent them loosely with foil. The pies are done when the crust is firm and the sugar on top is melted and slightly caramelized.
Step 7: Cool and Serve
Remove the pies from the oven and let them cool on the baking sheet for 5 minutes. This allows the filling to set slightly so it’s not molten hot. Serve warm with a scoop of vanilla ice cream or a dollop of whipped cream. They’re best eaten fresh out of the oven, but leftovers are still good at room temperature.
Expert Tips & Tricks
Here’s everything I’ve learned from making these dozens of times. These tips will save you from my mistakes.
Don’t Skip the Resting Time
Letting the apples sit with the sugar is not optional. It draws out moisture and prevents a soggy crust. I’ve tried skipping it once, and the bottom was mushy. Now I always let them sit for at least 10 minutes.
Keep the Filling Cool
If your kitchen is warm, the dough might get too soft to handle. Keep the dough in the fridge until you’re ready to roll it. If it gets too sticky, chill it for 5 minutes. Cold dough is easier to work with.
Seal It Tight
Press the edges firmly and use the fork to crimp. If the seal isn’t tight, the filling will leak out and burn on the pan. I’ve had pies burst in the oven, and cleaning the burnt sugar is a nightmare. Take the time to seal them properly.
Use a Fork, Not Your Fingers
Pressing with your fingers might not create a strong enough seal. The tines of a fork create ridges that lock the dough together. It’s a simple trick that makes a big difference.
Don’t Overfill
It’s tempting to load them up, but less is more. 2-3 tablespoons of filling is plenty. Overfilled pies will leak and look messy. Underfilled pies are still delicious, just less impressive looking.
Cool Before Eating
I know it’s hard to wait, but let them cool for 5 minutes. The filling is extremely hot and can burn your mouth. Plus, cooling helps the filling set so it doesn’t run out when you bite into it.
Variations & Substitutions
Once you’ve nailed the basic version, here’s how you can mix it up. I’ve tried all of these.
Pear Hand Pies
Substitute pears for apples. Pears are sweeter and softer, so use less sugar. They make a delicate, floral filling that’s great in the fall.
Berry Blast
Use mixed berries (blueberries, raspberries, blackberries) instead of apples. Add 1 tablespoon of cornstarch to the berries to thicken the filling. Berries cook faster, so reduce baking time by 2-3 minutes.
Chocolate Chip Apple
Add 1 tablespoon of mini chocolate chips to each pie along with the apples. It’s like an apple pie à la mode in pastry form. My kids love this version.
Spiced Up
Add a pinch of nutmeg, allspice, or cardamom to the cinnamon sugar. It adds depth and complexity. I like adding a tiny bit of nutmeg for a cozy, holiday vibe.
Gluten-Free
Use gluten-free pie crusts. Most brands work well, but check the ingredients to ensure they’re sturdy enough to hold the filling. I’ve used Bob’s Red Mill gluten-free crusts with success.
Vegan
Use vegan pie crusts and coconut oil instead of butter for brushing. The filling is naturally vegan. It’s surprisingly good, though the texture is slightly different.
Serving & Storage
How to Serve:
I usually serve these straight from the baking sheet at the dinner table—it looks rustic and stays warm. But here are other ways I’ve enjoyed them:
- With a scoop of vanilla ice cream (the classic combo)
- With a dollop of whipped cream and a drizzle of caramel sauce
- Alone as a snack with a cup of tea
- Crumbled over yogurt for breakfast
Storage Instructions:
Refrigerator: Store leftovers in an airtight container for up to 3 days. The crust will soften over time, but they’re still good cold or reheated.
Reheating: Best method: Reheat in a 350°F oven for 5-7 minutes to crisp up the crust. Microwave works but makes the crust soggy. If you microwave, do it in short bursts (15-20 seconds) and let it rest.
Freezing: You can freeze unbaked hand pies. Assemble them, freeze on a baking sheet until solid, then transfer to a freezer bag. Bake from frozen, adding 5-7 minutes to the baking time. They don’t freeze well after baking because the crust gets soggy.
Nutrition Information
I’m not a nutritionist, but here’s the breakdown if you’re tracking. Keep in mind that these are estimates and can vary based on the crust brand and apple size.
| Nutrient | Per Hand Pie (approx.) |
|---|---|
| Calories | 180 |
| Protein | 2g |
| Carbs | 28g |
| Fiber | 2g |
| Sugar | 14g |
| Fat | 8g |
| Sodium | 150mg |
What’s Good: Decent fiber from the apples. Vitamin C from the fruit. What to Know: Higher in sugar and carbs due to the crust and added sugar. Contains gluten and dairy (unless modified). It’s a treat, not a health food, but it’s better than buying pre-packaged pastries.
Final Thoughts
So that’s my go-to Cinnamon Sugar Apple Hand Pies! I’ve probably talked your ear off at this point, but when you make a recipe this often, you have a lot to say about it. This has saved weeknight dinners more times than I can count. It’s my answer to “what’s for dessert” when I’m tired, don’t want takeout, and still want something that tastes really good. My kids are happy, my husband’s happy, and I’m happy because I’m not stressed about cooking.
Make it yours! Try different apples, swap in your favorite spices, or add chocolate chips. The best recipes are the ones you adapt to your family’s tastes. If you make this, drop a comment and let me know what you think! I love hearing how recipes turn out in your kitchen. And if something doesn’t work, tell me that too—I’m here to help troubleshoot.
Happy cooking! And I hope your kitchen smells half as good as mine does right now. If you’re looking for more quick and easy recipes, check out my crispy baked chicken nuggets for a savory weeknight option, or these no-bake peanut butter granola bites for another sweet treat that comes together in minutes.
Frequently Asked Questions
Can I use fresh apples instead of canned?
Absolutely! In fact, I prefer fresh apples because they have better flavor and texture. Canned apples are often too soft and mushy. Just make sure to dice them small so they cook through quickly. If you’re using a very hard apple like Granny Smith, you might need to bake them for an extra 2-3 minutes.
Why did my hand pies leak filling?
This usually happens if the seal wasn’t tight enough or if you overfilled them. Make sure to press the edges firmly and use a fork to crimp. Also, leave a ½-inch border around the filling. If the filling is too wet, let the apples sit with the sugar longer to draw out excess moisture before assembling.
Can I make these ahead of time?
Yes! You can assemble the hand pies and freeze them unbaked. Place them on a baking sheet and freeze until solid, then transfer to a freezer bag. When you’re ready to bake, let them thaw for 10 minutes and bake as directed, adding 5 minutes to the baking time. You can also make the filling ahead and store it in the fridge for up to 2 days.
Can I use puff pastry instead of pie crust?
You can, but the texture will be different. Puff pastry is flakier and lighter, while pie crust is more tender and pie-like. Puff pastry might not hold the filling as well, so be careful not to overfill. If you use puff pastry, brush the tops with egg wash for a golden finish.
How do I store leftovers?
Store leftovers in an airtight container at room temperature for up to 2 days, or in the fridge for up to 3 days. Reheat in the oven to crisp up the crust. They’re best eaten fresh, but they’re still good the next day.
Can I double this recipe?
Yes! Double all the ingredients and use two baking sheets. Make sure you have enough space between the pies so they bake evenly. You might need to bake in batches if your oven is small. The cooking time stays the same.
Pin This Recipe!


Cinnamon Sugar Apple Hand Pies
- Total Time: 30 minutes
- Yield: 4-6 servings 1x
Description
A quick and easy 30-minute dessert using refrigerated pie crusts and simple ingredients. These hand pies are perfect for busy weeknights, utilizing bruised or overripe apples for a jammy, sweet filling.
Ingredients
- 2 boxes (2 packages) refrigerated pie crusts
- 3 medium apples, peeled and diced (about 450g)
- 3 tablespoons granulated sugar
- 1 teaspoon ground cinnamon
- 1 teaspoon lemon juice
- 1 tablespoon melted butter
- 2 tablespoons granulated sugar (for topping)
- 1 teaspoon ground cinnamon (for topping)
- Vanilla ice cream or whipped cream (for serving)
Instructions
- Preheat oven to 375°F (190°C). Line two large baking sheets with parchment paper.
- Peel and dice apples into ½-inch cubes. Toss with 3 tablespoons sugar, 1 teaspoon cinnamon, and lemon juice. Let sit for 5-10 minutes to draw out moisture.
- Unroll pie crusts on a floured surface. Roll slightly to smooth creases. Cut each round in half to make semi-circles or into four smaller circles.
- Place 2-3 tablespoons of apple mixture in the center of each dough circle, leaving a ½-inch border.
- Fold dough over filling to create a half-moon shape. Press edges firmly and crimp with a fork to seal. Cut a small slit in the top for steam.
- Brush tops with melted butter and sprinkle generously with the mixture of 2 tablespoons sugar and 1 teaspoon cinnamon.
- Bake for 15-18 minutes until crust is golden brown and filling is bubbly. Tent with foil if edges brown too quickly.
- Cool on baking sheet for 5 minutes before serving warm with ice cream or whipped cream.
Notes
Use bruised or overripe apples for a jammy texture. Do not skip the resting time for the apples to prevent a soggy crust. Ensure the edges are sealed tightly to prevent leaking. Can be frozen unbaked.
- Prep Time: 15 minutes
- Cook Time: 15 minutes
- Category: Dessert
- Cuisine: American
Nutrition
- Serving Size: 1 hand pie
- Calories: 180
- Sugar: 14
- Sodium: 150
- Fat: 8
- Saturated Fat: 3
- Carbohydrates: 28
- Fiber: 2
- Protein: 2
Keywords: apple hand pies, easy dessert, weeknight dinner, 3 ingredient recipe, apple pie, quick baking, family friendly


