
Last November, I stood in my kitchen at 11 PM, surrounded by the wreckage of a Thanksgiving dinner that had somehow gone slightly off the rails. The turkey was fine, actually. The stuffing was good. But I had four pounds of roasted butternut squash sitting on the counter, looking at me like, “Well? Are you going to eat me or what?” I was too full to eat another bite of solid food, but I was also too stressed to throw it away. So, I did what any sleep-deprived cook would do: I threw everything into a blender.
I didn’t have a plan. I didn’t have a fancy recipe book open. I just had squash, some leftover vegetable broth, a stick of butter that was slowly melting on the stove, and a handful of sage leaves I’d picked from the garden before the frost hit. I blended it. I heated it. I browned the butter until it smelled like cookies. I poured it all together.
It was magic. Like, actual magic. The first spoonful tasted like autumn itself. Creamy, nutty, slightly sweet, with that sharp, savory punch from the browned butter and crispy sage. I ate three bowls before bed. My husband, who usually complains about “leftover soup” for days after the holiday, asked for seconds the next morning.
That accidental bowl of soup became a ritual. Every time butternut squash is on sale (which is basically every week in fall and winter), I make this creamy roasted butternut squash soup with brown butter sage. It’s my go-to comfort food when the wind is howling outside, and it’s the answer to “what’s for dinner” when I want something that feels fancy but takes almost zero effort. I’ve tested this recipe dozens of times, tweaking the ratios of cream to squash, the type of squash, and the timing on the brown butter, until I landed on the perfect version. And honestly? It’s easier than making a grilled cheese sandwich.
Why You’ll Love This Creamy Roasted Butternut Squash Soup
There are about a million soup recipes out there. Why this one? Because it hits that sweet spot between complicated and boring. It’s not just “blend veggies and water.” It’s a flavor experience that feels like a warm hug.
Here’s why this soup has earned a permanent spot in my weekly rotation:
Roasting Changes Everything — Most people boil their squash. Don’t do that. Boiling dilutes the flavor. Roasting it first caramelizes the natural sugars, giving the soup a deep, nutty sweetness that you just can’t get any other way. It’s the difference between a grocery store soup and a restaurant-quality bowl.
Brown Butter Sage is the Secret Weapon — This is the game-changer. Brown butter (beurre noisette) adds a toasty, hazelnut-like depth that pairs perfectly with the earthiness of the squash. Crispy fried sage leaves on top? That’s the fancy touch that makes your guests think you spent hours in the kitchen. Spoiler: it takes two minutes.
Stupidly Simple Cleanup — You only need one baking sheet for the squash and one pot for the soup. If you use an immersion blender, you don’t even need to transfer anything to a separate blender. That’s three dishes total. I’ll take that over a sink full of pots any day.
Freezer-Friendly Comfort — This soup freezes beautifully. I make a big batch on Sunday, portion it into containers, and have a cozy dinner ready to go for three nights during the week. It reheats without separating, which is a miracle with cream-based soups.
Kid-Approved (Mostly) — My kids are skeptical of anything orange, but they love this. The sweetness masks the “veggie” taste, and the brown butter smells like popcorn to them. I usually serve it with a side of rosemary garlic focaccia for dipping, and the plates are clean in minutes.
This soup is my answer to cold nights. It’s warm, it’s filling, and it makes your whole house smell like a bakery. You don’t need to be a chef to make it. You just need a roasting pan and some patience.
Ingredients You’ll Need
Here’s the best part: you probably have most of this already in your pantry. This isn’t a recipe that requires a special trip to three different specialty stores. It’s simple, honest ingredients that shine when you don’t overcomplicate them.
For the Roasted Squash Base
Butternut Squash (3-4 pounds / 1.5 kg) — This is the star. You can buy a whole squash and peel it yourself (more fun, less mess if you’re good with a knife), or buy the pre-cut cubes from the store. If you buy pre-cut, look for pieces that are uniform in size so they roast evenly. I prefer the whole squash because it tastes fresher, but I won’t judge if you buy the cubes.
Extra Virgin Olive Oil (3 tablespoons / 45ml) — Just enough to coat the squash. Don’t drown it. You want roasting, not frying. I use a good quality oil here because you’ll taste it.
Kosher Salt (1 tablespoon) — And black pepper to taste. Season the squash *before* it goes in the oven. This is non-negotiable. Under-seasoned roasted vegetables taste bland, and that blandness carries into the soup.
Garlic Cloves (4-5 cloves, peeled) — Roast these right alongside the squash. They’ll get soft and sweet, losing their sharp bite. I throw them in on the last 10 minutes of roasting so they don’t burn.
For the Soup Liquid

Vegetable or Chicken Broth (4 cups / 950ml) — Use low-sodium so you can control the saltiness. I usually keep vegetable broth on hand for a vegetarian version, but chicken broth adds a nice savory depth. I love using homemade stock if I have it, but store-bought works perfectly fine.
Heavy Cream (½ cup / 120ml) — This makes it creamy. You can use half-and-half for a lighter version, but it won’t be as rich. Or, for a dairy-free option, use full-fat coconut milk. It adds a slight coconut flavor, but it’s delicious. I stick to heavy cream because, well, it’s comfort food.
Onion (1 medium yellow onion, chopped) — I sauté this at the start to build the flavor base. Sweet onions work too, but yellow gives that classic soup depth. White onions are too sharp for this.
For the Brown Butter Sage Topping
Unsalted Butter (4 tablespoons / 60g) — This is for browning. Use good butter. If you can’t find unsalted, use salted and reduce the salt in the soup slightly. I usually use Kerrygold or a local dairy brand because the fat content makes it brown more evenly.
Fresh Sage Leaves (12-15 leaves) — Fresh is key here. Dried sage doesn’t crisp up the same way and tastes dusty. Look for it in the produce section near the herbs. If you can’t find fresh, you can skip the fried sage, but you’ll miss out on the texture. I grow sage in my garden, but if you don’t, a small bunch from the store is worth the few dollars.
Optional Add-ins:
I sometimes add a pinch of nutmeg or cinnamon for warmth, but the brown butter and sage are strong enough on their own. If you like heat, a few cracks of red pepper flakes on top cut through the richness nicely.
Equipment Needed
You don’t need fancy gadgets for this. Here’s what I actually use in my everyday kitchen.
Rimmed Baking Sheet — I use a half-sheet pan (18×13 inches). It needs to be big enough to hold all the squash in a single layer. If you crowd the pan, the squash steams instead of roasts. I use two pans if my squash is huge.
Large Pot or Dutch Oven — A 6-quart pot is perfect. It needs to hold the roasted squash, onions, and broth without overflowing when you blend it. I use my Le Creuset Dutch oven because it heats evenly, but any heavy-bottomed pot works.
Immersion Blender — This is my favorite tool for soup. You blend right in the pot. No hot splashing, no extra dishes. If you don’t have one, a standard countertop blender works, but be careful blending hot liquids. Fill it only halfway and vent the lid with a towel. I’ve made that mistake before. It’s messy.
Small Skillet — Any small frying pan works for browning the butter and frying the sage. I use a non-stick 8-inch skillet because it’s easy to clean.
Peeler or Knife — If you’re peeling the squash yourself, a sturdy vegetable peeler or a sharp chef’s knife is essential. Butternut squash skin is tough. I learned this the hard way with a dull knife. Take your time.
How to Make It: Step-by-Step
Alright, let’s make this! I’m walking you through exactly how I do it, including the little tricks I’ve picked up over the years.
Step 1: Prep and Roast the Squash (45-60 minutes)
Preheat your oven to 400°F (200°C). If you’re using a whole squash, cut it in half lengthwise, scoop out the seeds (save them if you want to roast them later—they’re delicious with salt), and peel the skin off with a knife or peeler. Cut the flesh into 1-inch cubes. Toss them on a baking sheet with olive oil, salt, and pepper. Spread them out in a single layer. Don’t overlap them! Give them space to roast.
Roast for 30-40 minutes, flipping halfway through, until the squash is tender and has some browned edges. The browning is where the flavor lives. While the squash roasts, throw the peeled garlic cloves on the pan in the last 10 minutes so they soften without burning.
Step 2: Sauté the Aromatics (5 minutes)
While the squash is in the oven, heat a little olive oil in your large pot over medium heat. Add the chopped onion and a pinch of salt. Cook for 5-7 minutes until the onion is soft and translucent. Don’t rush this. Sweet onions equal sweet soup. If you want to add a carrot or two, now’s the time. I usually skip it for a smoother texture, but it’s a good way to sneak in veggies for kids.
Step 3: Combine and Simmer (15 minutes)
Once the squash is roasted and the onions are soft, add the roasted squash and garlic to the pot. Pour in the vegetable or chicken broth. Bring it to a gentle simmer. Let it cook for about 10-15 minutes. This helps the squash absorb some of the broth flavor and makes it easier to blend. It’s not strictly necessary, but it adds depth.
Step 4: Blend Until Silky (3 minutes)
Remove the pot from the heat. Let it cool for a minute or two (so you don’t burn yourself). Use an immersion blender to puree the soup directly in the pot. Blend until completely smooth. If you’re using a countertop blender, blend in batches. Add the heavy cream now and blend it in. Taste and adjust seasoning. Need more salt? Add it. Too thick? Add a splash more broth. Too thin? Simmer it for a few more minutes.
Step 5: Make the Brown Butter Sage (5 minutes)
In your small skillet, melt the butter over medium heat. Swirl it occasionally. It will foam up, then settle. Keep watching. Once the foam clears and you see brown bits at the bottom and smell a nutty aroma (like hazelnuts or popcorn), it’s done. Immediately remove from heat and toss in the sage leaves. They’ll fry for about 30 seconds until crispy. Be careful—it’s hot!
Step 6: Serve and Garnish
Ladle the hot soup into bowls. Drizzle a spoonful of the brown butter and crispy sage over the top. The butter will melt into the soup, creating beautiful ribbons of flavor. Serve immediately with crusty bread. I love dipping this in roasted root veggies on the side, but honestly, just the soup is enough.
Total time: About 1 hour, but only 15 minutes of active work.
Expert Tips & Tricks
Here’s everything I’ve learned from making this soup dozens of times. These tips will save you from my mistakes.
Roast, Don’t Boil
I cannot stress this enough. Boiling squash makes it watery and flavorless. Roasting concentrates the sweetness and adds a nutty complexity that boiling just can’t match. If you’re short on time, you can steam it, but roast it if you can.
Watch the Brown Butter Like a Hawk
Brown butter goes from perfect to burnt in about 30 seconds. Burnt butter tastes bitter and ruins the whole soup. Keep the heat at medium, not high. Watch for the brown bits and smell the nutty aroma. When in doubt, take it off the heat a few seconds early—it will keep cooking from residual heat.
Save the Squash Seeds
Don’t throw them away! Rinse them, toss them with a little salt and oil, and roast them at 350°F for 10-15 minutes. They make a great topping for the soup or a snack. I call them “squash nuts” and my kids love them.
Texture Check
If you want an ultra-smooth soup, strain it through a fine-mesh sieve after blending. This removes any fibrous bits from the squash. It takes an extra minute but makes the texture restaurant-quality. I usually skip this for weeknights, but for guests, I strain it.
Acidity Balance
Butternut squash is very sweet. Sometimes it needs a little brightness. If the soup tastes too heavy or one-dimensional, add a teaspoon of apple cider vinegar or lemon juice at the end. It wakes up the flavors without making it taste sour.
Variations & Substitutions
Once you’ve nailed the basic version, here’s how you can mix it up. I’ve tried all of these.
Spicy Version
Add a diced jalapeño or red pepper flakes when sautéing the onions. Or, stir in a teaspoon of curry powder with the broth. It adds a nice kick that cuts through the cream.
Coconut Curry Squash Soup
Skip the heavy cream and brown butter. Instead, sauté the onions with curry powder and ginger, then use coconut milk instead of cream. Top with cilantro instead of sage. It’s a completely different vibe but still creamy and comforting.
Apple Sage Variation
Add one diced apple (like Honeycrisp or Granny Smith) when sautéing the onions. The apple adds a tartness that pairs beautifully with the sage. I do this when I have too many apples from apple strudel season.
Dairy-Free Option
Use coconut milk instead of heavy cream. The soup will be slightly thicker and have a coconut flavor, but it’s still delicious. Skip the brown butter and drizzle with olive oil and crispy sage instead.
Gluten-Free
This recipe is naturally gluten-free. Just make sure your broth is certified gluten-free if you’re sensitive. Serve with gluten-free bread or crackers.
Serving & Storage
How to Serve:
I usually serve this straight from the pot at the dinner table—it stays warm and looks rustic. But here are other ways I’ve enjoyed it:
- Croutons: Homemade croutons made from stale bread are amazing here. Or use crispy baked ranch chickpeas for a crunchy, protein-packed topping.
- Swirls: A dollop of sour cream or Greek yogurt on top adds a nice tang.
- Side Salad: A simple arugula salad with lemon vinaigrette cuts the richness of the soup.
Storage Instructions:
Refrigerator: Store in an airtight container for up to 4 days. The soup will thicken in the fridge—totally normal. Just add a splash of broth or milk when reheating to loosen it up.
Freezer: This soup freezes well for up to 3 months. Let it cool completely, then freeze in portions. Thaw in the fridge overnight and reheat gently on the stove. Do not freeze in the blender jar.
Reheating: Reheat on low heat, stirring frequently. High heat can cause the cream to separate. If it looks grainy, whisk in a little fresh cream to bring it back together.
Nutrition Information
I’m not a nutritionist, but here’s the breakdown if you’re tracking. This is per serving (based on 6 servings).
Per Serving:
- Calories: 280
- Protein: 4g
- Carbs: 32g
- Fiber: 5g
- Sugar: 8g
- Fat: 16g
- Saturated Fat: 8g
It’s a hearty soup, so it fills you up. The squash provides a good amount of fiber and vitamin A. If you’re watching calories, you can reduce the cream or use half-and-half. But honestly? It’s comfort food. Enjoy it.
Frequently Asked Questions
Can I use canned butternut squash?
You can, but the texture and flavor won’t be the same. Canned squash is often softer and less sweet. If you use it, skip the roasting step and just sauté the onions, add the squash and broth, and blend. It’s a good shortcut, but roasted squash tastes better.
Why is my soup too thick?
Butternut squash is starchy. If it’s too thick, just add more broth or water, a quarter cup at a time, until you reach your desired consistency. It’s easier to thin it out than to fix it if it’s too thin.
Can I make this ahead?
Yes! In fact, it often tastes better the next day after the flavors have melded. Make the soup, let it cool, and store it in the fridge. Reheat it gently on the stove the next day. Add the brown butter sage right before serving.
What kind of sage should I use?
Fresh sage is best. It crisps up nicely in the butter. Dried sage doesn’t work for the topping—it’ll just get chewy. If you can’t find fresh, you can skip the sage topping and just add a pinch of dried sage to the soup while it simmers, but you’ll miss the texture.
Can I freeze the brown butter?
No. Brown butter changes texture when frozen and thawed. It’s best made fresh right before serving. You can make the soup ahead and freeze it, but make the brown butter sage topping when you’re ready to eat.
Is this soup vegan?
The base recipe is vegan if you use vegetable broth and skip the heavy cream. For creaminess, use coconut milk. The brown butter sage topping isn’t vegan, so skip that or use vegan butter and crispy sage (which is hard to find, so just omit it). It’s still delicious without it.
How long does it take to roast the squash?
It depends on the size of the cubes and your oven. Check at 30 minutes. The squash is done when a fork slides in easily and the edges are browned. It usually takes 35-45 minutes.
Final Thoughts
So that’s my go-to creamy roasted butternut squash soup! I’ve probably talked your ear off at this point, but when you make a recipe this often, you have a lot to say about it. This soup has saved my weeknight dinners more times than I can count. It’s my answer to “what’s for dinner” when I’m tired, don’t want takeout, and still want something that tastes really good. My kids are happy, my husband’s happy, and I’m happy because I’m not stressed about cooking.
Make it yours! Try different add-ins, swap in your favorite vegetables, adjust the spices. The best recipes are the ones you adapt to your family’s tastes. If you make this, drop a comment and let me know what you think! I love hearing how recipes turn out in your kitchen. And if something doesn’t work, tell me that too—I’m here to help troubleshoot.
Happy cooking! And I hope your kitchen smells half as good as mine does right now.
Pin This Recipe!
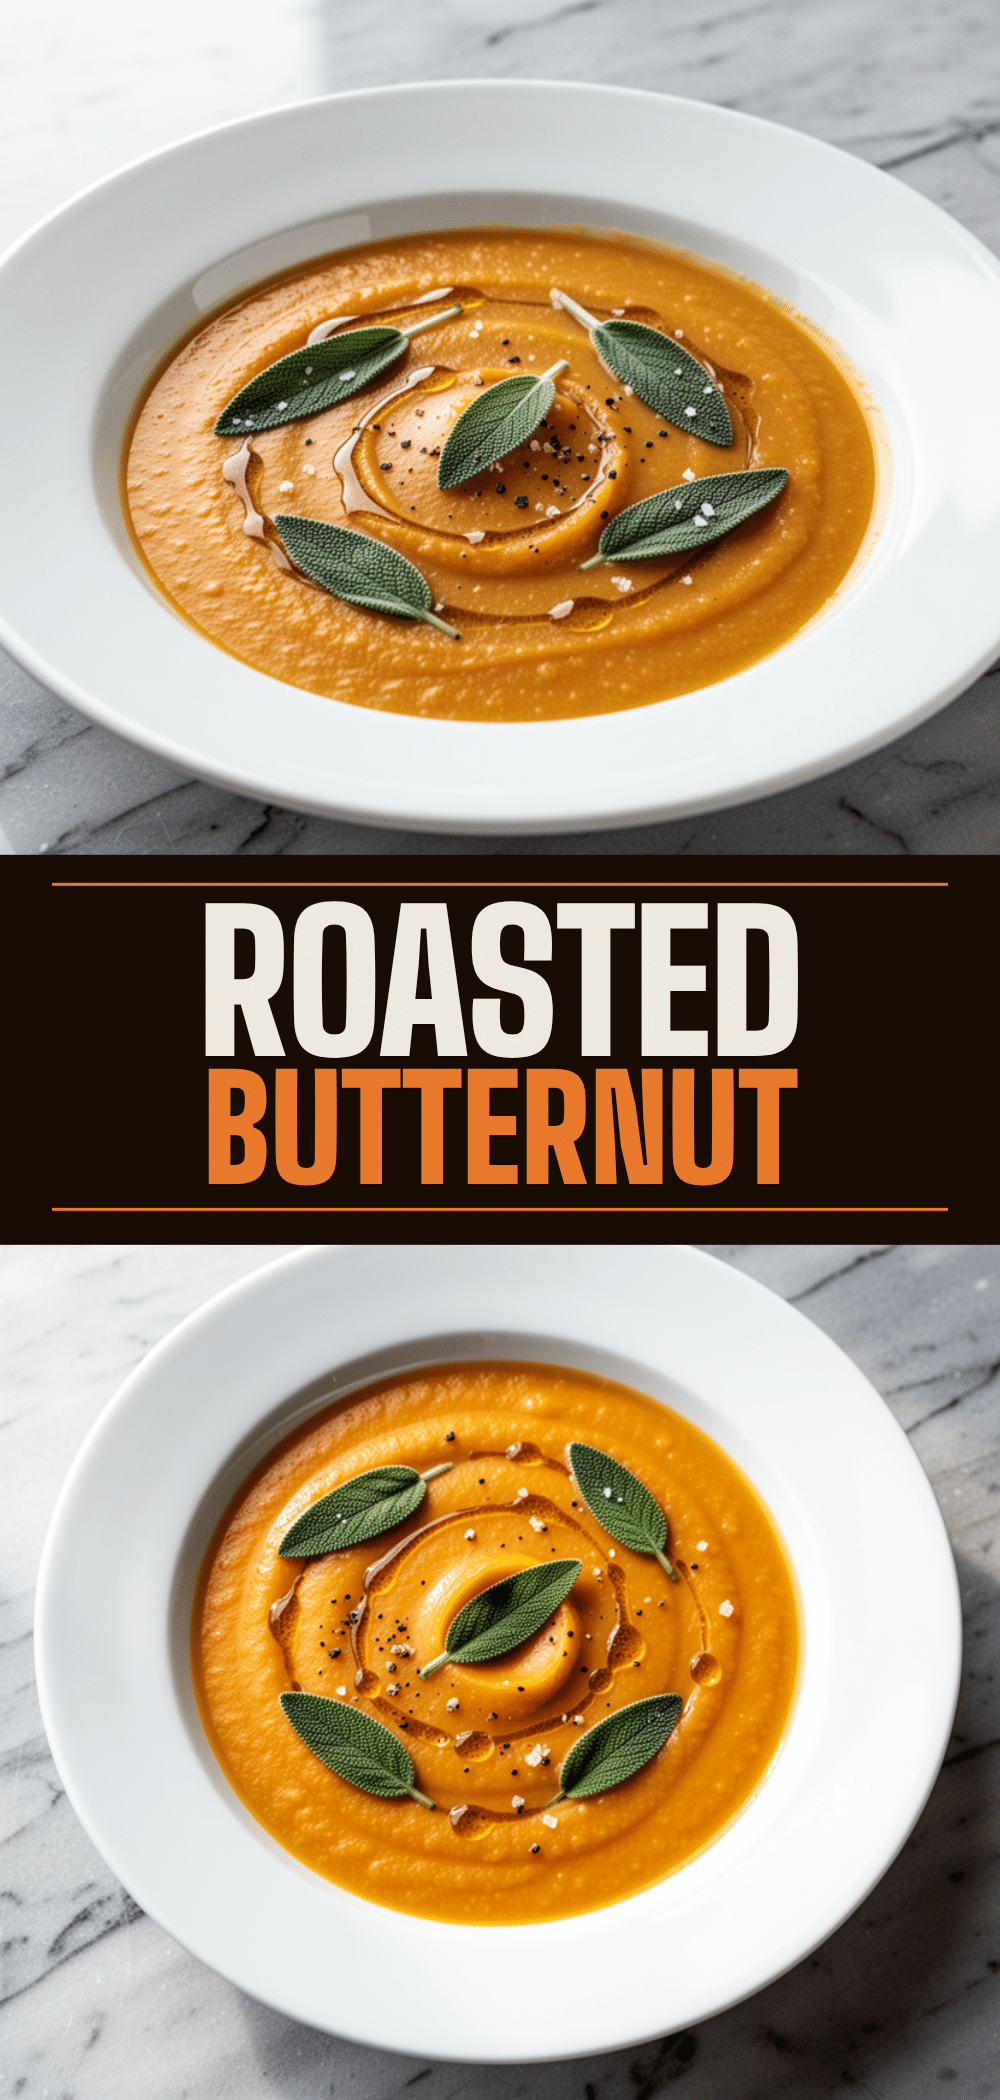

Creamy Roasted Butternut Squash Soup: Easy 30-Minute Comfort
- Total Time: 1 hour
- Yield: 6 servings 1x
Description
A rich, comforting soup made by roasting butternut squash to caramelize its natural sugars, then blending it with sautéed aromatics and heavy cream. Finished with a luxurious brown butter and crispy sage topping.
Ingredients
- 3–4 pounds butternut squash (peeled, seeded, and cut into 1-inch cubes)
- 3 tablespoons extra virgin olive oil
- 1 tablespoon kosher salt
- Black pepper to taste
- 4–5 garlic cloves, peeled
- 1 medium yellow onion, chopped
- 4 cups vegetable or chicken broth (low-sodium)
- ½ cup heavy cream
- 4 tablespoons unsalted butter
- 12–15 fresh sage leaves
- Optional: pinch of nutmeg, cinnamon, or red pepper flakes
Instructions
- Preheat oven to 400°F (200°C). Toss squash cubes with olive oil, salt, and pepper on a rimmed baking sheet in a single layer.
- Roast squash for 30-40 minutes, flipping halfway, until tender and browned. Add garlic cloves to the pan for the last 10 minutes of roasting.
- While squash roasts, heat a little olive oil in a large pot over medium heat. Sauté chopped onion with a pinch of salt for 5-7 minutes until soft and translucent.
- Add roasted squash, roasted garlic, and broth to the pot with onions. Bring to a gentle simmer and cook for 10-15 minutes.
- Remove from heat and blend until smooth using an immersion blender or countertop blender. Stir in heavy cream and adjust seasoning.
- In a small skillet, melt butter over medium heat until it foams, then settles and turns nutty brown with brown bits at the bottom.
- Immediately remove from heat and toss in sage leaves until crispy (about 30 seconds).
- Ladle soup into bowls, drizzle with brown butter and crispy sage, and serve immediately.
Notes
Roasting the squash concentrates sweetness and flavor compared to boiling. Watch brown butter closely as it burns quickly. The soup freezes well for up to 3 months but brown butter should be made fresh. For a dairy-free version, substitute coconut milk for heavy cream and olive oil for butter.
- Prep Time: 15 minutes
- Cook Time: 45 minutes
- Category: Main Course
- Cuisine: American
Nutrition
- Serving Size: 1 bowl
- Calories: 280
- Sugar: 8
- Fat: 16
- Saturated Fat: 8
- Carbohydrates: 32
- Fiber: 5
- Protein: 4
Keywords: butternut squash soup, roasted squash, brown butter, sage, comfort food, fall recipes, vegetarian soup, gluten-free


