Last Tuesday, I was staring at the clock. It was 6:15 PM. I had just walked through the door, dropped my bag by the couch, and realized I had absolutely zero energy to cook anything that required chopping vegetables, managing multiple pots, or pretending I cared about “meal planning” for the rest of the week. My husband was already on the couch, doom-scrolling through dinner options on his phone, looking like he was considering ordering pizza again. We both knew we didn’t want pizza. We wanted something warm, comforting, and actually good for us, but the idea of standing over a stove for 45 minutes felt impossible.
That’s when I remembered the caramelized onion jam I had made over the weekend. It was sitting in the fridge, glowing like amber treasure. I grabbed some sharp cheddar, a crisp fall apple, and some thick sourdough bread. I figured, “What’s the worst that could happen? We eat grilled cheese.”
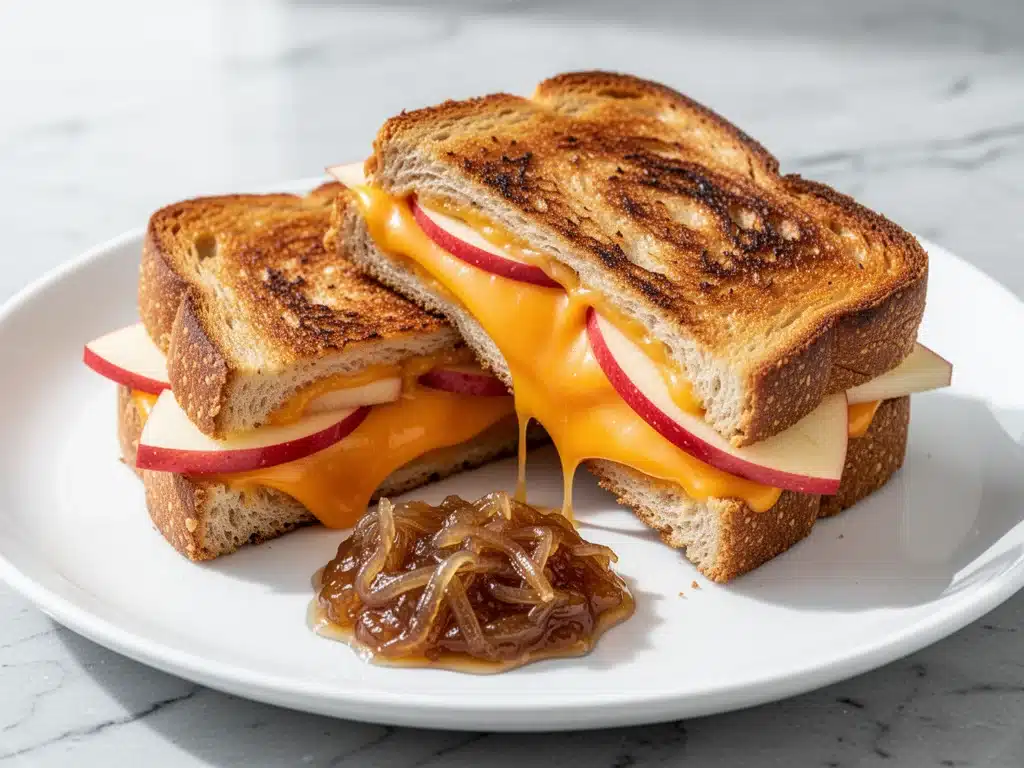
Fifteen minutes later, we were sitting at the table, phones face-down, actually talking to each other. The sandwich was crispy, the cheese was stringy and perfect, and the sweet-tart apple jam added this incredible depth that made it feel like a gourmet meal rather than a quick fix. My husband took one bite, looked up from his phone, and said, “You need to write this down. This is it. This is the weeknight winner.” And honestly? He was right. This Fall Harvest Apple Cheddar Grilled Cheese with Caramelized Onion Jam has become my secret weapon for busy evenings. It’s fancy enough to impress, but easy enough to make when you’re running on fumes.
I’ve made this at least six times in the last month. Sometimes I add a slice of turkey, sometimes I keep it pure veggie, but the core combo never changes. The salty sharp cheddar cuts through the sweet apple, and that onion jam? It’s the game-changer. It’s the kind of recipe that makes you feel like a chef even when you’re half-asleep. If you’re tired of boring sandwich options or everything bagel smashed avocado toast for the tenth time in a row, trust me on this one. It’s comfort food, upgraded.
Why You’ll Love This Recipe
Look, I get it. Grilled cheese sounds simple. But most people make it dry, or the cheese doesn’t melt, or it’s just… boring. This version is different. It’s the kind of sandwich that makes people stop mid-chew and ask for the recipe. Here’s why this Fall Harvest Apple Cheddar Grilled Cheese with Caramelized Onion Jam has completely taken over our dinner rotation:
- It’s Actually Fast (Even With the Jam) — I know, “caramelized onions” sounds like a three-hour project. But I make a big batch of jam on Sunday (or use leftover jam from a previous cook), so assembling the sandwich takes about 10 minutes. It’s faster than waiting for a pizza delivery. Seriously, if you can butter bread, you can make this.
- Flavor Explosion in Every Bite — Most grilled cheese is just salt and fat. This one has sweet, savory, tart, and salty all in one bite. The sharp cheddar brings the punch, the apple adds brightness, and the onion jam ties it all together. It’s complex, but not complicated. You’ll taste layers, not just melted cheese.
- Uses Up Leftovers — I usually have half a block of cheddar and a bruised apple lying around. This recipe is the perfect way to use up those random fridge items before they go bad. It’s zero-waste cooking at its finest. I’ve even used leftover rosemary garlic focaccia for this, and it was absolutely divine.
- Kid-Approved (Even the Picky Ones) — My kids usually turn their noses up at anything with “jam” in it, but they love this. The sweetness of the apple and the gooey cheese wins them over every time. It’s a sneaky way to get them to eat vegetables (okay, onions) and fruit in one bite.
- Feels Like a Treat — Because it uses good ingredients like sharp cheddar and fresh apples, it doesn’t feel like “diet food” or “quick junk.” It feels like a little indulgence. It’s the kind of meal that makes a Tuesday night feel special without any effort.
This is my go-to when I need dinner to just work. No complicated techniques, no weird ingredients, just reliable, delicious food that makes everyone happy. And honestly? It pairs perfectly with a simple cozy fall butternut squash soup if you’re feeling fancy, but it’s totally fine on its own.
Ingredients You’ll Need
Here’s the best part: you probably have most of this already. I’m particular about three ingredients here, and I’ll tell you exactly why. For this Fall Harvest Apple Cheddar Grilled Cheese with Caramelized Onion Jam, quality matters because there are so few components. You can’t hide bad cheese behind a mountain of sauce.
For the Sandwich Assembly
Sharp Cheddar Cheese (8 oz / 225g, sliced or shredded) — This is non-negotiable. I use extra-sharp cheddar. Mild cheddar is too bland and doesn’t have enough punch to stand up to the sweet apple and onion. Block cheese melts better than pre-shredded, which has anti-caking agents that can make the texture gritty. Grate it yourself if you can—it’s worth the extra minute.
Fresh Apple (1 medium, thinly sliced) — I love Honeycrisp or Fuji for this. They hold their shape a bit better than Granny Smith (which can be too tart) and aren’t as mushy as Red Delicious. You want slices that are thin enough to cook through but thick enough to provide a juicy crunch. Peel them if you prefer, but the skin adds nice color and texture.
Thick Sliced Bread (4 slices) — Sourdough is my favorite because it has a tangy flavor that complements the cheddar, and it’s sturdy enough to hold the jam without getting soggy. Texas toast works too if you like a softer sandwich. Avoid thin white sandwich bread—it falls apart. You need structure.
Butter (4 tablespoons / 60g, softened) — Use real butter. Margarine just doesn’t give you that golden, crispy crust. Softened butter spreads easier and creates a better seal on the bread.
For the Caramelized Onion Jam
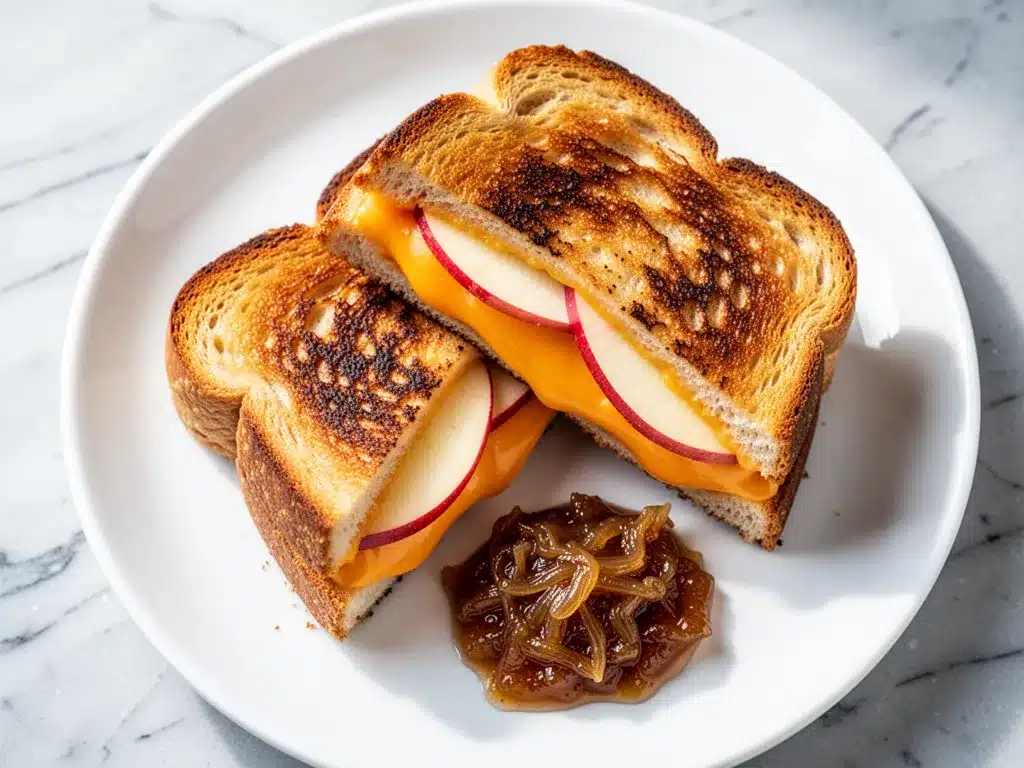
Yellow Onions (2 large, thinly sliced) — You need a lot of onions. They shrink down massively. Look for onions that are firm and dry, not soft or sprouting. Yellow onions are sweeter when cooked than white or red ones.
Balsamic Vinegar (2 tablespoons) — This adds the tang and helps caramelize the onions faster. Apple cider vinegar works too, but balsamic gives it that rich, dark jam texture.
Brown Sugar (1 tablespoon) — Just a touch to help the caramelization. You don’t want it to be a dessert; you want it to be savory-sweet.
Butter and Olive Oil (1 tablespoon each) — A combo of both gives the best flavor and highest smoke point for cooking the onions.
Salt and Pepper — To taste. Don’t skip the salt; it brings out the onion’s natural sweetness.
Equipment Needed
You don’t need fancy equipment for this. Here’s what I actually use.
Large Skillet — A 12-inch cast iron skillet is perfect for the onions. It holds heat well, which is crucial for caramelizing. For the sandwich, a smaller 8-inch non-stick skillet works best so you can cook two sandwiches at a time without crowding.
Sharp Knife — For slicing the apples and onions thinly. A dull knife makes apple slices uneven, which leads to some parts being raw and others burnt.
Wooden Spoon or Spatula — For stirring the onions. You need something that won’t scratch your pan if you’re using non-stick.
Measuring Spoons — For the balsamic and brown sugar. Accuracy helps balance the sweet and tart.
Pastry Brush (Optional) — I use this to butter the bread evenly. It’s faster than spreading with a knife and gets into the corners.
How to Make It: Step-by-Step
Alright, let’s make this! I’m walking you through exactly how I do it, including the little tricks I’ve picked up. This Fall Harvest Apple Cheddar Grilled Cheese with Caramelized Onion Jam comes together quickly once you have the jam ready.
Step 1: Make the Caramelized Onion Jam (15-20 minutes)
If you don’t have leftover jam, start here. Heat the butter and olive oil in a large skillet over medium heat. Add the thinly sliced onions and a pinch of salt. Stir to coat. Cook for about 10 minutes, stirring occasionally, until the onions are soft and starting to brown. Add the brown sugar and balsamic vinegar. Stir well and cook for another 5-7 minutes until the mixture is dark, sticky, and jam-like. It should look like thick paste, not watery onions. Let it cool completely. Pro tip: You can make this ahead and store it in the fridge for up to a week.
Step 2: Prep the Bread and Cheese
While the onions cool, slice your apples into thin rounds. Lay out your four slices of bread. On one side of each slice, spread a thin layer of the cooled onion jam. Don’t go crazy—too much jam will make the bread soggy. Just a light coating.
Step 3: Assemble the Sandwiches
Flip the bread over (jam-side down). Layer half of the cheddar cheese on two slices, then add a layer of apple slices, then the rest of the cheese. Top with the other two slices of bread, jam-side up. The cheese acts as a glue to hold the apple in place. Why this matters: Putting cheese on both sides of the apple prevents it from sliding out when you flip the sandwich.
Step 4: Butter the Outside
Butter the top slice of each sandwich generously. This is what creates the golden crust. Make sure you get to the edges.
Step 5: Cook the Sandwiches (5-7 minutes)
Heat your non-stick skillet over medium-low heat. Place the sandwiches in the pan. Cook for 3-4 minutes until the bottom is golden brown and crispy. Carefully flip them using a spatula. Butter the newly exposed top side (or butter the top before flipping, either works). Cook for another 3-4 minutes until the cheese is fully melted and the second side is golden. Watch the heat: If the bread is browning too fast but the cheese isn’t melting, lower the heat. Patience is key.
Step 6: Slice and Serve
Remove from heat and let rest for 1 minute (so the cheese sets slightly and doesn’t slide out). Slice diagonally and serve immediately. The steam rising off this sandwich is worth the wait.
Expert Tips & Tricks
Here’s everything I’ve learned from making this dozens of times. These tips will save you from my mistakes.
Don’t Rush the Onions
I know it’s a “quick” recipe, but the onions need time to caramelize. If you rush them, they’ll be sharp and watery, not sweet and jammy. Medium-low heat is your friend. Stir every few minutes, not constantly, so they get some color.
Use a Lid to Melt the Cheese
If your bread is perfect but the cheese is still cold, cover the pan with a lid for the last minute of cooking. The trapped steam helps melt the cheese without burning the bread. I learned this the hard way with a cold, gooey center.
Apple Slices Should Be Thin
Thick apple slices won’t cook through in the time it takes to brown the bread. You’ll end up with a raw, crunchy apple in a warm sandwich. Use a mandoline if you have one for even slices.
Room Temperature Butter
Cold butter tears the bread. Softened butter spreads smoothly and creates an even layer. Take your butter out 20 minutes before cooking.
Common Mistake: Soggy Bread
Fix: Make sure the onion jam is cooled before assembling. Warm jam releases steam into the bread, making it soggy. Also, don’t overload the sandwich. Less is more.
Variations & Substitutions
Once you’ve nailed the basic version, here’s how you can mix it up. I’ve tried all of these.
Add Some Protein
Add a slice of turkey or ham for a more substantial meal. The salty meat pairs beautifully with the sweet apple and cheddar. It’s like a gourmet Reuben but better.
Switch the Cheese
Gruyère is amazing with apple and onion. It’s nutty and melts beautifully. If you’re feeling fancy, use a mix of cheddar and gruyère. Fontina is another great melting cheese for this.
Spicy Kick
Add a few slices of pickled jalapeños or a dash of cayenne pepper to the onion jam. The heat cuts through the richness of the cheese and apple. It’s addictive.
Gluten-Free Option
Use gluten-free sourdough or sturdy gluten-free bread. Just be careful with the buttering—GF bread can be more fragile. Cook on lower heat to avoid burning.
Vegan Version
Use vegan cheddar slices (though they don’t melt as well) and a vegan butter alternative. The onion jam is naturally vegan. It’s not quite the same, but it’s still tasty.
Serving & Storage
How to Serve:
I usually serve this straight from the skillet. It’s rustic and stays warm. Pair it with a simple green salad or cozy fall butternut squash soup for a complete meal. A crisp apple cider or an iced vanilla chai latte is a perfect drink pairing.
Toppings Bar:
When I have guests, I put out extra caramelized onion jam and red pepper flakes. Everyone customizes their sandwich.
Storage:
This is best eaten fresh. The bread gets soggy if stored assembled. If you have leftovers, store the onion jam and apple slices separately in airtight containers in the fridge for up to 3 days. Reassemble and reheat in a skillet when ready to eat. Don’t microwave the sandwich—it makes the bread chewy.
Nutrition Information
I’m not a nutritionist, but here’s the breakdown if you’re tracking. This is comfort food, so it’s rich, but balanced by the apple and onion.
Per Serving (based on 2 sandwiches):
- Calories: 580
- Protein: 22g
- Carbs: 45g
- Fiber: 4g
- Fat: 32g
- Sodium: 680mg
What’s Good: Decent protein from the cheese, fiber from the apple and onions. You can lighten it up by using less butter or part-skim cheese.
Final Thoughts
So that’s my go-to Fall Harvest Apple Cheddar Grilled Cheese with Caramelized Onion Jam! I’ve probably talked your ear off at this point, but when you make a recipe this often, you have a lot to say about it. This has saved weeknight dinners more times than I can count. It’s my answer to “what’s for dinner” when I’m tired, don’t want takeout, and still want something that tastes really good. My kids are happy, my husband’s happy, and I’m happy because I’m not stressed about cooking.
Make it yours! Try different cheeses, add different fruits, or tweak the spice level. The best recipes are the ones you adapt to your family’s tastes. If you make this, drop a comment and let me know what you think! I love hearing how recipes turn out in your kitchen. And if something doesn’t work, tell me that too—I’m here to help troubleshoot.
Happy cooking! And I hope your kitchen smells half as good as mine does right now.
Frequently Asked Questions
Can I use pre-shredded cheese?
You can, but it won’t melt as smoothly. Pre-shredded cheese has cellulose added to prevent clumping, which can make the texture a bit grainy. Block cheese, grated fresh, melts into a silky, gooey perfection. If you’re in a huge rush, pre-shredded works, but fresh is better.
Why did my bread burn before the cheese melted?
The heat was too high. Grilled cheese needs low and slow. If the bread is browning too fast, lower the heat immediately. Covering the pan with a lid for the last minute helps steam the cheese without burning the bread further.
Can I make the onion jam ahead?
Yes! In fact, I recommend it. The jam tastes even better after sitting in the fridge for a day. Store it in an airtight container for up to 5 days, or freeze it for up to 3 months. Thaw in the fridge before using.
What other fruits work in this sandwich?
Pears are a great substitute for apples. They have a similar texture and sweetness. You could also try thinly sliced figs for a more gourmet twist, though they’re softer and cook faster.
Can I add bacon?
Absolutely. Crispy bacon adds a smoky saltiness that pairs perfectly with the sweet apple and cheddar. Add it right on top of the cheese before closing the sandwich.
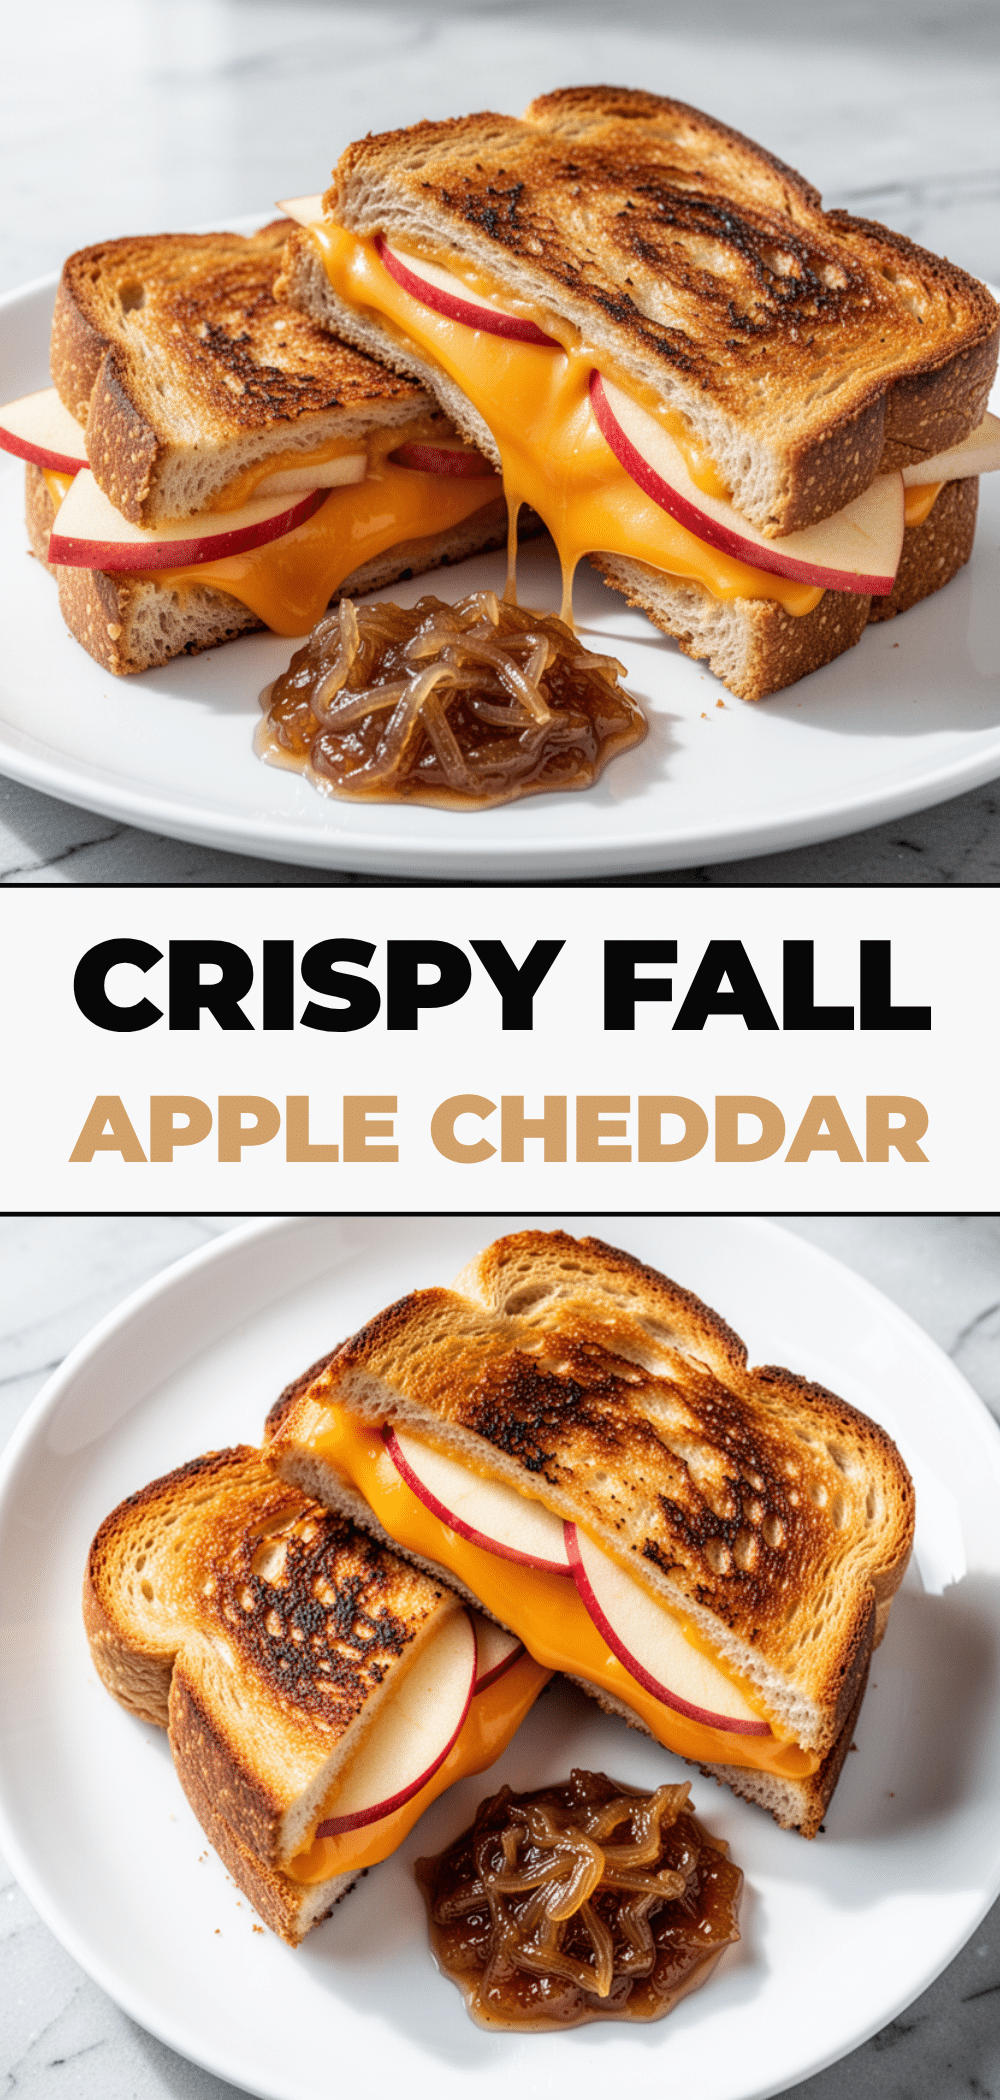
Pin This Recipe!
Fall Harvest Apple Cheddar Grilled Cheese with Caramelized Onion Jam
- Total Time: 30 minutes
- Yield: 2 servings 1x
Description
A gourmet-inspired grilled cheese sandwich featuring sharp cheddar, crisp fall apples, and homemade caramelized onion jam, perfect for a quick and comforting weeknight dinner.
Ingredients
- 8 oz (225g) sharp cheddar cheese, sliced or shredded
- 1 medium apple (Honeycrisp or Fuji), thinly sliced
- 4 slices thick sourdough bread
- 4 tablespoons (60g) softened butter
- 2 large yellow onions, thinly sliced
- 2 tablespoons balsamic vinegar
- 1 tablespoon brown sugar
- 1 tablespoon butter
- 1 tablespoon olive oil
- Salt and pepper to taste
Instructions
- Heat 1 tablespoon butter and 1 tablespoon olive oil in a large skillet over medium heat.
- Add thinly sliced onions and a pinch of salt. Cook for about 10 minutes, stirring occasionally, until soft and starting to brown.
- Add brown sugar and balsamic vinegar. Stir well and cook for another 5-7 minutes until the mixture is dark, sticky, and jam-like.
- Let the onion jam cool completely.
- Slice apples into thin rounds.
- Lay out bread slices. Spread a thin layer of cooled onion jam on one side of each slice.
- Flip bread over (jam-side down). Layer half the cheddar on two slices, add apple slices, then the rest of the cheese. Top with remaining bread slices (jam-side up).
- Butter the top slice of each sandwich generously.
- Heat a non-stick skillet over medium-low heat. Place sandwiches in the pan.
- Cook for 3-4 minutes until the bottom is golden brown and crispy.
- Carefully flip sandwiches. Butter the newly exposed top side.
- Cook for another 3-4 minutes until cheese is melted and the second side is golden.
- Remove from heat, let rest for 1 minute, slice diagonally, and serve immediately.
Notes
Make sure the onion jam is cooled before assembling to prevent soggy bread. Use block cheese grated fresh for better melting. If the bread browns too fast, lower the heat and cover with a lid to help melt the cheese. The onion jam can be made ahead and stored in the fridge for up to a week.
- Prep Time: 15 minutes
- Cook Time: 15 minutes
- Category: Main Course
- Cuisine: American
Nutrition
- Serving Size: 1 sandwich
- Calories: 580
- Sugar: 12
- Sodium: 680
- Fat: 32
- Saturated Fat: 18
- Carbohydrates: 45
- Fiber: 4
- Protein: 22
Keywords: grilled cheese, apple cheddar sandwich, caramelized onion jam, weeknight dinner, comfort food, fall recipes, easy dinner


