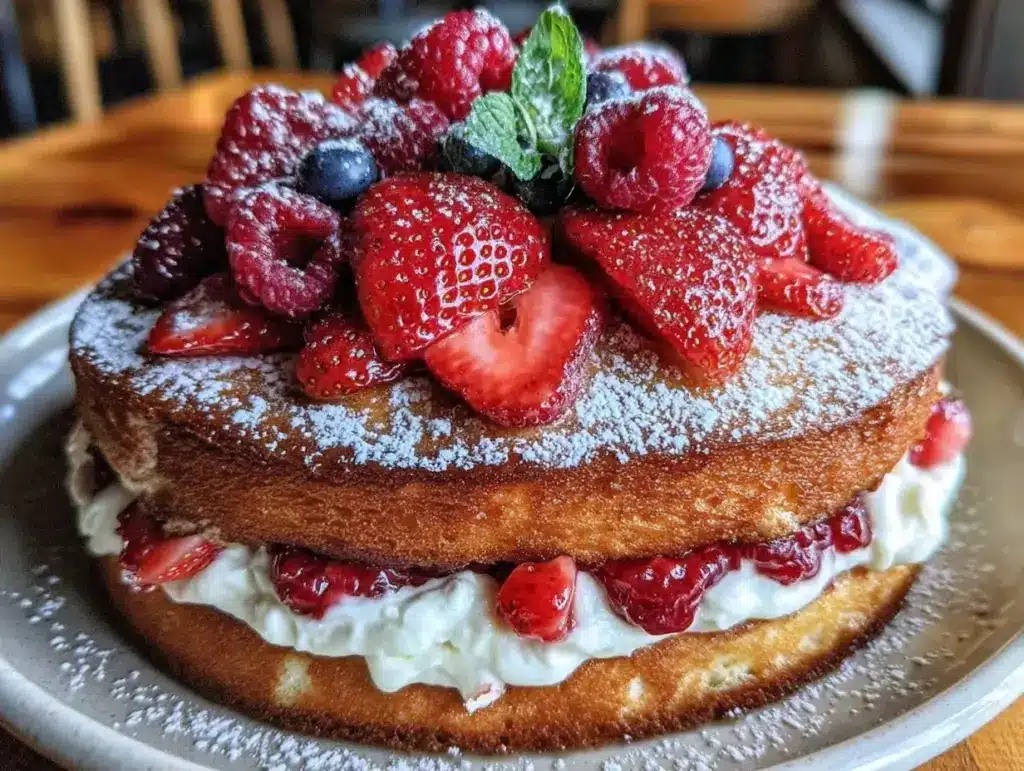
I have a confession to make. For years, I bought the little white box of biscuit mix, poured in the heavy whipping cream, and called it a day. It was easy. It was fast. But it tasted like… well, it tasted like a box. It lacked soul. It lacked that deep, red, juicy strawberry punch that makes you close your eyes and sigh.
Then, last June, I bought a $3 bag of overripe berries from the farmer’s market. They were soft and leaking juice into the bag. My instinct was to compost them. Instead, I chopped them up, tossed them with sugar, and waited ten minutes. The juice pooled at the bottom. It smelled incredible. I made some biscuits from scratch—yes, actually mixed flour and butter with my hands—and when I stacked those warm, buttery layers with that glossy, sweet berry syrup, I realized I’d been doing it wrong my whole life.
This strawberry shortcake with fresh berries you’ll make on repeat isn’t about fancy techniques or expensive ingredients. It’s about taking the simplest components—flour, butter, sugar, cream, and strawberries—and letting them do exactly what they do best. It’s the dessert that saved me from dessert fatigue. When I’m tired, when I don’t want to bake a complicated cake, when I just want something that tastes like summer, this is my go-to. And honestly? It’s the only strawberry dessert I make anymore. The rest are just distractions.
Why You’ll Love This Recipe
There are about a dozen reasons I keep coming back to this version, but let’s be real: you don’t need another dessert that requires 45 minutes of standing over a mixer. This one is different. It’s built for people who want to bake but hate the cleanup.
- Minimal Ingredients — Seriously. You need flour, sugar, baking powder, salt, cold butter, heavy cream, and strawberries. That’s it. If you have those in your pantry, you’re already halfway to dessert. No weird extracts or obscure flours.
- Forgiving Dough — I’ve made this with dough that was slightly too wet and slightly too dry. Both worked. The biscuit topping is sturdy enough to handle a lot of juice without turning into mush immediately, but tender enough to melt in your mouth. You really can’t mess this up.
- Maximum Flavor, Minimum Effort — The secret isn’t in the biscuit; it’s in the macerated berries. Letting the strawberries sit with sugar for just 15 minutes creates a natural syrup that’s better than any artificial flavoring. It’s chemistry, but the kind that tastes like magic.
- Textural Contrast — This is the holy grail of desserts. You get the crunch of the sugared crust, the flaky softness of the biscuit, the burst of juicy fruit, and the cool richness of the cream. It’s a mouthful of everything good.
- Make-Ahead Friendly — You can chop the berries and mix the dough up to a day in advance. Just keep them separate until you’re ready to eat. This makes it perfect for dinner parties where you’re already stressed about the main course.
This is my “if you can only make one thing, make this” dessert. It’s reliable. It’s delicious. And it makes your kitchen smell like a strawberry patch.
Ingredients You’ll Need
Here’s the best part: you probably have 90% of this already. I’m not asking you to run to the store for anything fancy. This is pantry-friendly, beginner-proof cooking.
For the Macerated Strawberries
Fresh strawberries (1.5 pounds / 680g) — Don’t buy the sad, pale ones from the grocery store aisle if you can help it. Look for deep red, fragrant berries. If they’re small, slice them in half. If they’re huge, quarter them. Uniformity helps, but it’s not a law. I usually chop mine roughly because I like big chunks in every bite.
Granulated sugar (3 tablespoons / 37g) — This draws the moisture out of the berries. You can adjust this depending on how sweet your berries are. If they’re tart, go up to 4 tablespoons. If they’re super sweet, 2 tablespoons is fine. Taste one first.
Lemon juice (1 teaspoon / 5ml) — Optional, but I swear by it. It brightens the flavor and stops the berries from tasting flat. Just a little squeeze. Fresh lemon, not the bottled stuff.
For the Biscuit Topping
All-purpose flour (2 cups / 250g) — Don’t use cake flour; it’ll be too tender. Don’t use bread flour; it’ll be too chewy. All-purpose is the sweet spot. Spoon it into the cup and level it off. Don’t pack it down.
Baking powder (1 tablespoon / 12g) — This is the leavening agent. Make sure yours isn’t old. If it’s been in your cabinet since 2019, toss it. Fresh baking powder = fluffy biscuits. Old baking powder = flat rocks.
Salt (½ teaspoon / 3g) — Essential. It balances the sweetness and brings out the butter flavor. Don’t skip it.
Cold unsalted butter (½ cup / 113g) — This is non-negotiable. The butter must be cold. Cube it straight from the fridge. If it’s soft, it’ll melt into the flour before it hits the oven, and you’ll lose those flaky layers. I keep a stick of butter in a small bowl in the fridge specifically for this reason.
Heavy cream (¾ cup / 180ml) — Cold, straight from the fridge. This binds the dough. Some recipes use milk, but cream makes the biscuits richer and more tender. If you’re out, half-and-half works in a pinch, but cream is best.
Granulated sugar (1 tablespoon / 15g) — For sprinkling on top before baking. This gives you that crunchy, sugary crust that contrasts with the soft interior.
For Serving
Heavy whipping cream (1 cup / 240ml) — Whipped until soft peaks form. Don’t over-whip it into butter! You want it light and airy. If you’re not confident whipping cream, try this no-churn vanilla bean ice cream recipe for a similar technique—it’s very forgiving.
Equipment Needed
You don’t need fancy gadgets. Here’s what I actually use, and what you can swap if you don’t have it.
Large mixing bowl — I use a 4-quart stainless steel bowl. It’s big enough to toss the berries without spilling.
Pastry cutter or fork — To cut the butter into the flour. I use a fork because it’s less cleanup. A pastry cutter works faster, but a fork is fine. You’re just looking for pea-sized crumbs.
Baking sheet — Line it with parchment paper. This prevents sticking and makes cleanup a breeze. I’ve burned cookies on bare sheets before; parchment is a lifesaver.
Coffee mug or glass cutter — To cut out the biscuits. I don’t have a biscuit cutter. I use an old coffee mug. It works perfectly. Just dip it in flour so it doesn’t stick.
Small saucepan — Optional, if you want to warm the berries slightly for a warm shortcake vibe. Otherwise, serve them cold.
How to Make It: Step-by-Step
Alright, let’s make this! I’m walking you through exactly how I do it. It’s simple, but there are a few tricks to get it right.
Step 1: Macerate the Strawberries (15 minutes)
Wash and hull your strawberries. Hulling just means removing the green leafy tops. Slice them into bite-sized pieces. Toss them in a bowl with the 3 tablespoons of sugar and the lemon juice. Stir gently. Set them aside for at least 15 minutes. You’ll see the sugar dissolve and create a beautiful red syrup. This step is crucial—it’s where the flavor happens. While the berries sit, preheat your oven to 400°F (200°C).
Step 2: Mix the Dry Ingredients (2 minutes)
In your large bowl, whisk together the 2 cups of flour, 1 tablespoon of baking powder, and ½ teaspoon of salt. Make sure there are no clumps of baking powder. If you see white spots, whisk again. This ensures even rising.
Step 3: Cut in the Butter (3 minutes)
Add the cold, cubed butter to the flour mixture. Use your pastry cutter or a fork to press the butter into the flour. You’re not trying to make it smooth. You want little pebbles of butter coated in flour. Some pieces can be larger, like peas. This is what creates the flaky layers. If you overmix here, the biscuits will be tough. Stop when it looks like coarse meal.
Step 4: Add the Cream (2 minutes)
Pour in the cold heavy cream. Use a spatula or your hands to gently fold it in. Mix just until the dough comes together. It will look shaggy and messy. That’s good. Do not overwork the dough. If there are still dry patches, press them together. It’s okay if it’s a bit sticky. Overmixing is the enemy of tender biscuits.
Step 5: Shape and Cut (3 minutes)
Turn the dough out onto a lightly floured surface. Pat it out into a rectangle about ¾-inch thick. Don’t roll it with a rolling pin if you can avoid it—patting it preserves the air pockets. Cut out rounds with your mug or cutter. Twist the cutter slightly as you cut to seal the edges, which helps them rise straight up. Gather the scraps, pat them out again, and cut more biscuits. You should get about 8-10 biscuits.
Step 6: Bake (15-18 minutes)
Place the biscuits on your parchment-lined baking sheet, leaving an inch between them. Brush the tops with a little extra cream (optional, for browning) and sprinkle with the 1 tablespoon of sugar. Bake for 15-18 minutes, or until they are golden brown on top and cooked through. If you tap the bottom, it should sound hollow. Let them cool for 5 minutes.
Step 7: Assemble (2 minutes)
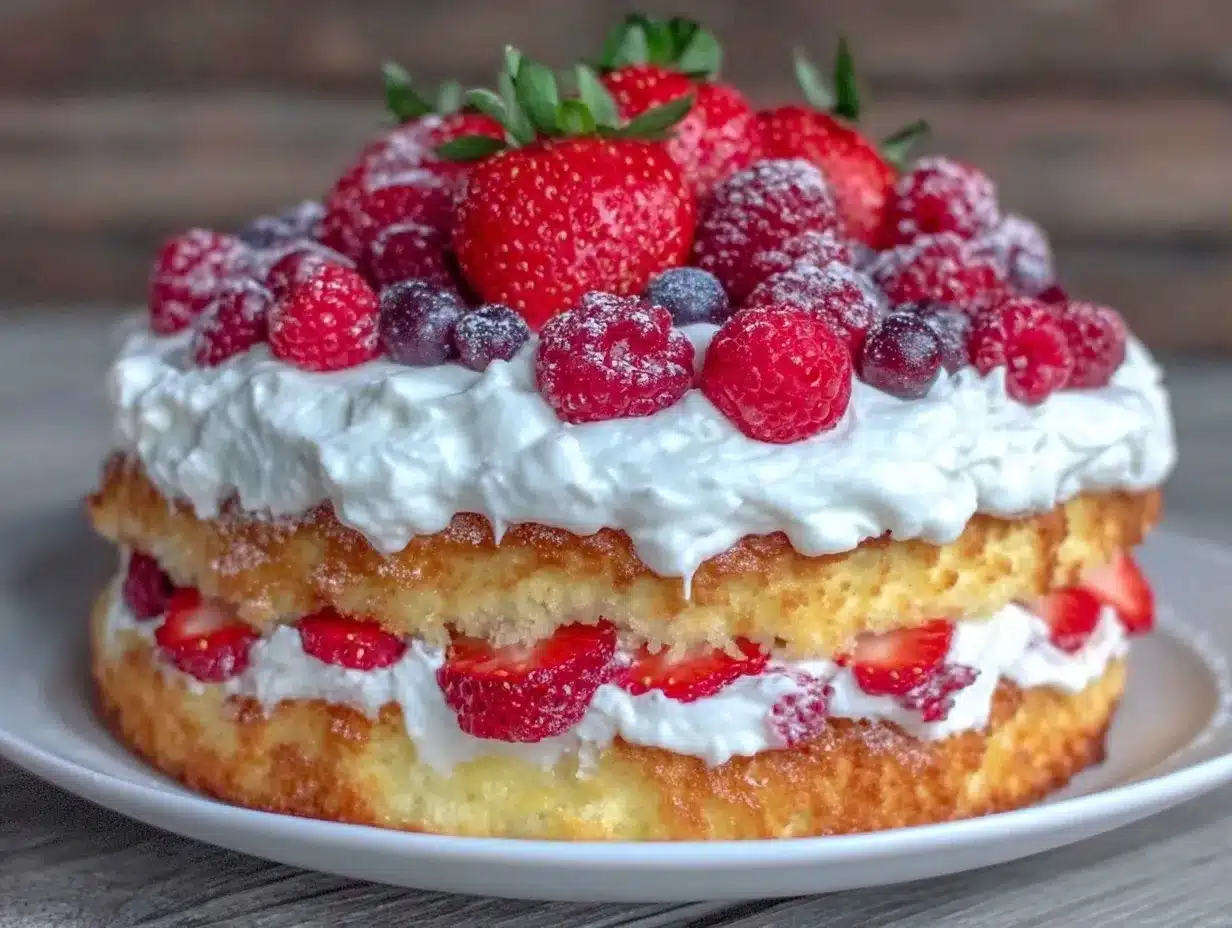
Split the warm biscuits in half horizontally. Place the bottom half in a bowl or plate. Spoon a generous amount of berries and syrup over it. Top with a dollop of whipped cream. Add the top half of the biscuit. Add more berries and cream on top. Serve immediately. The biscuit should be warm, the berries cool and juicy, and the cream cold. It’s a textural masterpiece.
Expert Tips & Tricks
Here’s everything I’ve learned from making this dozens of times. These tips will save you from my mistakes.
Butter Must Be Cold
This cannot be stressed enough. If your butter is soft, it melts into the flour. You want solid bits of butter to create steam pockets in the oven. If your kitchen is hot, put the butter in the freezer for 10 minutes before cutting. I’ve ruined batches with warm butter—it’s heartbreaking.
Don’t Overmix
When you add the cream, mix gently. The more you handle the dough, the more gluten develops, and the tougher the biscuit becomes. It’s okay if it looks a bit lumpy. That’s what makes them tender.
Use Good Berries
The fruit is the star. If your strawberries are bland, the dessert will be bland. Look for in-season, locally grown berries if possible. They’re sweeter and more aromatic. If you’re out of season, frozen strawberries work too, but thaw and drain them first to remove excess water. Check out my no-bake strawberry cheesecake cups if you want to use frozen berries in a different way.
Whip Cream Correctly
If you’re whipping your own cream, make sure the bowl and whisk are cold. Whip until soft peaks form—when you lift the whisk, the cream should hold a shape but still droop slightly. If you whip it too stiff, it’ll be buttery and dense, not light and airy.
Serve Warm Biscuits
The contrast between the warm biscuit and the cold berries/cream is the best part. Don’t let the biscuits cool completely before assembling. Serve them as soon as they’re cool enough to handle.
Variations & Substitutions
Once you’ve nailed the basic version, here’s how you can mix it up. I’ve tried all of these.
Raspberry Shortcake
Swap the strawberries for raspberries. They’re tart and beautiful. Use less sugar if you prefer. The technique is exactly the same.
Mixed Berry Shortcake
Use a mix of strawberries, blueberries, and blackberries. I love blackberries in cobbler, but they’re amazing here too. Just adjust the sugar based on tartness.
Vanilla Bean Boost
Add 1 teaspoon of vanilla extract to the heavy cream before whipping. Or scrape a vanilla bean into the cream. It adds a floral note that pairs beautifully with strawberries.
Gluten-Free Option
Use a 1:1 gluten-free flour blend. The texture might be slightly denser, but it still works. Make sure your baking powder is gluten-free.
Dairy-Free Version
Use coconut cream instead of heavy cream for both the dough and the topping. It adds a slight coconut flavor, which is actually really nice with strawberries. Use vegan butter for the biscuits.
Warm Berry Compote
Instead of cold macerated berries, cook them in a saucepan with a little sugar until they break down and thicken. Serve warm over the biscuit. It’s like a deconstructed cobbler.
Serving & Storage
How to Serve:
I usually serve this straight from the baking sheet to the table. It’s rustic and fun. Put a big bowl of berries in the center and let everyone build their own. It’s interactive and feels like a summer party.
Side Dishes:
This is a dessert, so it doesn’t need sides. But if you’re having a picnic, pair it with homemade peach iced tea or strawberry watermelon agua fresca. The drinks complement the sweetness perfectly.
Storage:
Leftover biscuits can be stored in an airtight container at room temperature for 2 days. Reheat them in the oven for 5 minutes to crisp them up. The berries should be eaten within 2 days of macerating, as they’ll get watery. The whipped cream should be made fresh. Don’t store assembled shortcake; the biscuit will get soggy.
Freezing:
You can freeze the unbaked biscuit dough rounds. Place them on a baking sheet and freeze until solid, then transfer to a bag. Bake from frozen, adding 2-3 minutes to the baking time. This is a great trick for meal prepping dessert.
Nutrition Information
I’m not a nutritionist, but here’s the breakdown if you’re tracking. This is a rich dessert, so portion control is key.
Per Serving (based on 6 servings):**
– Calories: 380
– Protein: 6g
– Carbs: 45g
– Fiber: 3g
– Sugar: 28g
– Fat: 20g
– Saturated Fat: 12g
– Cholesterol: 45mg
– Sodium: 220mg
What’s Good:
– Fresh fruit provides vitamins and antioxidants
– Protein from the cream and flour
– Satisfying sweetness without refined sugars
What to Know:
– Higher in calories due to butter and cream
– Contains dairy and gluten
– Moderate sodium (use low-sodium baking powder if needed)
My Take:
Look, this is a dessert. It’s meant to be enjoyed. It’s better than store-bought cake, and it’s made with real ingredients. When I make this, I take a smaller portion and savor it. It’s worth the calories. Plus, the fresh fruit makes it feel a little bit healthier than a slice of chocolate cake.
Final Thoughts
So that’s my go-to strawberry shortcake! I’ve probably talked your ear off at this point, but when you make a recipe this often, you have a lot to say about it. This has saved summer dinners more times than I can count. It’s my answer to “what’s for dessert” when I want something special but don’t want to stress. My kids are happy, my husband’s happy, and I’m happy because I’m not stressed about cooking.
Make it yours! Try different berries, add a splash of liqueur to the cream, or serve it with a scoop of vanilla bean ice cream for an extra treat. The best recipes are the ones you adapt to your family’s tastes.
If you make this, drop a comment and let me know what you think! I love hearing how recipes turn out in your kitchen. And if something doesn’t work, tell me that too—I’m here to help troubleshoot.
Happy cooking! And I hope your kitchen smells half as good as mine does right now.
Frequently Asked Questions
Can I use frozen strawberries?
Yes, but they need to be thawed and drained first. Frozen strawberries release a lot of water. If you use them straight from the freezer, your shortcake will be soggy. Thaw them in a colander, press out the excess liquid, and then macerate them with sugar. The flavor won’t be quite as bright as fresh, but it works in a pinch.
Why did my biscuits turn out flat?
This usually happens for two reasons: the butter was too warm, or the dough was overmixed. If the butter melts before it hits the oven, you lose the steam that creates lift. Also, if you knead the dough too much, the gluten develops and the biscuits stay dense. Remember: cold butter, gentle handling.
Can I make the dough ahead of time?
You can shape the dough and keep it in the fridge for up to 24 hours. Cover it tightly with plastic wrap. Bake straight from the fridge, adding a minute or two to the baking time. This is great for meal prepping. Just don’t let the butter soften before baking.
What’s the best way to hull strawberries?
I use a strawberry huller tool—it’s cheap and fast. But if you don’t have one, a paring knife works. Just cut around the stem in a cone shape. Or, if you’re lazy like me, just slice off the top and call it a day. No one will judge you.
Can I use milk instead of heavy cream in the dough?
You can, but the biscuits won’t be as tender or rich. Heavy cream has a higher fat content, which creates a softer crumb. If you must use milk, add an extra tablespoon of butter to the dough to compensate for the lost fat. But heavy cream is worth the splurge.
How do I store leftovers?
Store the biscuits in an airtight container at room temperature for 2 days. Reheat in the oven to crisp them up. The berries should be eaten within 2 days. Do not store assembled shortcake, as the biscuit will absorb the juice and become soggy. Always assemble just before eating.
Pin This Recipe!
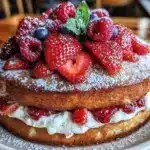
Strawberry Shortcake: The Easiest, Foolproof Recipe
- Total Time: 38 minutes
- Yield: 6 servings 1x
Description
A simple, foolproof strawberry shortcake recipe featuring homemade biscuits, macerated fresh strawberries, and whipped cream. This dessert requires minimal ingredients and effort while delivering maximum flavor and textural contrast.
Ingredients
- 1.5 pounds fresh strawberries, hulled and sliced
- 3 tablespoons granulated sugar (for berries)
- 1 teaspoon lemon juice
- 2 cups all-purpose flour
- 1 tablespoon baking powder
- ½ teaspoon salt
- ½ cup cold unsalted butter, cubed
- ¾ cup heavy cream, cold
- 1 tablespoon granulated sugar (for topping)
- 1 cup heavy whipping cream, whipped to soft peaks
Instructions
- Wash and hull strawberries, then slice into bite-sized pieces. Toss with 3 tablespoons sugar and lemon juice. Set aside for at least 15 minutes to macerate.
- Preheat oven to 400°F (200°C).
- In a large bowl, whisk together flour, baking powder, and salt.
- Add cold cubed butter to the flour mixture. Use a pastry cutter or fork to cut butter into flour until it resembles coarse meal with pea-sized butter pieces.
- Pour in cold heavy cream. Gently fold with a spatula or hands until dough comes together. Do not overmix.
- Turn dough onto a lightly floured surface. Pat into a ¾-inch thick rectangle. Cut out rounds with a mug or cutter. Gather scraps and cut more biscuits.
- Place biscuits on a parchment-lined baking sheet. Brush tops with extra cream and sprinkle with 1 tablespoon sugar.
- Bake for 15-18 minutes until golden brown and cooked through. Cool for 5 minutes.
- Split warm biscuits in half. Place bottom half in a bowl, top with berries and syrup, add whipped cream, and cover with top half. Serve immediately.
Notes
Ensure butter is very cold to create flaky layers. Do not overmix the dough to keep biscuits tender. Macerating the strawberries is crucial for flavor. Serve warm biscuits with cold berries and cream for best texture contrast. Leftover biscuits can be frozen unbaked.
- Prep Time: 20 minutes
- Cook Time: 18 minutes
- Category: Dessert
- Cuisine: American
Nutrition
- Serving Size: 1 biscuit half with
- Calories: 380
- Sugar: 28
- Sodium: 220
- Fat: 20
- Saturated Fat: 12
- Carbohydrates: 45
- Fiber: 3
- Protein: 6
Keywords: strawberry shortcake, easy dessert, homemade biscuits, summer dessert, fresh berries, foolproof recipe