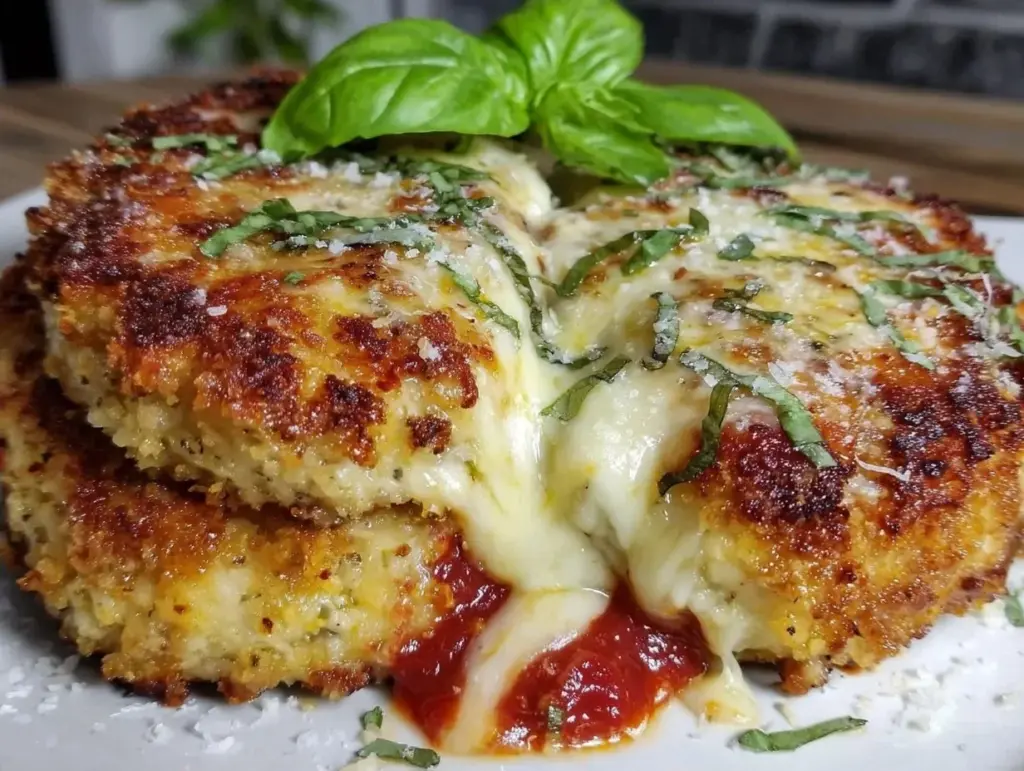
I have a confession to make. For years, I was convinced that making chicken parmesan at home was a massive undertaking. I’m talking about breading, frying in hot oil that splattered all over my stove, making sauce from scratch, and dealing with a greasy, soggy mess that tasted good but felt like a chore. I ordered takeout instead. Over and over again.
Then, I had a revelation. Why was I frying chicken when the oven does the job better? Why was I making complicated marinades when I just wanted crispy chicken and melted cheese? I stripped the recipe down to its absolute bones. I removed the frying pan. I simplified the breading. I kept the flavor punchy and the texture crunchy. The result? This baked chicken parmesan with a crispy panko crust that is genuinely better than takeout, easier to make, and uses ingredients you probably already have in your pantry.
I’ve tested this version at least a dozen times. I’ve made it for picky eaters, for dinner parties, and for lazy Tuesday nights when I just wanted something comforting without the stress. It works every single time. If you can only make one chicken dish this week, let it be this one. It’s foolproof, it’s forgiving, and it tastes incredible.
Why You’ll Love This Recipe
This isn’t just another chicken recipe. This is the one that changed my mind about homemade comfort food. Here’s why I keep coming back to it:
It’s Actually Crispy — Most baked chicken recipes end up soggy. Not this one. The secret is panko breadcrumbs. They’re flaky, airy, and they stay crunchy in the oven. I’ve compared the texture to restaurant-style fried chicken, but without the grease. It has that satisfying crunch that makes you stop mid-bite and say, “Wow.”
Minimal Cleanup — Seriously, this is the biggest selling point for me. You use three shallow bowls for breading and one baking sheet. That’s it. No deep fryer to clean. No multiple skillets. Just one pan and three bowls. I can do this while watching TV or helping the kids with homework. It’s that simple.
Three Core Ingredients — I know, I know. Chicken parmesan usually has a long list. But for the coating? It’s just panko, parmesan, and an egg wash. For the topping? Just marinara and mozzarella. You don’t need fancy spices or obscure sauces. The flavors do the heavy lifting. This is cooking for people who want great taste but hate complicated ingredient lists.
Beginner-Proof — If you can dip chicken in egg and roll it in crumbs, you can make this. There’s no technique required. No timing juggling. You just assemble it and put it in the oven. I’ve walked my teenagers through this recipe via text message, and they nailed it. You really can’t mess this up.
Better Than Takeout — This is hands-down the best method for getting that restaurant-quality result at home. The sauce is warm and tangy, the cheese is stringy and melted, and the chicken is juicy. Plus, you know exactly what’s in it. No mystery meat, no weird preservatives. Just real food.
This is my go-to when I want dinner to just work. No complicated techniques, no weird ingredients, just reliable, delicious food that makes everyone happy. It’s the kind of meal that feels like a treat but doesn’t feel like a project.
Ingredients You’ll Need
Here’s the best part: you probably have most of this already. I’m keeping this list short because simplicity is the point. I’m particular about three ingredients here, and I’ll tell you exactly why.
Chicken Breasts (4 large, about 1.5 lbs / 680g) — I use boneless, skinless chicken breasts. They cook evenly and are easy to handle. If they’re super thick, pound them down a bit so they cook through without drying out. Don’t skip this step if they’re thick. It ensures even cooking.
Panko Breadcrumbs (1 cup / 80g) — This is non-negotiable. Regular breadcrumbs are too fine and dense. Panko is made differently—it’s flakier and airier. That’s what gives you that shatteringly crisp crust. I buy the Japanese-style panko from any major grocery store. It’s worth the extra dollar.
Grated Parmesan Cheese (½ cup / 50g) — I use freshly grated parmesan if I have time, but pre-grated works fine for the breading mix. The saltiness of the parmesan mixed with the panko creates a savory crust that’s addictive. Don’t use the cheap powdered stuff in the green shaker; it lacks flavor.
Eggs (2 large) — These act as the glue for the breading. Beat them well with a fork until they’re uniform. Some people use milk or buttermilk, but I find plain egg wash gives the crispiest result for this specific recipe.
Marinara Sauce (2 cups / 500g) — I’m not going to make you make sauce from scratch for this. Use your favorite jarred marinara. I prefer a robust, slightly spicy one like Classico or Rao’s, but any good-quality store-bought sauce works. If you want to use baked garlic parmesan chicken tenders as inspiration, you can use a garlic-heavy sauce here too.
Mozzarella Cheese (1.5 cups / 170g, shredded) — Use low-moisture mozzarella. The pre-shredded kind has anti-caking agents that can make the cheese grainy. If you buy a block and shred it yourself, it melts smoother and stretchier. This is the cheese that gets all gooey and delicious.
Italian Seasoning (1 teaspoon) — Just a sprinkle in the breading mix for extra flavor. It’s optional but recommended. If you don’t have it, dried basil or oregano works fine.
Optional Garnish: Fresh basil leaves and a drizzle of extra virgin olive oil. I always add this at the end for a pop of freshness.
Equipment Needed
You don’t need fancy equipment for this. Here’s what I actually use.
Three Shallow Bowls — You need three for the breading station. One for the panko mix, one for the beaten eggs, and one empty one for the breaded chicken to rest before baking. I use ceramic bowls because they’re stable and don’t slip.
Baking Sheet — A standard half-sheet pan. I line it with parchment paper or aluminum foil for easy cleanup. I also like to use a wire rack on top of the baking sheet if I have one—it allows air to circulate underneath the chicken so the bottom stays crispy too. But it’s not required.
Meat Mallet or Rolling Pin — To pound the chicken breasts. If you don’t have a mallet, a heavy skillet or rolling pin works. This is crucial for even thickness.
Fork or Whisk — For beating the eggs. A fork is fine.
Tongs — To handle the chicken. Makes it easier to dip and transfer without getting your hands messy.
Sharp Knife — If you need to trim any fat or uneven parts of the chicken.
How to Make It: Step-by-Step
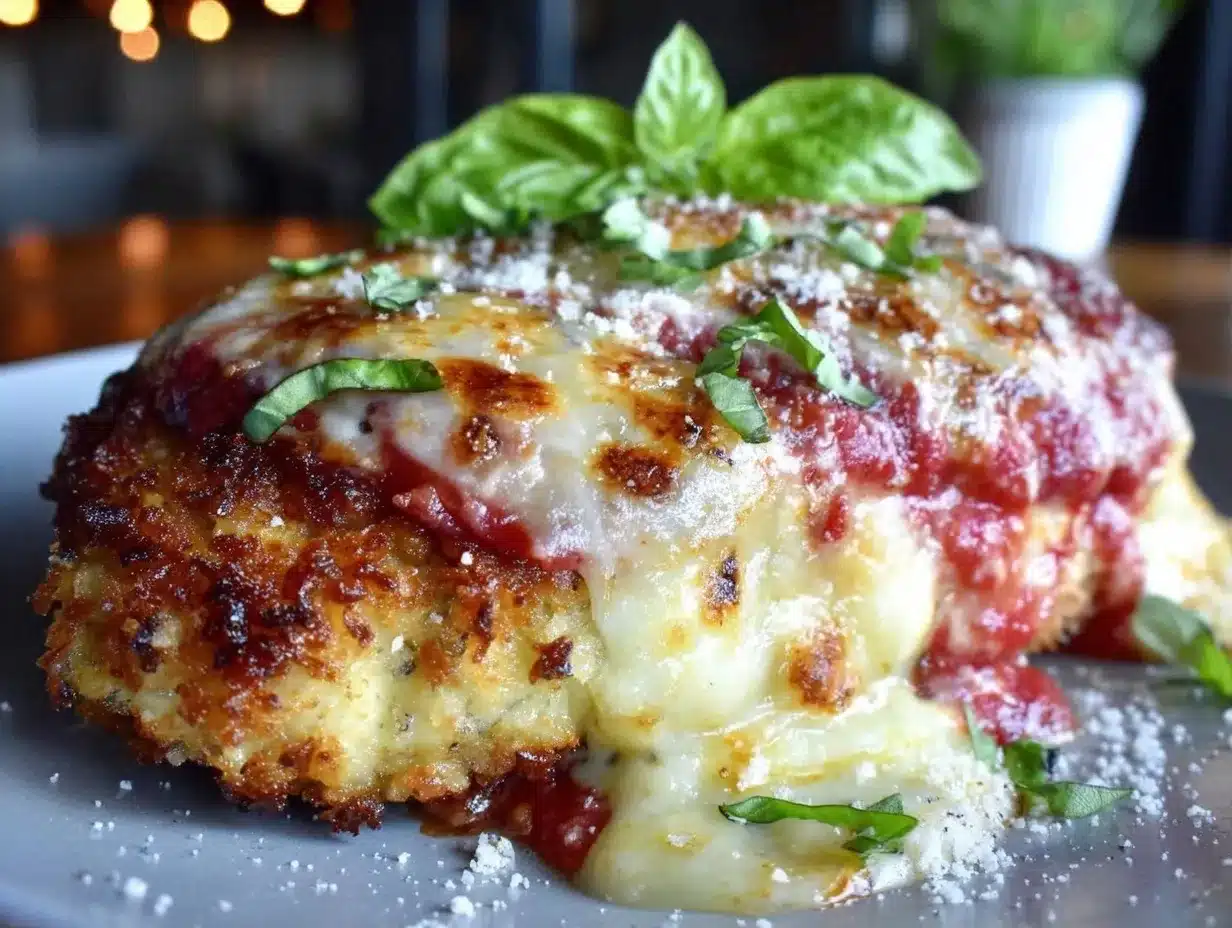
Alright, let’s make this! I’m walking you through exactly how I do it, including the little tricks I’ve picked up. This is designed to be simple and stress-free.
Step 1: Prep the Chicken
Start by patting the chicken breasts dry with paper towels. This sounds minor, but removing excess moisture helps the egg wash stick better. If your chicken breasts are very thick (more than 1 inch), place them between two sheets of plastic wrap or in a zip-top bag and gently pound them with a meat mallet or rolling pin until they are about ½ inch thick. This ensures they cook evenly and quickly without drying out. Season the chicken lightly with salt and pepper on both sides.
Step 2: Set Up Your Breading Station
Get three shallow bowls ready. In the first bowl, mix the panko breadcrumbs, grated parmesan cheese, and Italian seasoning. Stir well. In the second bowl, beat the eggs with a fork until they are smooth and uniform. The third bowl will be empty and ready for the breaded chicken. This setup makes the process smooth and organized.
Step 3: Bread the Chicken
Dip a piece of chicken into the egg wash, letting any excess drip off. Then, press it firmly into the panko mixture. Make sure to coat all sides, pressing the crumbs onto the chicken so they adhere well. Lift it up and shake off any loose crumbs. Place the breaded chicken on the empty bowl or directly onto the prepared baking sheet. Repeat with the remaining chicken. If you’re putting them on the empty bowl first, let them sit for a minute so the breading sets slightly before moving to the pan.
Step 4: Bake the Chicken
Preheat your oven to 400°F (200°C). Line a baking sheet with parchment paper or foil. Place the breaded chicken on the sheet, leaving a little space between each piece. Bake for 15-18 minutes. You want the chicken to be cooked through (internal temperature of 165°F / 74°C) and the crust to start turning golden. If you like a darker crust, you can broil for the last 1-2 minutes, but watch it closely so it doesn’t burn.
Step 5: Add Sauce and Cheese
Once the chicken is mostly cooked and the crust is golden, remove the pan from the oven. Spoon about ½ cup of marinara sauce over each piece of chicken. Top generously with shredded mozzarella cheese. Return the pan to the oven and bake for another 5-7 minutes, or until the cheese is melted, bubbly, and slightly browned. This step is all about that cheesy, saucy goodness.
Step 6: Rest and Serve
Remove the chicken from the oven and let it rest for 3-5 minutes. This allows the juices to redistribute so the chicken stays moist. Garnish with fresh basil if you have it. Serve immediately with extra marinara on the side for dipping. It’s best enjoyed hot and crispy.
Expert Tips & Tricks
Here’s everything I’ve learned from making this dozens of times. These tips will save you from my mistakes.
Pound the Chicken Evenly
This is the #1 tip for juicy chicken. If some parts are thick and some are thin, the thin parts dry out before the thick parts cook. Pounding them to an even ½-inch thickness ensures consistent cooking. It takes 2 minutes and makes a huge difference.
Press the Breadcrumbs On
Don’t just dust the chicken with panko. Press it in. Use your hand to pack the crumbs onto the chicken. Loose crumbs will fall off in the oven. If you find loose crumbs on the pan, you can bake them separately and use them as a crunchy topping or snack.
Use a Wire Rack (Optional but Recommended)
If you have a wire cooling rack that fits inside your baking sheet, use it. Placing the chicken on the rack allows air to circulate all around, preventing the bottom from getting soggy. It mimics the effect of deep frying. But if you don’t have one, just line the pan with parchment paper and it will still be great.
Don’t Overcrowd the Pan
Give the chicken space. If pieces are touching, they’ll steam instead of bake, and the crust won’t get crispy. If you have more than 4 pieces, use two pans or bake in batches. Patience pays off.
Choose the Right Mozzarella
Low-moisture mozzarella melts better than fresh mozzarella balls. Fresh mozzarella has too much water and can make the dish soggy. Stick to the block or pre-shredded low-moisture kind for that perfect stretch.
Common Mistakes (and how to avoid them):
Mistake: Chicken is dry. Fix: You overcooked it. Use a meat thermometer. Pull it at 165°F. Also, ensure you pounded it to even thickness.
Mistake: Crust is soggy. Fix: You didn’t press the crumbs on, or you overcrowded the pan. Or you skipped the parchment paper and the chicken sat in its own juices. Try the wire rack method.
Mistake: Sauce is too watery. Fix: Use a thick marinara. If your jarred sauce is runny, simmer it in a pan for 10 minutes to reduce it before using it.
Variations & Substitutions
Once you’ve nailed the basic version, here’s how you can mix it up. I’ve tried all of these.
Chicken Parmesan Pasta
Instead of serving the chicken on its own, slice the baked chicken and toss it with cooked pasta and extra marinara sauce. It’s like a deconstructed chicken parmesan pasta. I love this with spaghetti or penne. It’s a great way to use up leftover chicken.
Chicken Parmesan Sandwich
Serve the baked chicken on a toasted sub roll or ciabatta bun with a slice of provolone cheese. Add some arugula or lettuce for crunch. It’s basically a chicken parm sub. My kids love this for lunch.
Spicy Version
Add red pepper flakes to the panko mixture and use a spicy marinara sauce. It adds a nice kick that balances the richness of the cheese. If you like heat, this is the way to go.
Gluten-Free Option
Use gluten-free panko breadcrumbs. They’ve gotten much better in recent years and work well here. Just make sure your marinara is also certified gluten-free if you have celiac disease.
Dairy-Free Option
Use a dairy-free parmesan alternative in the breading and dairy-free mozzarella for the topping. It’s not quite the same, but it’s still tasty. I’ve made this for friends who are lactose intolerant, and they enjoyed it.
Vegetable Version
You can use this same breading method for eggplant slices or zucchini rounds. Bake them until tender, top with sauce and cheese, and broil. It’s a lighter take on the classic dish.
Serving & Storage
How to Serve:
I usually serve this straight from the baking sheet at the dinner table—it looks rustic and stays warm. But here are other ways I’ve enjoyed it:
Side Dishes:
- Simple green salad with balsamic vinaigrette
- Steamed broccoli or green beans
- Garlic bread or breadsticks (obviously)
- Roasted potatoes or mashed potatoes
Toppings Bar:
When I have guests, I put out: extra marinara, fresh basil, red pepper flakes, and grated parmesan. Everyone customizes their plate.
Storage Instructions:
Refrigerator:
Store leftover chicken parmesan in an airtight container for up to 3 days. The crust will soften in the fridge, which is normal.
Reheating:
Best method: Reheat in a 375°F oven for 10-15 minutes. This restores the crispiness of the crust. Avoid the microwave if you want the crust to stay crunchy. If you must use the microwave, do it in short bursts and accept that the crust will be soft.
Freezing:
You can freeze the baked chicken parmesan, but the texture of the crust may change slightly upon thawing. I recommend freezing it after the baking step (before adding sauce and cheese) if you want to freeze it raw. Or freeze the fully baked version and reheat in the oven. It’s not ideal, but it works in a pinch.
Nutrition Information
I’m not a nutritionist, but here’s the breakdown if you’re tracking.
Per Serving (based on 4 servings):
- Calories: 450
- Protein: 40g
- Carbs: 25g
- Fiber: 2g
- Sugar: 6g
- Fat: 20g
- Saturated Fat: 8g
- Cholesterol: 120mg
- Sodium: 650mg
What’s Good:
- High protein from the chicken and cheese
- Calcium from the cheese
- Relatively low carb compared to fried versions
What to Know:
- Higher in calories from the cheese and breading
- Contains dairy and gluten
- Check your marinara for added sugar
My Take:
Look, this is comfort food. It’s not a diet recipe. But it’s way better than takeout, costs less, and I know exactly what’s in it. When I want to make it lighter, I use less cheese and more veggies on the side. But usually? I just eat a reasonable portion and enjoy it.
Final Thoughts
So that’s my go-to baked chicken parmesan! I’ve probably talked your ear off at this point, but when you make a recipe this often, you have a lot to say about it.
This has saved weeknight dinners more times than I can count. It’s my answer to “what’s for dinner” when I want something hearty and comforting without the hassle of frying. My kids are happy, my husband’s happy, and I’m happy because I’m not stressed about cooking. It’s that simple.
Make it yours! Try different add-ins, swap in your favorite vegetables, or adjust the spice level. The best recipes are the ones you adapt to your family’s tastes. If you want to try another easy chicken dish, check out this crispy baked chicken breast with maple dijon glaze for a sweet and savory twist.
If you make this, drop a comment and let me know what you think! I love hearing how recipes turn out in your kitchen. And if something doesn’t work, tell me that too—I’m here to help troubleshoot.
Happy cooking! And I hope your kitchen smells half as good as mine does right now.
Frequently Asked Questions
Can I use chicken thighs instead of breasts?
Absolutely. Chicken thighs are actually juicier and more forgiving if you overcook them slightly. Just note that they have more fat, so the calorie count will be slightly higher. Use boneless, skinless thighs and follow the same breading and baking instructions. You might need to bake them 2-3 minutes longer.
Why is my crust not crispy?
This usually happens for a few reasons. First, did you press the panko onto the chicken firmly? Loose crumbs fall off. Second, are you overcrowding the pan? Chicken needs space to bake, not steam. Third, did you use regular breadcrumbs instead of panko? Panko is specifically designed to be crunchy. Fourth, are you reheating in the microwave? That softens the crust. Always reheat in the oven.
Can I make this ahead of time?
Yes! You can bread the chicken and store it in the fridge on a wire rack for up to 24 hours before baking. Just keep it covered. When you’re ready to cook, take it out and bake as directed. This is great for meal prep. You can also fully bake it and reheat later, but the crust will be softer.
What kind of marinara sauce should I use?
Use a sauce you like to eat on its own. I prefer a robust, slightly spicy sauce. If your sauce is very watery, simmer it in a pan for 10 minutes to reduce it before using it. A thick sauce prevents the chicken from getting soggy.
Can I freeze the baked chicken parmesan?
You can, but the texture of the crust may suffer. For best results, freeze the breaded chicken before baking. Wrap each piece tightly in plastic wrap and then foil. When ready to cook, bake from frozen, adding 5-10 minutes to the cooking time. If you freeze it after baking, reheat in the oven to restore crispiness.
Is there a way to make this healthier?
You can reduce the amount of cheese used, or use a lower-fat mozzarella. You can also mix the panko with some whole wheat breadcrumbs for added fiber. But honestly, the joy of this recipe is in the indulgence. Enjoy it as a treat!
Pin This Recipe!
Baked Chicken Parmesan: 3 Ingredients, Perfect Crispy Panko
- Total Time: 40 minutes
- Yield: 4 servings 1x
Description
A foolproof, baked chicken parmesan recipe that delivers restaurant-quality crispy panko crust without the grease of frying. This simplified method uses minimal ingredients and cleanup, making it perfect for busy weeknights.
Ingredients
- 4 large boneless, skinless chicken breasts (about 1.5 lbs / 680g)
- 1 cup panko breadcrumbs (80g)
- ½ cup grated parmesan cheese (50g)
- 2 large eggs
- 2 cups marinara sauce (500g)
- 1.5 cups shredded low-moisture mozzarella cheese (170g)
- 1 teaspoon Italian seasoning
- Salt and pepper to taste
- Fresh basil leaves for garnish (optional)
- Extra virgin olive oil for drizzle (optional)
Instructions
- Preheat oven to 400°F (200°C). Line a baking sheet with parchment paper or foil.
- Pat chicken breasts dry with paper towels. If thick, pound them to an even ½-inch thickness. Season lightly with salt and pepper.
- Set up a breading station with three shallow bowls. Mix panko, parmesan, and Italian seasoning in the first bowl. Beat eggs in the second bowl. Leave the third bowl empty.
- Dip chicken in egg wash, letting excess drip off, then press firmly into the panko mixture to coat all sides.
- Place breaded chicken on the prepared baking sheet, ensuring pieces are not touching.
- Bake for 15-18 minutes until the crust is golden and chicken is nearly cooked through.
- Remove from oven. Spoon ½ cup marinara sauce over each piece and top with mozzarella cheese.
- Return to oven and bake for another 5-7 minutes until cheese is melted, bubbly, and slightly browned.
- Let rest for 3-5 minutes before serving. Garnish with fresh basil if desired.
Notes
For extra crispiness, use a wire rack on the baking sheet to allow air circulation. Do not overcrowd the pan. If using chicken thighs, bake for 2-3 minutes longer. For a gluten-free version, use gluten-free panko. For a dairy-free version, use dairy-free alternatives for cheese.
- Prep Time: 15 minutes
- Cook Time: 25 minutes
- Category: Main Course
- Cuisine: Italian
Nutrition
- Serving Size: 1 piece of chicken w
- Calories: 450
- Sugar: 6
- Sodium: 650
- Fat: 20
- Saturated Fat: 8
- Carbohydrates: 25
- Fiber: 2
- Protein: 40
Keywords: baked chicken parmesan, crispy panko chicken, easy chicken dinner, healthy chicken parmesan, weeknight meals, gluten-free option


