
Last October, I was standing in my kitchen at 10 PM, staring at a pile of store-bought mini pies that looked suspiciously like they had been frozen in 2018. My sister-in-law was having her second baby shower, and the theme was “cozy autumn.” I wanted to make something that felt warm, homemade, and genuinely festive—but I also needed it to be portable. You can’t exactly hand a guest a steaming bowl of cozy fall butternut squash soup while they’re mingling near the diaper table.
I ended up making these cinnamon apple hand pies. They were supposed to be a quick backup plan. But when I pulled the first batch out of the oven, the smell of brown sugar, cinnamon, and baking apples filled the entire house. My toddler, who usually refuses anything with “texture,” devoured three of them in five minutes. By the time the shower started, I had made an extra dozen.
Here’s the thing about baby shower food: it needs to be sweet but not cloying, easy to eat with one hand, and visually cute without being over-the-top. These hand pies hit every single note. They’re flaky, spiced, and filled with a warm apple cinnamon mixture that tastes like a hug. Plus, they’re perfect for that autumn vibe that everyone loves right now.
I’ve tested this recipe about eight times now (yes, I have too much free time when I’m not actually cooking for a living). I’ve tweaked the filling so it’s not too runny, figured out the perfect dough thickness, and even found a way to make them look fancy with a simple egg wash. If you’re planning a fall baby shower, or just want a weekend baking project that makes your house smell amazing, these are it.
Why You’ll Love This Recipe
I know what you’re thinking. “Hand pies? Isn’t that just a fancy name for a turnover?” Sort of. But these are specifically designed for parties, which means they’re smaller, easier to handle, and way more impressive than a standard apple crisp.
Zero Stress Baking — Seriously, if you can roll out a ball of dough, you can make these. I use store-bought pie crusts for the base, but you can make your own if you’re feeling ambitious. The filling is just cooked-down apples, so there’s no complicated custard or jam making involved.
Perfectly Portable — Baby showers mean standing around, chatting, and holding a glass of wine or a sparkling cider. These hand pies are small enough to eat in two or three bites without making a mess. No fork required. No plate needed. Just pick it up and go.
Make-Ahead Friendly — This is the biggest win. You can assemble them the day before, pop them in the fridge, and bake them fresh 30 minutes before guests arrive. Or, you can bake them fully, let them cool, and reheat them gently on the day of. They actually taste better the next day because the flavors meld together.
Autumn Vibes in Every Bite — There’s something about the combination of cinnamon, nutmeg, and warm apples that just screams “fall.” It’s nostalgic and comforting. Think of them as the portable version of fall caramel apple cheesecake bars, but in a flaky pastry shell.
Kid-Approved — Let’s be real. Baby showers have kids. Lots of them. These are sweet, familiar, and not too spicy. My nieces and nephews always fight over the last one. It’s a safe dessert that even picky eaters will enjoy.
So basically, you get a dessert that looks homemade, tastes incredible, is easy to manage, and fits the season perfectly. What’s not to love?
Ingredients You’ll Need
Here’s the best part: you probably have most of this already. The ingredient list is short, simple, and focused on quality over quantity. Since there are only a few components, each one really matters.
For the Filling
Apples (4 medium, about 1.5 lbs / 680g) — This is the star. I use a mix of Granny Smith and Honeycrisp. Granny Smith gives the tartness and holds its shape, while Honeycrisp adds sweetness and softness. If you only have one type, that’s fine, but a mix is best. Avoid Red Delicious—they turn to mush.
Butter (2 tablespoons / 30g) — Unsalted is best so you can control the salt. Just a little bit to help sauté the apples and add richness.
Granulated Sugar (¼ cup / 50g) — Not too sweet. We want the apple flavor to shine. If your apples are very tart, you can bump this to ⅓ cup.
Brown Sugar (2 tablespoons / 25g) — This adds that deep, molasses-y flavor that makes fall desserts taste like fall. It also helps the filling get slightly caramelized.
Ground Cinnamon (1 teaspoon) — The essential spice. Don’t use old cinnamon; if it’s been sitting in your cabinet for two years, it’s probably lost its punch. Buy fresh if you can.
Ground Nutmeg (¼ teaspoon) — Just a pinch. It adds warmth and depth. Don’t skip it, but don’t overdo it either.
Apple Cider (2 tablespoons / 30ml) — This is the secret ingredient. It intensifies the apple flavor and helps create a glossy sauce. If you don’t have cider, apple juice works, but cider is better. Or you can use iced vanilla chai latte if you’re feeling fancy and want a spiced kick!
Cornstarch (1 tablespoon) — This thickens the juices so your hand pies don’t leak all over the pan. It’s crucial for a clean bite.
Lemon Juice (1 teaspoon) — Just a splash to brighten the flavor and keep the apples from browning too much.
For the Pastry
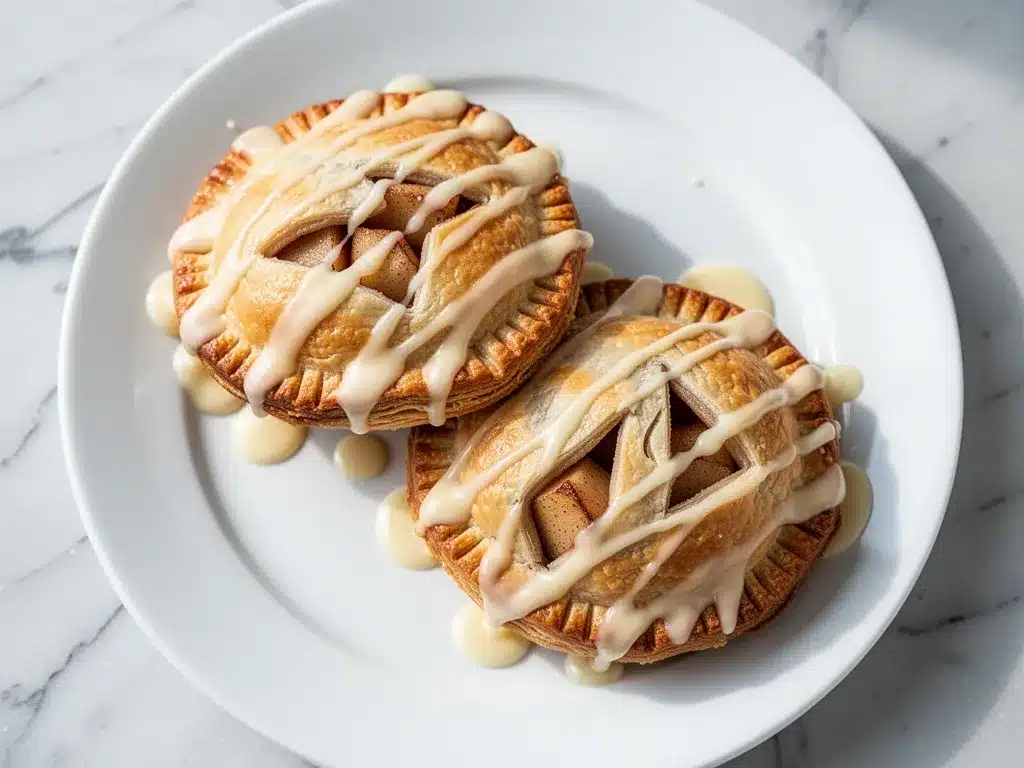
Pie Crusts (2 sheets, thawed) — I highly recommend using high-quality store-bought crusts like Marie Callender’s or a local bakery brand. Making dough from scratch is fun, but for a party, you want consistency and flakiness. If you want to make your own, look up a pumpkin bread streusel style crust for a similar buttery texture.
Heavy Cream or Egg Wash (2 tablespoons) — For brushing the tops. This gives them that beautiful golden-brown shine. Cream makes them softer; egg wash makes them crunchier. I prefer cream for these.
Sparkling Sugar or Turbinado Sugar (for sprinkling) — This adds a nice crunch and sparkle. Regular granulated sugar works, but sparkling sugar looks more festive.
Equipment Needed
You don’t need fancy equipment for this. Here’s what I actually use.
Medium Saucepan — Non-stick is easiest for cooking down the apple filling. I use a 2-quart saucepan.
Sharp Knife & Cutting Board — For dicing the apples. Uniform pieces cook evenly.
Paring Knife — For peeling and coring if you’re using whole apples. I usually buy pre-peeled or use a corer.
Rolling Pin — To roll out the pie crusts. A simple wooden one works fine.
Pastry Brush — For the egg wash or cream. A silicone one is easier to clean.
Baking Sheets — Two large sheets. Line them with parchment paper for easy cleanup.
Cookie Cutters or Muffin Tin — This is a pro tip. Instead of free-shaping, I use a 3-inch round cutter or press the dough into a mini muffin tin for perfectly uniform pies. It saves time and looks professional.
Cooling Rack — Essential for cooling the pies so the crust stays crisp.
How to Make It: Step-by-Step
Alright, let’s make this! I’m walking you through exactly how I do it, including the little tricks I’ve picked up.
Step 1: Prep the Apples (10 minutes)
Peel, core, and dice the apples into small, uniform cubes (about ½-inch pieces). Smaller pieces cook faster and fit better in the small hand pies. Place them in a bowl and toss with the lemon juice to prevent browning. Set aside.
Step 2: Cook the Filling (15 minutes)
In a medium saucepan over medium heat, melt the butter. Add the diced apples, granulated sugar, brown sugar, cinnamon, and nutmeg. Stir well to coat the apples in the sugar and spices. Cook for 5 minutes, stirring occasionally, until the apples start to soften.
Next, pour in the apple cider and cornstarch mixture (mix cornstarch with 1 tablespoon of water first to make a slurry). Stir constantly. The mixture will thicken quickly. Cook for another 5-7 minutes until the filling is thick and glossy, and the apples are tender but not mushy. It should look like a loose jam. Remove from heat and let it cool completely. Important: If you fill the pies while the mixture is hot, the steam will make the dough soggy and they’ll fall apart.
Step 3: Prepare the Dough (5 minutes)
Preheat your oven to 375°F (190°C). Line two baking sheets with parchment paper. Unroll your pie crusts onto a lightly floured surface. If the dough is too cold to roll, let it sit at room temperature for 10 minutes.
Using a 3-inch round cutter (or a small glass), cut out circles from the dough. You should get about 10-12 circles per sheet. Don’t worry about perfect circles; rustic edges look charming.
Step 4: Assemble the Hand Pies (10 minutes)
Place a circle of dough on your palm or a small spatula. Add 1-2 teaspoons of the cooled apple filling to the center. Don’t overfill! Too much filling will leak out and burn. Fold the dough over the filling to create a half-moon shape. Press the edges firmly with your fingers to seal. You can use a fork to crimp the edges for a decorative look.
Trim any excess dough hanging off the edges. Repeat with all the dough circles. Place the assembled hand pies on the prepared baking sheets, leaving about 2 inches between them.
Step 5: Bake to Golden Perfection (15-18 minutes)
Brush the tops of the hand pies with heavy cream or egg wash. This helps them brown evenly and gives them a nice sheen. Sprinkle generously with sparkling sugar or turbinado sugar.
Bake for 15-18 minutes, or until the crusts are deep golden brown and the sugar has caramelized slightly. Keep an eye on them in the last few minutes—sugar burns quickly.
Step 6: Cool and Serve
Let the hand pies cool on the baking sheet for at least 10 minutes. This allows the filling to set. If you try to eat them too hot, the filling will be runny. Serve warm or at room temperature.
Total Time: About 50 minutes (15 min prep, 15 min cooking filling, 15 min assembly/baking, 10 min cooling)
Expert Tips & Tricks
Here’s everything I’ve learned from making this dozens of times. These tips will save you from my mistakes.
Cool the Filling Completely
I cannot stress this enough. Warm filling = soggy crust. I usually make the filling the day before, or at least 2 hours ahead. You can even put it in the fridge to speed up the cooling process. Once it’s cold, it’s much easier to handle and won’t steam the dough.
Don’t Skip the Seal
When sealing the edges, press firmly. If you’re worried about leaks, you can brush a little water on the edge of the dough before folding. This acts like glue. I also like to use a fork to crimp, which creates a tighter seal and looks pretty.
Use a Mini Muffin Tin for Uniformity
If you’re hosting a large party and want everything to look identical, press the dough into a greased mini muffin tin, add the filling, and fold the edges over. It’s faster and ensures consistent size. It’s a great hack for sourdough breakfast toast-style efficiency in dessert making.
Freezing Raw Hand Pies
You can assemble the hand pies and freeze them on the baking sheet until solid, then transfer to a bag. Bake from frozen, adding 3-5 minutes to the baking time. This is perfect for last-minute planning.
Gluten-Free Option
Use gluten-free pie crusts. They can be a bit more fragile, so handle gently. The filling works perfectly with GF crusts. I’ve tested this with several brands, and mediterranean chickpea bowl-style crusts (like those from generic GF brands) work well if you add a bit more flour to prevent sticking.
Variations & Substitutions
Once you’ve nailed the basic version, here’s how you can mix it up. I’ve tried all of these.
Pumpkin Spice Variation
Swap the apples for canned pumpkin puree (1 cup). Add 1 teaspoon pumpkin pie spice, ¼ teaspoon salt, and 2 tablespoons brown sugar. Cook down until thick. This pairs beautifully with pumpkin spice cinnamon rolls if you’re doing a full fall brunch.
Cherry Almond Variation
Use dried cherries (soaked in warm water for 10 minutes) and add ¼ teaspoon almond extract to the filling. Sprinkle with sliced almonds before baking. This is reminiscent of cherry almond crumble bars but in a hand pie form.
Bacon Apple Variation
Cook 2 strips of bacon until crispy, crumble, and mix into the apple filling. The salty-sweet combo is incredible. This goes well with maple dijon roasted chicken if you’re serving a savory fall meal.
Mini Cupcake Style
Instead of folding, use cupcake liners. Place a circle of dough in each liner, add filling, and fold the edges over loosely. This is easier for kids to eat and looks cute in a basket.
Serving & Storage
How to Serve:
I usually serve these in a decorative basket lined with a napkin, or on a tiered stand. They look beautiful with a dusting of powdered sugar. Pair them with a side of iced vanilla chai latte or hot cider for the full fall experience.
Storage:
Room Temperature: Store in an airtight container for up to 2 days. They’re best eaten within 24 hours for maximum crispness.
Refrigerator: Not recommended. The fridge makes the crust soggy. If you must, bring to room temperature before serving.
Freezing: Freeze baked hand pies in a single layer, then transfer to a bag. Reheat in a 350°F oven for 10 minutes to crisp up. They freeze well for up to 1 month.
Make-Ahead Strategy: Make the filling 2 days ahead. Assemble and freeze raw hand pies. Bake on the day of the party. This is the ultimate stress-free plan.
Nutrition Information
I’m not a nutritionist, but here’s the breakdown if you’re tracking. Keep in mind, these are small, so portions are modest.
Per Hand Pie (based on 12 pies):
- Calories: 180
- Protein: 2g
- Carbs: 24g
- Fiber: 1g
- Sugar: 12g
- Fat: 9g
- Saturated Fat: 5g
- Cholesterol: 15mg
- Sodium: 120mg
What’s Good:
– Contains fruit (apples)
– Moderate calories for a dessert bite
– Can be made with whole wheat crust for more fiber
What to Know:
– Higher in sugar due to the filling and topping
– Contains gluten and dairy (unless modified)
– Not suitable for vegan (unless using vegan crust and butter)
My Take:
Look, this is a dessert. It’s sweet and buttery. Enjoy it as a treat. If you want to lighten it up, use less sugar in the filling and skip the sparkling sugar topping. But honestly? These are for celebration. Don’t stress the calories.
Final Thoughts
So that’s my go-to fall baby shower cinnamon apple hand pies! I’ve probably talked your ear off at this point, but when you make a recipe this often, you have a lot to say about it.
This has saved my sanity at more than one party. It’s my answer to “what dessert can I bring that’s festive, easy, and won’t require a lot of cleanup?” My friends always ask for the recipe, and my family requests them for birthdays and holidays too. It’s versatile, delicious, and perfect for the season.
Make it yours! Try different apple varieties, add different spices, or experiment with the crust. The best recipes are the ones you adapt to your tastes. If you make these, drop a comment and let me know how they turn out! I love hearing how recipes work in your kitchen. And if something doesn’t work, tell me that too—I’m here to help troubleshoot.
Happy baking! And I hope your kitchen smells half as good as mine does right now.
Frequently Asked Questions
Can I make these ahead of time?
Yes! You can make the filling 2-3 days ahead and store it in the fridge. You can also assemble the raw hand pies and freeze them for up to 1 month. Bake from frozen, adding 3-5 minutes to the baking time. This is the best way to plan for a party.
Why did my hand pies leak filling?
Usually, this means the filling was too warm when you assembled them, or you didn’t seal the edges tightly enough. Make sure the filling is completely cool, and press the edges firmly with your fingers or a fork. Also, don’t overfill—1-2 teaspoons is plenty.
Can I use store-bought pie crust?
Absolutely. In fact, I recommend it for consistency and ease. Just thaw them according to package directions before rolling. If you want to make your own, use a standard 2-crust recipe.
How do I reheat leftovers?
Reheat in a 350°F oven for 10-15 minutes to crisp up the crust. Avoid the microwave, as it makes the crust soggy. If they’re frozen, bake directly from frozen at 375°F for 20-25 minutes.
Can I use different fruit?
Yes! Pears, cherries, and peaches work well. Just adjust the sugar and thickener based on the fruit’s natural sweetness and juiciness. For juicier fruits like peaches, you may need a bit more cornstarch.
Are these good for a vegan baby shower?
Not as written, but you can easily make them vegan. Use a vegan pie crust (like those from Dastardly or store-bought vegan brands), vegan butter in the filling, and skip the egg wash (use plant milk instead). The filling is naturally vegan.
Can I double this recipe?
Yes, double everything. You’ll need more baking sheets or to bake in batches. The cooking time stays the same. Just make sure your oven has enough space for airflow.
Pin This Recipe!


Fall Baby Shower Cinnamon Apple Hand Pies
- Total Time: 50 minutes
- Yield: 12 servings 1x
Description
Flaky, portable hand pies filled with a warm cinnamon apple mixture, perfect for autumn baby showers or weekend baking projects.
Ingredients
- 4 medium apples (about 1.5 lbs / 680g), peeled, cored, and diced (mix of Granny Smith and Honeycrisp)
- 2 tablespoons unsalted butter
- 1/4 cup granulated sugar
- 2 tablespoons brown sugar
- 1 teaspoon ground cinnamon
- 1/4 teaspoon ground nutmeg
- 2 tablespoons apple cider
- 1 tablespoon cornstarch mixed with 1 tablespoon water
- 1 teaspoon lemon juice
- 2 sheets pie crusts, thawed
- 2 tablespoons heavy cream or egg wash
- Sparkling sugar or Turbinado sugar for sprinkling
Instructions
- Peel, core, and dice apples into 1/2-inch cubes. Toss with lemon juice and set aside.
- In a medium saucepan over medium heat, melt butter. Add apples, granulated sugar, brown sugar, cinnamon, and nutmeg. Stir to coat and cook for 5 minutes until apples soften.
- Add apple cider and the cornstarch slurry. Stir constantly and cook for 5-7 minutes until the filling is thick, glossy, and apples are tender. Remove from heat and let cool completely.
- Preheat oven to 375°F (190°C). Line two baking sheets with parchment paper.
- Roll out pie crusts on a floured surface. Cut into 3-inch circles (about 10-12 per sheet).
- Place 1-2 teaspoons of cooled filling in the center of each dough circle. Fold over to create a half-moon shape and press edges firmly to seal. Crimp with a fork if desired.
- Place pies on baking sheets. Brush tops with heavy cream or egg wash and sprinkle with sparkling sugar.
- Bake for 15-18 minutes until deep golden brown.
- Cool on the baking sheet for at least 10 minutes before serving.
Notes
Ensure the filling is completely cool before assembling to prevent soggy crusts. Do not overfill. Can be made ahead: assemble raw and freeze, or bake and reheat. For gluten-free, use GF pie crusts. For vegan, use vegan crust and butter.
- Prep Time: 15 minutes
- Cook Time: 15 minutes
- Category: Dessert
- Cuisine: American
Nutrition
- Serving Size: 1 hand pie
- Calories: 180
- Sugar: 12
- Sodium: 120
- Fat: 9
- Saturated Fat: 5
- Carbohydrates: 24
- Fiber: 1
- Protein: 2
Keywords: fall baby shower, cinnamon apple hand pies, autumn dessert, portable dessert, easy baking, apple pie, party food


